在我们asp.net中我们页面控件的样式是通过css控制的,同样在silverlight中也设置了几种不同方式的控件样式控制方法
1、对于全局样式的控制我们放在App.xaml文件中
<Application xmlns="http://schemas.microsoft.com/winfx/2006/xaml/presentation" xmlns:x="http://schemas.microsoft.com/winfx/2006/xaml" x:Class="Silverlight20.App" > <Application.Resources>
<!--全局样式 - 任何地方都可引用--> <!-- Style - 自定义样式资源。用于修改控件的样式。各个控件的默认样式可参见文档 x:Key - 唯一标识 TargetType - 目标对象类型 Setter - 属性设置器 Property - 需要设置的属性名称 Value - 需要设置的属性值 --> <Style x:Key="styleTestApp" TargetType="TextBox"> <Setter Property="FontSize" Value="24"/> <Setter Property="Foreground" Value="#0000FF"/> </Style>
</Application.Resources> </Application>
2、当我们的系统在非常庞大的话,我们都放在此文件下会造成此文件非常的长,维护起来相当的不方便,为此微软又提供了两一种样式管理方式,通过新建数据字典文件,然后在控件中引用该文件
<ResourceDictionary xmlns="http://schemas.microsoft.com/winfx/2006/xaml/presentation"
xmlns:x="http://schemas.microsoft.com/winfx/2006/xaml"> <ControlTemplate x:Key="homeTemplate" TargetType="Button"> <Grid> <VisualStateManager.VisualStateGroups> <VisualStateGroup x:Name="FocusStates"> <VisualStateGroup.Transitions> <VisualTransition GeneratedDuration="00:00:00.1000000"/> </VisualStateGroup.Transitions> <VisualState x:Name="Unfocused"/> <VisualState x:Name="Focused"/> </VisualStateGroup> <VisualStateGroup x:Name="CommonStates"> <VisualStateGroup.Transitions> <VisualTransition GeneratedDuration="00:00:00.1000000"/> </VisualStateGroup.Transitions> <VisualState x:Name="MouseOver"> <Storyboard> <DoubleAnimationUsingKeyFrames BeginTime="00:00:00" Duration="00:00:00.0010000" Storyboard.TargetName="normal" Storyboard.TargetProperty="(UIElement.Opacity)"> <SplineDoubleKeyFrame KeyTime="00:00:00" Value="0"/> </DoubleAnimationUsingKeyFrames> <DoubleAnimationUsingKeyFrames BeginTime="00:00:00" Duration="00:00:00.0010000" Storyboard.TargetName="down" Storyboard.TargetProperty="(UIElement.Opacity)"> <SplineDoubleKeyFrame KeyTime="00:00:00" Value="0"/> </DoubleAnimationUsingKeyFrames> <DoubleAnimationUsingKeyFrames BeginTime="00:00:00" Duration="00:00:00.0010000" Storyboard.TargetName="hover" Storyboard.TargetProperty="(UIElement.Opacity)"> <SplineDoubleKeyFrame KeyTime="00:00:00" Value="1"/> </DoubleAnimationUsingKeyFrames> </Storyboard> </VisualState> <VisualState x:Name="Normal"/> <VisualState x:Name="Pressed"> <Storyboard> <DoubleAnimationUsingKeyFrames BeginTime="00:00:00" Duration="00:00:00.0010000" Storyboard.TargetName="normal" Storyboard.TargetProperty="(UIElement.Opacity)"> <SplineDoubleKeyFrame KeyTime="00:00:00" Value="0"/> </DoubleAnimationUsingKeyFrames> <DoubleAnimationUsingKeyFrames BeginTime="00:00:00" Duration="00:00:00.0010000" Storyboard.TargetName="hover" Storyboard.TargetProperty="(UIElement.Opacity)"> <SplineDoubleKeyFrame KeyTime="00:00:00" Value="0"/> </DoubleAnimationUsingKeyFrames> <DoubleAnimationUsingKeyFrames BeginTime="00:00:00" Duration="00:00:00.0010000" Storyboard.TargetName="down" Storyboard.TargetProperty="(UIElement.Opacity)"> <SplineDoubleKeyFrame KeyTime="00:00:00" Value="1"/> </DoubleAnimationUsingKeyFrames> </Storyboard> </VisualState> <VisualState x:Name="Disabled"/> </VisualStateGroup> </VisualStateManager.VisualStateGroups> <Image Height="26" x:Name="normal" Width="26" Source="images/home_rest.png" Stretch="Fill"/> <Image Height="26" x:Name="down" Width="26" Opacity="0" Source="images/home_pressed.png" Stretch="Fill"/> <Image Height="26" x:Name="hover" Width="26" Opacity="0" Source="images/home_hover.png" Stretch="Fill"/> </Grid> </ControlTemplate> <Style x:Key="ButtonStyle1" TargetType="Button"> <Setter Property="Template"> <Setter.Value> <ControlTemplate TargetType="Button"> <Grid> <Button x:Name="btnup" Content="up" Template="{StaticResource homeTemplate}"/> <ContentPresenter HorizontalAlignment="{TemplateBinding HorizontalContentAlignment}" VerticalAlignment="{TemplateBinding VerticalContentAlignment}"/> </Grid> </ControlTemplate> </Setter.Value> </Setter> </Style> <!-- 应该在此定义资源字典条目。--> </ResourceDictionary>
通过不同文件的分配可以使得样式管理起来更加的方便,是一种推荐的方式,更能使得文件的复用性增强。
3、有一种情况是在该控件的样式只有自己本身应用,在系统别的地方没有使用,诸如此种情况,我们应用页面内引用,和css的应用类似
<UserControl x:Class="Silverlight20.Appearance.Style" xmlns="http://schemas.microsoft.com/winfx/2006/xaml/presentation" xmlns:x="http://schemas.microsoft.com/winfx/2006/xaml"> <StackPanel HorizontalAlignment="Left">
<StackPanel.Resources>
<!--容器内样式 - 所属容器内可引用--> <!-- Style - 自定义样式资源。用于修改控件的样式。各个控件的默认样式可参见文档 x:Key - 唯一标识 TargetType - 目标对象类型 Setter - 属性设置器 Property - 需要设置的属性名称 Value - 需要设置的属性值 --> <Style x:Key="styleTestInContainer" TargetType="TextBox"> <Setter Property="FontSize" Value="24"/> <Setter Property="Foreground" Value="#00FF00"/> </Style>
</StackPanel.Resources>
<!--全局样式的应用--> <TextBox Text="我是TextBox(全局样式的应用)" Margin="5" Style="{StaticResource styleTestApp}" />
<!--容器内样式的应用--> <TextBox Text="我是TextBox(容器内样式的应用)" Margin="5" Style="{StaticResource styleTestInContainer}" />
<!--内联样式的应用。内联样式优先级高于全局样式和容器内样式--> <TextBox Text="我是TextBox(内连样式的应用)" Margin="5" Foreground="#FF0000" Style="{StaticResource styleTestInContainer}" />
</StackPanel> </UserControl>
以上三种方式为系统基本的应用方式,当让一些简单的样式改变,可以使用在控件内部直接定义。
在我们定义控件样式的同时,我们会在系统中应用到相同的控件,为了达到控件的复用性,微软提供了自定义控件模板,此种方式也是我们最常用的方式,当让相对难度大一点的控件在我们定义后,其应用不会仅局限于该项目中,在另外的项目中我们同样的能应用。
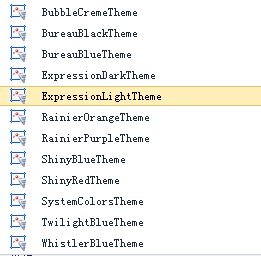
4、当我们感觉我们所应用的控件不行仅仅局限于vs自带的控件的时候,微软为此特意开发了几套系统皮肤,供我们使用,对于系统整体皮肤的更换其实也很简单,我们在微软官方网站下载Silverlight_4_Toolkit_2010安装包,安装后在vs中就会自动添加相应的皮肤文件
我们在系统中引用的时候最简单的方式就是直接添加dll文件
系统引用时先添加命名空间
//引入命名空间 using System.Windows.Controls.Theming; 然后在代码中加入
///////////// RainierOrangeTheme.SetIsApplicationTheme(App.Current, true);//设置主题
简单的两行代码就能实现整套系统的整体换肤
当然还有另一种应用的方式
系统中添加xmal皮肤文件
让后后台代码中应用
Uri url = new Uri("Themes/Xaml/System.Windows.Controls.Theming.RainierOrange.xaml", UriKind.Relative); Theme.SetApplicationThemeUri(App.Current, url);
此种方式同样也是两行代码,但在应用时须将皮肤文件的属性生成时标识为:内容
当然能力可以,自己可以定义皮肤文件。