实战场景 - 灰度发布
灰度发布的作用:按照一定的关系区别,分部分的代码进行上线,使代码的发布能平滑过渡上线
实现方式:
1、用户的信息cookie等信息区别
2、根据用户的IP地址
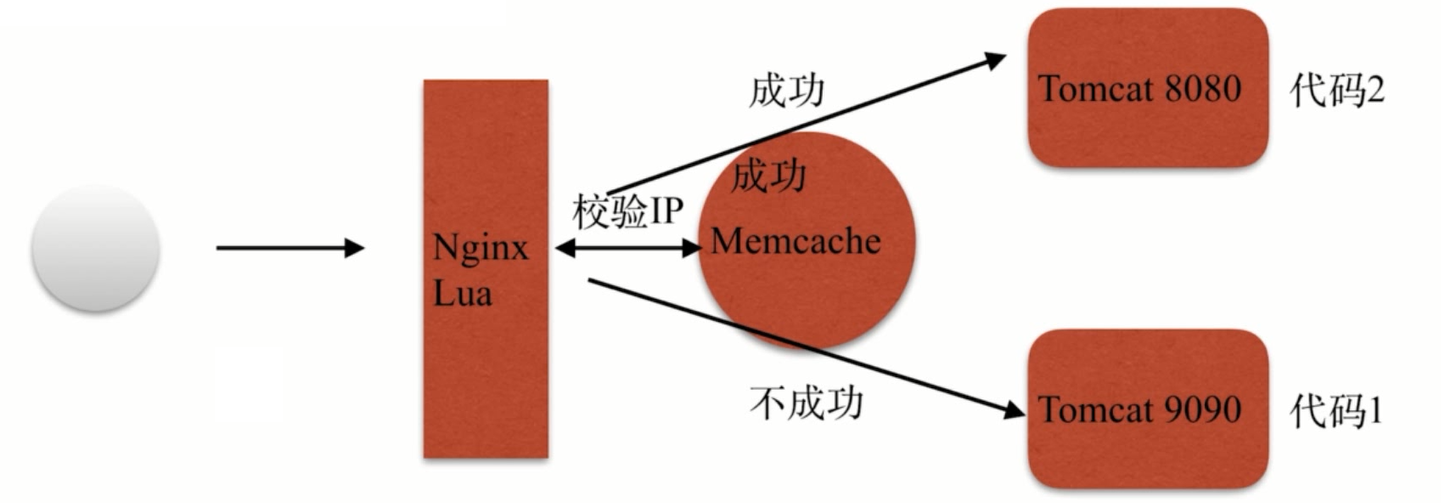
安装memcached:yum -y install memcached


准备好两个tomcat,9090代表生产环境,8080代表预发布环境

为避免冲突,修改tomcat9090的端口号


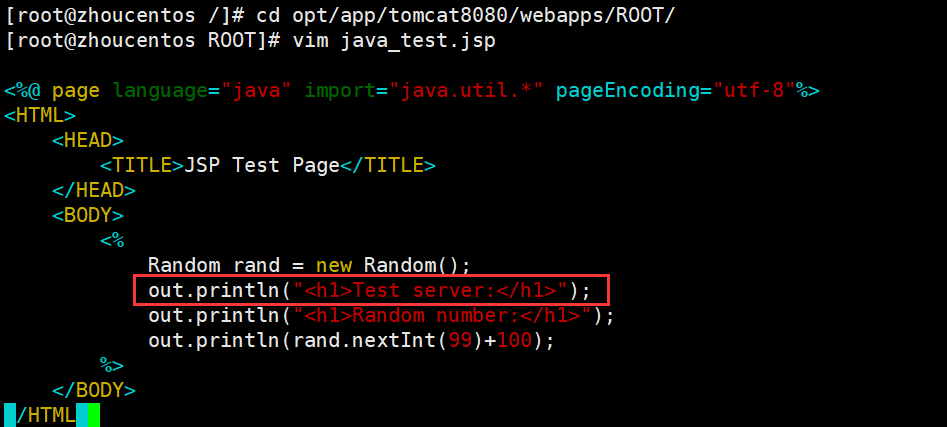
这里分别在同个tomcat/webapp/ROOT/下放了同样内容的jsp文件

把8080下的jsp问价内容改一下区别于9090
<%@ page language="java" import="java.util.*" pageEncoding="utf-8"%>
<HTML>
<HEAD>
<TITLE>JSP Test Page</TITLE>
</HEAD>
<BODY>
<%
Random rand = new Random();
out.println("<h1>Test server:</h1>");
out.println("<h1>Random number:</h1>");
out.println(rand.nextInt(99)+100);
%>
</BODY>
</HTML>
启动两个tomcat


查看进程

查看端口


启动memcached
查看进程

查看端口号

安装lua调用memcache的模块
写个脚本执行
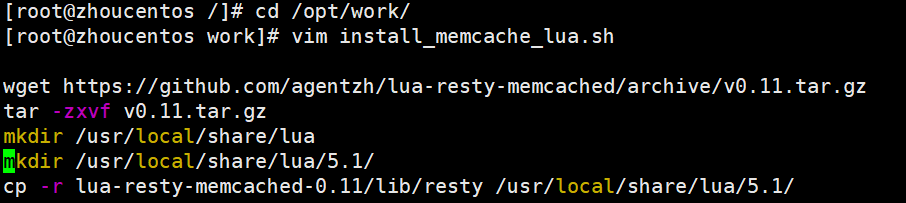
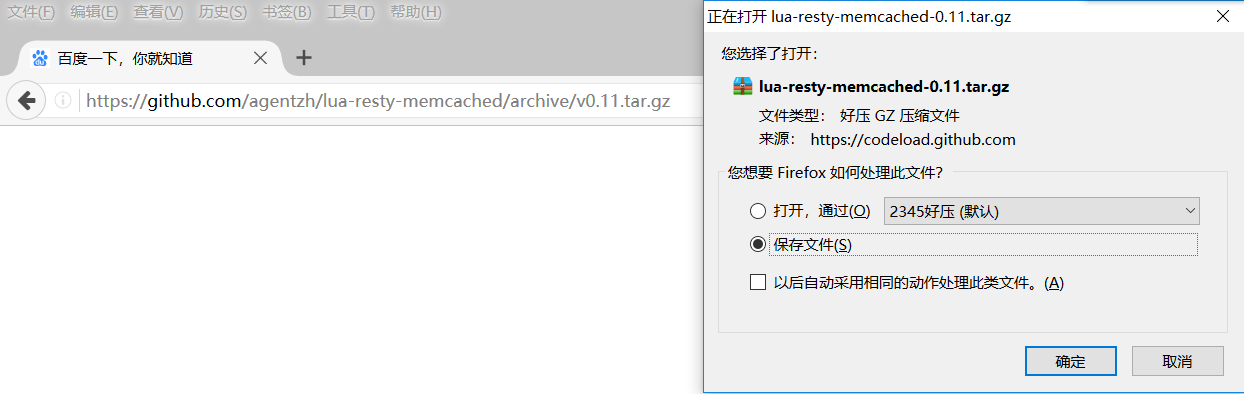
wget https://github.com/agentzh/lua-resty-memcached/archive/v0.11.tar.gz
tar -zxvf v0.11.tar.gz
mkdir /usr/local/share/lua
mkdir /usr/local/share/lua/5.1/
cp -r lua-resty-memcached-0.11/lib/resty /usr/local/share/lua/5.1/
运行脚本,如果出现404,则手动去脚本里那个网站下载安装包并手动执行脚本里面的安装步骤


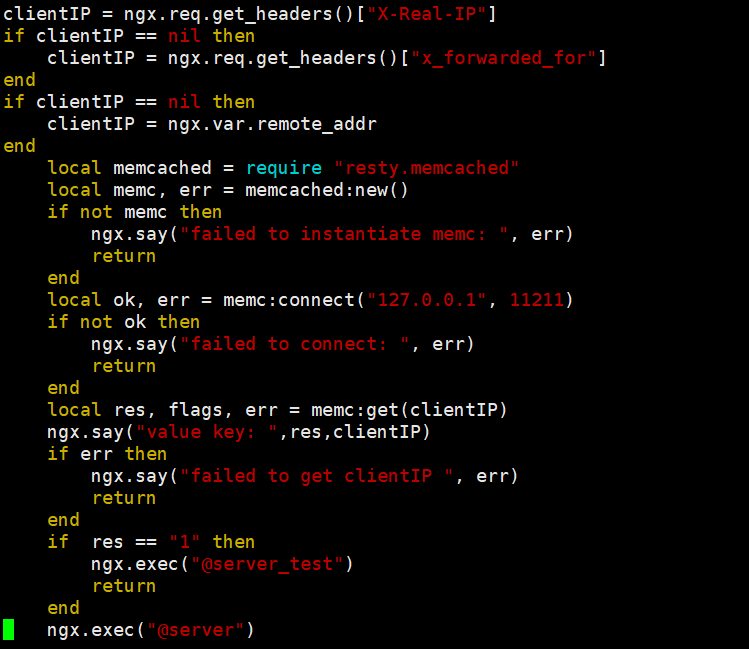
准备好一个lua脚本,放在/opt/app/lua下


clientIP = ngx.req.get_headers()["X-Real-IP"]
if clientIP == nil then
clientIP = ngx.req.get_headers()["x_forwarded_for"]
end
if clientIP == nil then
clientIP = ngx.var.remote_addr
end
local memcached = require "resty.memcached"
local memc, err = memcached:new()
if not memc then
ngx.say("failed to instantiate memc: ", err)
return
end
local ok, err = memc:connect("127.0.0.1", 11211)
if not ok then
ngx.say("failed to connect: ", err)
return
end
local res, flags, err = memc:get(clientIP)
ngx.say("value key: ",res,clientIP)
if err then
ngx.say("failed to get clientIP ", err)
return
end
if res == "1" then
ngx.exec("@server_test")
return
end
ngx.exec("@server")
编辑配置文件

把原来的location删掉,添加新的location
location /hello {
default_type 'text/plain';
content_by_lua 'ngx.say("hello, lua")';
}
location /myip{
default_type 'text/plain';
content_by_lua '
clientIP = ngx.req.get_headers()["x_forwarded_for"]
ngx.say("IP:",clientIP)
';
}
location /{
default_type "text/html";
content_by_lua_file /opt/app/lua/dep.lua;
}
location @server{
proxy_pass http://127.0.0.1:9090;
}
location @server_test{
proxy_pass http://127.0.0.1:8080;
}

由于这里没有写后台代码,所以使用telnet命令手动setip到memcached里面,实现指定IP访问预发布环境
如果出现以下问题

解决方法: 安装telnet服务
centos、ubuntu安装telnet命令的方法.
yum list telnet* 列出telnet 相关的安装包
yum install telnet-server 安装telnet服务
yum install telnet.* 安装telnet客户端


依次输入以下内容,即可把192.168.56.1加入到访问预发布环境的IP列表中
telnet 127.0.0.1 11211
set 192.168.56.1 0 0 1
1
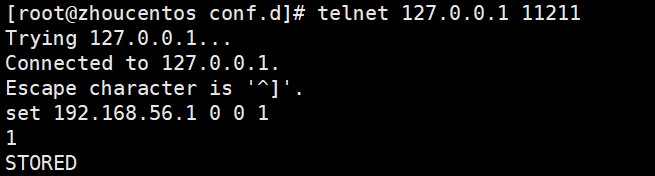
这里如果要退出的话,按ctrl+]
再输入quit就可以了

检查语法,并重载
nginx -tc /etc/nginx/nginx.conf
nginx -s reload -c /etc/nginx/nginx.conf

访问location


用前面set好的IP访问

切换IP访问