首先安装所依赖的库
(1)PCRE库
PCRE库支持正则表达式。如果我们在配置文件nginx.conf中使用了正则表达式,那么在编译Nginx时就必须把PCRE库编译进Nginx,因为Nginx的HTTP模块需要靠它来解析正则表达式。另外,pcre-devel是使用PCRE做二次开发时所需要的开发库,包括头文件等,这也是编译Nginx所必须使用的。
sudo apt-get install libpcre3 libpcre3-dev
(2)zlib库
zlib库用于对HTTP包的内容做gzip格式的压缩,如果我们在nginx.conf中配置了gzip on,并指定对于某些类型(content-type)的HTTP响应使用gzip来进行压缩以减少网络传输量,则在编译时就必须把zlib编译进Nginx。zlib-devel是二次开发所需要的库。可以这样安装:
sudo apt-get install zlib1g-dev
(3)OpenSSL库
如果服务器不只是要支持HTTP,还需要在更安全的SSL协议上传输HTTP,那么需要拥有OpenSSL。另外,如果我们想使用MD5、SHA1等散列函数,那么也需要安装它。可以这样安装:
sudo apt-get install openssl libssl-dev
去nginx官网下载最新的stable版本并解压
cd /usr/local/src
sudo wget http://nginx.org/download/nginx-1.12.1.tar.gz
tar zxvf ng
切换到nginx目录下
老三样
1.sudo ./configure 检查安装环境
2.sudo make 编译
3.sudo make install 安装
最后可以看到 安装的目录 -/usr/local/nginx

目录结构
-conf 配置文件目录
-html 网页文件
-logs 日志文件
-sbin 二进制程序文件
启动,重启,关闭nginx
1.二进制文件启动nginx
sudo /usr/local/nginx/sbin nginx
2.利用命令启动
sudo /usr/local/nginx/sbin/nginx -s reload/reopen
sudo /usr/local/nginx/sbin/nginx -h 查看帮助
3.利用信号控制 参考资料:https://www.nginx.com/resources/wiki/start/topics/tutorials/commandline/
kill -QUIT $( cat /usr/local/nginx/logs/nginx.pid )
| TERM, INT | Quick shutdown (快速关闭) |
| QUIT | Graceful shutdown (平滑关闭) |
| KILL | Halts a stubborn process |
| HUP |
Configuration reload Start the new worker processes with a new configuration(通过配置文件平滑启动) Gracefully shutdown the old worker processes |
| USR1 | Reopen the log files (重新打开日志文件) |
| USR2 | Upgrade Executable on the fly(升级可执行文件) |
| WINCH | Gracefully shutdown the worker processes(平滑关闭子进程) |
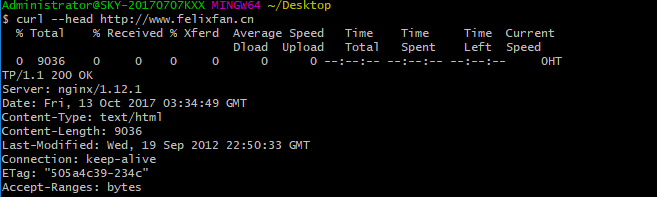
彩蛋:修改版本头信息
curl --head http://www.felixfan.cn
首先要修改源码中的/src/core/nginx.h文件
/*
 * Copyright (C) Igor Sysoev
 * Copyright (C) Nginx, Inc.
 */


#ifndef _NGINX_H_INCLUDED_
#define _NGINX_H_INCLUDED_


#define nginx_version      1012001
#define NGINX_VERSION      "fan"
#define NGINX_VER          "Felix/"NGINX_VERSION

#ifdef NGX_BUILD
#define NGINX_VER_BUILD    NGINX_VER " (" NGX_BUILD ")"
#else
#define NGINX_VER_BUILD    NGINX_VER
#endif

#define NGINX_VAR          "Felix"
#define NGX_OLDPID_EXT     ".oldbin"


#endif /* _NGINX_H_INCLUDED_ */
然后再次编译 杀死进程 重启nginx
活学活用,使用kill -USER1 分割日志文件
#!/bin/bash

#这个脚本每天零点运行

#日志位置
logs_path="/usr/local/nginx/logs/"

#创建文件夹,移动文件,并以昨天命名
mkdir -p ${logs_path}$(date -d "yesterday" +"%Y")/$(date -d "yesterday" +"%d")
mv ${logs_path}access_log ${logs_path}$(date -d "yesterday" +"%Y")/$(date -d "yesterday" +"%d")/$(date -d "yesterday" +"%Y%m%d")

#发送信号量告诉nginx生成新的access.log文件
kill -USR1 `cat /usr/local/nginx/logs/nginx.pid`
运行cron定时任务
0 0 * * * /bin/bash /usr/local/nginx/sbin/cut_nginx_logs.sh
编译安装php
1.下载php cd /usr/loca/src
wget http://cn2.php.net/distributions/php-7.0.2.tar.gz
2.解压并预编译
tar -zxvf php-7.0.2.tar.gz
cd cd php-7.0.2/
./configure --help
3.编译
./configure --prefix=/usr/local/php
 --with-curl
 --with-freetype-dir
 --with-gd
 --with-gettext
 --with-iconv-dir
 --with-kerberos
 --with-libdir=lib64
 --with-libxml-dir
 --with-mysqli
 --with-openssl
 --with-pcre-regex
 --with-pdo-mysql
 --with-pdo-sqlite
 --with-pear
 --with-png-dir
 --with-xmlrpc
 --with-xsl
 --with-zlib
 --enable-fpm
 --enable-bcmath
 --enable-libxml
 --enable-inline-optimization
 --enable-gd-native-ttf
 --enable-mbregex
 --enable-mbstring
 --enable-opcache
 --enable-pcntl
 --enable-shmop
 --enable-soap
 --enable-sockets
 --enable-sysvsem
 --enable-xml
 --enable-zip
4.安装解决依赖
https://xwsoul.com/posts/18
5.配置文件
cp php.ini-development /usr/local/php/lib/php.ini
cp /usr/local/php/etc/php-fpm.conf.default /usr/local/php/etc/php-fpm.conf
cp /usr/local/php/etc/php-fpm.d/www.conf.default /usr/local/php/etc/php-fpm.d/www.conf
cp -R ./sapi/fpm/php-fpm /etc/init.d/php-fpm
6.启动php-fpm
/etc/init.d/php-fpm start