一、CALayer的常用属性
-
1、@propertyCGPoint position;
图层中心点的位置,类似与UIView的center;用来设置CALayer在父层中的位置;以父层的左上角为原点(0,0); -
2、 @property CGPoint anchorPoint;
称『定位点』、『锚点』,该描述是相对于x、y位置比例而言的默认在图像中心点(0.5、0.5)的位置;决定着CALayer身上的哪个点会再position属性所指的位置,以自己的左上角为原点(0,0);它的x、y取值范围都是0~1。 -
3、 @property(nullable) CGColorRef backgroundColor;
图层背景颜色 -
4、 @property(nullable) CGColorRef borderColor;
图层边框颜色 -
5、 @property CGFloat borderWidth;
图层边框宽度 -
6、 @property CGRect bounds;
图层大小 -
7、 @property(nullable, strong) id contents;
图层显示内容,例如可以将图片作为图层内容显示 -
8、 @property CGRect contentsRect;
图层显示内容的大小和位置 -
9、 @property CGFloat cornerRadius;
圆角半径 -
10、 @property(getter=isDoubleSided) BOOL doubleSided;
图层背景是否显示,默认是YES -
11、 @property CGRect frame;
图层大小和位置,不支持隐式动画,所以CALyaer中很少使用frame,通常使用bound和position代替 -
12、 @property(getter=isHidden) BOOL hidden;
是否隐藏 -
13、 @property(nullable, strong) CALayer *mask;
图层蒙版 -
14、 @property BOOL masksToBounds;
子图层是否剪切图层边界,默认是NO -
15、 @property float opacity;
图层透明度,类似与UIView的alpha -
16、 @property(nullable) CGColorRef shadowColor;
阴影颜色 -
17、 @property CGSize shadowOffset;
阴影偏移量 -
18、 @property float shadowOpacity;
阴影透明度,注意默认为0,如果设置阴影必须设置此属性 -
19、 @property(nullable) CGPathRef shadowPath;
阴影形状 -
20、 @property CGFloat shadowRadius;
阴影模糊半径 -
21、 @property(nullable, copy) NSArray
二、CALayer不常用属性
-
1、 @property CGFloat zPosition;
图层中心点在z轴中的位置 -
2、 @property CGFloat anchorPointZ;
图层在z轴中的锚点; -
3、 - (CGAffineTransform)affineTransform;
-
4、- (void)setAffineTransform:(CGAffineTransform)m;
以上属性为图层形变;该属性值指定一个CGAffineTransform对象,该对象代表对CALayer执行X、Y两个维度(也就是平面)上的旋转、缩放、位移、斜切、镜像等变换矩阵 -
5、 @property(nullable, readonly) CALayer *superlayer;
图层的父图层
三、CALayer图层操作
-
1、 - (void)addSublayer:(CALayer *)layer;
添加子图层 -
2、 - (void)removeFromSuperlayer;
将自己从父图层中移除 -
3、 - (void)insertSublayer:(CALayer *)layer atIndex:(unsigned)idx;
在自己子图层数组中的第idx位置添加图层 -
4、 - (void)insertSublayer:(CALayer )layer below:(nullable CALayer )sibling;
将图层layer添加在子图层sibling的下面 -
5、 - (void)insertSublayer:(CALayer )layer above:(nullable CALayer )sibling;
将图层layer添加在子图层sibling的上面 -
6、 - (void)replaceSublayer:(CALayer )layer with:(CALayer )layer2;
将图层layer替换layer2;
四、CALayer动画操作
-
1、 - (void)addAnimation:(CAAnimation )anim forKey:(nullable NSString )key;
图层添加某一属性的动画 -
2、 - (nullable NSArray< NSString > )animationKeys;
获取所有动画的属性 -
3、 - (nullable CAAnimation )animationForKey:(NSString )key;
获取某一属性的动画 -
4、 - (void)removeAnimationForKey:(NSString *)key;
移除某一属性动画 -
5、 - (void)removeAllAnimations;
移除所有动画
五、隐式动画
在ios中CALayer的设计主要是为了内容展示和动画操作,CALayer本身并不包含在UIKit中,它不能响应事件。由于CALayer在设计之初就考虑它的动画操作功能,CALayer很多属性在修改时都能形成动画效果,这种属性称为『隐式动画属性』。但是对于UIView的根视图层而言属性的修改并不形成动画效果,因为很多情况下根图层更多的充当容器的作用,如果它的属性变动形成动画效果会直接影响子图层。另外,UIView的根图层创建工作完全有iOS负责完成,无法重新创建,但是可以往根图层中添加子图层或移除子图层。
-
1、如何查看CALayer的某个属性是否支持隐式动画
- 可以查看头文件,看有没有Animatable,如果有表示支持;
- 查看官方文档
- 下面标明都支持隐式动画
- 可以查看头文件,看有没有Animatable,如果有表示支持;
-
2、例子


#pragma mark 绘制图层
-(void)drawMyLayer{
    CGSize size=[UIScreen mainScreen].bounds.size;
    //获得根图层
    layer=[[CALayer alloc]init];
    //设置背景颜色,由于QuartzCore是跨平台框架,无法直接使用UIColor
    layer.backgroundColor=[UIColor colorWithRed:0 green:146/255.0 blue:1.0 alpha:1.0].CGColor;
    //设置中心点
    layer.position=CGPointMake(size.width/2, size.height/2);
    //设置大小
    layer.bounds=CGRectMake(0, 0, WIDTH,WIDTH);
    //设置圆角,当圆角半径等于矩形的一半时看起来就是一个圆形
    layer.cornerRadius=WIDTH/2;
    //设置阴影
    layer.shadowColor=[UIColor grayColor].CGColor;
    layer.shadowOffset=CGSizeMake(2, 2);
    layer.shadowOpacity=.9;
    //设置边框
    //    layer.borderColor=[UIColor whiteColor].CGColor;
    //    layer.borderWidth=1;
    //设置锚点
    //    layer.anchorPoint=CGPointZero;
    [self.view.layer addSublayer:layer];
}
#pragma mark 点击放大
-(void)touchesEnded:(NSSet *)touches withEvent:(UIEvent *)event{
    UITouch *touch=[touches anyObject];
    CGFloat width=layer.bounds.size.width;
    if (width==WIDTH) {
        width=WIDTH*4;
    }else{
        width=WIDTH;
    }
    layer.bounds=CGRectMake(0, 0, width, width);
    layer.position=[touch locationInView:self.view];
    layer.cornerRadius=width/2;
}

七、CALayer绘图
使用Quartz 2D绘图,是直接调用UIView的drawRect:方法绘制图形、图像,这种方式的本质还是再图层中绘制。drawRect:方法是由UIKit组件进行调用,因此厘米那可以使用到一些UIKir封装的方法进行绘制,而直接绘制到图层的方法由于并非UIKit直接调用因此只能用原生的Core Graphics方法绘制;
图层绘制有两种方法,不管使用那种方法绘制完必须调用图层的setNeedDisplay方法,下面介绍图层的两种绘制方法:
(1)、通过图层代理drawLayer:inContext:方法绘制
通过代理方法进行图层呢个绘制只要指定图层的代理,然后在代理对象中重写 - (void)drawLayer:(CALayer *)layer inContext:(CGContextRef)ctx;方法即可。需要注意这个方法虽然是代理方法但是不用手动实习那CALayerDelegate,因为CALayer定义中给NSObject做了分类扩展,所有的NSObject都包含这个方法。另外设置完代理后必须要调用图层的 - (void)setNeedsDisplay;方法,否测绘制内容无法显示;
例如:
#pragma mark 绘制图层
-(void)drawMyLayer{
    //自定义图层
    CALayer *layer=[[CALayer alloc]init];
    layer.bounds=CGRectMake(0, 0, PHOTO_HEIGHT, PHOTO_HEIGHT);
    layer.position=CGPointMake(160, 200);
    layer.backgroundColor=[UIColor redColor].CGColor;
    layer.cornerRadius=PHOTO_HEIGHT/2;
    //注意仅仅设置圆角,对于图形而言可以正常显示,但是对于图层中绘制的图片无法正确显示
    //如果想要正确显示则必须设置masksToBounds=YES,剪切子图层
    layer.masksToBounds=YES;
    //阴影效果无法和masksToBounds同时使用,因为masksToBounds的目的就是剪切外边框,
    //而阴影效果刚好在外边框
    //    layer.shadowColor=[UIColor grayColor].CGColor;
    //    layer.shadowOffset=CGSizeMake(2, 2);
    //    layer.shadowOpacity=1;
    //设置边框
    layer.borderColor=[UIColor whiteColor].CGColor;
    layer.borderWidth=2;
    //设置图层代理
    layer.delegate=self;
    //添加图层到根图层
    [self.view.layer addSublayer:layer];
    //调用图层setNeedDisplay,否则代理方法不会被调用
    [layer setNeedsDisplay];
}
#pragma mark 绘制图形、图像到图层,注意参数中的ctx是图层的图形上下文,其中绘图位置也是相对图层而言的
-(void)drawLayer:(CALayer *)layer inContext:(CGContextRef)ctx{
    //    NSLog(@"%@",layer);//这个图层正是上面定义的图层
    CGContextSaveGState(ctx);
    //图形上下文形变,解决图片倒立的问题
    CGContextScaleCTM(ctx, 1, -1);
    CGContextTranslateCTM(ctx, 0, -PHOTO_HEIGHT);
    UIImage *image=[UIImage imageNamed:@"001.png"];
    //注意这个位置是相对于图层而言的不是屏幕
    CGContextDrawImage(ctx, CGRectMake(0, 0, PHOTO_HEIGHT, PHOTO_HEIGHT), image.CGImage);
    //    CGContextFillRect(ctx, CGRectMake(0, 0, 100, 100));
    //    CGContextDrawPath(ctx, kCGPathFillStroke);
    CGContextRestoreGState(ctx);
}
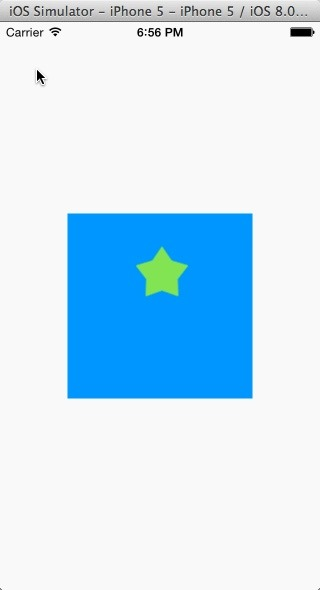
(2)、使用自定义图层绘图
在自定义图层绘图时只要自己编写一个类继承与CALayer然后在 - (void)drawInContext:(CGContextRef)ctx;中绘图即可。同前面在代理方法绘图一样,要显示图层中绘制的内容也要调用图层的 - (void)setNeedsDisplay;方法,否则 - (void)drawInContext:(CGContextRef)ctx;方法将不会调用;
例如:
KCALayer.h
#import "KCALayer.h"

@implementation KCALayer
-(void)drawInContext:(CGContextRef)ctx{
    NSLog(@"3-drawInContext:");
    NSLog(@"CGContext:%@",ctx);
    //    CGContextRotateCTM(ctx, M_PI_4);
    CGContextSetRGBFillColor(ctx, 135.0/255.0, 232.0/255.0, 84.0/255.0, 1);
    CGContextSetRGBStrokeColor(ctx, 135.0/255.0, 232.0/255.0, 84.0/255.0, 1);
    //    CGContextFillRect(ctx, CGRectMake(0, 0, 100, 100));
    //    CGContextFillEllipseInRect(ctx, CGRectMake(50, 50, 100, 100));
    CGContextMoveToPoint(ctx, 94.5, 33.5);
    //// Star Drawing
    CGContextAddLineToPoint(ctx,104.02, 47.39);
    CGContextAddLineToPoint(ctx,120.18, 52.16);
    CGContextAddLineToPoint(ctx,109.91, 65.51);
    CGContextAddLineToPoint(ctx,110.37, 82.34);
    CGContextAddLineToPoint(ctx,94.5, 76.7);
    CGContextAddLineToPoint(ctx,78.63, 82.34);
    CGContextAddLineToPoint(ctx,79.09, 65.51);
    CGContextAddLineToPoint(ctx,68.82, 52.16);
    CGContextAddLineToPoint(ctx,84.98, 47.39);
    CGContextClosePath(ctx);
    CGContextDrawPath(ctx, kCGPathFillStroke);
}
@end
ViewController.m
#pragma mark 绘制图层
-(void)drawMyLayer{
    KCALayer *layer=[[KCALayer alloc]init];
    layer.bounds=CGRectMake(0, 0, 185, 185);
    layer.position=CGPointMake(160,284);
    layer.backgroundColor=[UIColor colorWithRed:0 green:146/255.0 blue:1.0 alpha:1.0].CGColor;
    //显示图层
    [layer setNeedsDisplay];
    [self.view.layer addSublayer:layer];
}
七、CALayer绘图
使用Quartz 2D绘图,是直接调用UIView的drawRect:方法绘制图形、图像,这种方式的本质还是再图层中绘制。drawRect:方法是由UIKit组件进行调用,因此厘米那可以使用到一些UIKir封装的方法进行绘制,而直接绘制到图层的方法由于并非UIKit直接调用因此只能用原生的Core Graphics方法绘制;
图层绘制有两种方法,不管使用那种方法绘制完必须调用图层的setNeedDisplay方法,下面介绍图层的两种绘制方法:
(1)、通过图层代理drawLayer:inContext:方法绘制
通过代理方法进行图层呢个绘制只要指定图层的代理,然后在代理对象中重写 - (void)drawLayer:(CALayer *)layer inContext:(CGContextRef)ctx;方法即可。需要注意这个方法虽然是代理方法但是不用手动实习那CALayerDelegate,因为CALayer定义中给NSObject做了分类扩展,所有的NSObject都包含这个方法。另外设置完代理后必须要调用图层的 - (void)setNeedsDisplay;方法,否测绘制内容无法显示;
例如: