注:这部分的学习还是要靠自己多点点 多尝试尝试
这部分19年3月份我是玩的很溜的,一年没用,基本忘光光了。
学习要温故而知新!
流程拓扑图
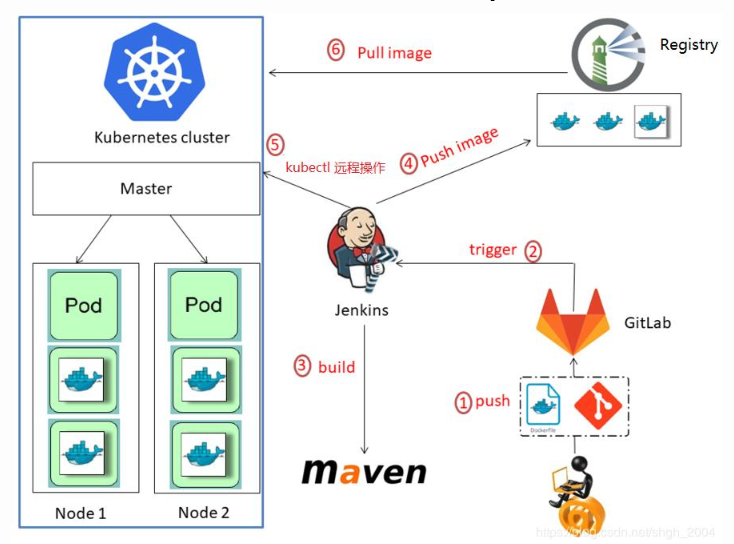
前提准备
部署应用服务
部署kubernetes 集群:https://www.cnblogs.com/zisefeizhu/p/12505117.html
部署ceph集群:https://www.cnblogs.com/zisefeizhu/p/12512377.html
部署harbor:https://www.cnblogs.com/zisefeizhu/p/12329864.html
部署jenkins:https://www.cnblogs.com/zisefeizhu/p/12499084.html
部署gitlab:https://www.cnblogs.com/zisefeizhu/p/12524824.html
检查集群状态
kubernetes集群
# kubectl get cs
NAME                 STATUS    MESSAGE             ERROR
scheduler            Healthy   ok
controller-manager   Healthy   ok
etcd-1               Healthy   {"health":"true"}
etcd-2               Healthy   {"health":"true"}
etcd-0               Healthy   {"health":"true"}
# kubectl get nodes
NAME         STATUS                     ROLES    AGE     VERSION
20.0.0.201   Ready,SchedulingDisabled   master   4d22h   v1.17.2
20.0.0.202   Ready,SchedulingDisabled   master   4d22h   v1.17.2
20.0.0.203   Ready,SchedulingDisabled   master   4d22h   v1.17.2
20.0.0.204   Ready                      node     4d22h   v1.17.2
20.0.0.205   Ready                      node     4d22h   v1.17.2
20.0.0.206   Ready                      node     4d22h   v1.17.2
# kubectl get pods -n assembly
NAME                              READY   STATUS             RESTARTS   AGE
jenkins-0                         1/1     Running            2          74m
rbd-provisioner-9cf46c856-ngxwn   1/1     Running            1          65m

ceph集群
# ceph -s
......

    health: HEALTH_OK
gitlab创建项目

创建组:**
使用管理员root创建组,一个组里面可以有多个项目分支,可以将开发添加到组里面进行设置权限,不同的组就是公司不同的开发项目或者服务模块,不同的组添加不同的开发即可实现对开发设置权限的管理。
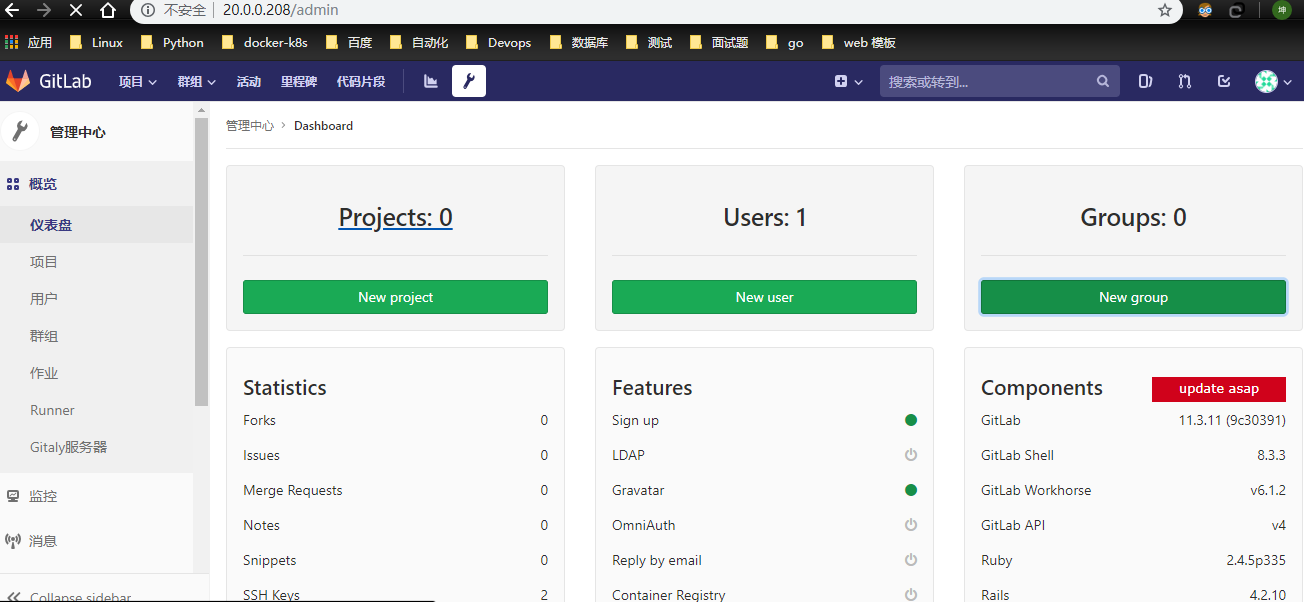

使用管理员创建项目


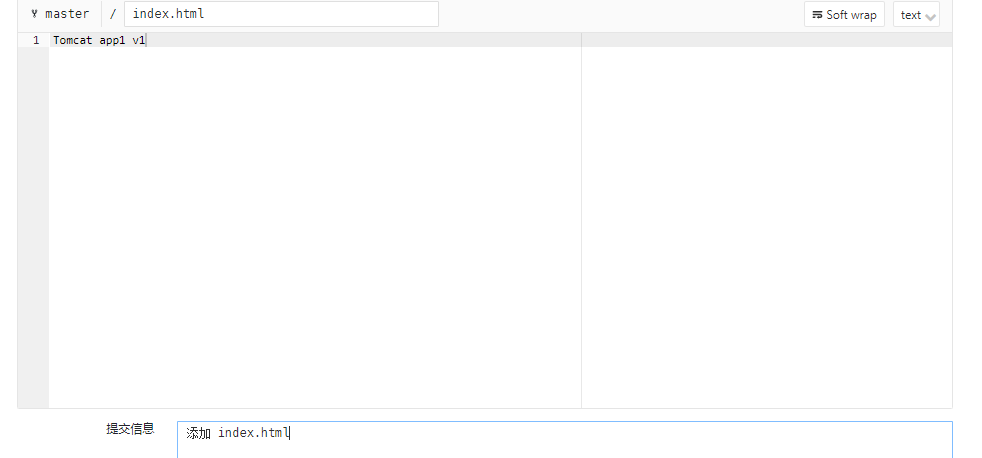
免密钥拉取gitlab 代码
# cat ~/.ssh/id_rsa.pub
ssh-rsa AAAAB3NzaC1yc2EAAAADAQABAAABAQDFLo3T4x0JJeOg7rzTXrjuxQMj+Y39j6wan6lO4nI5Zj5Z7YKy4YUjVy/i3iYTycyvVHCwfds/yGUxdoGIt/IfyGbH4XYtFTdJwh+8y1lBNwYxiGN9103n1JlrK08GjFj73vhSduLATEiUx2mLyVd3D26aE51RrxW+sK1PSN0EzMNPJiJLRDVbOYA8sd+xloWbNOFKJu9ecKzvy57Z8c8ohRnm3xZ23tHZdGdRTfN8LBXkAPUB7jA8SkXOpSMg9qj/BajFf7FPynNQr16AmiIU7F9PDl6JM1fWgs6SQyTezw1CK1oXcIAZLNIMTrtX/vd0ZY+ml+luyuZtLuRIKPRN root@bs-k8s-gitlab


# git clone git@20.0.0.208:web-test/app1.git
正克隆到 'app1'...
remote: Enumerating objects: 3, done.
remote: Counting objects: 100% (3/3), done.
remote: Total 3 (delta 0), reused 0 (delta 0)
接收对象中: 100% (3/3), done.
[root@bs-k8s-gitlab ~]# cd app1/
[root@bs-k8s-gitlab app1]# cat index.html
Tomcat app1 v1[root@bs-k8s-gitlab app1]# echo zisefeizhu >> index.html
[root@bs-k8s-gitlab app1]# git add .
[root@bs-k8s-gitlab app1]# git commit -m "Testing gitlab and jenkins Connection #1"
[master f21339a] Testing gitlab and jenkins Connection #1
 1 file changed, 1 insertion(+), 1 deletion(-)
[root@bs-k8s-gitlab app1]# git push origin master
Counting objects: 5, done.
Writing objects: 100% (3/3), 288 bytes | 0 bytes/s, done.
Total 3 (delta 0), reused 0 (delta 0)
To git@20.0.0.208:web-test/app1.git
   1198095..f21339a  master -> master

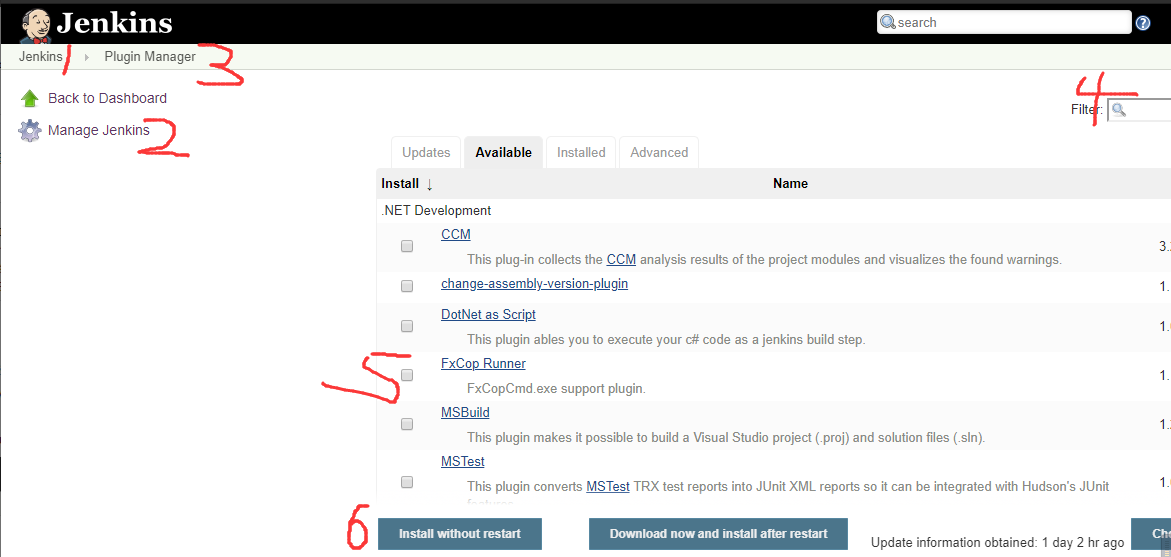
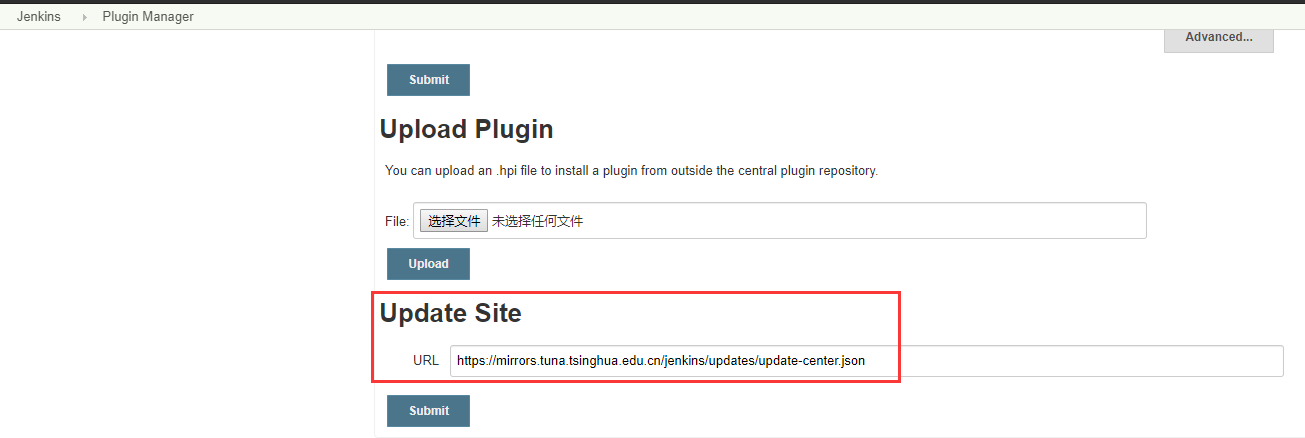
jenkins配置插件
插件安装
Git plugin        git
GitLab Plugin     gitlab
Kubernetes plugin 动态创建代理
Pipeline          流水线
Email Extension   邮件扩展
Extended Choice Parameter
gitlab触发jenkins
gitlab生成token
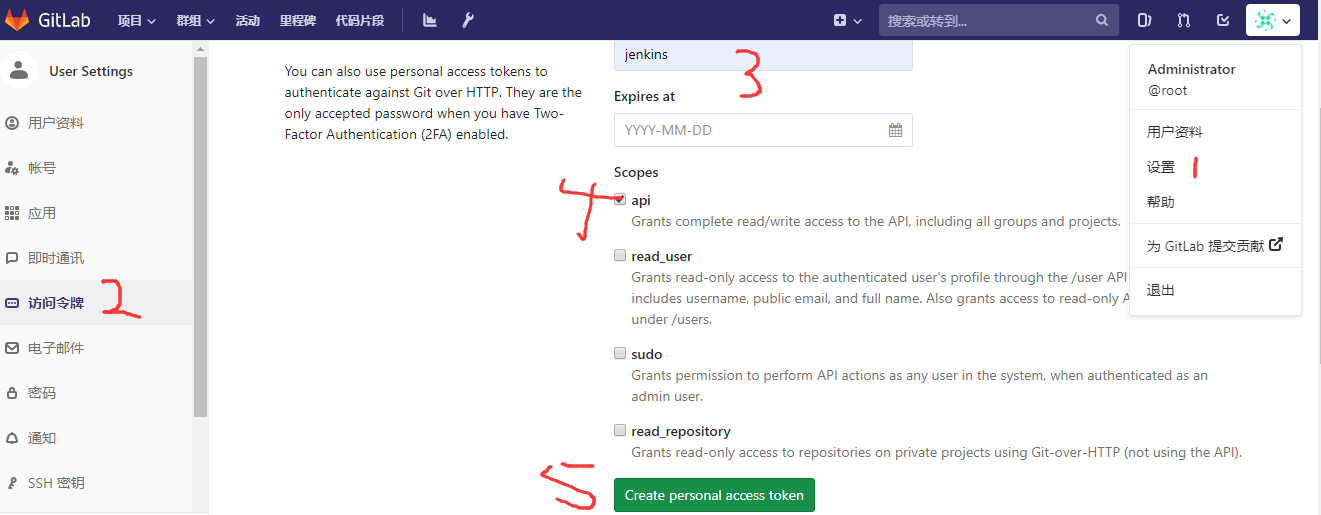

复制此token,此token只显示一次:8YJobWVnZri-chf-QakJ
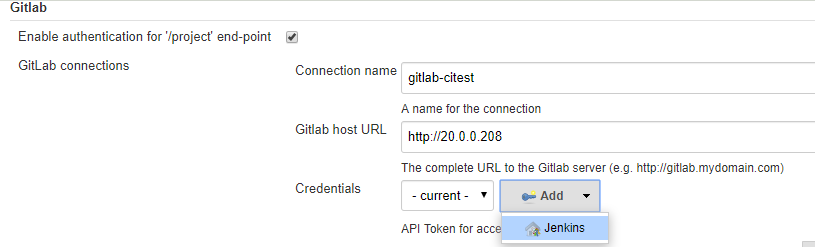
jenkins配置连接gitlab
系统管理 --> 系统设置 --> gitlab

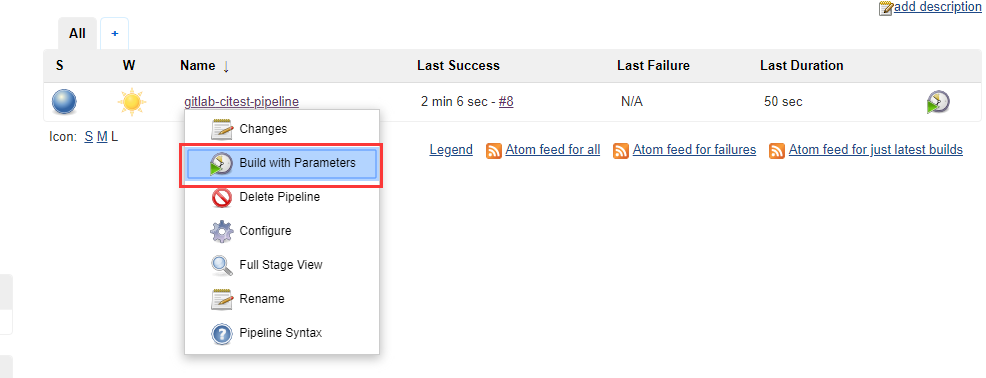
创建jenkins任务


http://20.0.0.202:30006/project/gitlab-citest-pipeline 这个地址用来设置gitlab的webhook。
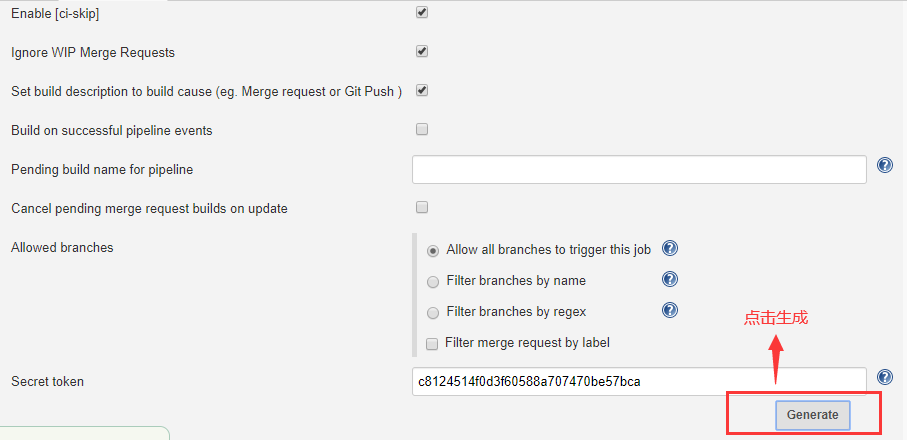
token: c8124514f0d3f60588a707470be57bca
gitlab设置webhooks


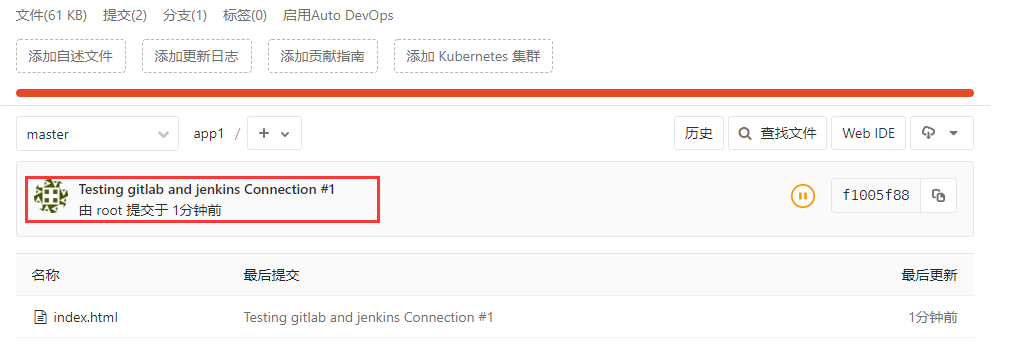
提交代码至gitlab触发jenkins任务
# git clone git@20.0.0.208:web-test/app1.git
正克隆到 'app1'...
remote: Enumerating objects: 6, done.
remote: Counting objects: 100% (6/6), done.
remote: Compressing objects: 100% (2/2), done.
remote: Total 6 (delta 0), reused 0 (delta 0)
接收对象中: 100% (6/6), done.
# cd app1/
# echo zisefeizhu >> index.html
# git add .
# git commit -m "Testing gitlab and jenkins Connection #1"
[master f1005f8] Testing gitlab and jenkins Connection #1
 1 file changed, 1 insertion(+)
# git push origin master
Counting objects: 5, done.
Writing objects: 100% (3/3), 289 bytes | 0 bytes/s, done.
Total 3 (delta 0), reused 0 (delta 0)
To git@20.0.0.208:web-test/app1.git
   f21339a..f1005f8  master -> master
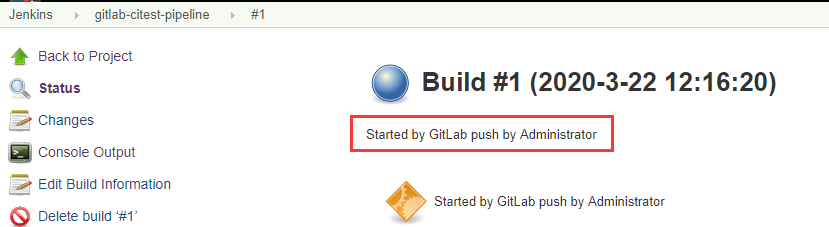
显示任务由gitlab触发的。
Jenkins Pipeline 及参数化构建
**Jenkins参数化构建流程图 ** 【网图】

Jenkins Pipeline是一套插件,支持在Jenkins中实现集成和持续交付管道;
- Pipeline通过特定语法对简单到复杂的传输管道进行建模;
- 声明式:遵循与Groovy相同语法。pipeline { }
- 脚本式:支持Groovy大部分功能,也是非常表达和灵活的工具。node { }
- Jenkins Pipeline的定义被写入一个文本文件,称为Jenkinsfile。
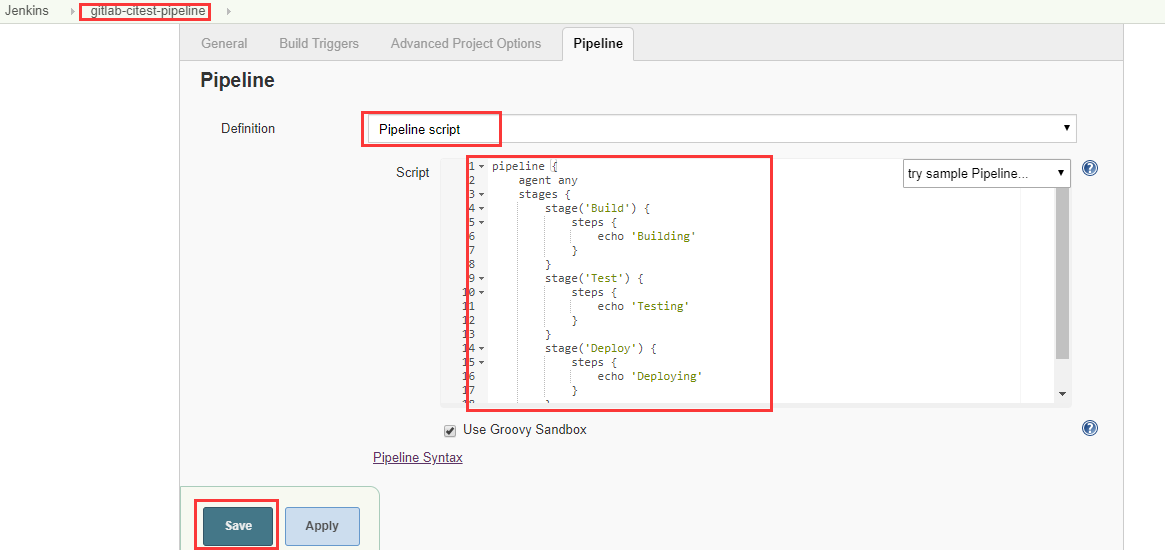
pipeline {
    agent any
    stages {
        stage('Build') {
            steps {
                echo 'Building'
            }
        }
        stage('Test') {
            steps {
                echo 'Testing'
            }
        }
        stage('Deploy') {
            steps {
                echo 'Deploying'
            }
        }
    }
}

pipeline简单使用
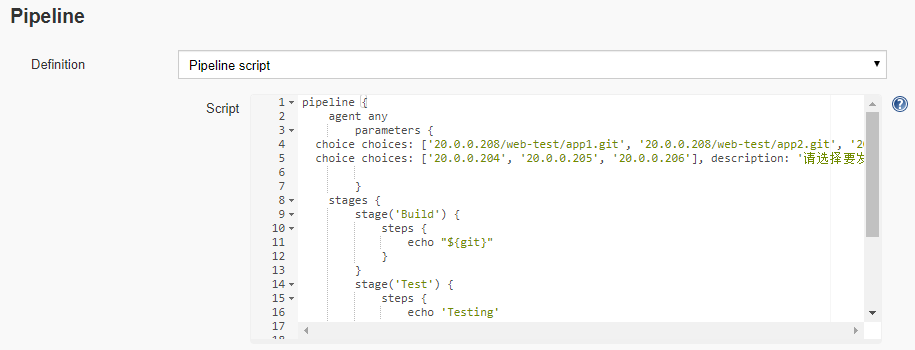
pipeline {
    agent any
        parameters {
  choice choices: ['20.0.0.208/web-test/app1.git', '20.0.0.208/web-test/app2.git', '20.0.0.208/web-test/app3.git'], description: '请选择要发布的项目git地址', name: 'git'
  choice choices: ['20.0.0.204', '20.0.0.205', '20.0.0.206'], description: '请选择要发布的服务器', name: 'host'

        }
    stages {
        stage('Build') {
            steps {
                echo "${git}"
            }
        }
        stage('Test') {
            steps {
                echo 'Testing'
            }
        }
        stage('Deploy') {
            steps {
                echo "${host}"
            }
        }
    }
}
构建发布测试

Started by user zisefeizhu
Running in Durability level: MAX_SURVIVABILITY
[Pipeline] Start of Pipeline
[Pipeline] node
Running on Jenkins in /var/jenkins_home/workspace/gitlab-citest-pipeline
[Pipeline] {
[Pipeline] stage
[Pipeline] { (Build)
[Pipeline] echo
20.0.0.208/web-test/app2.git
[Pipeline] }
[Pipeline] // stage
[Pipeline] stage
[Pipeline] { (Test)
[Pipeline] echo
Testing
[Pipeline] }
[Pipeline] // stage
[Pipeline] stage
[Pipeline] { (Deploy)
[Pipeline] echo
20.0.0.205
[Pipeline] }
[Pipeline] // stage
[Pipeline] }
[Pipeline] // node
[Pipeline] End of Pipeline
Finished: SUCCESS