PrintStream(打印流) 打印流可以打印任意类型的数据,而且打印前都会把数据转换成字符串再进行打印(就是把数据存入硬盘中)
编码与解码图例: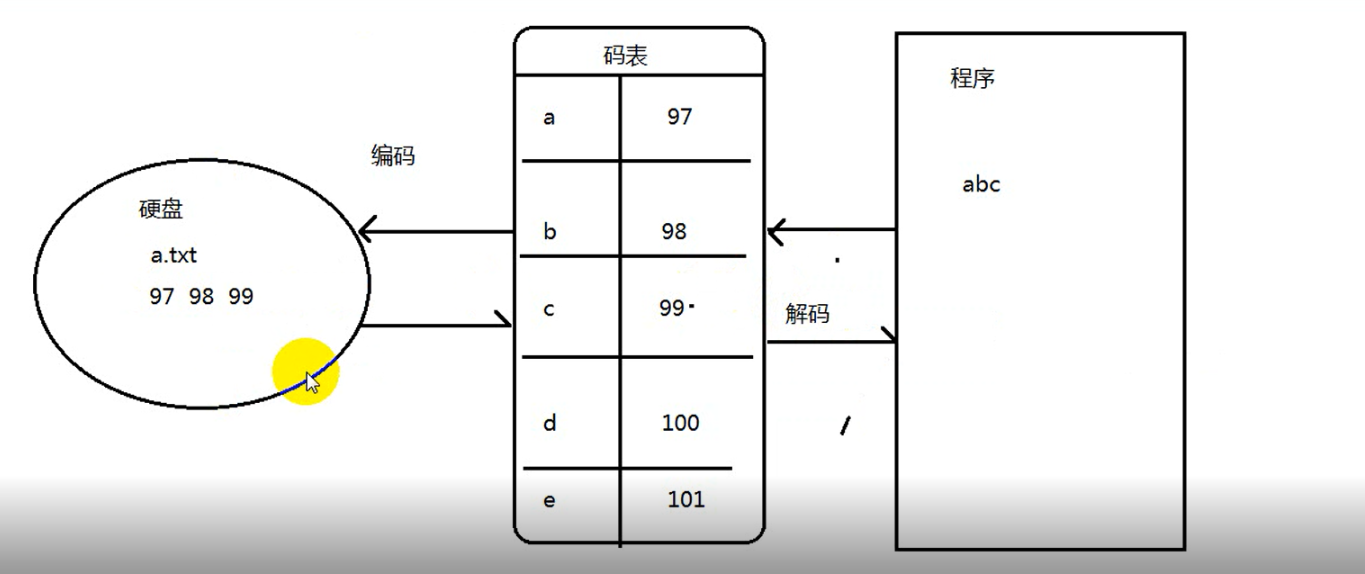
下面我们来看看一个简单的字节输出流
public class Demo1 {
    public static void main(String[] args) throws IOException {
        File file = new File("D:\新建文件夹\a.txt");
        FileOutputStream fileOutputStream = new FileOutputStream(file);
        fileOutputStream.write(97);
     fileOutputStream.close();
    }
}
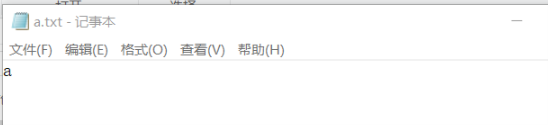
最后我们查看记事本会发现我们存储的是字符串a,但是我们存入的数字97。原来记事本把这个数字当成了码值,因为记事本本身带有解码的功能,当我们存储int类型的数据的时候(FileOutputStream并没有对这个进行编码,它也把这个当成了码值),记事本会自动把数字转换成对应的字符,存储到记事本上面
如果我们想要存储97,只能先把这个变成一个String类型的数据存储,因为write接受一个字节类型数据,所以我们要使用String类的getBytes()方法把字符97转换成对应的码值(编码)后再存储到记事本上面,然后记事本再进行解码,这个我们就可以看到97这个数字了,例如下面
public class Demo1 {
    public static void main(String[] args) throws IOException {
        File file = new File("D:\新建文件夹\a.txt");
        FileOutputStream fileOutputStream = new FileOutputStream(file);
        fileOutputStream.write("97".getBytes());
     fileOutputStream.close();
    }
}

我们再来看看一个简单的字符输出流
public class Demo1 {
    public static void main(String[] args) throws IOException {
        File file = new File("D:\新建文件夹\a.txt");
        FileWriter fileWriter = new FileWriter(file);
        fileWriter.write(97);
        fileWriter.close();
    }
}
我们可以发现记事本上面显示的是a,这个可以证明FileWriter 对于存储int类型的数据并没有进行编码,最后才会导致记事本自动解码显示为a(a编码后就是97)
但是当我们给write方法传入一个字符且不进行编码的时候,我们会发现记事本上面记录的是97,这个说明FileWriter内部对字符进行了编码,最后才导致记事本解码为97
public class Demo1 {
    public static void main(String[] args) throws IOException {
        File file = new File("D:\新建文件夹\a.txt");
        FileWriter fileWriter = new FileWriter(file);
        fileWriter.write("97");
        fileWriter.close();
    }
}
总结上面的一些实例,我们可以发现无论是字节输出流,还是字符输出流,都需要把我们需要传入的数据转换成字符类型进行传输,如果我们要传入int类型的数据感觉很麻烦,因为字节也就是码值这个也是int类型
PrintStream(打印流) 打印流可以打印任意类型的数据,而且打印前都会把数据转换成字符串再进行打印(就是把数据存入硬盘中)
使用PrintStream打印流可以让我们放心的传入任何类型的数据(包括对象和数组),不需我们手动转换成字符类型,它内部就可以帮我们把数据转换成字符串,并把字符串编码,很方便
注意:PrintStream内部维护了一个字节数组,当我们使用write的时候是把数据存储到了字节数组中,并不是打印到文件中
当我们使用flush,close方法或者数组满了的时候,才会打印到文件中
PrintStream的构造方法:
PrintStream(File file) 创建具有指定文件且不带自动行刷新的新打印流。 |
PrintStream(File file, String csn) 创建具有指定文件名称和字符集且不带自动行刷新的新打印流。 |
PrintStream(OutputStream out) 创建新的打印流。 |
PrintStream(OutputStream out, boolean autoFlush) 创建新的打印流。 |
PrintStream(OutputStream out, boolean autoFlush, String encoding) 创建新的打印流。 |
PrintStream(String fileName) 创建具有指定文件名称且不带自动行刷新的新打印流。 |
PrintStream(String fileName, String csn) 创建具有指定文件名称和字符集且不带自动行刷新的新打印流。 |
PrintStream的一些方法:
print(boolean b) 打印 boolean 值。(这个方法有很多重载,这个是为什么我们可以传入很多数据的原因) |
println(boolean x) 打印 boolean 值,然后换行。(这个方法有很多重载,这个是为什么我们可以传入很多数据的原因) |
flush() 刷新该流的缓冲,就是把内部数组中的数据打印到文本中 |
close() 关闭流。 |
下面是一些实例:
传入int类型的97
public class Demo1 {
    public static void main(String[] args) throws IOException {
        File file = new File("D:\新建文件夹\a.txt");
        PrintStream printStream = new PrintStream(file);
        printStream.print(97);
        printStream.close();
    }
}
传入一个对象
class People{
    String name;
    char sex;

    public People(String name,char sex) {
        this.name = name;
        this.sex = sex;
    }

    @Override
    public String toString() {
        return "姓名:"+this.name+"  性别:"+this.sex+"";
    }
}

public class Demo1 {
    public static void main(String[] args) throws IOException {
        File file = new File("D:\新建文件夹\a.txt");
        PrintStream printStream = new PrintStream(file);
        printStream.print(new People("张三",'男'));
        printStream.close();
    }
}

注意:如果我们要在原有的数据上面追加数据,那么我们就要使用另一个构造方法PrintStream(OutputStream out)例如:
这一次我使用了println方法,换行
public class Demo1 {
    public static void main(String[] args) throws IOException {
        for (int i = 0; i < 2; i++) {
            File file = new File("D:\新建文件夹\a.txt");
            PrintStream printStream = new PrintStream(new FileOutputStream(file,true));
            printStream.println(new People("张三",'男'));
            printStream.close();
        }
    }
}

我们一直在使用System.out.println()往控制台输出信息,那么我们如何在指定的地方输出我们的信息而不在控制台输出么?
我们要知道在java中默认的输出流就是向控制台输出的,如果我们要向其他地方输出信息,那么我们要指定输出的目标文件
我们可以找到在System类中有一个public static final PrintStream out字段

在System类中有一个方法setOut(PrintStream out)----重新分配“标准”输出流。我们可以知道它默认是向控制台输出的,如果我们要指定输出的目标文件,那么我们要传入一个PrintStream对象给它
实例如下:
public class Demo2 {
    public static void main(String[] args) throws IOException {
        File file = new File("D:\新建文件夹\a.txt");
        PrintStream printStream = new PrintStream(file);
        System.setOut(printStream);
        System.out.println("嘿嘿,你找到我了吗?");
    }
}

大家可能发现,这个有什么用,我用sysout输出不就是想在控制台看的么,不在控制台输出这不是很麻烦
其实我们一般把这个用来收集异常的日志信息,例如:
public class Demo2 {
    public static void main(String[] args) throws IOException {
        //一般我们把收集异常的文件名以当前的时间命名,后缀名以log结尾
        File logfile = new File("D:\新建文件夹\2018年3月10日.log");
        //使用这个构造方法,是因为日志信息不可能只有一条,为了防止数据丢失我们要用追加
        PrintStream printStream = new PrintStream(new FileOutputStream(logfile,true));
        try {
            int c = 4/0;
            System.out.println(c);
        } catch (Exception e) {
            //原来我们一般是写e.printStackTrace(),这样会把错误信息默认打印在控制台,
            //其实这个方法还有一个重载的方法public void printStackTrace(PrintStream s)接受一个PrintStream对象
            //用这个我们就可以把错误信息打印到指定的目标文件中了
            e.printStackTrace(printStream);
        }
    }
}
