1. 初始化项目,引入相关依赖
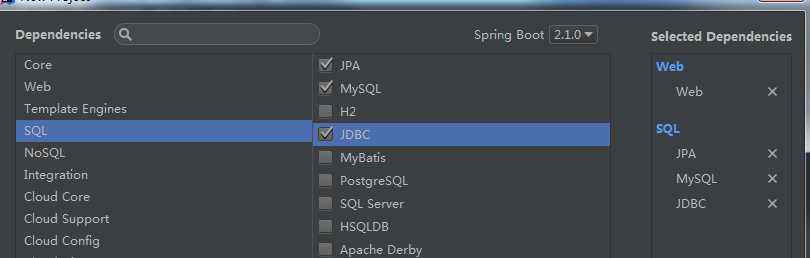
项目中引入的依赖关系
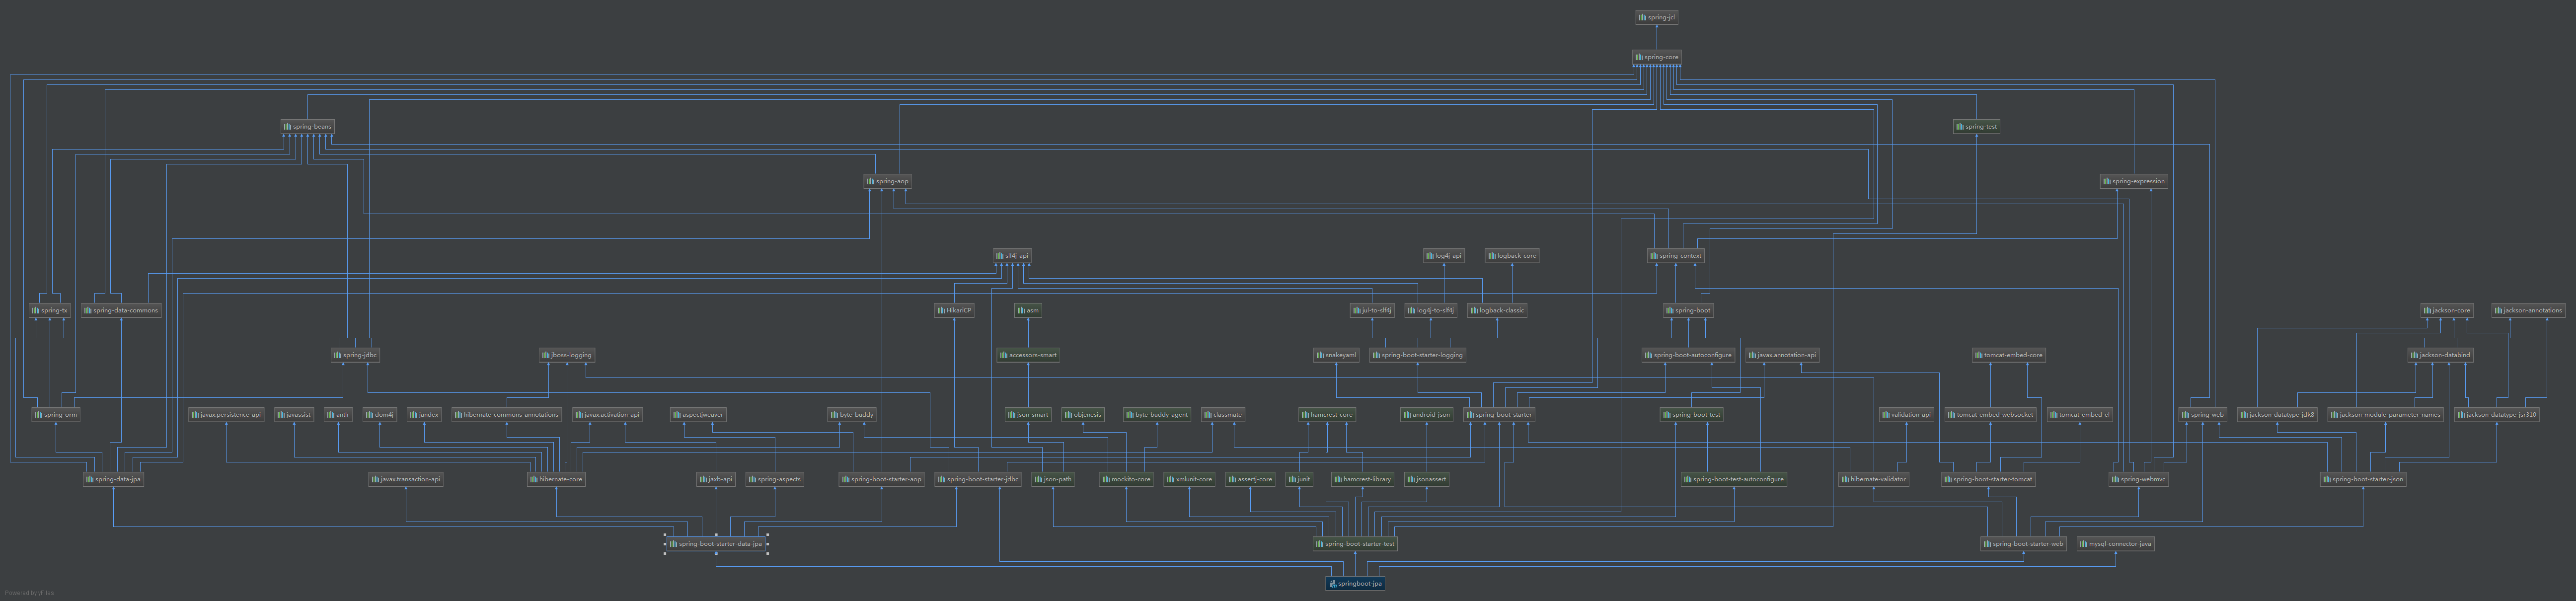
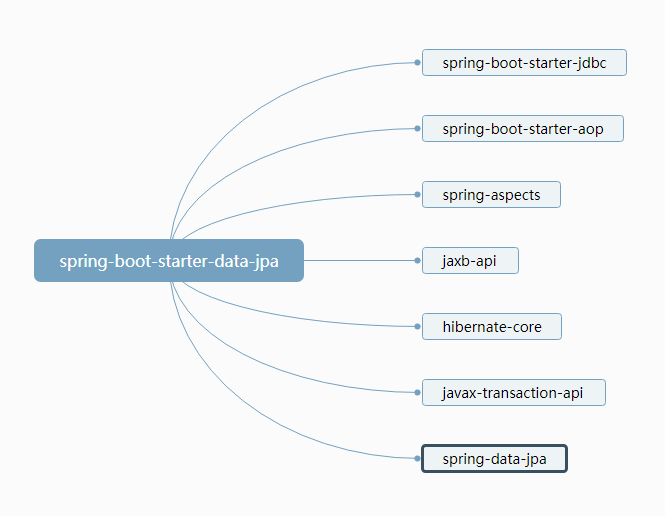
当中最主要的 spring-boot-starter-data-jpa 包主要依赖如下,可以看到JPA的底层主要是通过hibernate实现的。
2. 创建实体类,利用JPA生成数据表
2.1 编写实体类,配置好映射关系,从而和数据表进行映射
import javax.persistence.*;

@Entity //声明实体类,和数据表映射
@Table(name="tb_user") //指定对应数据表,省略的话默认表名为类名小写
public class User {
    @Id //声明为该表主键
    @GeneratedValue(strategy = GenerationType.IDENTITY) //主键自增策略
    private Integer id;

    @Column(name = "first_name",length = 50) //设置列名及长度
    private String firstName;

    @Column
    private String lastName;

    private String address;

//getter & setter 方法略
2. 编写Dao接口来操作实体类对应的数据表(Repository)
import com.zang.springboot.entity.User;
import org.springframework.data.jpa.repository.JpaRepository;

//继承JpaRepository来完成对数据库的操作
public interface UserRepository extends JpaRepository<User,Integer>{

}
3. 配置application.yml
spring:
  datasource:
    url: jdbc:mysql://localhost:3306/user_manage?serverTimezone=GMT%2B8
    username: root
    password: 123
    driver-class-name: com.mysql.cj.jdbc.Driver
  jpa:
    hibernate:
    #更新或创建数据库表结构
      ddl-auto: update
    #输出执行sql
    show-sql: true
启动Application类,JPA输出如下sql语句进行表的创建
Hibernate: create table tb_user (id integer not null auto_increment, address varchar(255), first_name varchar(50), last_name varchar(255), primary key (id)) engine=MyISAM
3. 插入查询测试
新建controller来接收请求
import com.zang.springboot.entity.User;
import com.zang.springboot.repository.UserRepository;
import org.springframework.beans.factory.annotation.Autowired;
import org.springframework.web.bind.annotation.GetMapping;
import org.springframework.web.bind.annotation.PathVariable;
import org.springframework.web.bind.annotation.RestController;

@RestController
public class UserController {

    @Autowired
    UserRepository userRepository;

    @GetMapping("/user/{id}")
    public User getUser(@PathVariable("id") Integer id){
        User user = userRepository.findById(id).orElse(null);
        return user;
    }

    //@PostMapping("/user")
    @GetMapping("/user") //为测试方便,通过url传参,请求应设为Get方式
    public User insertUser(User user){
        User saveUser = userRepository.save(user);
        return saveUser;
    }
}
传值测试:

后台输出如下,证明插入成功:

查询测试:

后台输出查询sql如下:
Hibernate: select user0_.id as id1_0_0_, user0_.address as address2_0_0_, user0_.first_name as first_na3_0_0_, user0_.last_name as last_nam4_0_0_ from tb_user user0_ where user0_.id=?