转载:http://www.cnblogs.com/keepfool/p/5616326.html
概述
在早期的前端Web设计开发年代,完成一些页面元素时,我们必须要有专业的PS美工爸爸,由PS美工爸爸来切图,做一些圆角、阴影、锯齿或者一些小图标。
在CSS3出现后,借助一些具有魔力的CSS3属性,使得这些元素大多都可以由开发人员自己来完成。
在开始阅读这篇文章前,我们先喊个口号:不想当艺术家的程序员不是好设计师!
本文的Demo和源代码已放到GitHub,如果您觉得本篇内容不错,请点个赞,或在GitHub上加个星星!
图例
我们先来看一副设计图
这幅图复杂的元素不多,布局也较为简单,我们大致分析一下,需要PS美工爸爸帮忙做的只有一件事情,就是将上半部分的蓝色背景图给抠出来。
除此之外,出现在这幅设计图的一些特殊形状和小图标,都可以通过CSS3来实现。
我们将这些特殊形状和小图标分为两类:
1. 可以用Icon Font实现的
Icon Font是将一些图标作成字体文件,在CSS中指定font-face和font-family,然后为每个图标指定相应的class。
在网页中使用Icon Font就像使用普通的文字一样,比如font-size属性可以设定图标的大小,设定color属性可以设定图标的颜色。
更多内容,请参考阿里巴巴矢量图标管理网站:http://iconfont.cn/。
2. 不能用IconFont实现的
为什么这些图形不用IconFont实现呢?因为通常Icon Font提供的都是一些正方形的矢量图标,也就是长等于宽的图标。
本篇要讲的就是如何通过CSS3来实现这4个图形。
三角形
不知大家注意到了没有,这4个图形都包含了一个特殊的元素——三角形。
这4个图形,都是由三角形、长方形,或者是一个被啃掉了一口的长方形组成的。
CSS3是如何实现三角形的呢?——答案是通过边框,也就是border属性。
长方形边框
HTML的块级元素都是长方形的,比如我们设定了以下样式:
<style>
    .simple-retangle {
        margin: 50px auto;
         200px;
        height: 200px;
        border: 40px solid salmon;
    }
</style>
<div class="simple-retangle"></div>
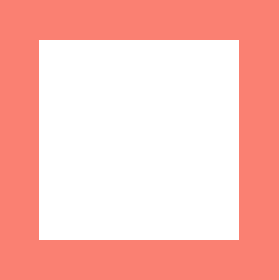
如大家所认知的,这只是一个简单的长方形,这个长方形在画面中是这样显式的:
这个长方形太单调了,再给它点颜色看看,咱们来个彩色边框吧。
<style>
    .colored-border-retangle {
        margin: 50px auto;
         200px;
        height: 200px;
        border-top: 40px solid coral;
        border-right: 40px solid lightblue;
        border-bottom: 40px solid lightgreen;
        border-left: 40px solid mediumpurple;
    }
</style>
<div class="colored-border-retangle"></div>
在画面中,每个边框都变成一个梯形了。
为什么它会变成梯形呢?
请注意长方形的4个角,以左上角为例,它到底是属于左边框还是上边框呢?
左上角,既属于左边框,又属于上边框,角落的归属成了一个问题,浏览器为了不让边框打架,就让二位各分一半吧。
于是乎左上角就被一分为二,变成了两个三角形,三角形靠近哪个边框,就显示那个边框的颜色。
三角形的实现
再看看文章开头的4个图案,你是不是又发现了这样一个规律?每个三角形都是“小家碧玉”的,它们没有内容。
既然如此,我们把上面这个彩色边框的矩形内容拿掉,看看会发生什么。
<style>
    .colored-border-empty-retangle {
        margin: 50px auto;
        border-top: 40px solid coral;
        border-right: 40px solid lightblue;
        border-bottom: 40px solid lightgreen;
        border-left: 40px solid mediumpurple;
    }
</style>
<div class="colored-border-empty-retangle"></div>
呜,cool!左边和右边都是三角形了 耶!
为什么上边和下边还是梯形呢?这是因为块级元素默认会在页面上水平平铺。
理解这一点,让上边和下边也变成三角形就简单了,将元素的width属性设为0:
<style>
    .colored-border-empty-retangle {
        margin: 50px auto;
         0;
        height: 0;
        border-top: 40px solid coral;
        border-right: 40px solid lightblue;
        border-bottom: 40px solid lightgreen;
        border-left: 40px solid mediumpurple;
    }
</style>
<div class="colored-border-empty-retangle"></div>
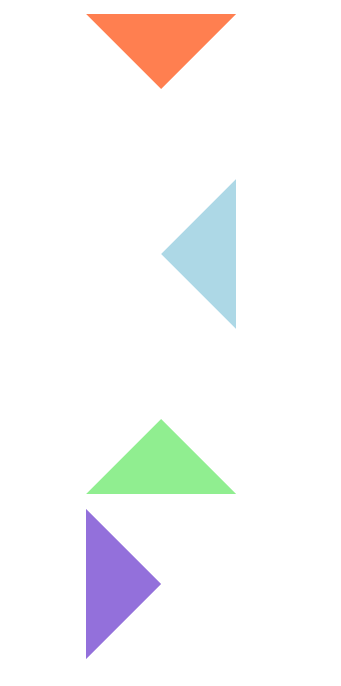
现在上下左右4个边框都是三角形了。
假设我们不要4个三角形,也不要让它们凑一块,我们就只要1个三角形,该如何做呢?
将其他3个边框的颜色设为透明色:
<style>
    .triangle-top,
    .triangle-right,
    .triangle-bottom,
    .triangle-left {
        margin: 20px auto;
         0;
        height: 0;
        border: 100px solid transparent;
    }

    .triangle-top {
        border-top-color: coral;
    }

    .triangle-right {
        border-right-color: lightblue;
    }

    .triangle-bottom {
        border-bottom-color: lightgreen;
    }

    .triangle-left {
        border-left-color: mediumpurple;
    }
</style>
<div class="triangle-top"></div>
<div class="triangle-right"></div>
<div class="triangle-bottom"></div>
<div class="triangle-left"></div>
图案实现
知道了三角形的实现方法,那么下面4个图案实现起来就小Case了。
这4个图案分别是:旗帜,向右的双实心箭头,气泡和丝带。
为了便于这几种图案的演示,我们先设定以下基础共通的样式
* {
    font-family: simhei, sans-serif;
    box-sizing: border-box;
}

html {
    font-size: 62.5%;
}

body {
    background-color: lightblue;
}

div {
    margin: 20px auto;
}
实现旗帜
旗帜图案是下半部分被啃掉了一口的长方形,这一口是个三角形。

根据以上知识,我们很自然地就能想到实现方法,将border-bottom的颜色设置为透明的。
.flag {
     0;
    height: 0;
    border: 2rem solid #FF6600;
    border-top- 4rem;
    border-bottom-color: transparent;
    border-bottom- 2rem;
}
实现双实心箭头
双实心箭头则是由两个三角形组成的
为了减少页面的HTML元素,我们可以只提供一个元素实现第1个三角形,然后借助CSS3的伪类实现第2个三角形。
第1个三角形使用了相对定位,第2个三角形使用了绝对定位,使得第2个三角形能够紧挨着第1个三角形。
.rds-arrow-wrapper {
    position: relative;
     20em;
    text-align: center;
}

.rds-arrow,
.rds-arrow:after {
    display: inline-block;
    position: relative;
     0;
    height: 0;
    border-top: 1rem solid transparent;
    border-left: 2rem solid #fff;
    border-bottom: 1rem solid transparent;
    border-right: 2rem solid transparent;
}

.rds-arrow {
    margin-left: 1rem;
}

.rds-arrow:after {
    content: "";
    position: absolute;
    left: 100%;
    top: -1rem;
    bottom: 0;
}
需要注意的是,箭头方向是向右的,但在CSS里面是通过border-left的颜色来控制的。
实现气泡
气泡是我们常见的一种图案,它是由一个三角形和一个长方形组成的。
由于三角形是放在长方形前面的,所以我们使用:before伪类,并设置绝对定位。
.bubble {
    position: relative;
    background-color: #33AAEE;
     10rem;
    height: 3rem;
    font-size: 2rem;
    line-height: 3rem;
    color: #FFF;
    text-align: center;
}

.bubble:before {
    position: absolute;
    content: "";
    right: 100%;
    top: 1rem;
     0;
    height: 0;
    border-top: 0.6rem solid transparent;
    border-right: 0.6rem solid #33AAEE;
    border-bottom: 0.6rem solid transparent;
    border-left: 0.6rem solid transparent;
}

.bubble .text {
    display: inline-block;
}
实现丝带
丝带的实现则稍微复杂一些,不过我们可以将它拆分成3个部分:
- 一个显示文字的长方形
- 左右两侧的耳朵(被啃了一口的长方形)
- 在下方用于显示阴影的两个小三角形
第1步:实现丝带主体长方形
.ribbon {
    position: relative;
     10rem;
    height: 3rem;
    padding: 0.7rem 0;
    font-size: 1.6rem !important;
    color: #fff;
    text-align: center;
    background: #ff0066;
}
第2步:实现丝带左右两侧的耳朵
:before伪类实现左耳朵,:after伪类实现右耳朵
.ribbon:before,
.ribbon:after {
    content: "";
    position: absolute;
    display: block;
    bottom: -0.6rem;
    border: 1.5rem solid #ff0066;
    z-index: -1;
}

.ribbon:before {
    left: -2.4rem;
    border-right- 1.5rem;
    border-left-color: transparent;
    box-shadow: 1px 1px 0 rgba(176, 102, 166, 0.8);
}

.ribbon:after {
    right: -2.4rem;
    border-left- 1.5rem;
    border-right-color: transparent;
    box-shadow: 0 1px 0 rgba(176, 102, 166, 0.8);
}
第3步:实现阴影
.ribbon .ribbon-content:before,
.ribbon .ribbon-content:after {
    content: "";
    position: absolute;
    display: block;
    border-style: solid;
    border-color: #bf004c transparent transparent transparent;
    bottom: -0.6rem;
}

.ribbon .ribbon-content:before {
    left: 0;
    border- 0.6rem 0 0 0.6rem;
}

.ribbon .ribbon-content:after {
    right: 0;
    border- 0.6rem 0.6rem 0 0;
}
HTML代码:
<div class="ribbon">
    <span class="ribbon-content">金卡会员</span>
</div>
最终效果:
页面实现
有以上的知识基础,实现本文开头的设计图就较为简单了。
由于代码较长,我就不贴出来了,请各位直接到GitHub上查看这个demo吧。
总结
读完以上内容,是不是觉得实现这些图案变得很简单了?是不是感觉很酷?现在你可以叫自己为爸爸了。
三角形的运用场景非常之多,你尽可以发挥你的想象去实现它们!


