作业题目:

实现的源代码:
def login():
    f=open(r'zmm.txt','rt',encoding="utf-8")
    r=f.read()
    s=r.index(',')
    m=len(r)
    i = 0


    while i < 3:
        user = input('请输入用户名:').strip()
        pwd = input("请输入密码:").strip()
        if user==r[0:s]:
            if pwd ==r[s+1:m]:
                print("登录成功!")
                break
            else:
                print("用户名或密码错误!")
            i = i + 1
        else:
            print("用户名或密码错误!")
            i = i + 1

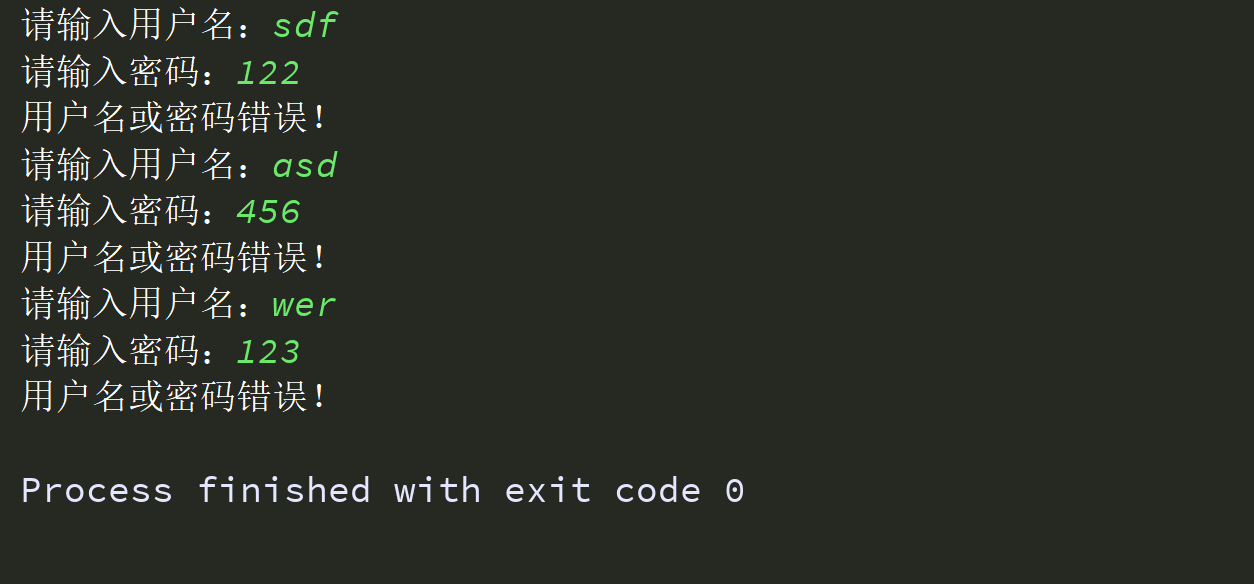
login()
实现结果为:


图片与视频读写操作:
import requests
res=requests.get("http://news.mydrivers.com/Img/20120301/2012030102215971.jpg")
print(res.content)
#写入图片
with open('风景.jpg','wb') as f:
    f.write(res.content)

#读取图片
with open('风景.jpg','rb') as f:
    res=f.read()
    print(res)

#文件拷贝
with open('风景.jpg','rb') as f,open('山水.jpg','wb') as w:
    res=f.read()
    w.write(res)


#读写视频
with  open('视频文件.mp4','rb')as f,open('视频文件—copy.mp4','wb') as w:
    res = f.read()#一次打开所有内容,若文件大小超出内存大小会导致内存溢出
    print(res)
     w.write(res)

#一行一行读文件
with  open('tianyan_sys.mp4','rb')as f,open('tianyancopy.mp4','wb') as w:
        for line in f:#一行一行读取文件内容,一行一行写入文件中,避免内存溢出
          w.write(line)
有关函数基础
'''
1、函数相当于工具,需要事先准备好,在需要时使用
2、函数必须先定义,后调用
3、函数的语法:
def cup(参数1,参数2...):
    """
    函数的声明
    水杯,用来盛水与喝水
    """
    函数体代码(逻辑代码)
    return 返回值
'''
'''
def: (全称defined)用来生命定义函数的关键字
函数名:看其名,知其意
():括号,存放的是接受外界的参数
注释:用来说明函数的作用
函数体代码:逻辑代码
return,后面跟函数的返回值

函数定义时发生的事情
1、先打开python解释器
2、加载函数基础.py文件
3、python会帮我们检测py文件中的语法,不会执行函数体代码

'''
# 注册功能
def register():
    while True:
        user=input('请输入用户名:').strip()
        pwd=input("请输入密码:").strip()
        re_pwd=input("请确认密码:").strip()


        if pwd==re_pwd:
            # user_info='用户名:%s,密码:%s'%(user,pwd)#第一种方法
            # user_info='用户名:{},密码:{}'.format(user,pwd)#第二种方法
            #字符串前写一个f相当于调用format方法
            user_info=f'用户名:{user},密码:{pwd}'#第三种方法

            #把用户信息写入文件中,f'{user}.txt'方法可以把文件名改为输入的用户名,若直接写为'user.txt',
            #名字不变,只是把内容写进去
            with open(f'{user}.txt','w',encoding="utf-8") as f:
                f.write(user_info)
            break
        else:
            print('两次密码不一致,请重新输入')

register()
数据类型:
#列表类型
1、insert()插入
list1=['tank',18,3.0,9,'广东','tank',[1,2]]
list1.insert(2,'oldboy')#插入对应的位置
print(list1)
print(list1.count('tank'))#看总的个数

print(list1.index('广东'))#查看索引

#clear()清空列表的值
str1=list1.clear()
print(str1)

#浅拷贝
list2=list1.copy()
print(list2)

list3=list1
print(list3)

list1.append('jam')
print(list2,'添加值后')
print(list3,'添加值后')


 list1[7].append('tank')
print(list2)
print(list3)

#深拷贝
from copy import deepcopy
list5=deepcopy(list1)
list1.append('jjj')
print(list2,'添加值后')
print(list3,'添加值后')
list1[7].append('tank')

#打印直接赋值、深、浅拷贝的结果
#浅拷贝:list1列表中外层值改变对其不影响,但list1中可变类型进行修改会随之改变
print(list2)
print(list3)
#深拷贝:把list1中所有值完全拷贝到一个新的地址中
print(list5)

#extend()合并
list1=[1,2,3]
list2=[4,5,6]
list1.extend(list2)
print(list1)

#reverse()反转
list1.reverse()
print(list1)

#sort()排序操作
list3=[1,3,5,7,2,9,4]
list3.sort()#升序
list4=list3.sort(reverse=True)#降序
print(list3)
print(list4)

#字典的内置方法
#1、按照key取/存值
dict1={'name':'张嫚嫚','age':20,'sex':'female','school':'ahpu'}
#根据key取学校
print(dict1['school'])
#print(dict1['sal'])报错
print(dict1.get('school','华南理工大学'))#有值用自己的值
print(dict1.get('sal','安徽大学'))#传none,没值用给定的值

#len
print(len(dict1))

#成员运算in与not in
print('name' in dict1)#True
print('sal' in dict1)#False

#删除
del dict1["name"]
print(dict1)

#pop()
name=dict1.pop('name')
print(dict1)
print(name)

#随机取出字典中某个值,字典是无序的
# dict1.popitem()
# print(dict1)

#keys,values,items
print(dict1.keys())
print(dict1.values())
print(dict1.items())

#循环字典中所的key
for key in dict1:
    print(key)

#update
print(dict1)
dict2={'work':'student'}
dict1.update(dict2)
print(dict1)

#元祖类型(在小括号内,以,隔开),元祖是不可变类型,列表是可变类型
tuple1=(1,2,3,4,5,6)
print(tuple1)
#按索引取值
print(tuple1[2])

#切片
print(tuple1[0:6])

#步长
print(tuple1[0:6:2])

print(len(tuple1))#长度

#成员运算 in  not in
print(1 in  tuple1)

#循环
for line in tuple1:
    print(line,end=" ")

#集合,在{}里以,隔开,可存放多个值,自带默认去重功能,也是无序的
set1={1,2,3,4,1,2,3,4}
print(set1)#只有1,2,3,4

#集合无序
set2=set()
set3={}
print(set2)
print(set3)

set3['name']='tank'
print(type(set3))
print(set3)


文件操作:
#with会自带close功能,会在文件自动处理完之后,自动关闭文件 #写文件 with open(r'F:软件pycharm工程�2day/file.txt','w',encoding="utf-8") as f: f.write("python is wonderful") #读文件 with open(r'F:软件pycharm工程�2day/file.txt','r',encoding="utf-8") as f: res=f.read() print(res) #文件追加 with open(r'F:软件pycharm工程�2day/file.txt','a',encoding="utf-8") as f: f.write(" hahahha")
f=open(r'F:软件pycharm工程�2day/zmm.txt', mode="wt",encoding="utf-8") f.write("hello world") f.close()#手动回收文件资源 #默认rt f=open(r'F:软件pycharm工程�2day/zmm.txt','rt',encoding="utf-8") res=f.read() print(res) f.close() #文件追加 f=open(r'F:软件pycharm工程�2day/zmm.txt', 'a',encoding="utf-8") f.write(" hello,zmm") f.close()
通过本次课程,不仅学习到了许多有关python的有用的知识,大部分了解的内容写在了注释中,而且老师风趣幽默的授课方式,也受到同学们的喜欢,激将了同学们的兴趣。