方法一
安装STS插件


安装插件导向窗口完成后,在eclipse右下角将会出现安装插件的进度,等插件安装完成后重启eclipse生效
新建spring boot项目


项目启动

方法二
1.创建Maven项目

2.选择项目类型

3.选择项目

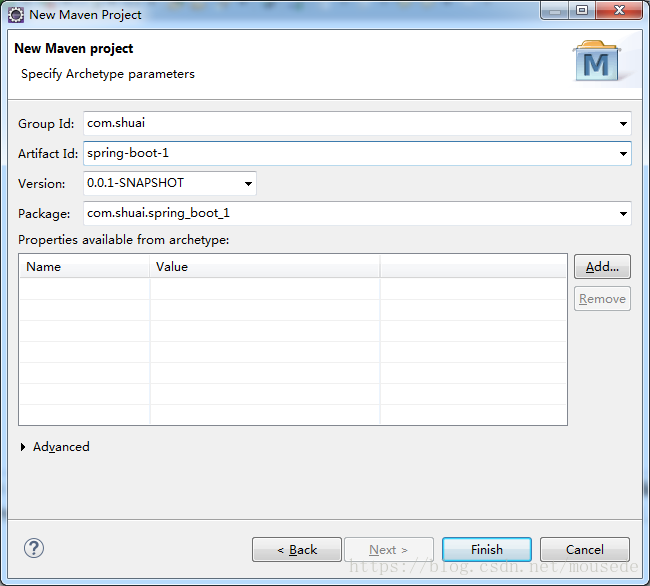
4.编写项目组和名称-finish即可
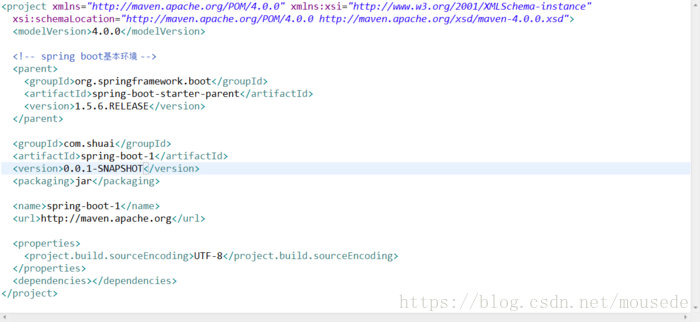
5.修改pom.xml文件
<!-- spring boot基本环境 -->
 <parent>
    <groupId>org.springframework.boot</groupId>
    <artifactId>spring-boot-starter-parent</artifactId>
    <version>1.5.6.RELEASE</version>
  </parent>
6.pom.xml中添加依赖
<!--web应用基本环境配置 -->
<dependency>

    <groupId>org.springframework.boot</groupId>

    <artifactId>spring-boot-starter-web</artifactId>

</dependency>

7.pom.xml中添加编译插件
<build>

    <plugins>

    <!-- spring-boot-maven-plugin插件就是打包spring boot应用的 -->

        <plugin>

            <groupId>org.springframework.boot</groupId>

            <artifactId>spring-boot-maven-plugin</artifactId>

        </plugin>

    </plugins

</build>

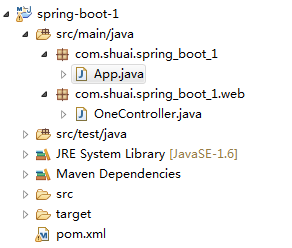
8.基础包和类
9.创建resources文件夹和application.properties文件

10.App.java
package com.hyc.springBootTest;

import org.springframework.boot.SpringApplication;
import org.springframework.boot.autoconfigure.EnableAutoConfiguration;
import org.springframework.boot.autoconfigure.SpringBootApplication;
import org.springframework.context.annotation.Configuration;

@Configuration
@EnableAutoConfiguration
@SpringBootApplication
public class App
{
    public static void main( String[] args )
    {
        SpringApplication.run(App.class, args);
    }
}
11.HelloController.java
package com.springboot.springbootDemo.controller;

import org.springframework.web.bind.annotation.RequestMapping;

import org.springframework.web.bind.annotation.RestController;

@RestController

@RequestMapping("hello2")

public class HelloController {

       @RequestMapping("")

       public String hello() {

              return "helloworld2";

       }

}

12.启动项目

13.访问项目(低版本可能无法访问,2版本可用)
http://localhost:8012/hello2

方法三
访问http://start.spring.io/

点击Generate Project下载项目压缩包
解压后,使用eclipse,Import -> Existing Maven Projects -> Next ->选择解压后的文件夹-> Finsh,OK done!