1、下载PHPMailer源码
(测试使用的是5.2.2 版本)
2、注册并登录网易邮箱(其他邮箱均可)【用于配置用户名和三方登录授权码,以及发送人邮箱地址】
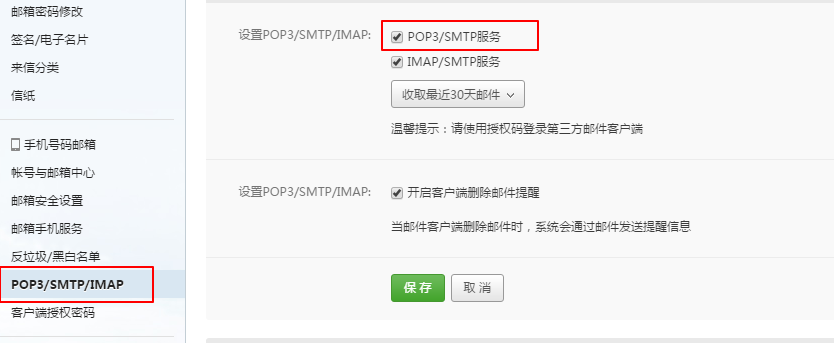
(1)开启POP3协议 定位到开启页面

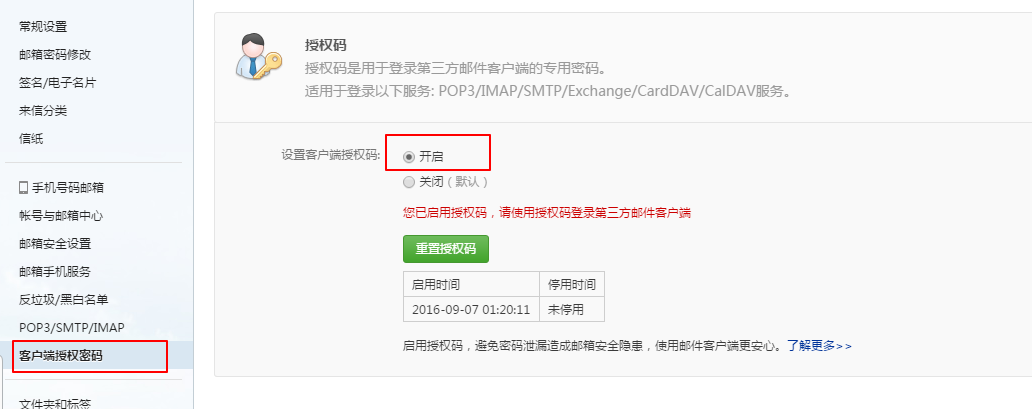
(2)开启三方登录授权,并获取授权码(一串字符串)

3、自定义封装邮件类
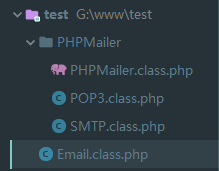
(1)核心文件(进行重命名):

class.phpmailer.php ====》 PHPMailer.class.php
class.pop3.php ====》POP3.class.php
class.smtp.php ====》SMTP.class.php
并拷贝到PHPMailer目录下

(2)邮件发送类封装:
<?php
require_once 'PHPMailer/PHPMailer.class.php';
require_once 'PHPMailer/SMTP.class.php';
require_once 'PHPMailer/POP3.class.php';

class Email
{
    public static function sendMail($title,$content,$to)
    {
        $mail = new PHPMailer();
        $mail -> IsSMTP();                       //告诉服务器使用smtp协议发送
        $mail -> SMTPAuth = true;                //开启SMTP授权
        $mail -> Host = 'smtp.163.com';          //告诉我们的服务器使用163的smtp服务器发送
        $mail -> From = 'Muse_girlo@163.com';    //发送者的邮件地址
        $mail -> FromName = 'Muse_girlo';        //发送邮件的用户昵称
        $mail -> Username = 'Muse_girlo';        //登录到邮箱的用户名
        $mail -> Password = 'xxxxxxxxxx';        //第三方登录的授权码,在邮箱里面设置
        //编辑发送的邮件内容
        $mail -> IsHTML(true);            //发送的内容使用html编写
        $mail -> CharSet = 'utf-8';                //设置发送内容的编码
        $mail -> Subject = $title;                //设置邮件的主题、标题
        $mail -> MsgHTML($content);                //发送的邮件内容主体
        //告诉服务器接收人的邮件地址
        $mail -> AddAddress($to);
        //调用send方法,执行发送
        $result = $mail -> Send();
        if($result){
            return true;
        }else{
            return $mail -> ErrorInfo;
        }

    }
}
4、发送邮件,调用邮件发送类
$title = "测试邮件发送功能";
$content = "脚踏实地,坚持学习!";
$to = "zqunor@foxmail.com";

$res = Email::sendMail($title, $content, $to);
if ($res) {
    echo '邮件发送成功!';
    } else {
    echo "邮件发送失败!";
}
5、浏览器测试

