1、swagger简介
Swagger是一款RESTful接口的文档在线自动生成、功能测试功能框架。一个规范和完整的框架,用于生成、描述、调用和可视化RESTful风格的Web服务,加上swagger-ui,可以有很好的呈现。
当我们在后台的接口修改了后,swagger可以实现自动的更新,而不需要人为的维护这个接口进行测试。
/'swægə/ v. 大摇大摆地走,趾高气扬地行走或行事;吓唬,虚张声势吓人;吹牛
2:基于前面的知识点
本知识点在springboot使用基于Mybatis注解方式实现的CRUD的基础上进行的。
3、springboot与swagger的集成:
第一步:jar包的引入:
        <!-- swagger -->
        <dependency>
            <groupId>io.springfox</groupId>
            <artifactId>springfox-swagger-ui</artifactId>
            <version>2.4.0</version>
        </dependency>
        <dependency>
            <groupId>io.springfox</groupId>
            <artifactId>springfox-swagger2</artifactId>
            <version>2.4.0</version>
        </dependency>
第二步:swagger的配置启动类编写:
要使用swagger要进行一些配置,这个在界面的图上是可以显示的:类似于说明书:在这个类中我们会使用注解来进行启动 swagger:
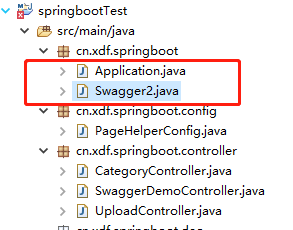
具体配置如下:
package cn.xdf.springboot;
import org.springframework.context.annotation.Bean;
import  org.springframework.context.annotation.Configuration;
import springfox.documentation.builders.ApiInfoBuilder;
import springfox.documentation.builders.PathSelectors;
import  springfox.documentation.builders.RequestHandlerSelectors;
import springfox.documentation.service.ApiInfo;
import springfox.documentation.service.Contact;
import springfox.documentation.spi.DocumentationType;
import springfox.documentation.spring.web.plugins.Docket;
import  springfox.documentation.swagger2.annotations.EnableSwagger2;
//swagger2的配置文件,在项目的启动类的同级文件建立
@Configuration
@EnableSwagger2
//是否开启swagger,正式环境一般是需要关闭的(避免不必要的漏洞暴露!),可根据springboot的多环境配置进行设置
@ConditionalOnProperty(name = "swagger.enable",  havingValue = "true")
public class Swagger2 {
     // swagger2的配置文件,这里可以配置swagger2的一些基本的内容,比如扫描的包等等
     @Bean
     public Docket createRestApi() {
          return new Docket(DocumentationType.SWAGGER_2)
                   .apiInfo(apiInfo())
                   .select()
                   // 为当前包路径
                   .apis(RequestHandlerSelectors.basePackage("cn.xdf.springboot.controller")).paths(PathSelectors.any())
                   .build();
     }
     // 构建 api文档的详细信息函数,注意这里的注解引用的是哪个
     private ApiInfo apiInfo() {
          return new ApiInfoBuilder()
                   // 页面标题
                   .title("Spring Boot 测试使用 Swagger2 构建RESTful API")
                   // 创建人信息
                   .contact(new Contact("MrZhang",  "https://www.cnblogs.com/zs-notes/category/1258467.html",  "1729497919@qq.com"))
                   // 版本号
                   .version("1.0")
                   // 描述
                   .description("API 描述")
                   .build();
     }
}
修改添加application.properties文件
#是否激活 swagger true or false
swagger.enable=true
第三步:使用swagger来进行模拟测试:
使用swagger2来进行测试接口主要是在哪些类中使用:这里我们依然选择在controller层:
package cn.xdf.springboot.controller;
import java.util.HashMap;
import java.util.List;
import java.util.Map;
import javax.validation.Valid;
import org.slf4j.Logger;
import org.slf4j.LoggerFactory;
import  org.springframework.beans.factory.annotation.Autowired;
import  org.springframework.web.bind.annotation.DeleteMapping;
import  org.springframework.web.bind.annotation.GetMapping;
import  org.springframework.web.bind.annotation.PathVariable;
import  org.springframework.web.bind.annotation.PostMapping;
import  org.springframework.web.bind.annotation.PutMapping;
import  org.springframework.web.bind.annotation.RequestBody;
import  org.springframework.web.bind.annotation.RequestMapping;
import  org.springframework.web.bind.annotation.RequestParam;
import  org.springframework.web.bind.annotation.RestController;
import com.github.pagehelper.PageHelper;
import com.github.pagehelper.PageInfo;
import cn.xdf.springboot.mapper.CategoryMapper;
import cn.xdf.springboot.pojo.Category;
import io.swagger.annotations.Api;
import io.swagger.annotations.ApiImplicitParam;
import io.swagger.annotations.ApiOperation;
/**
* 控制层 简单演示增删改查及分页
*
*/
@RestController
@RequestMapping("api")
@Api("swaggerDemoController相关的api")
public class SwaggerDemoController {

    @Autowired
    CategoryMapper categoryMapper;
    private static final Logger logger=  LoggerFactory.getLogger(SwaggerDemoController.class);
    //1.商品添加
    //@PutMapping("add") 添加方法--restful风格
    @PutMapping("add")
    @ApiOperation(value="商品新增")
    //正常业务时, 需要在category类里或者server层进行事务控制,控制层一般不进行业务控制的。
    //@Transactional(rollbackFor = Exception.class)
    //@RequestParam 接收页面中的请求的参数
    public Map<String,Object> addCategory(@RequestParam  String name){
      Category category = new Category();
      category.setName(name);
      categoryMapper.save(category);
      logger.info("开始新增某个商品信息");
        Map<String,Object> result = new  HashMap<String,Object>();
        result.put("respCode", "01");
        result.put("respMsg", "新增成功!");
        result.put("data", category);
        return result;
    }
    //2.商品修改
    //@PostMapping("update")  修改方法--restful风格
    @PostMapping("update")
    @ApiOperation(value = "商品修改", notes = "修改数据库中某个的商品信息")
    //@RequestBody 接收页面中的请求的参数对象(适用于post请求)
    //当入参为实体对象时,需要在方法上加@Valid或@Validated或者在参数前加@Valid或@Validated,或者在类上加@Validated
    public Map<String,Object> updateCategory(@Valid  @RequestBody  Category category) {
      Map<String,Object> result = new  HashMap<String,Object>();
      Category categoryGet =  categoryMapper.get(category.getId());
      if(categoryGet == null || "".equals(categoryGet)){
          try {
                   throw new Exception("修改的该商品不存在!");
              } catch (Exception e) {
                   e.printStackTrace();
              }
           result.put("respCode", "03");
           result.put("respMsg", "修改的该商品不存在!");
           result.put("data", category);
           return result;
      }
        categoryMapper.update(category);
        logger.info("开始修改某个商品信息");
        result.put("respCode", "03");
         result.put("respMsg", "修改成功!");
         result.put("data", category);
        return result;
    }
    //3.商品删除
    //@DeleteMapping("/delete/{id}") 删除方法--restful风格
    @DeleteMapping("/delete/{id}")
    @ApiOperation(value = "根据id删除商品", notes = "商品删除")
    @ApiImplicitParam(name = "id", value = "商品ID",  paramType = "path", required = true, dataType =  "Integer")
     public Map<String,Object>  deleteCategory(@PathVariable int id)throws Exception{   //@PathVariable 获取/delete/{id}中id
      Category category = categoryMapper.get(id);
      Map<String,Object> result = new  HashMap<String,Object>();
      if (category == null) {
          try {
                   throw new Exception("用户ID:" + id +  ",未找到");
              } catch (Exception e) {
                   e.printStackTrace();
              }
           result.put("respCode", "02");
           result.put("respMsg", "数据库无该商品信息,删除失败!");
           result.put("data", category);
           return result;
          }else{
              categoryMapper.delete(id);
              logger.info("开始删除某个商品信息");
              result.put("respCode", "01");
              result.put("respMsg", "删除成功!");
              result.put("data", category);
              return result;
          }
     }
    //4.根据ID查询商品信息
    //@GetMapping("")  查询方法--restful风格
    @GetMapping("/get/{id}")
    @ApiOperation(value = "根据id查询商品", notes = "查询数据库中某个的商品信息")
    @ApiImplicitParam(name = "id", value = "商品ID",  paramType = "path", required = true, dataType =  "Integer")
    public Map<String,Object> getCategory(@PathVariable  int id) { //@PathVariable 获取/get/{id}中id
      Category category = categoryMapper.get(id);
      logger.info("开始查询某个商品信息");
      Map<String,Object> result = new  HashMap<String,Object>();
      if (category == null) {
          try {
                   throw new Exception("用户ID:" + id +  ",未找到");
              } catch (Exception e) {
                   e.printStackTrace();
              }
           result.put("respCode", "02");
           result.put("respMsg", "数据库无该商品信息");
           result.put("data", category);
           return result;
          }else{
             result.put("respCode", "01");
             result.put("respMsg", "查询成功!");
             result.put("data", category);
             return result;
          }
    }
    //5.分页查询
    //@GetMapping("")  查询方法--restful风格
    @GetMapping("/page")
    @ApiOperation(value="商品查询(分页)")
    public Map<String,Object>  pageCategory(@RequestParam(value="start",defaultValue="0")int start,@RequestParam(value = "size", defaultValue =  "5") int size) throws Exception {
      //1. 在参数里接受当前是第几页 start ,以及每页显示多少条数据  size。 默认值分别是0和5。
          //2. 根据start,size进行分页,并且设置id 倒排序
          PageHelper.startPage(start,size,"id desc");
          //3. 因为PageHelper的作用,这里就会返回当前分页的集合了
          List<Category> cs = categoryMapper.findAll();
          logger.info("开始分页查询商品信息");
          //4. 根据返回的集合,创建PageInfo对象
          PageInfo<Category> page = new PageInfo<>(cs);

        Map<String,Object> result = new  HashMap<String,Object>();
        result.put("respCode", "01");
        result.put("respMsg", "成功");
        result.put("data", page);
        return result;
    }

}
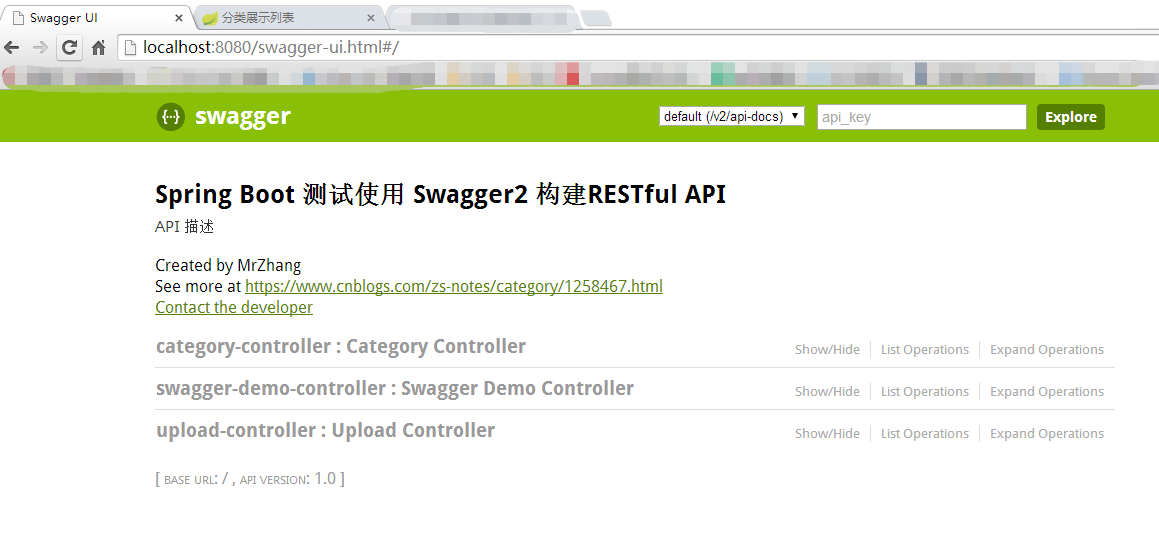
这样swagger2与springboot就集成完毕了。
看下最终效果吧:
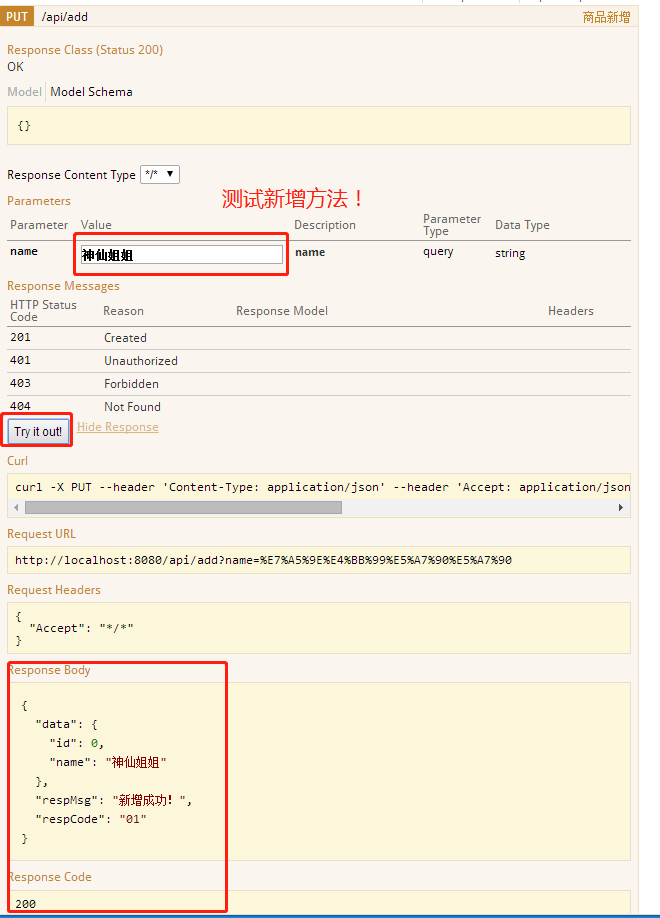
调试:点击需要访问的api列表,点击try it out!按钮,表示 执行。
----------------------------------------------------------------------------------------------------------------------------------------------------------------

而且这些方法是实时更新的!!!
接下来测试一个新增方法:
查询方法:

另外,大家可下载示例,查看自定义的字符出现的位置,这样可以对其有个大致了解,各字段的作用领域是哪里
Swagger常用属性说明:
