3.19
目录
1.Springboot开发步骤
2.Springboot对静态资源的映射规则
3.模板引擎
引入Thymeleaf
Thymeleaf使用和语法
4.SpringMVC自动配置原理
5.修改Springboot的默认配置
6.全面接管SpringMvc
1.步骤:
1.创建springboot应用,选中需要的模块
2.springboot已经默认将这些场景配置好了,只需要在配置文件中指定少量配置就可以运行起来
3.编写业务代码
2.springboot对静态资源的映射规则:
org.springframework.boot.autoconfigure.web.servlet.WebMvcAutoConfiguration
    public void addResourceHandlers(ResourceHandlerRegistry registry) {
            if (!this.resourceProperties.isAddMappings()) {
                logger.debug("Default resource handling disabled");
            } else {
                Duration cachePeriod = this.resourceProperties.getCache().getPeriod();
                CacheControl cacheControl = this.resourceProperties.getCache().getCachecontrol().toHttpCacheControl();
                if (!registry.hasMappingForPattern("/webjars/**")) {
                    this.customizeResourceHandlerRegistration(registry.addResourceHandler(new String[]{"/webjars/**"}).addResourceLocations(new String[]{"classpath:/META-INF/resources/webjars/"}).setCachePeriod(this.getSeconds(cachePeriod)).setCacheControl(cacheControl));
                }

                String staticPathPattern = this.mvcProperties.getStaticPathPattern();
                if (!registry.hasMappingForPattern(staticPathPattern)) {
                    this.customizeResourceHandlerRegistration(registry.addResourceHandler(new String[]{staticPathPattern}).addResourceLocations(getResourceLocations(this.resourceProperties.getStaticLocations())).setCachePeriod(this.getSeconds(cachePeriod)).setCacheControl(cacheControl));
                }

            }
        }
所有/webjars/**,都去classpath:/META-INF/resources/webjars/找资源
webjars:以jar包的方式引入静态资源 https://www.webjars.org/
<!--引入jquery-webjar-->
        <dependency>
            <groupId>org.webjars</groupId>
            <artifactId>jquery</artifactId>
            <version>3.3.1</version>
        </dependency>
        <!--引入bootstrap-->
        <dependency>
            <groupId>org.webjars</groupId>
            <artifactId>bootstrap</artifactId>
            <version>4.1.2</version>
        </dependency>
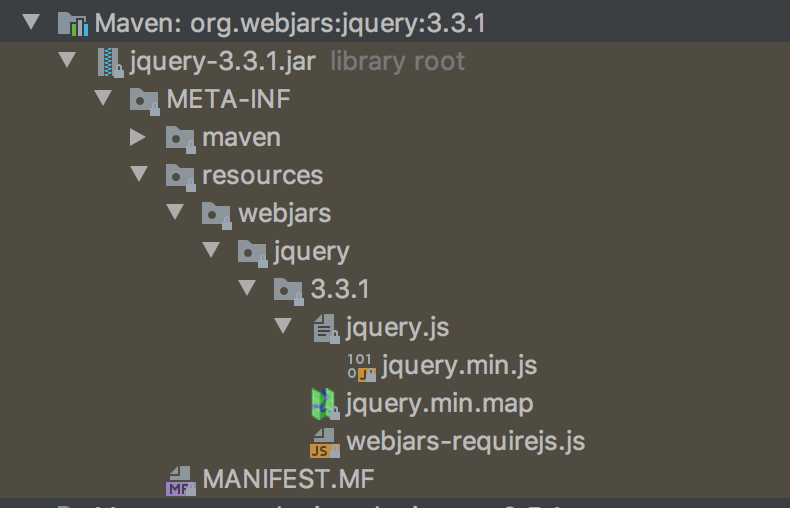
1)http://localhost:8084/webjars/jquery/3.3.1/jquery.js 能访问到引入的文档
在访问的时候只需要写webjars下面资源的名称即可
String staticPathPattern = this.mvcProperties.getStaticPathPattern();
                if (!registry.hasMappingForPattern(staticPathPattern)) {
                    this.customizeResourceHandlerRegistration(registry.addResourceHandler(new String[]{staticPathPattern}).addResourceLocations(getResourceLocations(this.resourceProperties.getStaticLocations())).setCachePeriod(this.getSeconds(cachePeriod)).setCacheControl(cacheControl));
                }
2)/** 访问当前项目的任何资源
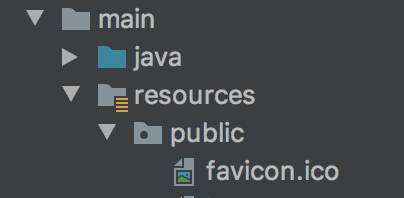
静态资源文件夹:
"classpath:/META-INF/resources/",
"classpath:/resources/",
"classpath:/static/",
"classpath:/public/"
"/":当前项目的根目录

为什么默认是这四个路径呢?可以看下面的源码。
/Users/mac/.m2/repository/org/springframework/boot/spring-boot-autoconfigure/2.0.0.RELEASE/spring-boot-autoconfigure-2.0.0.RELEASE.jar!/org/springframework/boot/autoconfigure/web/servlet/WebMvcProperties.class
this.staticPathPattern = "/**";
private static final String[] SERVLET_LOCATIONS = new String[]{"/"};
/Users/mac/.m2/repository/org/springframework/boot/spring-boot-autoconfigure/2.0.0.RELEASE/spring-boot-autoconfigure-2.0.0.RELEASE.jar!/org/springframework/boot/autoconfigure/web/ResourceProperties.class
 private static final String[] CLASSPATH_RESOURCE_LOCATIONS =
new String[]{"classpath:/META-INF/resources/",
"classpath:/resources/",
"classpath:/static/",
"classpath:/public/"};
3)首页 静态资源下的所有index.html页面,被"/**"映射,localhost:8084/ 找index页面
4)配置喜欢的图标 也是在静态文件夹里找
源码:
  @Bean
            public SimpleUrlHandlerMapping faviconHandlerMapping() {
                SimpleUrlHandlerMapping mapping = new SimpleUrlHandlerMapping();
                mapping.setOrder(-2147483647);
                mapping.setUrlMap(Collections.singletonMap("**/favicon.ico", this.faviconRequestHandler()));
                return mapping;
            }
修改成功!

5)修改默认静态资源路径 application.properties
#多个路径可以用,隔离开路径
spring.resources.static-locations=classpath:/hello/,classpath:/public/
3.模板引擎
JSP、Velocity、Freemarker、Thymeleaf
springboot推荐的Thymeleaf:语法更简单,功能更强大
1.引入thymeleaf
2.0.0版本springboot默认导入的是3.0.9版本的thymeleaf
  <dependency>
            <groupId>org.springframework.boot</groupId>
            <artifactId>spring-boot-starter-thymeleaf</artifactId>
        </dependency>
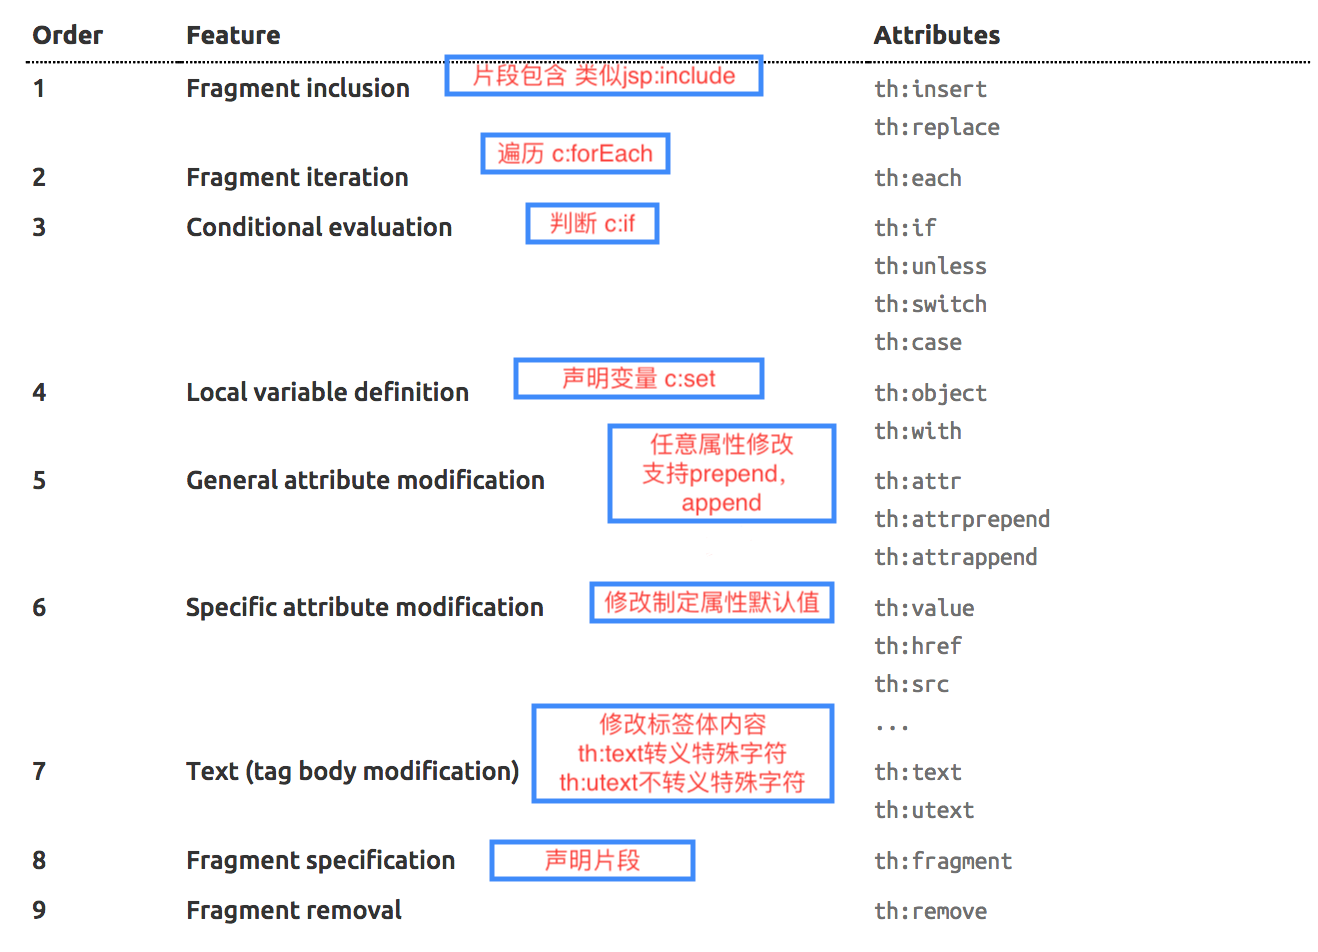
2.thymeleaf使用和语法
@ConfigurationProperties(
    prefix = "spring.thymeleaf"
)
public class ThymeleafProperties {
    private static final Charset DEFAULT_ENCODING;
    public static final String DEFAULT_PREFIX = "classpath:/templates/";
    public static final String DEFAULT_SUFFIX = ".html";
    private boolean checkTemplate = true;
    private boolean checkTemplateLocation = true;
    private String prefix = "classpath:/templates/";
    private String suffix = ".html";
    private String mode = "HTML";
把HTML页面放在classpath:/templates/,thymeleaf就能自动渲染
thymeleaf语法官方文档:
https://www.thymeleaf.org/doc/tutorials/3.0/usingthymeleaf.pdf
使用:
1)导入thymeleaf的名称空间
<html lang="en" xmlns:th="http://www.thymeleaf.org">
2)表达式

--------------------------
success.xml
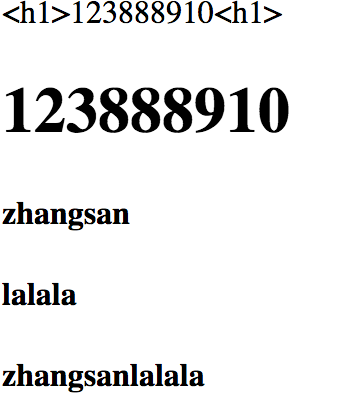
<!DOCTYPE html>
<html lang="en" xmlns:th="http://www.thymeleaf.org">
<head>
    <meta charset="UTF-8">
    <title>Title</title>
</head>
<body>
<!--th:text将div里面的文本内容替换

 th:任意HTML属性,来替换原生属性的值
-->
   <div th:text="${hello}"></div>
<div th:utext="${hello}"></div>
<!--th:each每次遍历都会生成当前这个标签
3个h4-->
<h4 th:text="${user}" th:each="user:${users}"></h4>
<h4>
    <!--3个span-->
    <span th:each="user:${users}">[[${user}]]</span>
</h4>
</body>
</html>
helloController.java
package com.controller;
import org.springframework.stereotype.Controller;
import org.springframework.web.bind.annotation.RequestMapping;
import org.springframework.web.bind.annotation.ResponseBody;
import org.springframework.web.bind.annotation.RestController;
import java.lang.reflect.Array;
import java.util.Arrays;
import java.util.Map;
/*
@RestContronller=@Controller+@ResponseBody
 */
@Controller
public class helloContronller {
   @RequestMapping("/success")
    public String success(Map<String,Object>map){
        map.put("hello","<h1>123888910<h1>");
        map.put("users", Arrays.asList("zhangsan","lalala"));
       return "success";
   }
}
实验结果:
4.springMVC自动配置原理
官方文档:
1.
Inclusion of ContentNegotiatingViewResolver and BeanNameViewResolver beans.
自动配置视图了ViewResolver(视图解析器:根据方法的返回值得到视图对象(View),视图对象决定如何渲染)
ContentNegotiatingViewResolver 组合所有的视图解析器
        @Bean
        @ConditionalOnBean({ViewResolver.class})
        @ConditionalOnMissingBean(
            name = {"viewResolver"},
            value = {ContentNegotiatingViewResolver.class}
        )
        public ContentNegotiatingViewResolver viewResolver(BeanFactory beanFactory) {
            ContentNegotiatingViewResolver resolver = new ContentNegotiatingViewResolver();
            resolver.setContentNegotiationManager((ContentNegotiationManager)beanFactory.getBean(ContentNegotiationManager.class));
            resolver.setOrder(-2147483648);
            return resolver;
        }
可以看到ContentNegotiatingViewResolver resolver = new ContentNegotiatingViewResolver();
进入ContentNegotiatingViewResolver类 找到其中的resolveViewName方法,看如何解析视图。
  @Nullable
    public View resolveViewName(String viewName, Locale locale) throws Exception {
        RequestAttributes attrs = RequestContextHolder.getRequestAttributes();
        Assert.state(attrs instanceof ServletRequestAttributes, "No current ServletRequestAttributes");
        List<MediaType> requestedMediaTypes = this.getMediaTypes(((ServletRequestAttributes)attrs).getRequest());
              if (requestedMediaTypes != null) {
            List<View> candidateViews = this.getCandidateViews(viewName, locale, requestedMediaTypes);
            View bestView = this.getBestView(candidateViews, requestedMediaTypes, attrs);
            if (bestView != null) {
                return bestView;
··· ···
视图通过getCandidateViews方法获取,进入该方法
发现该方法获取viewResolvers视图解析器并遍历
 private List<View> getCandidateViews(String viewName, Locale locale, List<MediaType> requestedMediaTypes) throws Exception {
        List<View> candidateViews = new ArrayList();
        if (this.viewResolvers != null) {
            Assert.state(this.contentNegotiationManager != null, "No ContentNegotiationManager set");
            Iterator var5 = this.viewResolvers.iterator();

            while(var5.hasNext()) {
                ViewResolver viewResolver = (ViewResolver)var5.next();
                View view = viewResolver.resolveViewName(viewName, locale);
                if (view != null) {
                    candidateViews.add(view);
                }
··· ···
那么视图解析器viewResolvers是怎么得到的呢?通过BeanFactory工具从容器中获取所有视图解析器。
protected void initServletContext(ServletContext servletContext) {
        Collection<ViewResolver> matchingBeans = BeanFactoryUtils.beansOfTypeIncludingAncestors(this.obtainApplicationContext(), ViewResolver.class).values();
        ViewResolver viewResolver;
        if (this.viewResolvers == null) {
            this.viewResolvers = new ArrayList(matchingBeans.size());
            Iterator var3 = matchingBeans.iterator();
··· ···
也就是说:
BeanFactory工具从容器中获取所有视图解析器viewResolvers
->getCandidateViews方法获取viewResolvers并遍历,返回值是List<View>列表
->在ContentNegotiatingViewResolver类中,resolveViewName方法使用getCandidateViews方法解析视图,返回值是View
->在ContentNegotiatingViewResolver类中,创建该类对象
所以,ContentNegotiatingViewResolver 组合了所有的视图解析器。
如何定制视图解析器:可以给容器中添加一个视图解析器,自动将其组合进来。通过测试验证正确性:
DemoApplication.java
package com;
import org.springframework.boot.SpringApplication;
import org.springframework.boot.autoconfigure.SpringBootApplication;
import org.springframework.context.annotation.Bean;
import org.springframework.web.servlet.View;
import org.springframework.web.servlet.ViewResolver;
import java.util.Locale;
@SpringBootApplication
public class DemoApplication {
    public static void main(String[] args) {
        SpringApplication.run(DemoApplication.class, args);
    }
    //将自己的视图解析器增加到容器中
    @Bean
    public ViewResolver myViewResolver(){
        return new MyViewResolver();
    }
    //视图解析器实现ViewResolver接口
    private static class MyViewResolver implements ViewResolver{
        @Override
        public View resolveViewName(String s, Locale locale) throws Exception {
            return null;
        }
    }
}
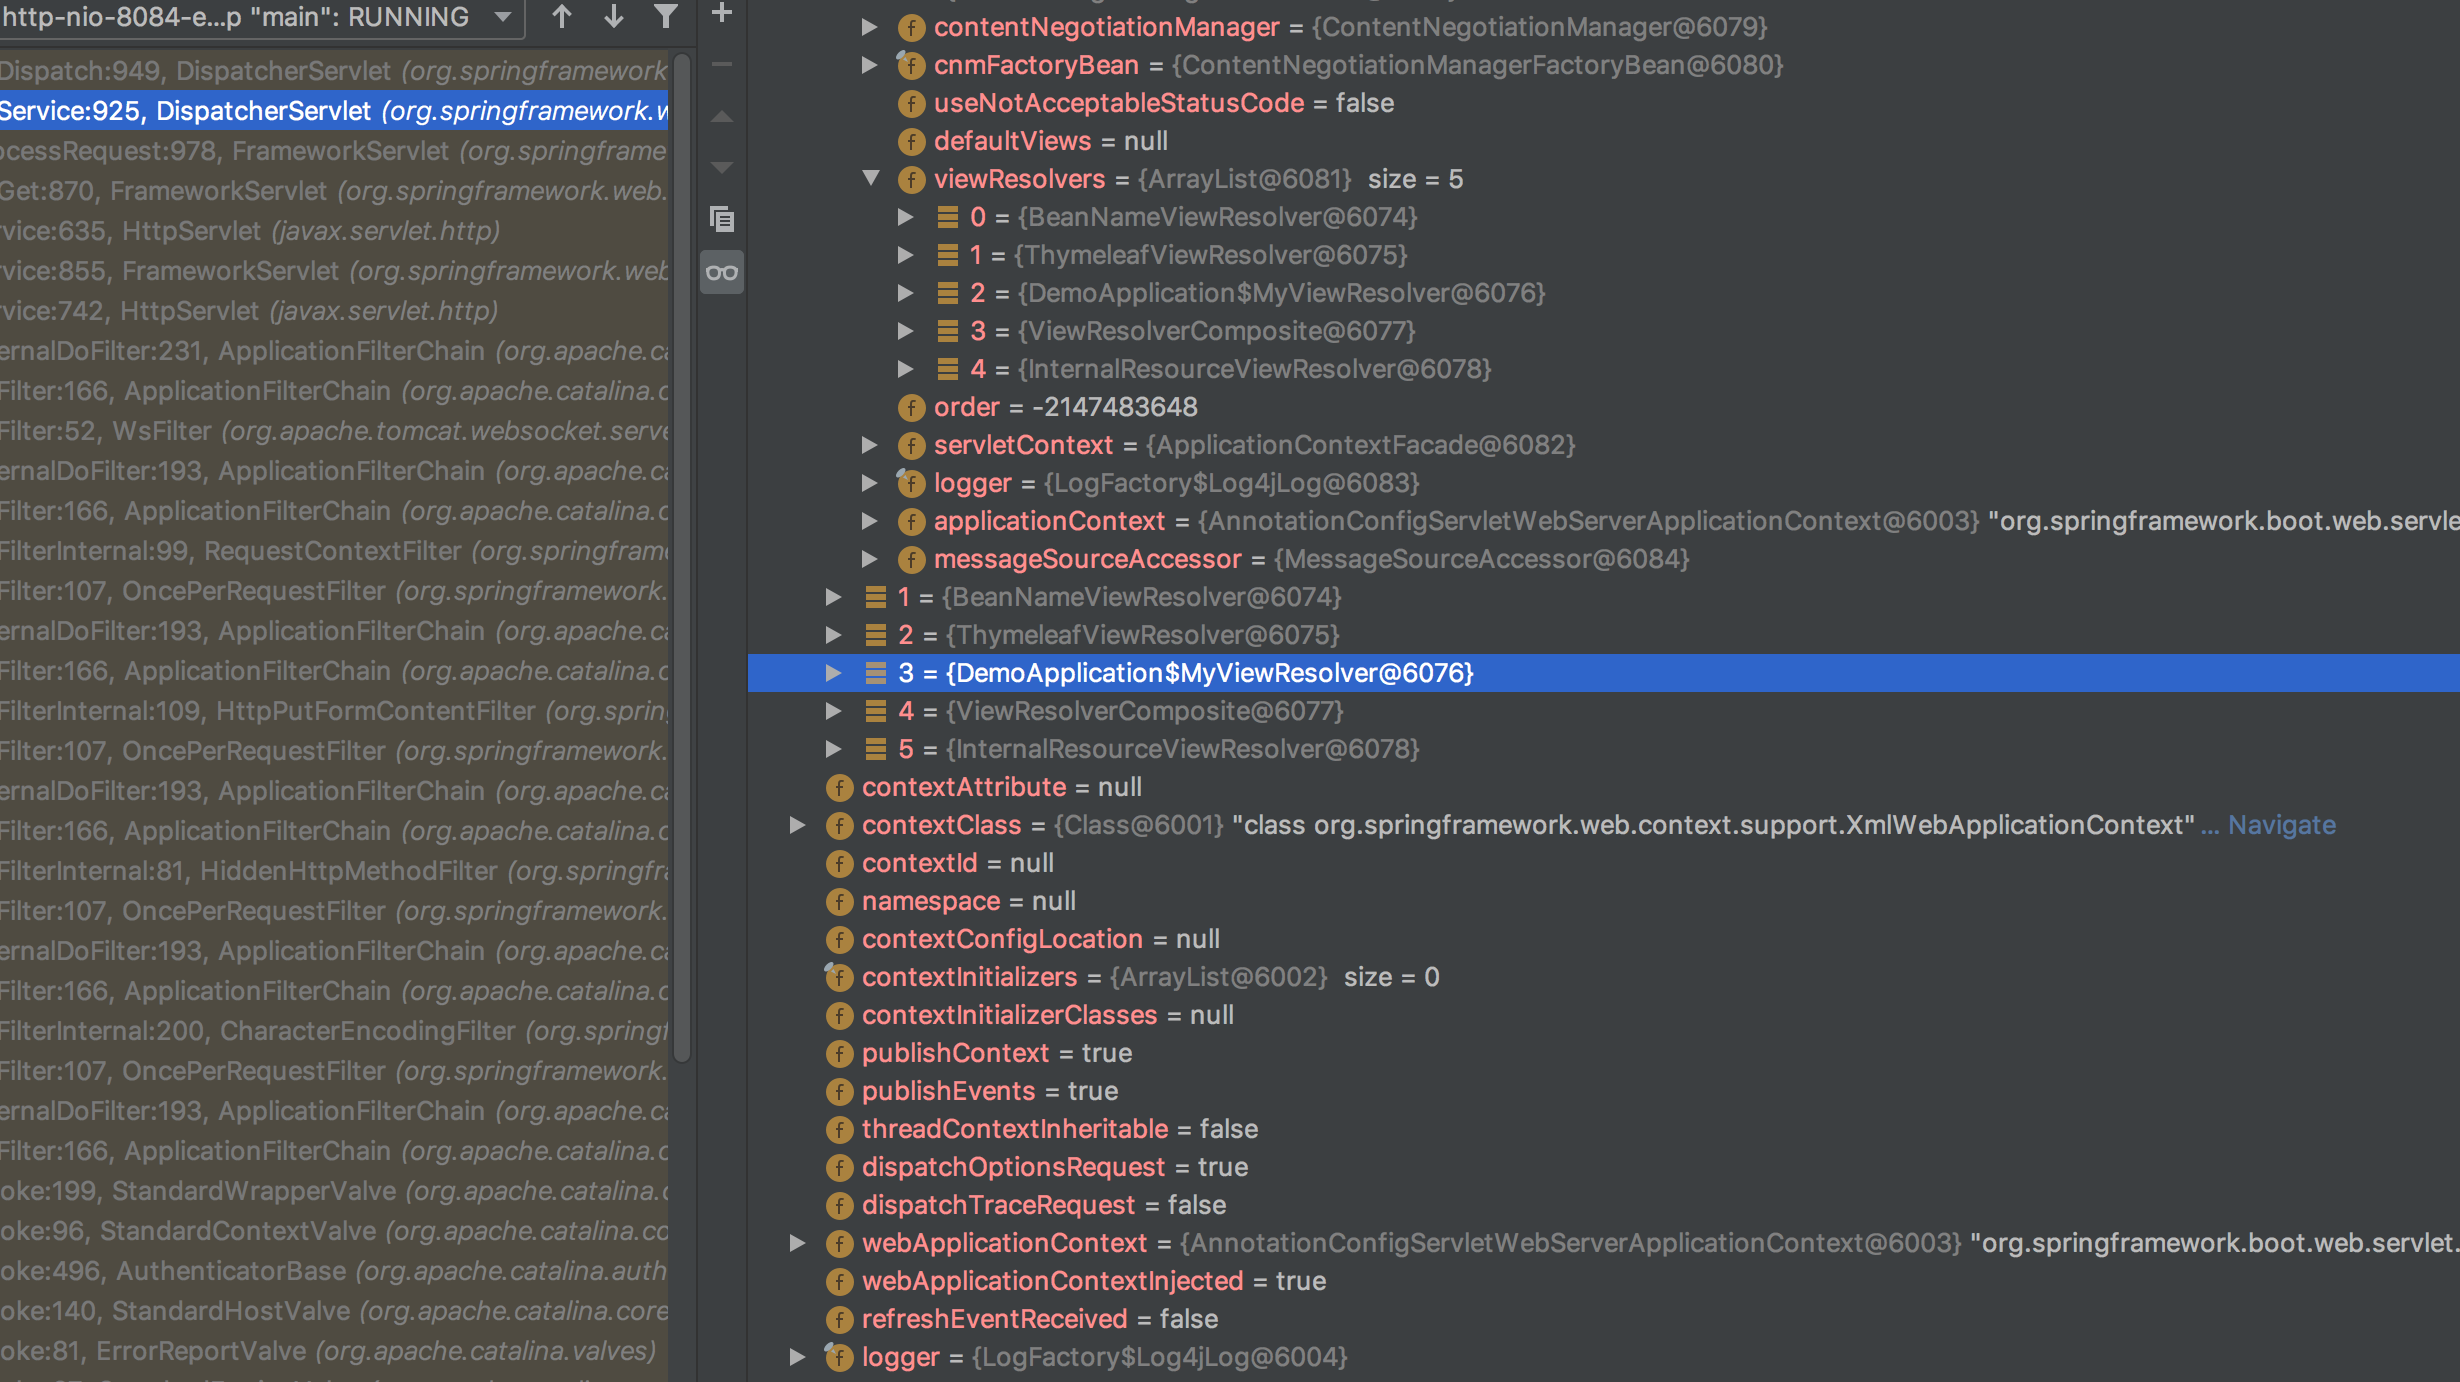
在DispatcherServlet.class的doDispatch方法处打上断点,debug
protected void doDispatch(HttpServletRequest request, HttpServletResponse response) throws Exception {
可以看到在容器中已经将自定义ViewResolver的组件添加进来了(蓝色行)
Support for serving static resources, including support for WebJars (covered later in this document)).静态资源文件夹路径webjars
Automatic registration of Converter, GenericConverter, and Formatter beans.
Converter: 转化器 类型转换
GenericConverter
Formatter:格式化器
自己也可以添加格式化器转换器,只需放在容器中
Support for HttpMessageConverters (covered later in this document).
HttpMessageConverters:springboot用来转换Http请求和响应的,从容器中确定,获取所有的HttpMessageConverter 可以自己配置,添加到容器
Automatic registration of MessageCodesResolver (covered later in this document). 定义错误代码生成规则 可以自己配置,添加到容器
Static index.html support. 静态资源首页
Custom Favicon support (covered later in this document). 图标设置 可以自己配置,添加到容器
Automatic use of a ConfigurableWebBindingInitializer bean (covered later in this document). 初始化ConfigurableWebBinder把请求数据绑定到JavaBean中 可以自己配置,添加到容器
更多容器中的组件具体可以看:org.springframework.boot.autoconfigure.web.servlet 里的xxxConfiguration类:web的所有自动配置场景。
5.修改springboot的默认配置
模式:
扩展springmvc
springmvc.xml
<beans xmlns="http://www.springframework.org/schema/beans"
       xmlns:xsi="http://www.w3.org/2001/XMLSchema-instance"
       xmlns:context="http://www.springframework.org/schema/context"
       xmlns:mvc="http://www.springframework.org/schema/mvc"
       xsi:schemaLocation="http://www.springframework.org/schema/beans
    http://www.springframework.org/schema/beans/spring-beans-4.1.xsd
    http://www.springframework.org/schema/context
    http://www.springframework.org/schema/context/spring-context-4.1.xsd
    http://www.springframework.org/schema/mvc
    http://www.springframework.org/schema/mvc/spring-mvc-4.1.xsd">
<mvc:view-controller path="/hello" view-name="success"/>
    <mvc:interceptors>
        <mvc:interceptor>
            <mvc:mapping path="/hello"/>
            <bean></bean>
        </mvc:interceptor>
    </mvc:interceptors>
</beans>
原来在springmvc中可以如上配置(拦截hello请求),那么在springboot中不写xml配置文件怎么实现呢?
有两种方法:
" '' ''
If you want to keep Spring Boot MVC features and you want to add additional MVC configuration (interceptors, formatters, view controllers, and other features), you can add your own @Configuration class of type WebMvcConfigurer but without @EnableWebMvc. If you wish to provide custom instances of RequestMappingHandlerMapping, RequestMappingHandlerAdapter, or ExceptionHandlerExceptionResolver, you can declare a WebMvcRegistrationsAdapter instance to provide such components.
If you want to take complete control of Spring MVC, you can add your own @Configuration annotated with @EnableWebMvc.'' '' ''
方法1:直接继承WebMvcConfigurationSupport并添加@Configuration注解
编写一个配置类(@Configuration)继承父类重写方法,不能标注@EnableWebMvc注解(springmvc的自动配置和我们的扩展配置都会生效,如果加上@EnableWebMvc则springmvc的自动配置全部失效-具体原因参见源码)。
package com.config;
import org.springframework.context.annotation.Configuration;
import org.springframework.web.servlet.config.annotation.ViewControllerRegistry;
import org.springframework.web.servlet.config.annotation.WebMvcConfigurationSupport;
@Configuration
public class MyMvcConfig extends WebMvcConfigurationSupport {
    @Override
    protected void addViewControllers(ViewControllerRegistry registry) {
        //super.addViewControllers(registry);
        //浏览器发送/s请求,也来到success页面
        registry.addViewController("/s").setViewName("success");
    }
}
方法2:直接在配置类上添加@EnableWebMvc并实现WebMvcConfigurer接口
会导致静态资源失效,需重写方法如下:
   @Override
    public void addResourceHandlers(ResourceHandlerRegistry registry) {
        registry.addResourceHandler("/**")
                .addResourceLocations("classpath:/resources/")
                .addResourceLocations("classpath:/static/")
                .addResourceLocations("classpath:/public/");
        super.addResourceHandlers(registry);
    }
6.全面接管SpringMvc(开发中不推荐)
springboot对springmvc的自动配置不需要了,所有都是自己配置。所有的springmvc的自动配置都失效了。
需要在配置类中添加@EnableWebMvc注解。
@EnableWebMvc
@Configuration
public class MyMvcConfig extends WebMvcConfigurationSupport {
    @Override
    protected void addViewControllers(ViewControllerRegistry registry) {
原理:
进入@EnableWebMvc
@Import({DelegatingWebMvcConfiguration.class})
public @interface EnableWebMvc {
进入DelegatingWebMvcConfiguration.class
@Configuration
public class DelegatingWebMvcConfiguration extends WebMvcConfigurationSupport {
在自动配置类WebMvcConfiguration.class可以看到:
@Configuration
@ConditionalOnWebApplication(
    type = Type.SERVLET
)
@ConditionalOnClass({Servlet.class, DispatcherServlet.class, WebMvcConfigurer.class})
//容器中缺少 WebMvcConfigurationSupport类型的bean时,自动配置类才会生效
@ConditionalOnMissingBean({WebMvcConfigurationSupport.class})
@AutoConfigureOrder(-2147483638)
@AutoConfigureAfter({DispatcherServletAutoConfiguration.class, ValidationAutoConfiguration.class})
public class WebMvcAutoConfiguration {
    public static final String DEFAULT_PREFIX = "";
    public static final String DEFAULT_SUFFIX = "";
也就是说:@EnableWebMvc将DelegatingWebMvcConfiguration类中对应的组件都导入到容器中,而这个类是继承WebMvcConfigurationSupport类的,所以将父类中的组件也会导入容器。在自动配置类中可以看到,只有容器中没有WebMvcConfigurationSupport类中组件,这个自动配置类才会生效。而此时容器中已经有了WebMvcConfigurationSupport类中组件,所以自动配置类不会再生效了。