linux 7 安装 LNMP环境
1、安装yum
# yum update -y
2、安装nginx
添加nginx的yum源
# yum localinstall http://nginx.org/packages/centos/7/noarch/RPMS/nginx-release-centos-7-0.el7.ngx.noarch.rpm
安装
# yum repolist enabled | grep "nginx*"

# yum -y install nginx

# nginx -v
nginx version: nginx/1.16.1
设置开机自启
# systemctl enable nginx.service
Created symlink from /etc/systemd/system/multi-user.target.wants/nginx.service to /usr/lib/systemd/system/nginx.service.
# systemctl list-dependencies | grep nginx
● ├─nginx.service
# systemctl start nginx
# ps -ef | grep nginx
root      6181     1  0 13:26 ?        00:00:00 nginx: master process /usr/sbin/nginx -c /etc/nginx/nginx.conf
nginx     6182  6181  0 13:26 ?        00:00:00 nginx: worker process
root      6190  5258  0 13:26 pts/1    00:00:00 grep --color=auto nginx
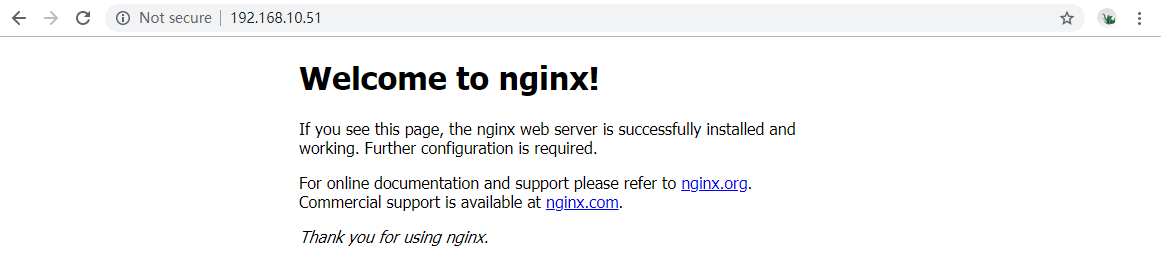
在浏览器输入IP检验安装是否成功
3、安装mysql
添加yum源
官网地址:https://dev.mysql.com/downloads/repo/yum/
# yum -y localinstall https://dev.mysql.com/get/mysql80-community-release-el7-3.noarch.rpm
安装
#  yum -y install mysql-community-server   mysql-community-devel

# mysqld --version
/usr/sbin/mysqld  Ver 8.0.17 for Linux on x86_64 (MySQL Community Server - GPL)
设置开机自启及启动
# systemctl enable mysqld.service
# systemctl list-dependencies | grep mysqld
● ├─mysqld.service

# systemctl start mysqld
# systemctl status mysqld
● mysqld.service - MySQL Server
   Loaded: loaded (/usr/lib/systemd/system/mysqld.service; enabled; vendor preset: disabled)
   Active: active (running) since Fri 2019-10-11 14:17:45 CST; 16s ago
     Docs: man:mysqld(8)
           http://dev.mysql.com/doc/refman/en/using-systemd.html
  Process: 1922 ExecStartPre=/usr/bin/mysqld_pre_systemd (code=exited, status=0/SUCCESS)
 Main PID: 1998 (mysqld)
   Status: "Server is operational"
   CGroup: /system.slice/mysqld.service
           └─1998 /usr/sbin/mysqld

Oct 11 14:17:19 csvn systemd[1]: Starting MySQL Server...
Oct 11 14:17:45 csvn systemd[1]: Started MySQL Server.
试登录
mysql5.7以后的争强了安全机制, 所以使用yum安装,启动会系统会自动生成一个随机的密码,修改mysql密码。
(mysql文档规定,密码必须包括大小写字母数字加特殊符号>8位)
查看mysql的随机密码
# grep 'temporary password' /var/log/mysqld.log
2019-10-11T06:17:24.106572Z 5 [Note] [MY-010454] [Server] A temporary password is generated for root@localhost: HVXG3liUOe+z
登录,并修改root密码
# mysql -u root -p
Enter password:
Welcome to the MySQL monitor.  Commands end with ; or g.
mysql>
mysql>  ALTER USER 'root'@'%' IDENTIFIED BY '111' PASSWORD EXPIRE NEVER;
ERROR 1819 (HY000): Your password does not satisfy the current policy requirements
mysql>
因密码过于简单(如:123456),不符合MySQL密码规范,调整MySQL密码验证规则,修改 policy 和 length 的值。
| validate_password.length 最低是4
mysql> set global validate_password.policy=0;
Query OK, 0 rows affected (0.07 sec)
mysql> set global validate_password.length=1;
Query OK, 0 rows affected (0.02 sec)
mysql> SHOW VARIABLES LIKE 'validate_password%';
+--------------------------------------+-------+
| Variable_name                        | Value |
+--------------------------------------+-------+
| validate_password.check_user_name    | ON    |
| validate_password.dictionary_file    |       |
| validate_password.length             | 4     |
| validate_password.mixed_case_count   | 1     |
| validate_password.number_count       | 1     |
| validate_password.policy             | LOW   |
| validate_password.special_char_count | 1     |
+--------------------------------------+-------+
7 rows in set (0.14 sec)
mysql>
mysql> ALTER USER 'root'@'localhost' IDENTIFIED BY '111111';
Query OK, 0 rows affected (0.03 sec)

mysql>
mysql> exit;
Bye
4、安装PHP
添加yum源
# rpm -Uvh https://dl.fedoraproject.org/pub/epel/epel-release-latest-7.noarch.rpm
Retrieving https://dl.fedoraproject.org/pub/epel/epel-release-latest-7.noarch.rpm
warning: /var/tmp/rpm-tmp.IziVRu: Header V3 RSA/SHA256 Signature, key ID 352c64e5: NOKEY
Preparing...                          ################################# [100%]
        package epel-release-7-12.noarch is already installed
# rpm -Uvh https://mirror.webtatic.com/yum/el7/webtatic-release.rpm
Retrieving https://mirror.webtatic.com/yum/el7/webtatic-release.rpm
warning: /var/tmp/rpm-tmp.qhE553: Header V4 RSA/SHA1 Signature, key ID 62e74ca5: NOKEY
Preparing...                          ################################# [100%]
Updating / installing...
   1:webtatic-release-7-3             ################################# [ 50%]
Cleaning up / removing...
   2:webtatic-release-6-9             ################################# [100%]
安装
# yum repolist enabled | grep "webtatic*"
 * webtatic: us-east.repo.webtatic.com
webtatic/x86_64       Webtatic Repository EL7 - x86_64                       587

# yum -y install php71w php71w-fpm
安装PHP扩展包
# yum -y install php71w-mbstring php71w-common php71w-gd php71w-mcrypt
# yum -y install php71w-mysql php71w-xml php71w-cli php71w-devel
# yum -y install php71w-pecl-memcached php71w-pecl-redis php71w-opcache
验证
# php -v
PHP 7.1.32 (cli) (built: Sep 11 2019 18:50:33) ( NTS )
Copyright (c) 1997-2018 The PHP Group
Zend Engine v3.1.0, Copyright (c) 1998-2018 Zend Technologies
    with Zend OPcache v7.1.32, Copyright (c) 1999-2018, by Zend Technologies
启动
#  systemctl enable php-fpm
Created symlink from /etc/systemd/system/multi-user.target.wants/php-fpm.service to /usr/lib/systemd/system/php-fpm.service.
# systemctl start php-fpm.service
更新MySQL的yum源报错了
# yum -y localinstall mysql80-community-release-el7-3.noarch.rpm
Loaded plugins: fastestmirror
Examining mysql80-community-release-el7-3.noarch.rpm: mysql80-community-release-el7-3.noarch
Marking mysql80-community-release-el7-3.noarch.rpm to be installed
Resolving Dependencies
--> Running transaction check
---> Package mysql80-community-release.noarch 0:el7-3 will be installed
--> Processing Conflict: mysql80-community-release-el7-3.noarch conflicts mysql-community-release
Loading mirror speeds from cached hostfile
 * base: mirrors.aliyun.com
 * extras: mirrors.aliyun.com
 * updates: mirrors.aliyun.com
No package matched to upgrade: mysql80-community-release
--> Finished Dependency Resolution
Error: mysql80-community-release conflicts with mysql-community-release-el6-5.noarch
 You could try using --skip-broken to work around the problem
 You could try running: rpm -Va --nofiles --nodigest
错误:mysql80 community release与mysql-community-release-el6-5冲突了,提示用
--skip-broken来绕过这个错误,或者 rpm -Va --nofiles --nodigest
解决:找到已有的MySQL安装包,卸载了
# rpm -qa | grep mysql
mysql-community-release-el6-5.noarch
# rpm -e --nodeps mysql-community-release-el6-5.noarch
warning: file /etc/yum.repos.d/mysql-community.repo: remove failed: No such file or directory
warning: file /etc/yum.repos.d/mysql-community-source.repo: remove failed: No such file or directory
再重新官网添加yum源包就可以了
# yum -y localinstall mysql80-community-release-el7-3.noarch.rpm
...
Running transaction
Warning: RPMDB altered outside of yum.
  Installing : mysql80-community-release-el7-3.noarch                      1/1
  Verifying  : mysql80-community-release-el7-3.noarch                      1/1

Installed:
  mysql80-community-release.noarch 0:el7-3

Complete!