一、前端项目结构
在上一节的基础上,我们分别在src下创建如下文件夹:
- assets:静态文件;
- components:公共组件,比如面包屑、编辑器、svg图标、分页器等等;
- hooks:函数组件,使用 React 16.8引进的Hook 特性实现;
- layout:布局组件;
- redux:redux目录,负责状态管理;
- routes:路由,负责路由管理;
- styles:全局样式;
- utils:工具包;
- views:视图层;
二、redux目录构建
我们项目使用redux进行状态管理,在使用redux状态管理器之前,我们需要安装依赖包:
npm install redux --save
npm install react-redux --save
npm install redux-logger --save
npm install redux-thunk --save
npm install redux-devtools-extension --save
1、在redux文件夹下创建root_reducers.js文件,用于保存整个项目使用到的reducer:
/**
 * @author zy
 * @date 2020/4/5
 * @Description: 合并reducer
 */
import {combineReducers} from 'redux';

export default combineReducers({})
这里利用 combineReducers 函数来把多个 reducer 函数合并成一个 reducer 函数,目前还没有引入redux函数,后面我们会逐渐完善。
2、在redux文件夹下创建Index.js文件:
/**
 * @author zy
 * @date 2020/4/4
 * @Description: redux状态管理器配置
 * 不懂原理的可以参考:https://github.com/brickspert/blog/issues/22#middleware
 */
import thunk from 'redux-thunk';
import {compose, createStore, applyMiddleware} from 'redux';
import rootReducers from './root_reducers';
import {composeWithDevTools} from 'redux-devtools-extension';

const storeEnhancers = process.env.NODE_ENV === 'production' ? compose(applyMiddleware(thunk)) :
    compose()(composeWithDevTools(applyMiddleware(thunk)));

/**
 * 创建store
 * @author zy
 * @date 2020/4/5
 */
const configureStore = () => {
    //创建store对象
    const store = createStore(rootReducers, storeEnhancers);

    //reducer热加载
    if (process.env.NODE_ENV !== 'production') {
        if (module.hot) {
            module.hot.accept('./root_reducers', () => {
                store.replaceReducer(rootReducers)
            })
        }
    }

    return store;
}

export default configureStore();
这里我们利用createStore创建了一个状态管理器,并传入了redux,此外我们还使用了thunk中间件来处理异步请求。
如果不理解这部分代码,可以先去看一下redux相关知识:
三、routes目录构建
路由构建是使用React Route路由库实现的,在使用之前,我们需要安装以下依赖:
npm install react-router-dom --save
1、在routes文件夹下创建web.js文件:
/**
 * @author zy
 * @date 2020/4/5
 * @Description: web路由
 * 不懂的可以参考:https://segmentfault.com/a/1190000020812860
 * https://reacttraining.com/react-router/web/api/Route
 */
import React from 'react';
import PageNotFound from '@/components/404';

function Home(props) {
    console.log('Home=>', props);
    return (
        <div>
            <h2>Home</h2>
            {props.children}
        </div>
    )
}

function About(props) {
    console.log('About=>', props);
    return <h2>About</h2>;
}

/**
 * web路由配置项
 * @author zy
 * @date 2020/4/5
 */
export default {
    path: '/',
    name: 'home',
    component: Home,
    exact: false,
    childRoutes: [
        {path: 'about', component: About},
        {path: '*', component: PageNotFound}
    ]
}
2、在routes下创建index.js文件:
import React from 'react';
import {Switch, Route} from 'react-router-dom';
import _ from 'lodash';
import webRouteConfig from './web';

//保存所有路由配置的数组
const routeConfig = [webRouteConfig]

/**
 * 路由配置
 * @author zy
 * @date 2020/4/5
 */
export default function () {

    /**
     * 生成路由嵌套结构
     * @author: zy
     * @date: 2020-03-05
     * @param routeConfig: 路由配置数组
     * @param contextPath: 路由根路径
     */
    const renderRouters = (routeConfig, contextPath = '/') => {
        const routes = [];

        const renderRoute = (item, routeContextPath) => {

            //基路径
            let path = item.path ? `${contextPath}/${item.path}` : contextPath;
            path = path.replace(//+/g, '/');

            if (!item.component) {
                return;
            }

            //这里使用了嵌套路由
            routes.push(
                <Route
                    key={path}
                    path={path}
                    component={()=>
                        <item.component>
                            {item.childRoutes && renderRouters(item.childRoutes, path)}
                        </item.component>
                    }
                    exact={item.childRoutes?false:true}
                />
            );
        }

        _.forEach(routeConfig, item => renderRoute(item, contextPath))

        return <Switch>{routes}</Switch>;
    };

    return renderRouters(routeConfig);
}
这里我们使用了嵌套路由,其中/为根路由,然后他有两个子路由,分别为/about,/*,最终生成的代码等价于:
<Switch>
    <Route key="/" path="/" exact={false}>
        <Home>
            <Switch>
                <Route key="/about" path="/about" exact={true} component={About}>
                <Route key="/*" path="/*" exact={true} component={PageNotFound}>
            </Switch>
        </Home>
    </Route>
</Switch>
这里使用了Swich和exact:
- <Switch>是唯一的,因为它仅仅只会渲染一个路径,当它匹配完一个路径后,就会停止渲染了。相比之下(不使用<Switch>包裹的情况下),每一个被location匹配到的<Route>将都会被渲染;
- exact:只有页面的路由和<Route>的path属性精确比对后完全相同该<Route>才会被渲染;
当我们访问/about时,由于/不是精确匹配,因此首先匹配匹配到/,然后会继续匹配其子元素,由于子元素是精确匹配,因此匹配到/about就会停止。我们为什么采用嵌套路由呢,以江南大学为例:
我们访问不同的页面会发现,它们都有导航栏,页面之间只是存在部分差异,因此我们可以把页面的整体布局放置到路由/对应的组件中,而差异部分放置到路由精确匹配的子组件中,这样我们就不必写太多的重复代码。
需要注意的是Home组件之所以可以嵌套子组件,是因为我们的代码中指定了显示子组件:
function Home(props) {
    console.log('Home=>', props);
    return (
        <div>
            <h2>Home</h2>
            {props.children}
        </div>
    )
}
如果不理解这部分代码,可以先去看一下react router相关知识:
四、components目录构建
在web.js中我们使用到了PageNotFound组件,我们需要在components下创建404文件,并在该文件夹下创建index.jsx文件,代码如下:
/**
 * @author zy
 * @date 2020/4/5
 * @Description: 找不到页面
 */
import React from 'react';
import {Result, Button} from 'antd';

/**
 * 页面找不到组件
 * @author zy
 * @date 2020/4/5
 */
function PageNotFound(props) {
    return (
        <Result
            status='404'
            title='404'
            subTitle='Sorry, the page you visited does not exist.'
            extra={
                <Button
                    type='primary'
                    onClick={() => {
                        props.history.push('/')
                    }}>
                    Back Home
                </Button>
            }
        />
    )
}

export default PageNotFound
由于此处我们使用了antd组件,因此需要引入依赖:
cnpm install antd --save
关于更多antd组件的使用请查看:antd官网。
五、hooks目录构建
1、useBus
我们在hooks文件夹下创建use_bus.js文件,使用event bus可以解决非父子组件间的通信:
/**
 * @author zy
 * @date 2020/4/5
 * @Description: 事件监听器
 * useContext Hook 是如何工作的:https://segmentfault.com/a/1190000020111320?utm_source=tag-newest
 * useEffect Hook 是如何工作的:https://segmentfault.com/a/1190000020104281
 * 微型库解读之200byte的EventEmitter - Mitt:https://segmentfault.com/a/1190000012997458?utm_source=tag-newest
 * 使用event bus进行非父子组件间的通信:https://blog.csdn.net/wengqt/article/details/80114590

 我们可以通过对event的订阅和发布来进行通信,这里举一个栗子:A和B是两个互不相关的组件,A组件的功能是登录,B组件的功能是登录之后显示用户名,这里就需要A组件将用户名传递给B组件。那么我们应该怎么做呢?
 1、在A组件中注册/发布一个type为login的事件;
 2、在B组件中注册一个监听/订阅,监听login事件的触发;
 3、然后当登录的时候login事件触发,然后B组件就可以触发这个事件的回调函数。
 */
import React, {useEffect} from 'react';
import mitt from 'mitt';

//创建上下文
const context = React.createContext();

//外层提供数据的组件
const Provider = context.Provider;

//useContext 接收一个 context 对象(React.createContext 的返回值)并返回该 context 的当前值
export function useBus() {
    return React.useContext(context);
}

/**
 * 事件监听器函数
 * @author zy
 * @date 2020/4/5
 * @param name:监听的事件名称
 * @param fn:事件触发时的回调函数
 */
export function busListener(name, fn) {
    //获取 context 的当前值
    // eslint-disable-next-line react-hooks/rules-of-hooks
    const bus = useBus();

    //组件第一次挂载执行,第二个参数发生变化时执行
    // eslint-disable-next-line react-hooks/rules-of-hooks
    useEffect(() => {
        //事件订阅
        bus.on(name, fn);
        //组件卸载之前执行
        return () => {
            //取消事件订阅
            bus.off(name, fn);
        }
    }, [bus, name, fn])
}

//外层提供数据的组件 向后代组件跨层级传值bus,这样后代组件都可以通过useBus获取到bus的值
export function BusProvider({children}) {
    const [bus] = React.useState(() => mitt());
    return <Provider value={bus}>{children}</Provider>
}
这里使用到了React 16.8引进的Hook新特性,感兴趣可以查看以下博客:
[3]微型库解读之200byte的EventEmitter - Mitt
2、useMount
我们在hooks下创建use_mount.js文件,用于模拟类组件componentDidMount函数:
/**
 * @author zy
 * @date 2020/4/6
 * @Description: 利用useEffect实现组件第一次挂载
 */
import {useEffect} from 'react'

/**
 * useMount函数
 * @author zy
 * @date 2020/4/6
 */
export default function useMount(func) {
    //由于第二个参数不变,因此只会执行一次func函数
    useEffect(() => {
        typeof func === 'function' && func();
        // eslint-disable-next-line
    }, [])
}
六、App.js文件
我们修改App.js文件代码如下:
/**
 * @author zy
 * @date 2020/4/5
 * @Description: 根组件
 */
import React from 'react';
import Routes from '@/routes';
import {BrowserRouter} from 'react-router-dom';

export default function App(props) {
    return (
        <BrowserRouter>
            <Routes/>
        </BrowserRouter>
    )
}
七、index.js文件
我们修改index.js文件如下:
/**
 * @author zy
 * @date 2020/4/5
 * @Description: 入口文件
 */
import React from 'react';
import ReactDOM from 'react-dom';
import App from './App';
import {AppContainer} from 'react-hot-loader';
import {BusProvider} from '@/hooks/use_bus';
import {Provider} from 'react-redux';
import store from '@/redux';

ReactDOM.render(
    <AppContainer>
        <BusProvider>
            <Provider store={store}>
                <App/>
            </Provider>
        </BusProvider>
    </AppContainer>,
    document.getElementById('root')
)
这里我们引入了局部热更新,这样当我们修改部门文件时,不会造成整个页面的刷新,可以保留状态值。
npm install react-hot-loader --save
此外,我们还引入了状态管理器store,用来管理我们所有组件的状态。
在import文件的时候,我们引入了@别名,@指的的是src路径,其配置在webpack.config.js文件中:
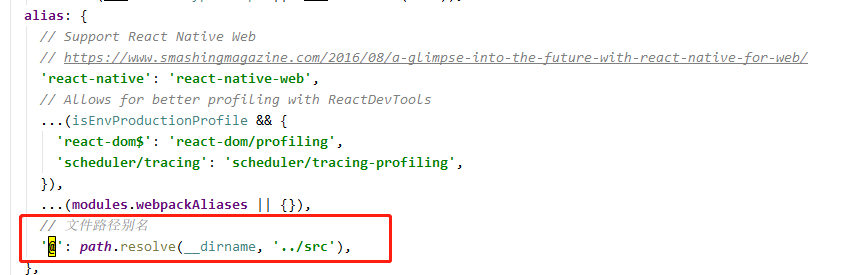
至此,我们整个前端框架搭建完毕,我们可以运行程序,访问http://localhost:3000:
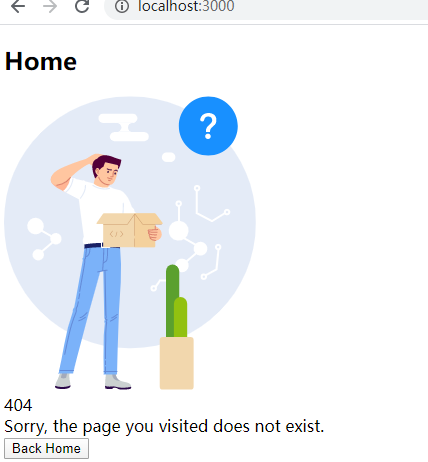
此外,我们还可以访问about页面:

我们可以看到,访问/会加载Home组件和PageNotFound组件,访问/about会加载Home和About组件。
参考文章:
[5]antd官方手册