前言
最近趁着跟老东家提离职之后、到新公司报道之前的这段空闲时期,着力研究了一番netty框架,对其有了一些浅薄的认识,后续的几篇文章会以netty为主,将近期所学记录一二,也争取能帮未对netty有过了解的园友对netty建立一个完整的认识。netty作为一个优秀的网络框架,值得为其花费一番时间。
netty的内容细究一下也有不少(虽然与Spring这种庞大的框架相比代码量少很多),本文作为netty系列的第一篇,决定先攀登一个高峰:讲一下netty的串行无锁化。这是netty的一个招牌特性,可以说理解了它,就掌握了netty的命门。开始正文之前,需要额外提醒一下,本文虽然是netty系列的第一篇,但是面向的对象是对netty有过一定了解的园友,如果是新人建议从第二篇【EventLoopGroup的初始化】开始看。
一、Talk is cheap,show me your code
先把netty的示例demo奉上,此处只要服务端构建的代码就可以了。
 1 public class NettyDemo1 {
 2     // netty服务端的一般性写法
 3     public static void main(String[] args) {
 4         EventLoopGroup boss = new NioEventLoopGroup(1);
 5         EventLoopGroup worker = new NioEventLoopGroup();
 6         try {
 7             ServerBootstrap bootstrap = new ServerBootstrap();
 8             bootstrap.group(boss, worker).channel(NioServerSocketChannel.class)
 9                     .option(ChannelOption.SO_BACKLOG, 100)
10                     .childHandler(new ChannelInitializer<SocketChannel>() {
11                         @Override
12                         protected void initChannel(SocketChannel socketChannel) throws Exception {
13                             ChannelPipeline pipeline = socketChannel.pipeline();
14                             pipeline.addLast(new StringDecoder());
15                             pipeline.addLast(new StringEncoder());
16                             pipeline.addLast(new NettyServerHandler());
17                         }
18                     });
19             ChannelFuture channelFuture = bootstrap.bind(90).sync();
20             channelFuture.channel().closeFuture().sync();
21         } catch (Exception e) {
22             e.printStackTrace();
23         } finally {
24             boss.shutdownGracefully();
25             worker.shutdownGracefully();
26         }
27     }
28 }
从第4行到第18行,都是在进行初始化的属性赋值,第19行bind方法触发真正的串行无锁化处理逻辑。串行无锁化如何理解呢?望文生义即可,通过串行(即顺序执行),来达到即使没有锁也可以线程安全的效果。具体如何做到呢?且往下追踪bind方法。
二、源码追踪
1、initAndRegister方法
在AbstractBootstrap类中的doBind方法调用了下面的initAndRegister方法(该方法在netty中很重要,现在先记住混个眼熟),前两步虽然也很重要,但跟本文的主题关系不大,下面主要看第3步:
 1 final ChannelFuture initAndRegister() {
 2         Channel channel = null;
 3         try {
 4             channel = channelFactory.newChannel();// 1、实例化NioServerSocketChannel
 5             init(channel);// 2、初始化该channel
 6         } catch (Throwable t) {
 7             // ...省略异常处理
 8         }
 9         ChannelFuture regFuture = config().group().register(channel);// 3、注册channel
10         if (regFuture.cause() != null) {
11             if (channel.isRegistered()) {
12                 channel.close();
13             } else {
14                 channel.unsafe().closeForcibly();
15             }
16         }
17         return regFuture;
18     }
第3步中,group()方法返回的是AbstractBootstrap中的group属性,该属性就是上面服务端demo中的boss变量。
2、boss.register(channel)方法
追踪进入MultithreadEventLoopGroup的register方法:
1 public ChannelFuture register(Channel channel) {
2         return next().register(channel);
3     }
next方法即从EventLoopGroup的EventExecutor数组中轮询取一个EventExecutor实例,即一个NioEventLoop对象,然后再调用NioEventLoop的register方法。
3、NioEventLoop.register(channel)方法
跟踪到SingleThreadEventLoop的register方法,如下,此处的promise.channel()返回值即之前的NioServerSocketChannel,它的unsafe()方法返回NioMessageUnsafe对象,所以此处最终调用的是NioMessageUnsafe的register方法。
1 public ChannelFuture register(final ChannelPromise promise) {
2         ObjectUtil.checkNotNull(promise, "promise");
3         promise.channel().unsafe().register(this, promise);
4         return promise;
5     }
4、NioMessageUnsafe.register方法
该方法位于AbstractChannel的内部类AbstractUnsafe中(AbstractUnsafe是NioMessageUnsafe的父类):
 1 public final void register(EventLoop eventLoop, final ChannelPromise promise) {
 2            //... 省略异常校验
 3             AbstractChannel.this.eventLoop = eventLoop;
 4
 5             if (eventLoop.inEventLoop()) {// 串行无锁化的第一个判断
 6                 register0(promise);
 7             } else {
 8                 try {
 9                     eventLoop.execute(new Runnable() {
10                         @Override
11                         public void run() {
12                             register0(promise);
13                         }
14                     });
15                 } catch (Throwable t) {
16                     //... 省略异常处理
17                 }
18             }
19         }
在eventLoop的父类SingleThreadEventExecutor中有一个成员变量thread,第5行代码用来判断这个thread是不是Thread.currentThread(),如果不是,则进入esle逻辑,执行eventLoop.execute方法。
5、eventLoop.execute方法
该方法位于SingleThreadEventExecutor中,主要做的事情有三步:1)、inEventLoop()方法判断当前线程是不是eventLoop中记录的线程;2)、addTask将任务放入队列中;3)、startThread()判断是否启动新线程。每步对应的代码在下面已经标出,比较简单。
执行到execute方法时,有三种情况:1)、eventLoop中记录的线程为null,即刚完成实例化;2)、eventLoop中记录的线程不为null,但不是当前线程;3)、eventLoop中记录的线程不为null,是当前线程(正常不会出现这种情况)。如果是第一种thread=null,则往队列中添加完任务后会进入startThread方法,在startThread方法中判断state属性是不是未启动,如果是则创建一个新的线程并通过cas将state置为已启动;如果是第二种情况thread!=null,往队列中添加任务后也会进入startThread方法,但由于state属性已经是已启动了,所以不会创建新的线程。至此,task中都添加了一个任务,且thread也有值了。
task中的任务是合适被执行的?且往下看。
 1 public void execute(Runnable task) {
 2         if (task == null) {
 3             throw new NullPointerException("task");
 4         }
 5
 6         boolean inEventLoop = inEventLoop();
 7         addTask(task); // 将task任务放入队列中
 8         if (!inEventLoop) { // 串行无锁化的第二次判断
 9             startThread(); // 如果需要,会启动一个线程  重要***
10             if (isShutdown()) {
11                 boolean reject = false;
12                 try {
13                     if (removeTask(task)) {
14                         reject = true;
15                     }
16                 } catch (UnsupportedOperationException e) {
17                 }
18                 if (reject) {
19                     reject();
20                 }
21             }
22         }
23
24         if (!addTaskWakesUp && wakesUpForTask(task)) {
25             wakeup(inEventLoop);
26         }
27     }
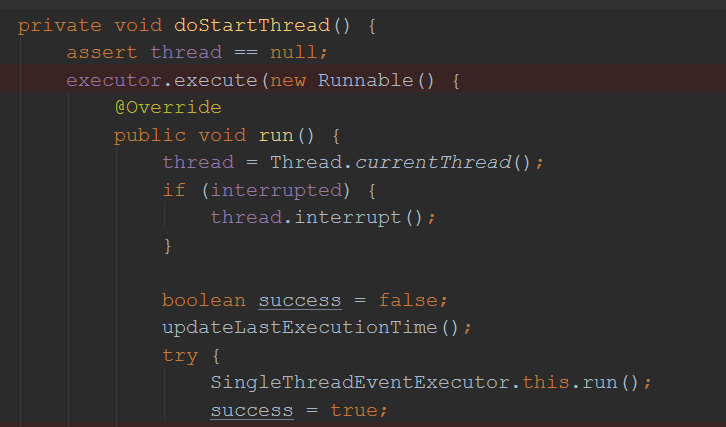
6、doStartThread()方法
此方法位于SingleThreadEventExecutor类,executor即封装的线程池了,在run方法中完成了对thread的赋值,然后执行了当前类的run方法。
7、SingleThreadEventExecutor.run()方法
该方法的实现在NioEventLoop中,如下,多出对 runAllTasks()方法进行调用,就是在这个方法中完成的对队列中任务的执行,直接调用的task.run方法,即单线程串行消费队列。
 1 protected void run() {
 2         for (;;) {
 3             try {
 4                 try {
 5                     switch (selectStrategy.calculateStrategy(selectNowSupplier, hasTasks())) {
 6                     case SelectStrategy.CONTINUE:
 7                         continue;
 8                     case SelectStrategy.BUSY_WAIT:
 9                     case SelectStrategy.SELECT:
10                         select(wakenUp.getAndSet(false));
11                         if (wakenUp.get()) {
12                             selector.wakeup();
13                         }
14                         // fall through
15                     default:
16                     }
17                 } catch (IOException e) {
18                     // ...异常处理省略
19                     continue;
20                 }
21
22                 cancelledKeys = 0;
23                 needsToSelectAgain = false;
24                 final int ioRatio = this.ioRatio;
25                 if (ioRatio == 100) {
26                     try {
27                         processSelectedKeys();
28                     } finally {
29                         // Ensure we always run tasks.
30                         runAllTasks();
31                     }
32                 } else {
33                     final long ioStartTime = System.nanoTime();
34                     try {
35                         processSelectedKeys();
36                     } finally {
37                         // Ensure we always run tasks.
38                         final long ioTime = System.nanoTime() - ioStartTime;
39                         runAllTasks(ioTime * (100 - ioRatio) / ioRatio);
40                     }
41                 }
42             } catch (Throwable t) {
43                 handleLoopException(t);
44             }
45             // ...省略无关代码
46         }
47     }
三、小结
上面是过了一遍netty串行无锁化的流程,下面对整个流程做一下总结。
netty串行无锁化的实现,是借助了SingleThreadEventExecutor中的Thread thread、int state和Queue<Runnable> taskQueue这三个成员变量。state变量用于判断当前EventExecutor是否启动(未启动则通过线程池创建一个启动线程并赋值给thread),thread变量用来判断当前线程是不是启动线程(通过inEventLoop方法实现),taskQueue用于存放待启动线程串行执行的任务。在NioEventLoop的run方法中,每一次循环都遍历一遍taskQueue执行里面的任务。
可以知道,一个NioEventLoop对应一个串行执行的启动线程,Reactor主线程对应的是boss中的一个NioEventLoop,负责串行执行客户端连接事件,Reactor子线程是有客户端接入事件后由主线程启用的,对应worker中的一个NioEventLoop,负责串行执行客户端读写时间。
至此,串行无锁化的内容就结束了,后面将从EventLoopGroup的初始化开始,一步步从零开始拆解netty的作用原理,敬请期待!
原创不易,若有问题,还请批评指正,感谢!