本文是根据菜鸟教程中的内容而写的,因为按照教程中做法来操作,中间遇到一些问题,我在centos6.5和ubuntu16.4中都遇到了,所以写在这里。强烈建议你先看完这篇博客,然后再操作,能省不少事。
首先推荐安装最新的扩展,去github中下载:https://github.com/phpredis/phpredis/releases,我下载的版本是3.1.6。下载完毕之后,完整操作如下:因为安装扩展要使用root权限,所以请使用su切换到root用户,多次使用sudo比较麻烦。
现在我已经下载好扩展压缩包了:
root@ubuntu:# cd /Downloads
root@ubuntu:/Downloads# tar -xzf phpredis-3.1.6.tar.gz
root@ubuntu:/Downloads# cd phpredis-3.1.6
root@ubuntu:/Downloads/phpredis-3.1.6# /usr/local/php/bin/phpize
Configuring for:
PHP Api Version:         20131106
Zend Module Api No:      20131226
root@ubuntu:/Downloads/phpredis-3.1.6# ./configure --with-php-config=/usr/local/php/bin/php-config
##
##一些列的检测
##
然后运行下面命令:
root@ubuntu:/Downloads/phpredis-3.1.6# make && make install
+-----------------------------------------------------------+
|                       ! ERROR !                           |
| The test-suite requires that proc_open() is available.    |
| Please check if you disabled it in php.ini.               |
+-----------------------------------------------------------+
出现如上错误,根据错误提示,需要更改php.ini配置文件,将proc_open()开启,所以执行:
root@ubuntu:/Downloads/phpredis-3.1.6# vi /usr/local/php/etc/php.ini
#使用vi编辑器的查找/proc_open,发现它在disable_function中,将其proc_open删除,然后保存退出
#再次运行make test
但是一运行make test,仍旧会报错:
root@ubuntu:/Downloads/phpredis-3.1.6# make test
......
PHP Warning:  shell_exec() has been disabled for security reasons in /Downloads/phpredis-3.1.6/run-tests.php
PHP Warning:  shell_exec() has been disabled for security reasons in /Downloads/phpredis-3.1.6/run-tests.php
PHP Warning:  shell_exec() has been disabled for security reasons in /Downloads/phpredis-3.1.6/run-tests.php
.....
和上面一次一样,编辑php.ini,开启shell_exec,及将其从disable_function中删除
然后再次运行make test
root@ubuntu:/Downloads/phpredis-3.1.6# vi /usr/local/php/etc/php.ini
root@ubuntu:/Downloads/phpredis-3.1.6# make test
然后这次没有报错了,证明扩展安装成功了
接下来,依旧修改php.ini,因为现在只是将redis扩展安装了,但是没有开启,仍旧不能使用。
在修改php.ini之前,请先执行下面的命令
root@ubuntu:/Downloads/phpredis-3.1.6# ls /usr/local/php/lib/php/extensions/
no-debug-non-zts-20131226
root@ubuntu:/Downloads/phpredis-3.1.6#
注意上面的no-debug-non-zts-20131226
请将这个目录的名称复制一遍,然后打开php.ini,添加如下两行
extension_dir='/usr/local/php/lib/php/extensions/no-debug-non-zts-20131226'
extension=redis.so
注意上面第一条的末尾的文件夹就是上一条命令ls的结果,保存退出,接下来就是测试时间了。先关闭php服务,不用重启apache
root@ubuntu:/Downloads/phpredis-3.1.6# ps -A | grep php
###
###这里是很多php或者php-fpm的程序
###
root@ubuntu:/Downloads/phpredis-3.1.6# killall php-fpm
root@ubuntu:/Downloads/phpredis-3.1.6# ps -A | grep php
root@ubuntu:/Downloads/phpredis-3.1.6#
然后执行下面这个命令,然后可以直接通过本地10000端口进行访问php程序。
@ubuntu:/Downloads/phpredis-3.1.6# cd ~
root@ubuntu:~# echo "<?php phpinfo();?>" > index.php
root@ubuntu:~# php -S localhost:10000
PHP 5.6.31 Development Server started at Mon Jan 15 23:04:33 2018
Listening on http://localhost:10000
Document root is /root
Press Ctrl-C to quit.
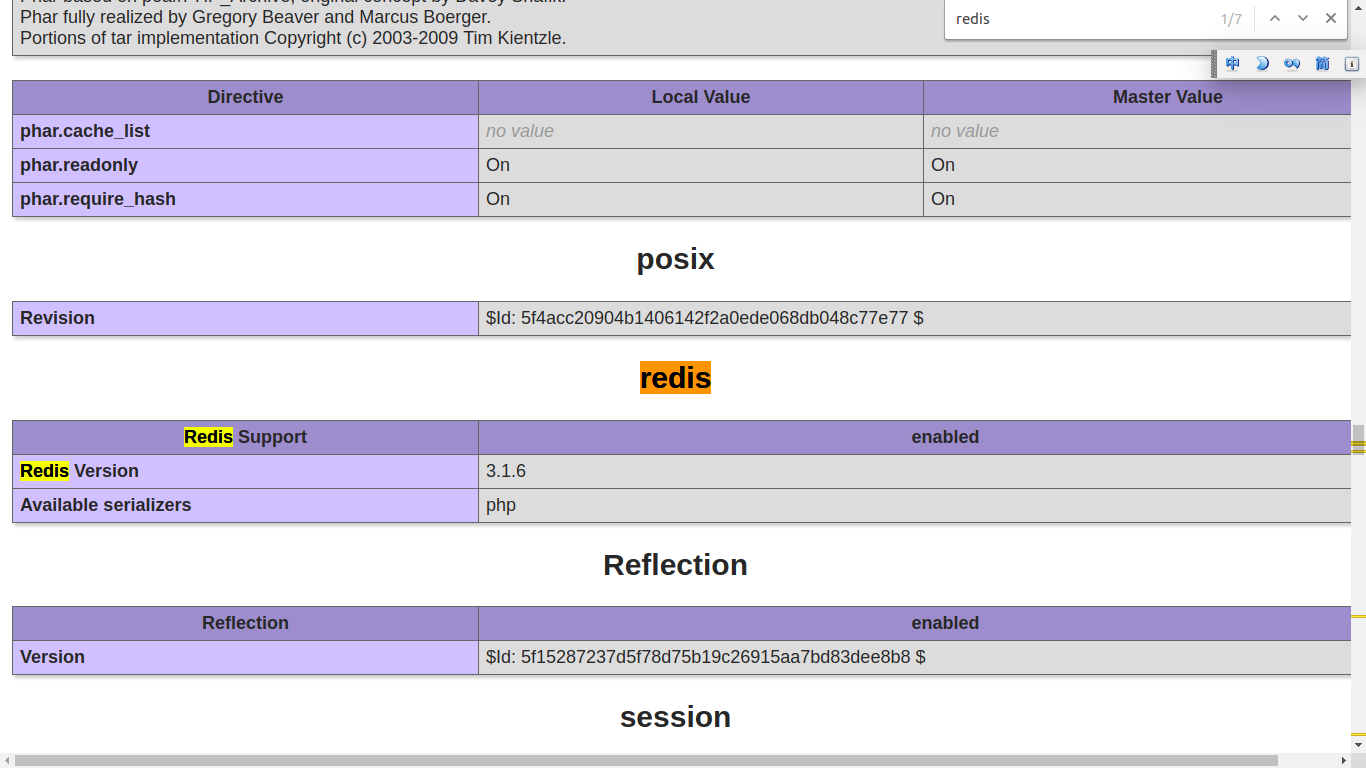
然后使用浏览器访问localhost:10000就可以查看phpinfo了,

看到这里,你可以根据这个完整的流程,实现解决一些问题,省时省事!