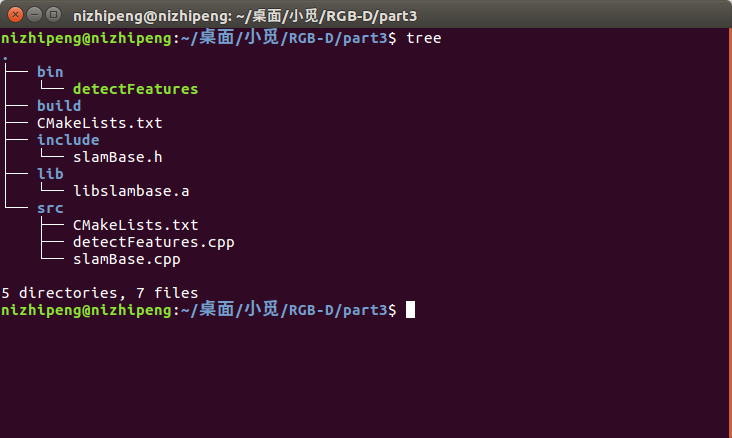
include头文件中有slamBase.h
# pragma once
// 各种头文件
// C++标准库
#include <fstream>
#include <vector>
using namespace std;

// OpenCV
#include <opencv2/core/core.hpp>
#include <opencv2/highgui/highgui.hpp>

//PCL
#include <pcl/io/pcd_io.h>
#include <pcl/point_types.h>

// 类型定义
typedef pcl::PointXYZRGBA PointT;
typedef pcl::PointCloud<PointT> PointCloud;

// 相机内参结构
struct CAMERA_INTRINSIC_PARAMETERS
{
    double cx, cy, fx, fy, scale;
};

// 函数接口
// image2PonitCloud 将rgb图和深度图转换为点云
PointCloud::Ptr image2PointCloud( cv::Mat& rgb, cv::Mat& depth, CAMERA_INTRINSIC_PARAMETERS& camera );

// point2dTo3d 将单个点从图像坐标转换为空间坐标
// input: 3维点Point3f (u,v,d)
cv::Point3f point2dTo3d( cv::Point3f& point, CAMERA_INTRINSIC_PARAMETERS& camera );
其中有三个部分,相机内参结构,rgb图和深度图转点云,2维像素点转3维空间点坐标(头文件中函数原型)。
src中源程序slamBase.cpp
#include "slamBase.h"


//传入rgb, depth, 和相机内参
PointCloud::Ptr image2PointCloud( cv::Mat& rgb, cv::Mat& depth, CAMERA_INTRINSIC_PARAMETERS& camera )
{
    PointCloud::Ptr cloud ( new PointCloud );
    for (int m = 0; m < depth.rows; m++)
        for (int n=0; n < depth.cols; n++)
        {
            // 获取深度图中(m,n)处的值
            ushort d = depth.ptr<ushort>(m)[n];
            // d 可能没有值,若如此,跳过此点
            if (d == 0)
                continue;
            // d 存在值,则向点云增加一个点
            PointT p;

            // 计算这个点的空间坐标
            p.z = double(d) / camera.scale;
            p.x = (n - camera.cx) * p.z / camera.fx;
            p.y = (m - camera.cy) * p.z / camera.fy;

            // 从rgb图像中获取它的颜色
            // rgb是三通道的BGR格式图,所以按下面的顺序获取颜色
            p.b = rgb.ptr<uchar>(m)[n*3];
            p.g = rgb.ptr<uchar>(m)[n*3+1];
            p.r = rgb.ptr<uchar>(m)[n*3+2];

            // 把p加入到点云中
            cloud->points.push_back( p );
        }
    // 设置并保存点云
    cloud->height = 1;
    cloud->width = cloud->points.size();
    cloud->is_dense = false;

    return cloud;
}

//像素坐标转为3维点
cv::Point3f point2dTo3d( cv::Point3f& point, CAMERA_INTRINSIC_PARAMETERS& camera )
{
    cv::Point3f p; // 3D 点
    p.z = double( point.z ) / camera.scale;  //point.z  d
    p.x = ( point.x - camera.cx) * p.z / camera.fx;  //point.x  u
    p.y = ( point.y - camera.cy) * p.z / camera.fy;  //point.y  v
    return p;
}
和实现程序slamBase.cpp在同一文件夹下的CMakeLists.txt
# 增加PCL库的依赖
FIND_PACKAGE( PCL REQUIRED COMPONENTS common io )

list(REMOVE_ITEM PCL_LIBRARIES "vtkproj4") # use this in Ubuntu 16.04

# 增加opencv的依赖
FIND_PACKAGE( OpenCV REQUIRED )
INCLUDE_DIRECTORIES( ${OpenCV_INCLUDE_DIRS} )

# 添加头文件和库文件
ADD_DEFINITIONS( ${PCL_DEFINITIONS} )
INCLUDE_DIRECTORIES( ${PCL_INCLUDE_DIRS}  )
LINK_LIBRARIES( ${PCL_LIBRARY_DIRS} )

#把slamBase.cpp编译成 slamBase 库,并把该库里调到的OpenCV和PCL的部分,和相应的库链接起来
ADD_LIBRARY( slambase slamBase.cpp )   # 实现文件  slamBase.cpp
TARGET_LINK_LIBRARIES( slambase
    ${OpenCV_LIBS}
    ${PCL_LIBRARIES} )

ADD_EXECUTABLE( detectFeatures detectFeatures.cpp ) #  可执行程序  detectFeatures.cpp
TARGET_LINK_LIBRARIES( detectFeatures
    slambase
    ${OpenCV_LIBS}
    ${PCL_LIBRARIES} )
库函数:ADD_LIBRARY( slambase slamBase.cpp ) TARGET_LINK_LIBRARIES( slambase ${OpenCV_LIBS} ${PCL_LIBRARIES} )
可执行程序:ADD_EXECUTABLE( detectFeatures detectFeatures.cpp ) TARGET_LINK_LIBRARIES( detectFeatures slambase ${OpenCV_LIBS} ${PCL_LIBRARIES} ) 使用到上诉的库
#include<iostream>
#include "slamBase.h" //
using namespace std;

// OpenCV 特征检测模块
#include <opencv2/features2d/features2d.hpp>
// #include <opencv2/nonfree/nonfree.hpp> // use this if you want to use SIFT or SURF
#include <opencv2/calib3d/calib3d.hpp>

int main( int argc, char** argv )
{
    // 声明并从data文件夹里读取两个rgb与深度图
    cv::Mat rgb1 = cv::imread( "./data/rgb20.png");
    cv::Mat rgb2 = cv::imread( "./data/rgb21.png");
    cv::Mat depth1 = cv::imread( "./data/depth20.png", -1);
    cv::Mat depth2 = cv::imread( "./data/depth21.png", -1);

    // 声明特征提取器与描述子提取器
    cv::Ptr<cv::FeatureDetector> detector;
    cv::Ptr<cv::DescriptorExtractor> descriptor;

    // 构建提取器,默认两者都为 ORB

    // 如果使用 sift, surf ,之前要初始化nonfree模块
    // cv::initModule_nonfree();
    // _detector = cv::FeatureDetector::create( "SIFT" );
    // _descriptor = cv::DescriptorExtractor::create( "SIFT" );

    detector = cv::ORB::create();
    descriptor = cv::ORB::create();

    vector< cv::KeyPoint > kp1, kp2; //关键点
    detector->detect( rgb1, kp1 );  //提取关键点
    detector->detect( rgb2, kp2 );

    cout<<"Key points of two images: "<<kp1.size()<<", "<<kp2.size()<<endl;

    // 可视化, 显示关键点
    cv::Mat imgShow;
    cv::drawKeypoints( rgb1, kp1, imgShow, cv::Scalar::all(-1), cv::DrawMatchesFlags::DRAW_RICH_KEYPOINTS );
    cv::namedWindow("Keypoints",0);
    cv::imshow( "keypoints", imgShow );
    cv::imwrite( "./data/keypoints.png", imgShow );
    cv::waitKey(0); //暂停等待一个按键

    // 计算描述子
    cv::Mat desp1, desp2;
    descriptor->compute( rgb1, kp1, desp1 );
    descriptor->compute( rgb2, kp2, desp2 );

    // 匹配描述子
    vector< cv::DMatch > matches;
    cv::BFMatcher matcher;
    matcher.match( desp1, desp2, matches );
    cout<<"Find total "<<matches.size()<<" matches."<<endl;

    // 可视化:显示匹配的特征
    cv::Mat imgMatches;
    cv::drawMatches( rgb1, kp1, rgb2, kp2, matches, imgMatches );
    cv::namedWindow("matches",0);
    cv::imshow( "matches", imgMatches );
    cv::imwrite( "./data/matches.png", imgMatches );
    cv::waitKey( 0 );

    // 筛选匹配,把距离太大的去掉
    // 这里使用的准则是去掉大于四倍最小距离的匹配
    vector< cv::DMatch > goodMatches;
    double minDis = 9999;
    for ( size_t i=0; i<matches.size(); i++ )
    {
        if ( matches[i].distance < minDis )
            minDis = matches[i].distance;
    }
    cout<<"min dis = "<<minDis<<endl;

    for ( size_t i=0; i<matches.size(); i++ )
    {
        if (matches[i].distance < 10*minDis)
            goodMatches.push_back( matches[i] );
    }

    // 显示 good matches
    cout<<"good matches="<<goodMatches.size()<<endl;
    cv::drawMatches( rgb1, kp1, rgb2, kp2, goodMatches, imgMatches );
    cv::namedWindow("good matches",0);
    cv::imshow( "good matches", imgMatches );
    cv::imwrite( "./data/good_matches.png", imgMatches );
    cv::waitKey(0);

    // 计算图像间的运动关系
    // 关键函数:cv::solvePnPRansac()
    // 为调用此函数准备必要的参数

    // 第一个帧的三维点
    vector<cv::Point3f> pts_obj;
    // 第二个帧的图像点
    vector< cv::Point2f > pts_img;

    // 相机内参,使用到结构
    CAMERA_INTRINSIC_PARAMETERS C;
    C.cx = 682.3;
    C.cy = 254.9;
    C.fx = 979.8;
    C.fy = 942.8;
    C.scale = 1000.0;

    for (size_t i=0; i<goodMatches.size(); i++)
    {
        // query 是第一个, train 是第二个
        cv::Point2f p = kp1[goodMatches[i].queryIdx].pt;
        // 获取d是要小心!x是向右的,y是向下的,所以y才是行,x是列!
        ushort d = depth1.ptr<ushort>( int(p.y) )[ int(p.x) ];
        if (d == 0)
            continue;
        pts_img.push_back( cv::Point2f( kp2[goodMatches[i].trainIdx].pt ) );

        // 将(u,v,d)转成(x,y,z)
        cv::Point3f pt ( p.x, p.y, d ); //   深度值/scale = z
        cv::Point3f pd = point2dTo3d( pt, C );
        pts_obj.push_back( pd );
    }
    //使用到结构
    double camera_matrix_data[3][3] = {
        {C.fx, 0, C.cx},
        {0, C.fy, C.cy},
        {0, 0, 1}
    };

    // 构建相机矩阵
    cv::Mat cameraMatrix( 3, 3, CV_64F, camera_matrix_data );
    cv::Mat rvec, tvec, inliers;
    // 求解pnp
    cv::solvePnPRansac( pts_obj, pts_img, cameraMatrix, cv::Mat(), rvec, tvec, false, 100, 1.0, 0.95, inliers ,cv::SOLVEPNP_ITERATIVE);
    // 求旋转向量和平移向量,旋转矩阵
    cout<<"inliers: "<<inliers.rows<<endl;
    cout<<"R="<<rvec<<endl;
    cout<<"t="<<tvec<<endl;
    //旋转矩阵
    cv::Mat R;
    cv::Rodrigues(rvec,R);
    cout<<"R_matrix="<<R<<endl;

    // 画出inliers匹配
    vector< cv::DMatch > matchesShow;
    for (size_t i=0; i<inliers.rows; i++)
    {
        matchesShow.push_back( goodMatches[inliers.ptr<int>(i)[0]] );
    }
    cv::drawMatches( rgb1, kp1, rgb2, kp2, matchesShow, imgMatches );
    cv::namedWindow("inlier matches",0);
    cv::imshow( "inlier matches", imgMatches );
    cv::imwrite( "./data/inliers.png", imgMatches );
    cv::waitKey( 0 );

    return 0;
}
使用到结构,和将旋转向量转为旋转矩阵的函数cv::Rodrigues()
OpenCV会利用一种“随机采样一致性”(Random Sample Consensus)的思路(见https://en.wikipedia.org/wiki/RANSAC)
cv::solvePnPRansac()函数 https://blog.csdn.net/jay463261929/article/details/53818611
和src,include文件同一文件夹下的CMakeLists.txt
CMAKE_MINIMUM_REQUIRED( VERSION 2.8 )
PROJECT( slam )

SET(CMAKE_CXX_COMPILER "g++")
SET( CMAKE_BUILD_TYPE Debug  )
SET(EXECUTABLE_OUTPUT_PATH ${PROJECT_SOURCE_DIR}/bin) #可执行文件输出的文件夹
SET(LIBRARY_OUTPUT_PATH ${PROJECT_SOURCE_DIR}/lib) #库函数编译输出位置

INCLUDE_DIRECTORIES( ${PROJECT_SOURCE_DIR}/include ) #头文件
LINK_DIRECTORIES( ${PROJECT_SOURCE_DIR}/lib) #使用编译好的库文件libslamBase.a

ADD_SUBDIRECTORY( ${PROJECT_SOURCE_DIR}/src ) #可执行程序

注意:当lib 文件下已经有编译好的库库文件libslamBase.a,可以将第一个CMakeLists.txt中ADD_LIBRARY( slambase slamBase.cpp ) TARGET_LINK_LIBRARIES( slambase ${OpenCV_LIBS} ${PCL_LIBRARIES} )去掉,因为slamBase.cpp已经被编译。
将第二个CMakeLists.txt中SET(LIBRARY_OUTPUT_PATH ${PROJECT_SOURCE_DIR}/lib) 去掉。
