在前面的几篇文章中,关于Silverlight中数据方面主要是以展现一个Person类的数组为例,其实数据源也可以是集合类型的。
在Silverlight中创建数据源集合,可以使用内建的ObservableCollection类,为了实现动态绑定,以使集合中的插入或移除操作可以自动更新 UI,则数据源集合需要实现INotifyPropertyChanged接口,INotifyCollectionChanged接口,而ObservableCollection实现了这2个接口外,还实现了Add,Remove,Clear,Insert操作。
下面仍然在前面的示例基础上进行修改,实现绑定到集合
首先仍然用之前的Person类,
public class Person:INotifyPropertyChanged
    {
        public event PropertyChangedEventHandler PropertyChanged;
        public Person() { }
        private string firstName;
        public string FirstName
        {
            get { return firstName; }
            set {
                if (value.Length>6)
                {
                    throw new Exception("数据太长");
                }
                firstName = value;
            if (PropertyChanged != null)
            {
                PropertyChanged(this, new PropertyChangedEventArgs("FirstName"));
            }
            }
        }
        private string lastName;
        public string LastName
        {
            get { return lastName; }
            set {
                if (String.IsNullOrEmpty(value))
                {
                    throw new ArgumentException();
                }
                lastName = value;
                if (PropertyChanged != null)
                {
                    PropertyChanged(this, new PropertyChangedEventArgs("LastName"));
                }
            }
        }
        public void NotifyPropertyChanged(string propertyname)
        {
            if (PropertyChanged != null)
            {
                PropertyChanged(this,new PropertyChangedEventArgs(propertyname));
            }
        }
         }
接着创建集合类Persons.cs
    public class Persons:ObservableCollection<Person>
    {

    }
不要忘记添加using System.Collections.ObjectModel;
接下来修改一下XAML,仍然只贴出关键部分
     <Grid x:Name="LayoutRoot" Background="White">
        <ListBox Height="100"   ItemsSource="{Binding Mode=OneWay}" />
     </Grid>
后台代码只要在原来的基础上变换一下
             InitializeComponent();
            allPersons = new Persons();
            allPersons.Add(new Person{FirstName="david",LastName="Grenn"});
            allPersons.Add(new Person{FirstName="dam",LastName="white"});
            allPersons.Add(new Person { FirstName = "tom", LastName = "Smith" });
            this.LayoutRoot.DataContext = allPersons;
这里注意一下概念,DataContext是可继承的,如果设置了父节点的DataContext属性,那么所有子节点拥有相同的DataContext
运行,效果如下:
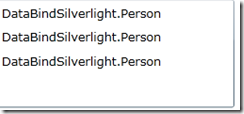
 ListBox中显示的数据并不是我们期望得到的,而是为"DataBindSilverlight.Person”的字符串 ,根本原因在于,在本例中传递给ListBox项的是一 个Person对象,因为在没有为ListBox控件指定数据模板的情况下,SL会使用默认的ToString()方法,将Person对象转换成字符串显示,因此会出现这样的情况。那么要改变这个状况,就需要为ListBox定制数据模板控制Person对象的呈现。
数据模板控制呈现
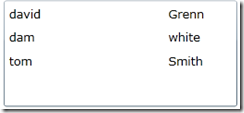
数据绑定可以将业务逻辑与用户界面元素很方便的关联,但是并不是说可以完全展现表示业务对象的信息,这时候就需要考虑数据模板来解决上面出现的问题,只要将XAML代码修改如下
<UserControl.Resources>
        <DataTemplate x:Key="template">
            <Grid>
               <TextBlock x:Name="firstname" Text="{Binding FirstName}"    />
                <TextBlock x:Name="lastname" Text="{Binding LastName}"  Margin="150,0,0,0"   />
            </Grid>
        </DataTemplate>
    </UserControl.Resources>
    <Grid x:Name="LayoutRoot" Background="White">
        <ListBox Height="100" HorizontalAlignment="Left" Margin="114,130,0,0" Name="listBox1" VerticalAlignment="Top" Width="220"  ItemsSource="{Binding Mode=OneWay}" ItemTemplate="{StaticResource template}" />
    </Grid>
其实可以看出,在静态资源中,对于数据模板的定义仍然采用的之前与数组对象同样的绑定方式,只不过它满足了更高的需求
