1 IoC与DI
IoC是Inversion of Control的简称,也就是控制反转。通常来说,创建对象需要调用者手动创建,也就是new XXX()的方式。当Spring框架出现后,对象的实例不再由调用者创建,而是由Spring容器创建,这样控制权就由调用者转移到Spring容器,控制权发生了反转,这就是Spring的控制反转。从Spring容器来看,Spring容器负责将被依赖对象赋值给调用者的成员变量,相当于为调用者注入它所依赖的实例,这就是Spring的依赖注入(Dependency Injection,DI)。
一句话总结:
IoC:控制权由调用者交由Spring容器,控制发生了反转DI:由Spring容器注入需要的值到对象中
2 Spring IoC容器
Spring中实现IoC的是Spring IoC容器,主要基于以下两个接口:
BeanFactoryApplicationContext
2.1 BeanFactory
位于org.springframework.beans.factory下,提供了完整的IoC服务支持,是一个管理Bean工厂,主要负责初始化各种Bean。可以通过XmlBeanFactory来获取XML文件中的Bean并进行装配,例子如下:
BeanFactory factory = new XmlBeanFactory(new FileSystemResource("/xxx/xxx/xxx/xxx/applicationContext.xml"));
TestInterface test = (TestInterface)factory.getBean("test");
test.hello();
需要使用绝对路径,而且,该方法已经过时了:
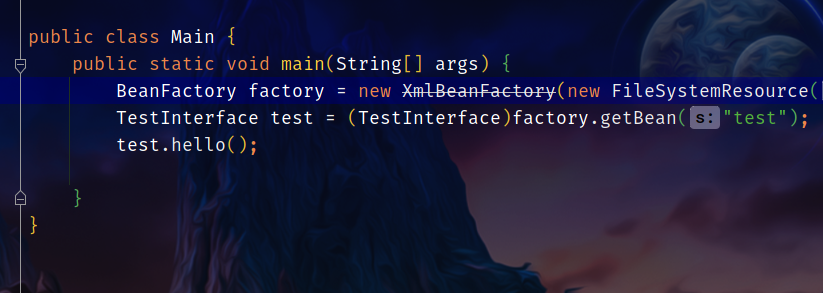
因此不推荐使用。
2.2 ApplicationContext
ApplicationContext是BeanFactory的子接口,也称为应用上下文,除了包含BeanFactory的功能外还添加了国际化、资源访问、事件传播等的支持,创建ApplicationContext的实例有以下三种方法:
ClassPathXmlApplicationContextFileSystemXmlApplicationContextWeb服务器实例化
2.2.1 ClassPathXmlApplicationContext
该类从resources下寻找指定的XML文件:
ApplicationContext context = new ClassPathXmlApplicationContext("applicationContext.xml");
TestInterface test = (TestInterface)context.getBean("test");
test.hello();

2.2.2 FileSystemXmlApplicationContext
该类读取配置文件需要加上前缀:
classpath::该前缀表示从类路径读取,对于Maven项目来说就是resourcesfile::该前缀表示从绝对路径获取
例子:
ApplicationContext context = new FileSystemXmlApplicationContext("classpath:applicationContext.xml");
//ApplicationContext context = new FileSystemXmlApplicationContext("file:/xxx/xxx/xxx/xxxx/xxx/applicationContext.xml");
2.2.3 Web服务器实例化
一般使用基于ContextLoaderListener的实现方式,修改web.xml,添加如下代码:
<context-param>
    <param-name>contextConfigLocation</param-name>
    <param-value>classpath:applicationContext.xml</param-value>
    <listener>
        <listener-class>
            org.springframework.web.context.ContextLoaderListener
        </listener-class>
    </listener>
</context-param>
3 DI的两种方法
DI通常有两种实现方式:
- 构造方法注入
setter注入
下面分别来看一下。
3.1 构造方法注入
Spring可以利用反射机制通过构造方法完成注入,比如有以下三个类:
public interface TestInterface {
    void hello();
}

public class TestA implements TestInterface {
    @Override
    public void hello() {
        System.out.println("Test A");
    }
}

public class TestB {
    private TestInterface test;

    public TestB(TestInterface test)
    {
        this.test = test;
    }

    public void method()
    {
        test.hello();
    }
}
TestInterface是一个简单的接口,而TestA实现了该接口,TestB需要一个TestInterface类型的对象,因此可以先注入一个TestA,再将该TestA注入到TestB的构造方法中:
<bean id="testA" class="TestA"/> <!--注入一个TestA对象-->
<bean id="testB" class="TestB">
	<constructor-arg index="0" ref="testA" /> <!--将上面注入的TestA作为参数传入构造方法中,在传给TestB的私有成员-->
</bean>
constructor-arg是用于定义通过构造方法的方式进行注入的标签,index定义位置,从0开始,ref是某个Bean的引用,值为该Bean的id。
3.2 通过setter注入
在上面的例子中,修改TestB如下:
public class TestB {
    private TestInterface test;

    public void setTest(TestInterface test) {
        this.test = test;
    }

    public void method()
    {
        test.hello();
    }
}
其实就是添加了一个setter,接着修改配置文件:
<bean id="testA" class="TestA"/>
<bean id="testB" class="TestB">
    <property name="test" ref="testA" />
</bean>
<property>表示通过setter注入,name是私有成员的名字,ref是被传入setter的Bean的id值。