An IAM policy is a JSON file that defines the level of permissions (authorization) a user (or a service) can have while accessing AWS services in your account.
In this hands-on exercise, you will create an IAM policy and review the generated JSON.
Prerequisites:
- AWS account
Topics Covered:
By the end of this lab, you will be able to:
- Create an IAM policy using the visual editor.
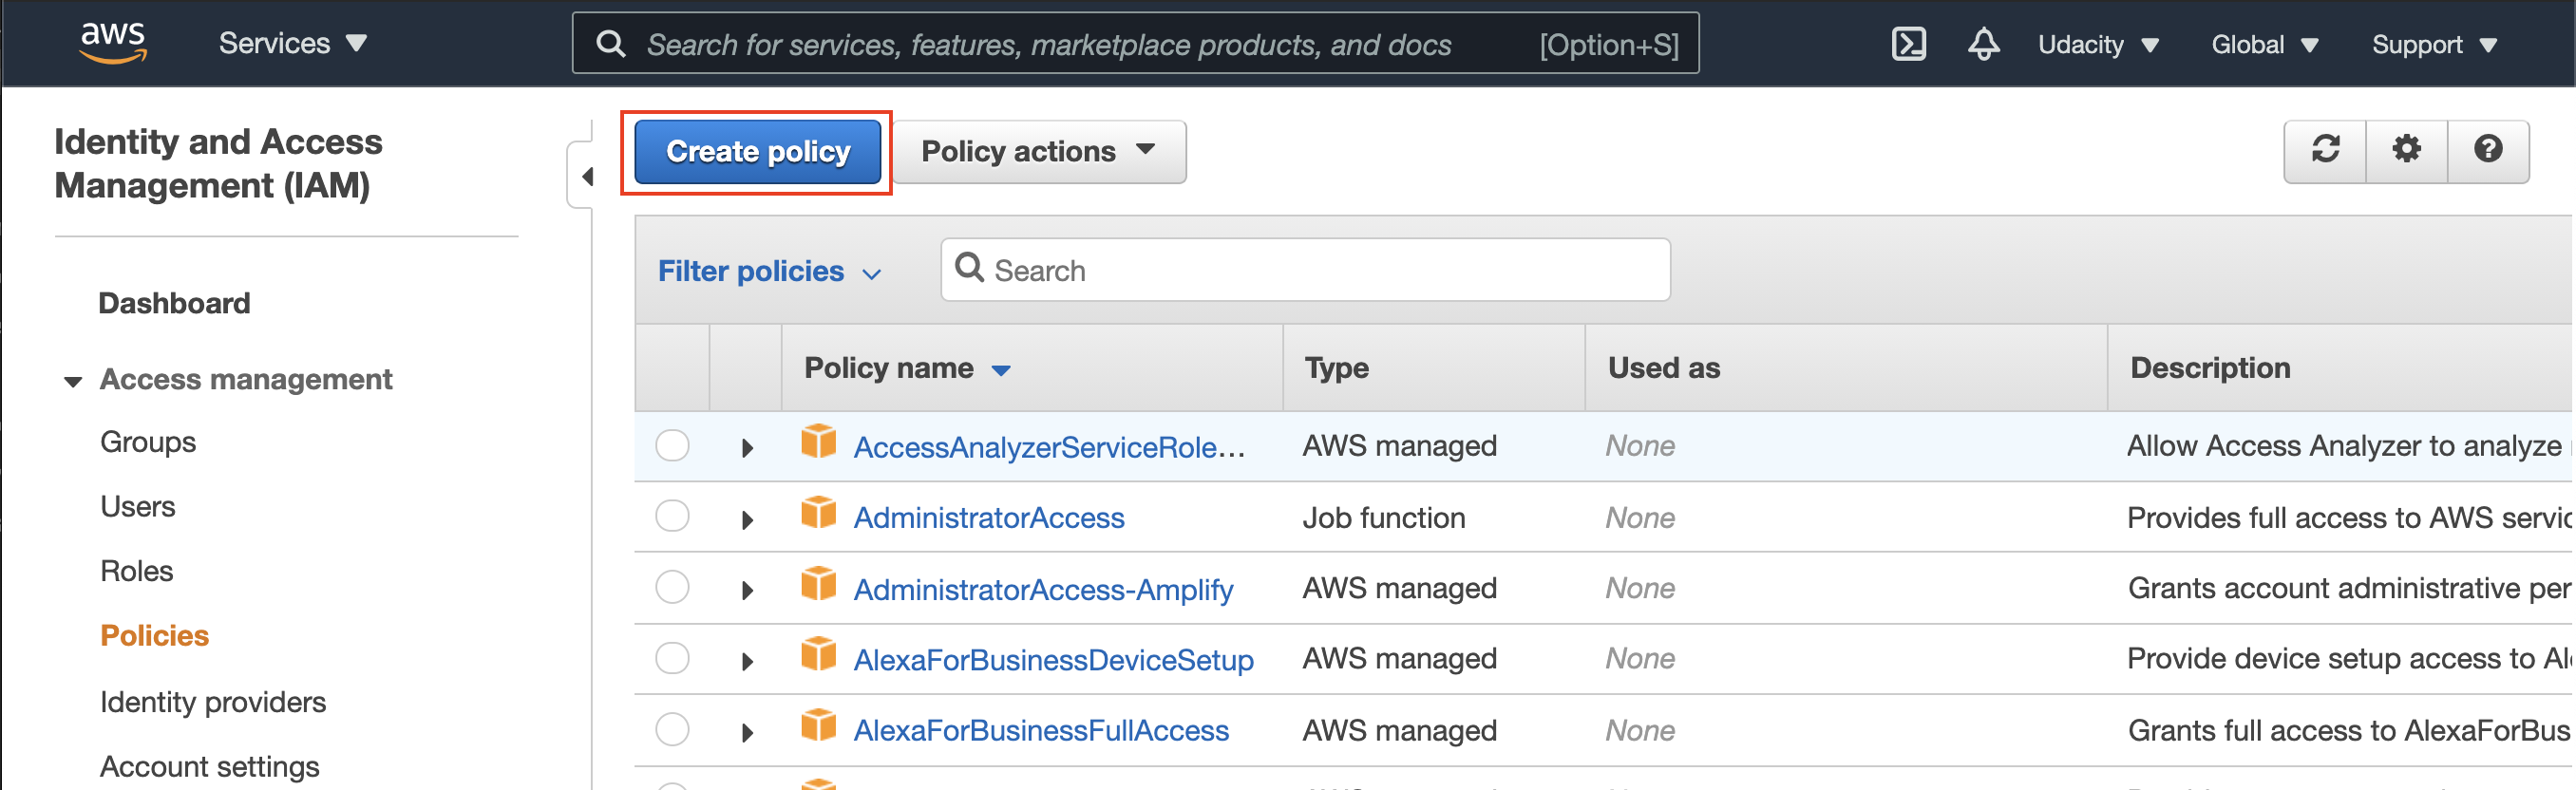
Step 1. Create a Policy
- Navigate to the IAM service, and select the IAM Policies dashboard.
- Click the Create policy button to launch the wizard.
Create a new policy
- In the Service section, click Choose a service and select S3.
- In the Actions section, under the Access level
- Select the checkbox to allow all List operations.
- Expand the Read action, and then select
GetObject.
- Next in the Resources section, ensure that Specific is selected, and select the Any checkboxes next to the bucket.
- Click on the Review policy button on the bottom right.
- Provide a name of your choice to your policy, and review the policy.
- Complete the process by clicking on the Create policy.
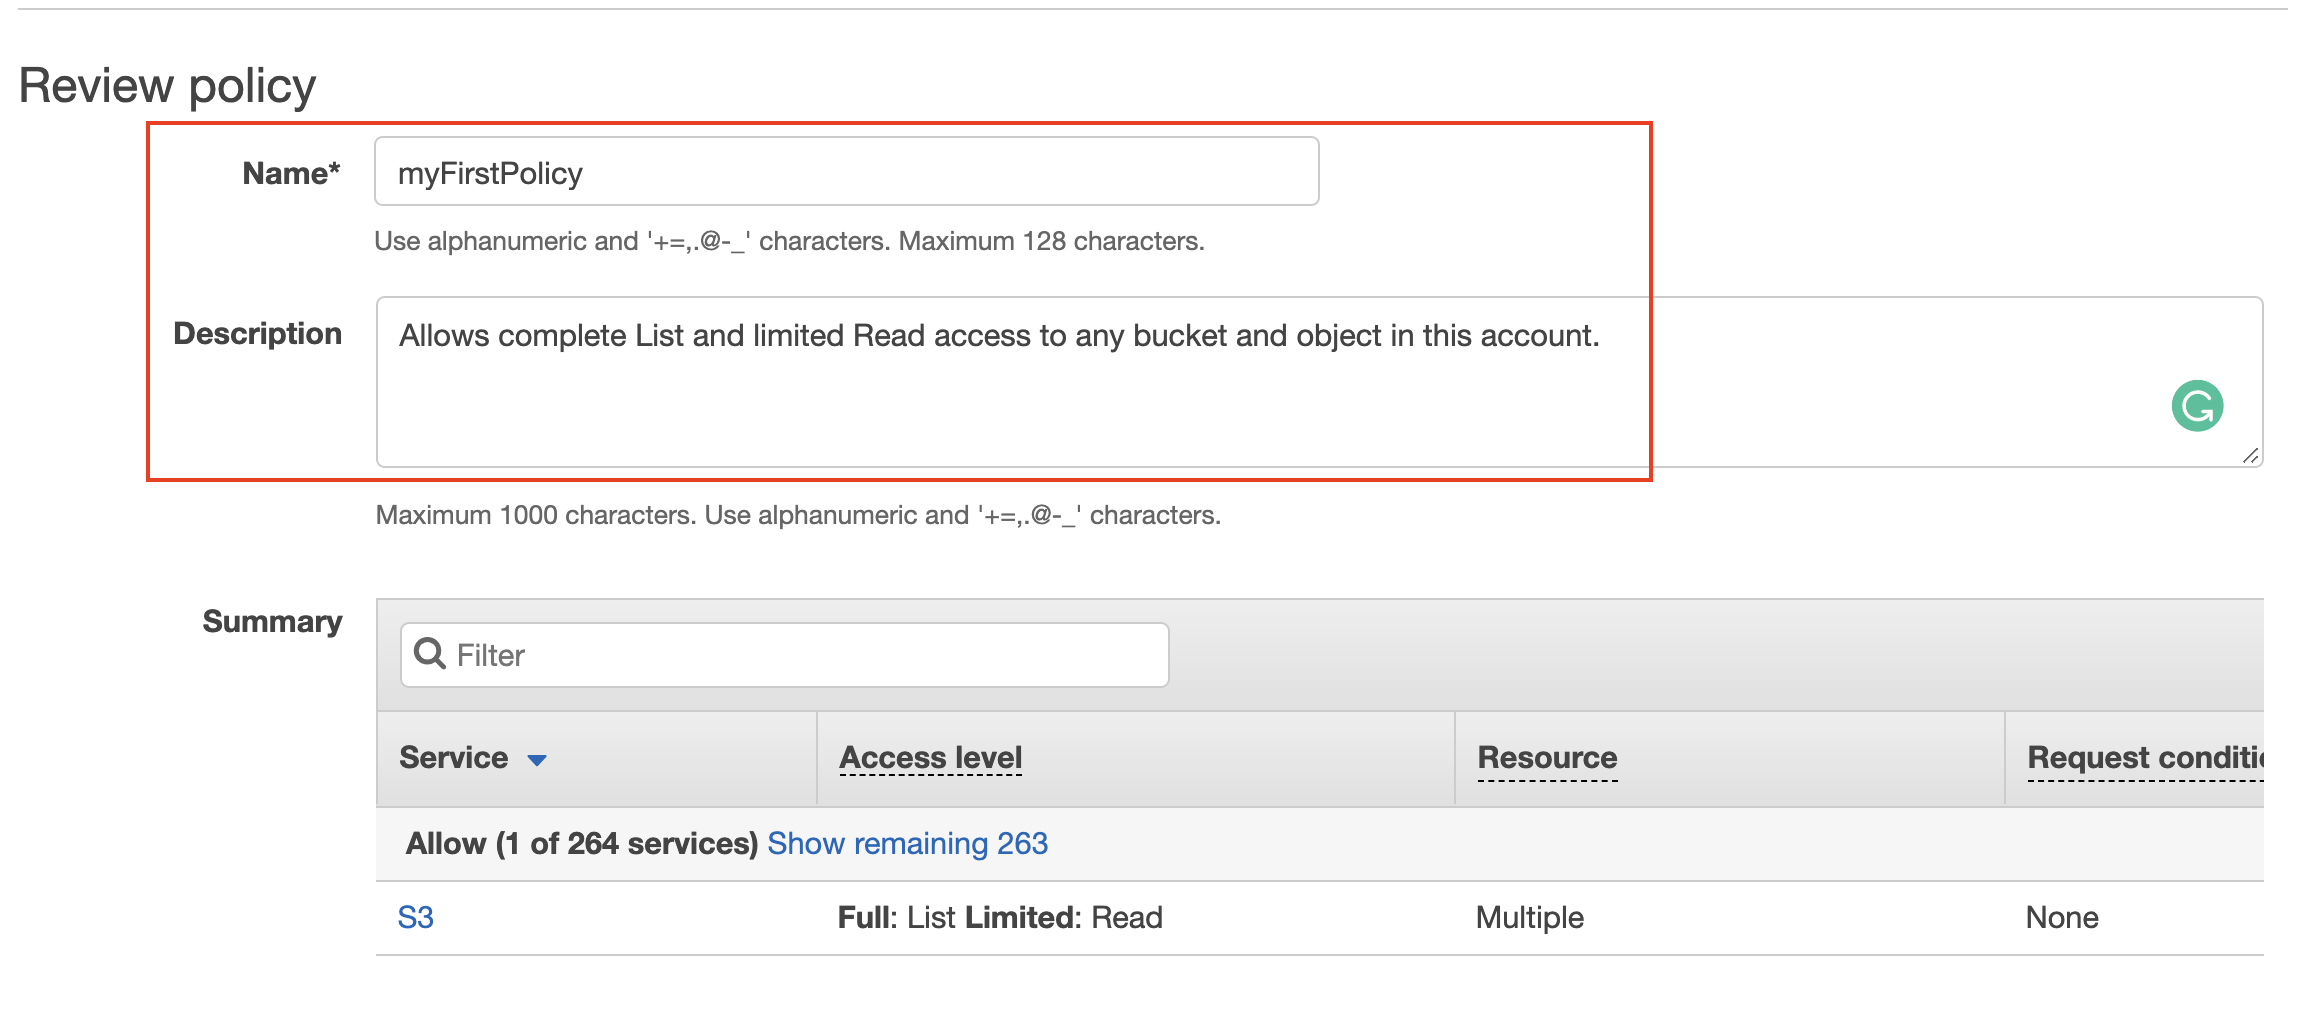
Provide a name and description of your new policy
Step 2. Review Policy
- After your policy is created, go back to the IAM Policies dashboard. Enter the name of the policy you just created in the Filter policies text box.

Filter the newly created policy
- Click on the name of your policy.
- Review the JSON for the policy you just created on the
Permissionstab. - Click on the
Policy usagetab to see if this policy is in use. Notice that this policy is not attached to any resources yet.
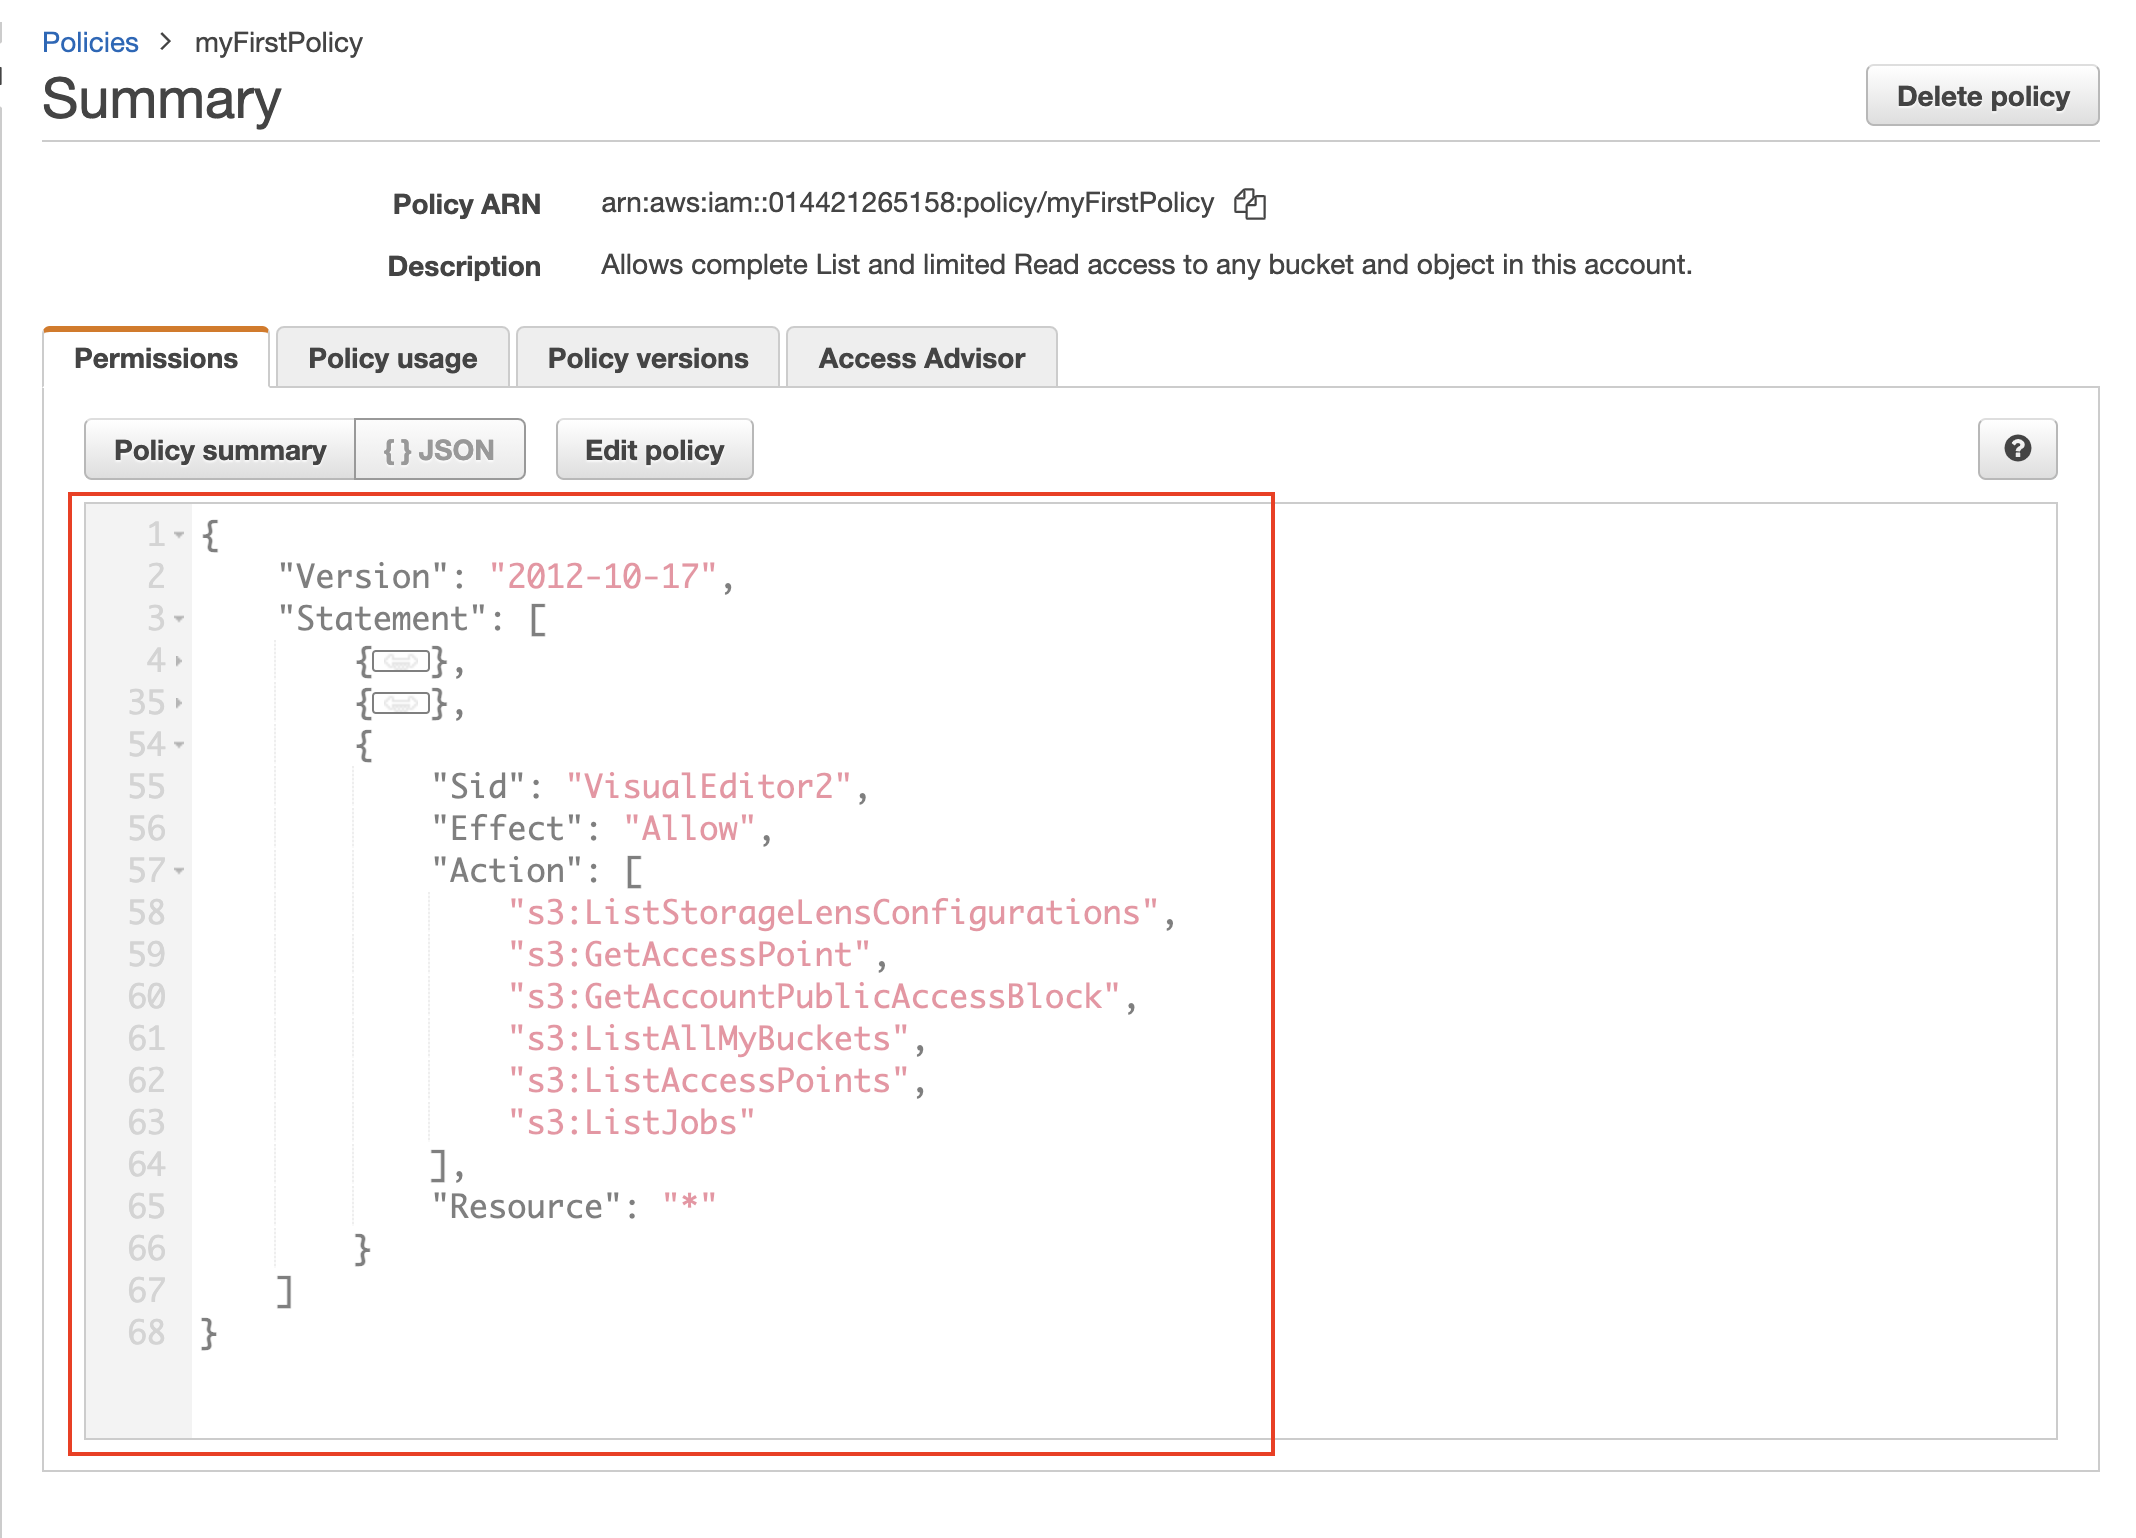
A sample JSON file constituting the policy. Now, you can attach this policy to any user or other AWS service.
- Each resource in the AWS gets a unique identifier, ARN. The newly created policy will also get its ARN, such as,
arn:aws:iam::014421265158:policy/myFirstPolicyshown in the snapshot above.
In the previous lab, you learned to create a custom policy that can allow users to access a specific set of services with defined permissions. Let's learn to attach the custom policy to a new user.
Prerequisites:
- An AWS account
- A sample IAM policy should be present in your account
Topics Covered:
- Using the AWS console, create a new IAM user with custom permissions
- Change the mode of access and attach another policy to an existing user
Step 1. Create a new IAM user
Let's create a new IAM user who would be allowed to interact with services in your AWS account as an administrator. The AWS allows us to choose if the new user should be granted a Programmatic access, or AWS web console access. The permissions to a user are granted in form of Policies, which are JSON documents. The AWS web console provides a pre-created list of policies to choose from.
- Navigate to the IAM console, and access the IAM Users service. Start the Add user wizard, as shown below.
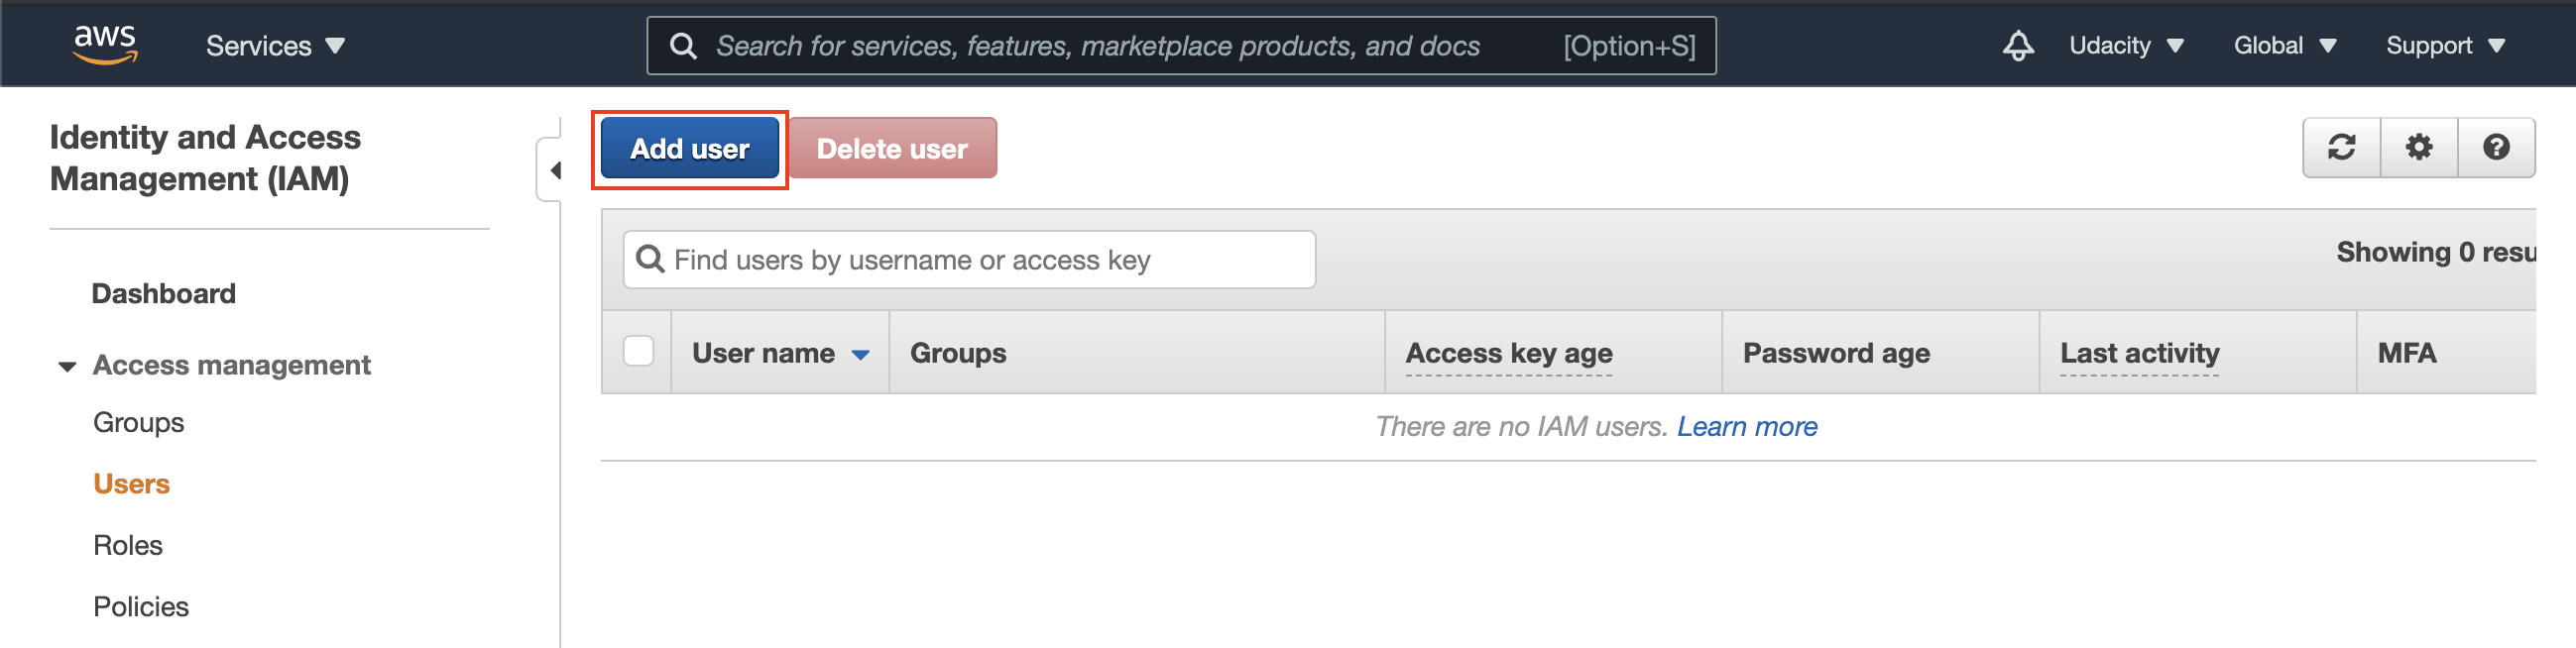
Launch the Add user wizard
- Set the user details, such as the name, and access type as Programmatic access only.
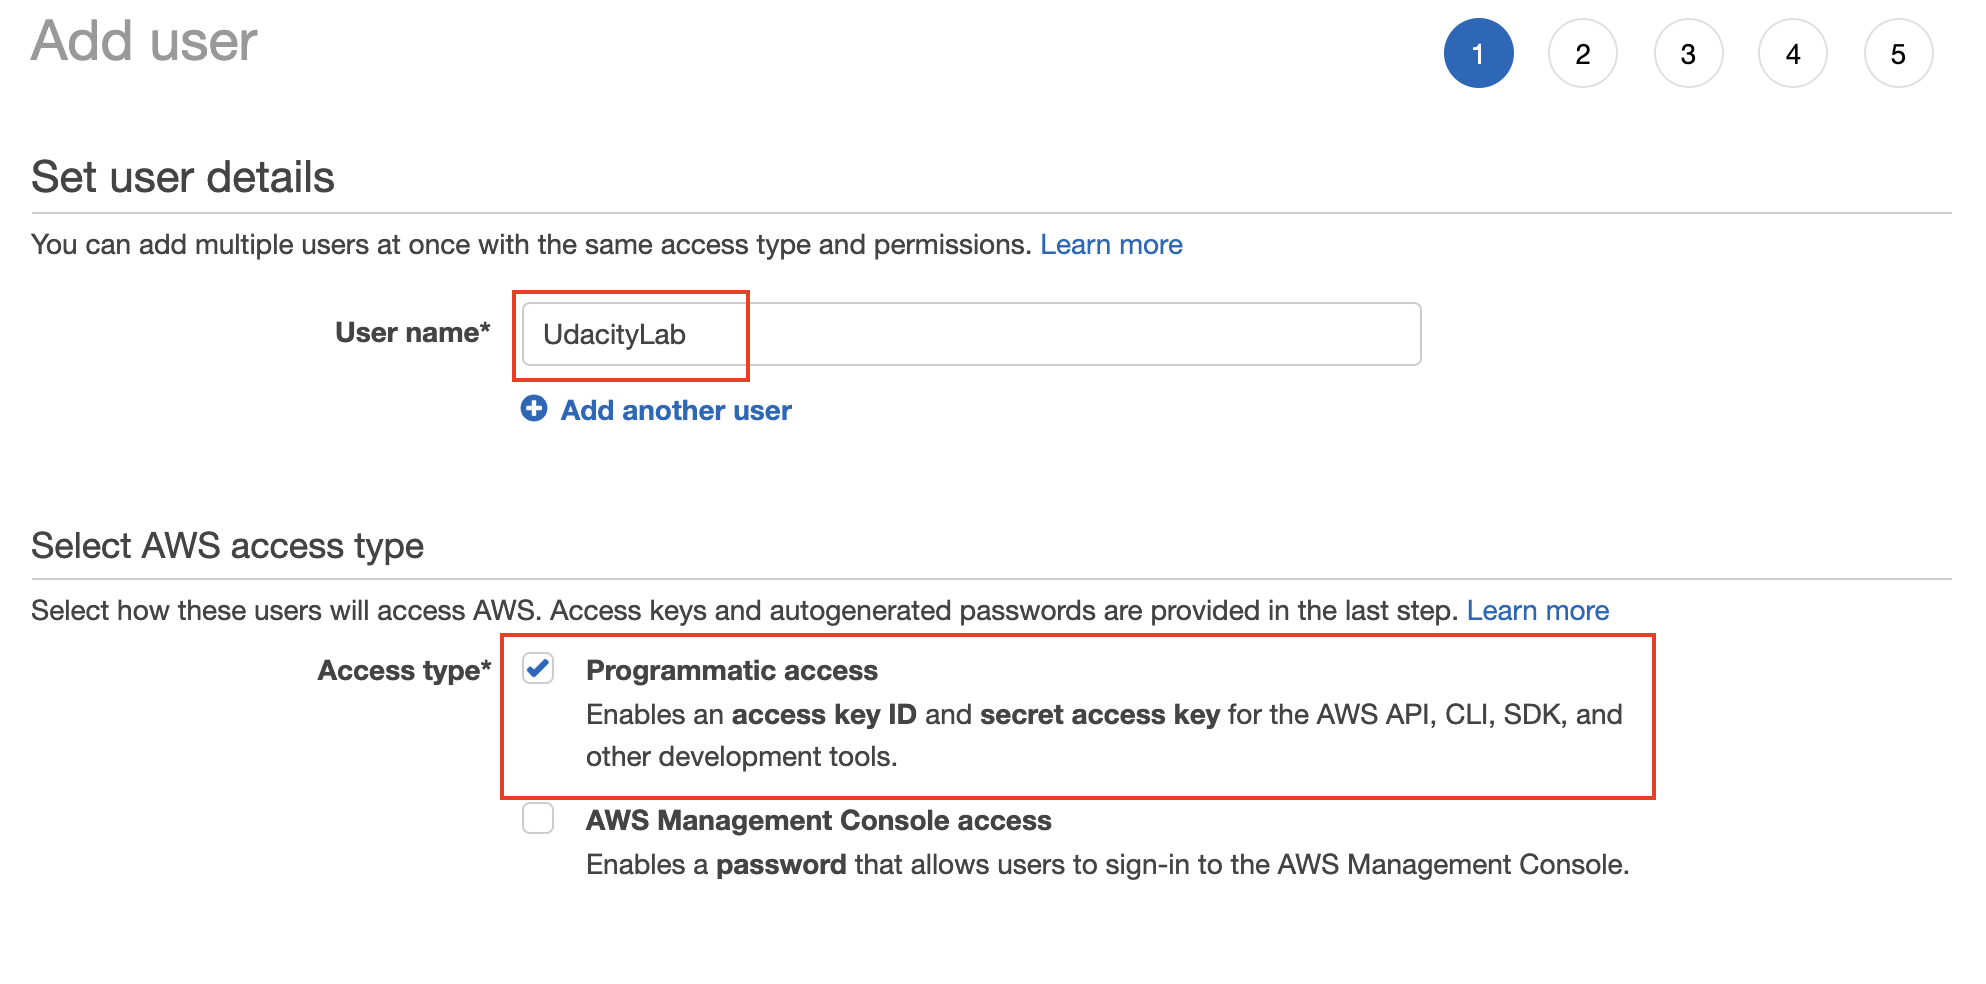
Set the user name, and type (mode) of access. For this exercise, select the programmatic access. However, you can experiment with the console access as well.
- Set the permissions to the new user by attaching the newly created policy. Though, the AWS provides three ways to grant permissions:
- Add the user to an existing group that has a defined set of permissions
- Copy the permissions from an existing user
- Attach any existing policies to the new user. AWS provides and manages a set of pre-defined standard policies.
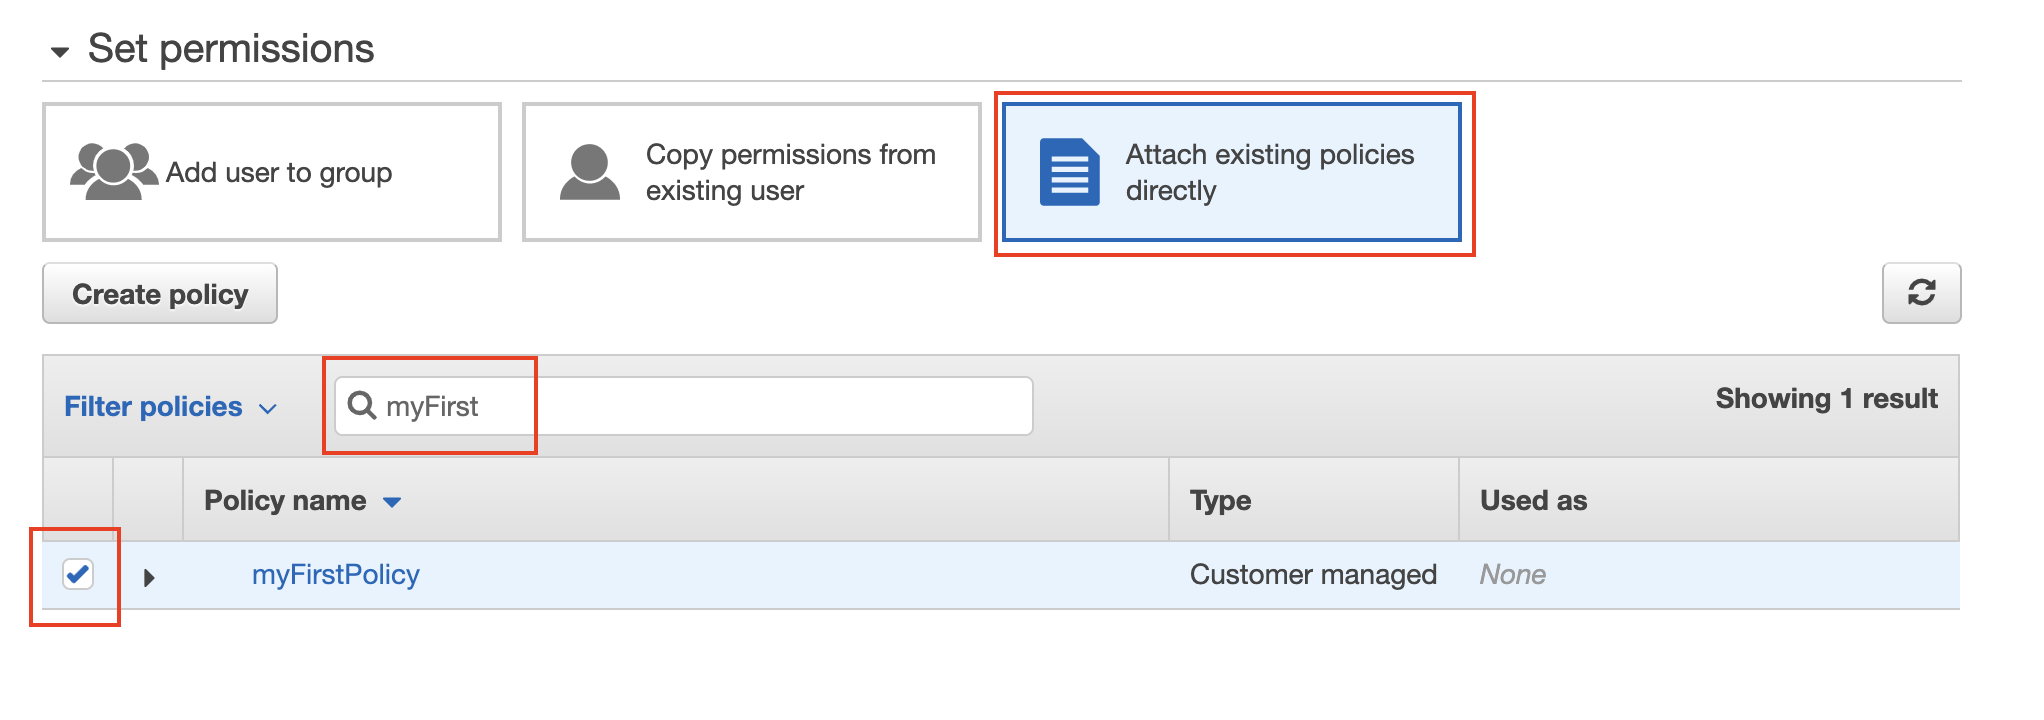
Attach the newly custom policy to the new user
- Provide tags [optional], review the details of the new user, and finally create the new user.
- Download the Access key file (.csv) that contains two items: an access key ID, and a secret. We need this file while trying to access the AWS services from the command-line tool.
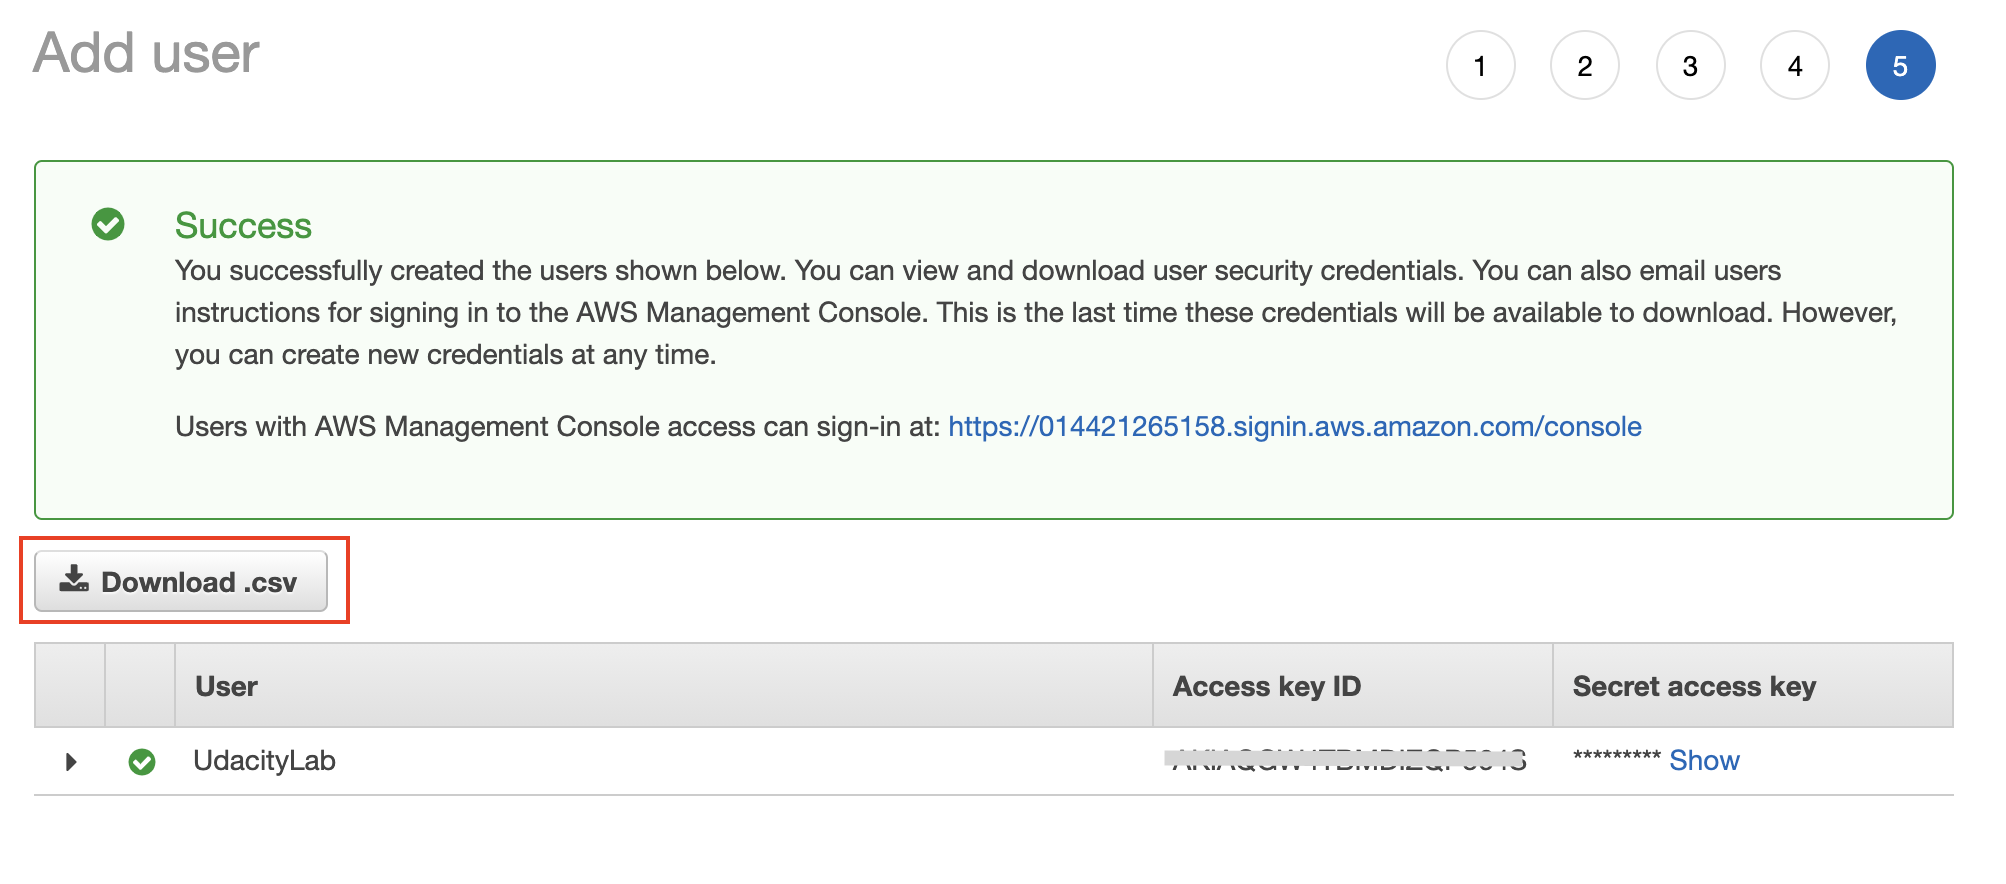
After a user is created successfully, download the access key file (.csv) containing the access key ID and a secret. In the upcoming lesson, we will learn to configure the command-line tool (AWS CLI) with these credentials.
Step 2. Review the new user
- Navigate back to the IAM Users dashboard, select the newly created user to view its details.
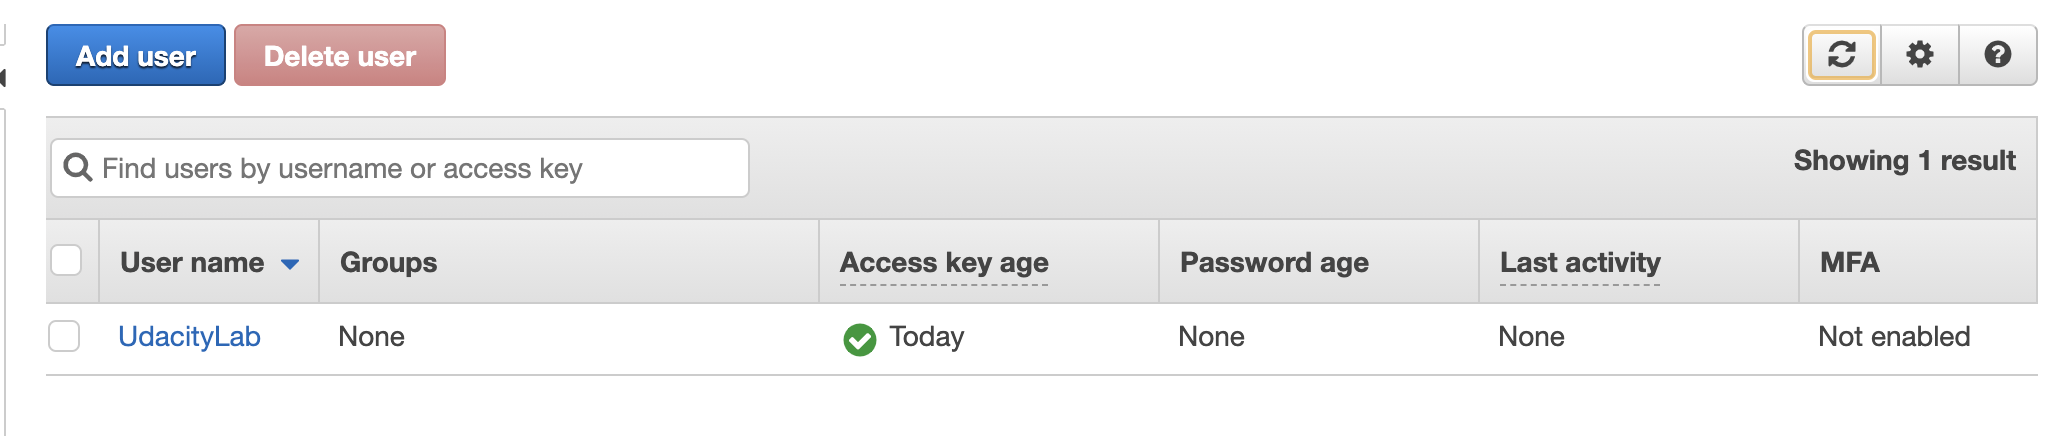
Select the new user to view its details
- View the details of the newly created user. Particularly, check the Permissions, Security credentials, and Access Advisor tabs to see the list of services that this user can access.
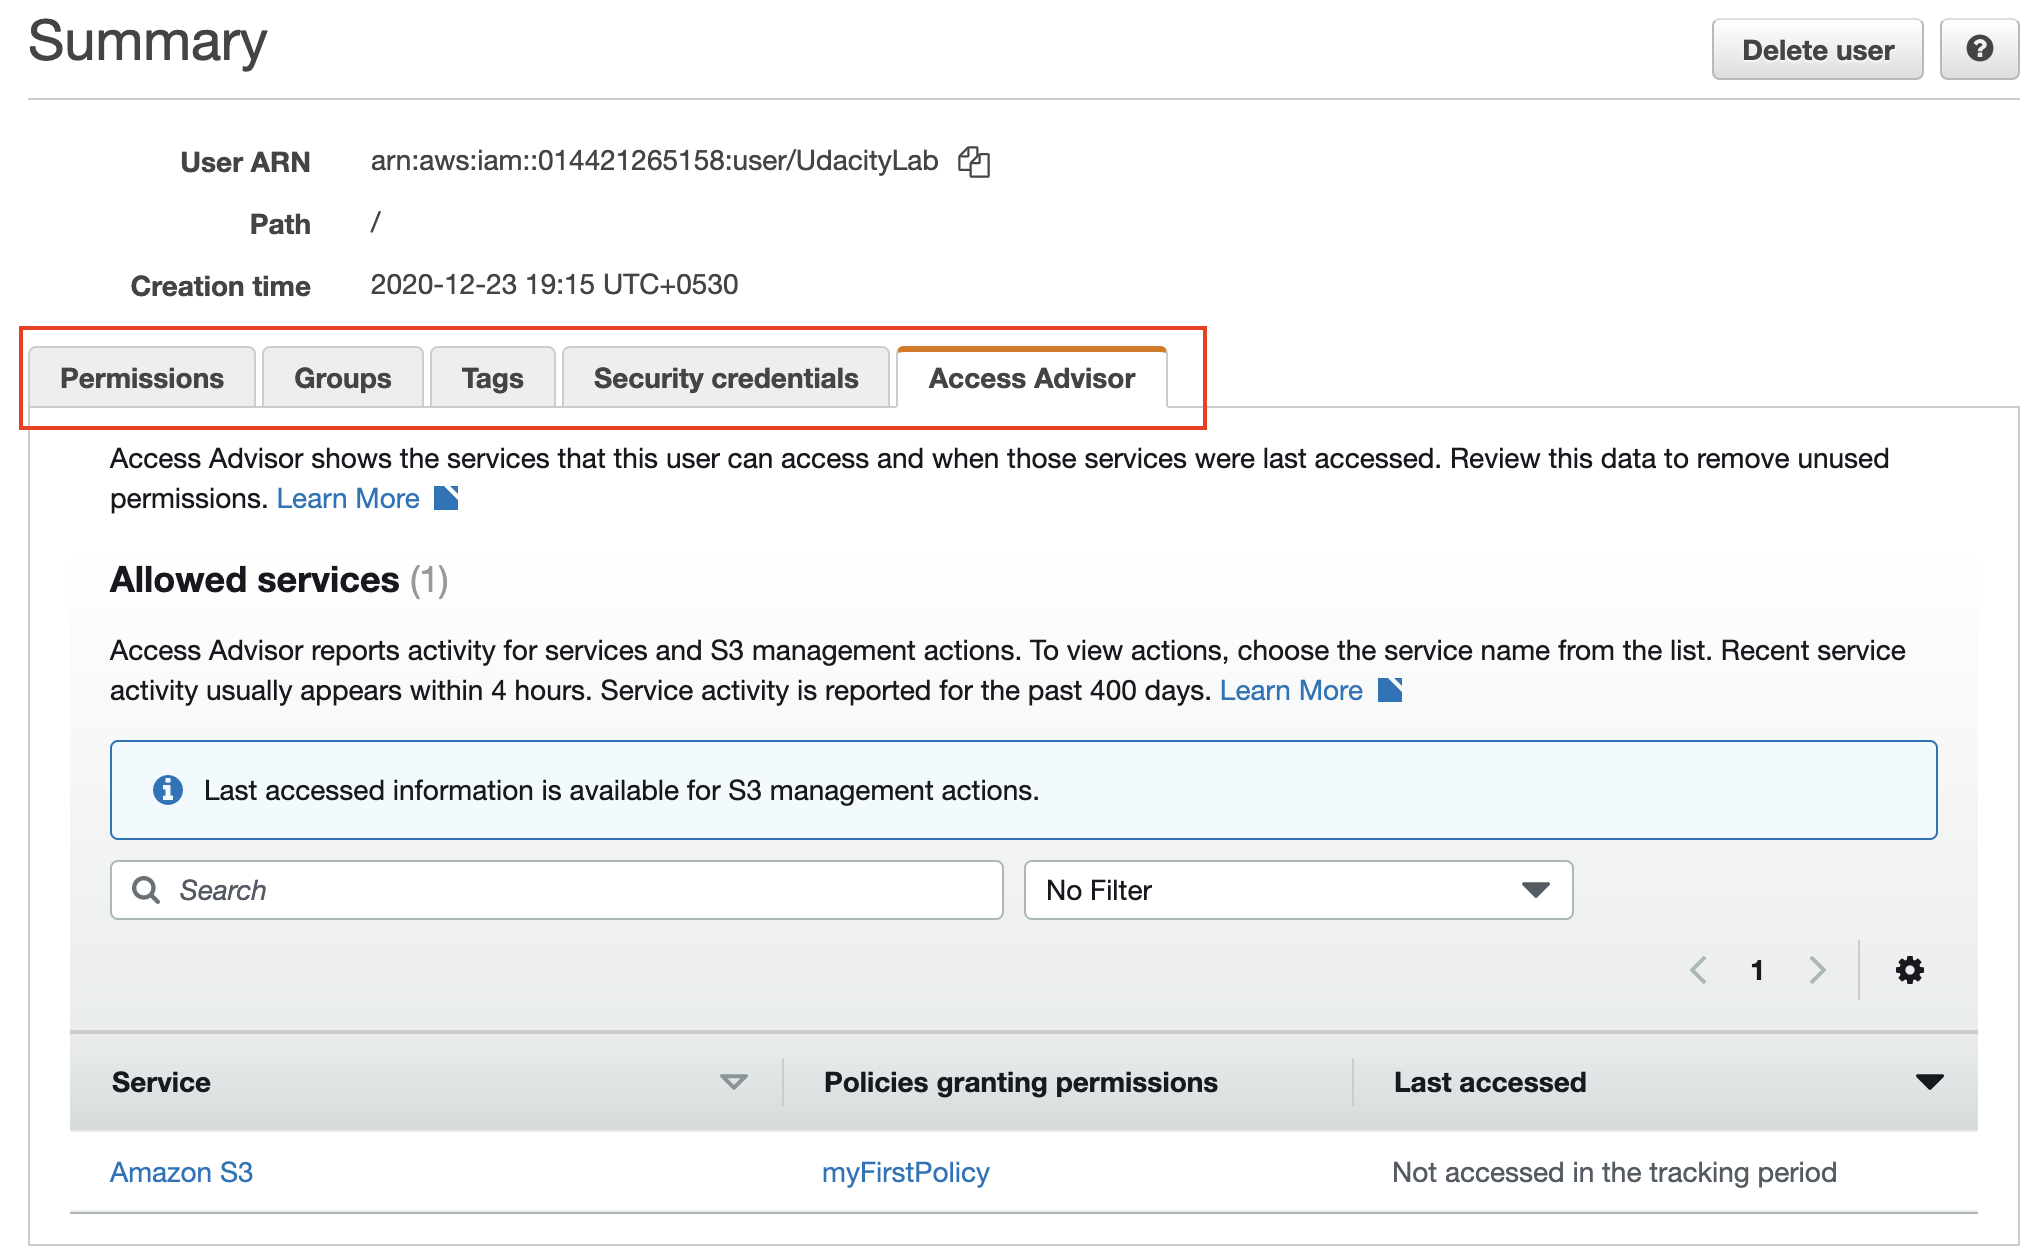
Summary of the newly created user
Step 3. Change the mode of access and attach another policy
In the previous steps, we attached a policy while creating a new user. However, you can attach/detach a policy even after a user is created. Let's try to do the following to the current user:
- Enable the AWS web console access
- Go to the Security credentials tab, and click on Manage the console password.
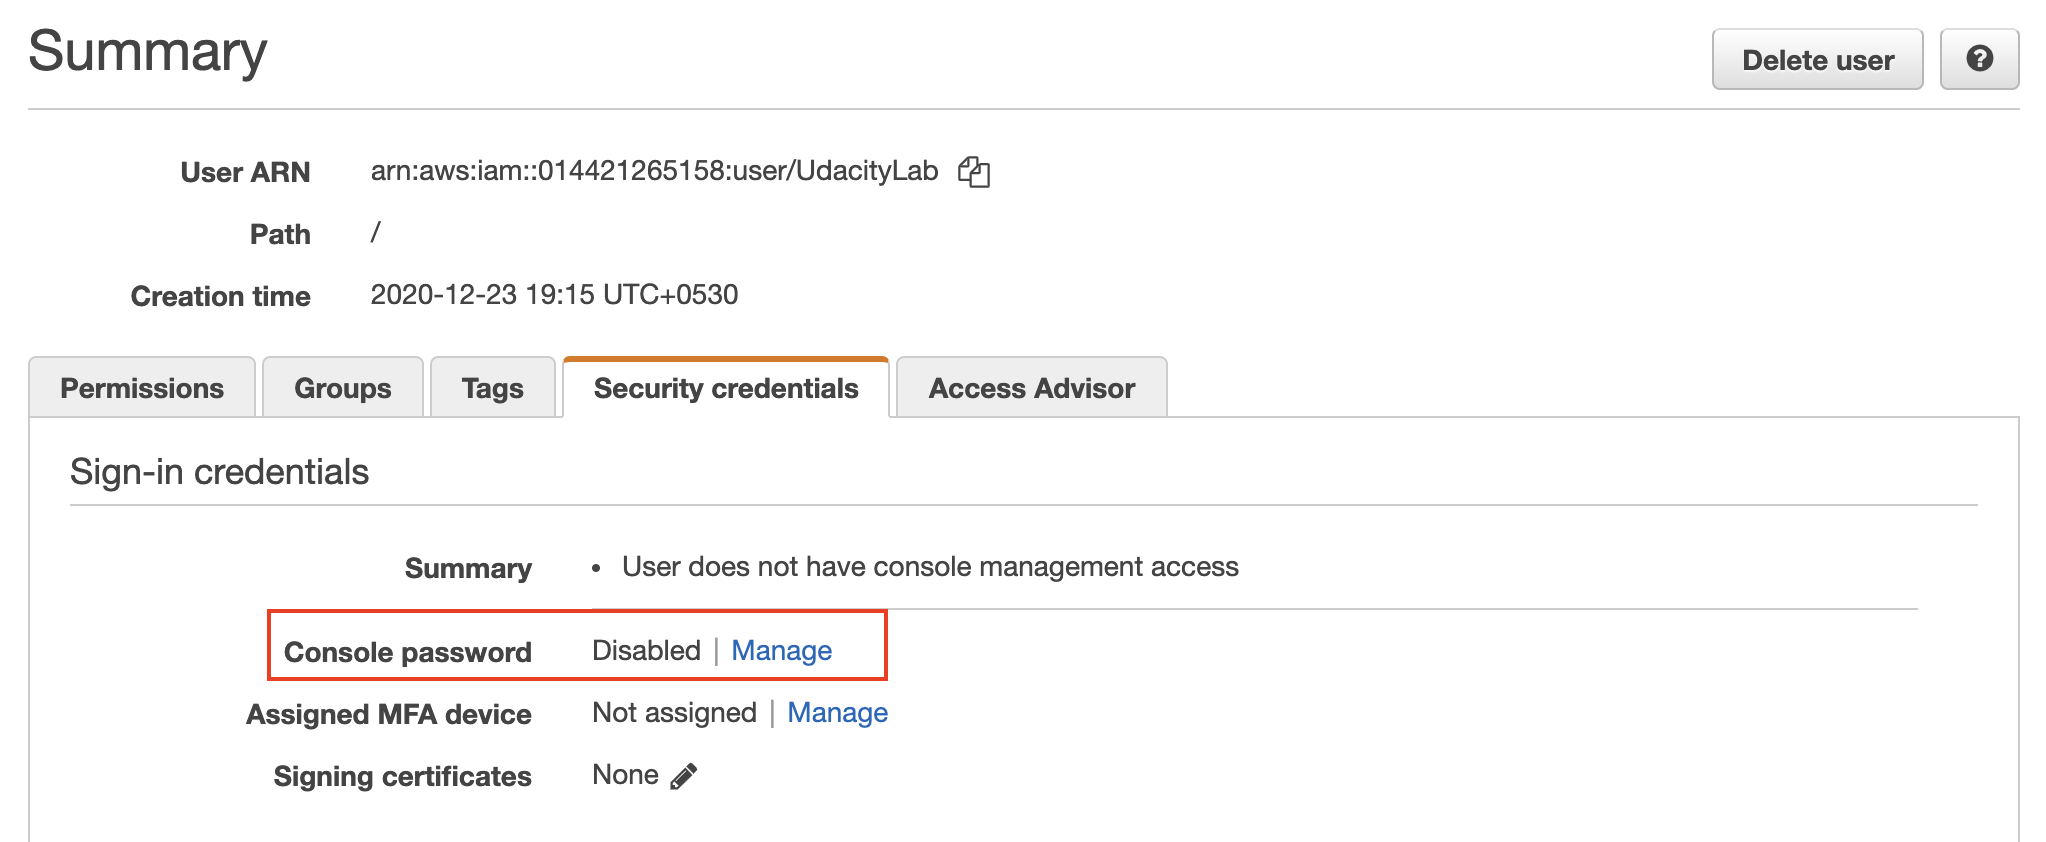
Manage the console access
- Enable the console access, and save the login credentials.
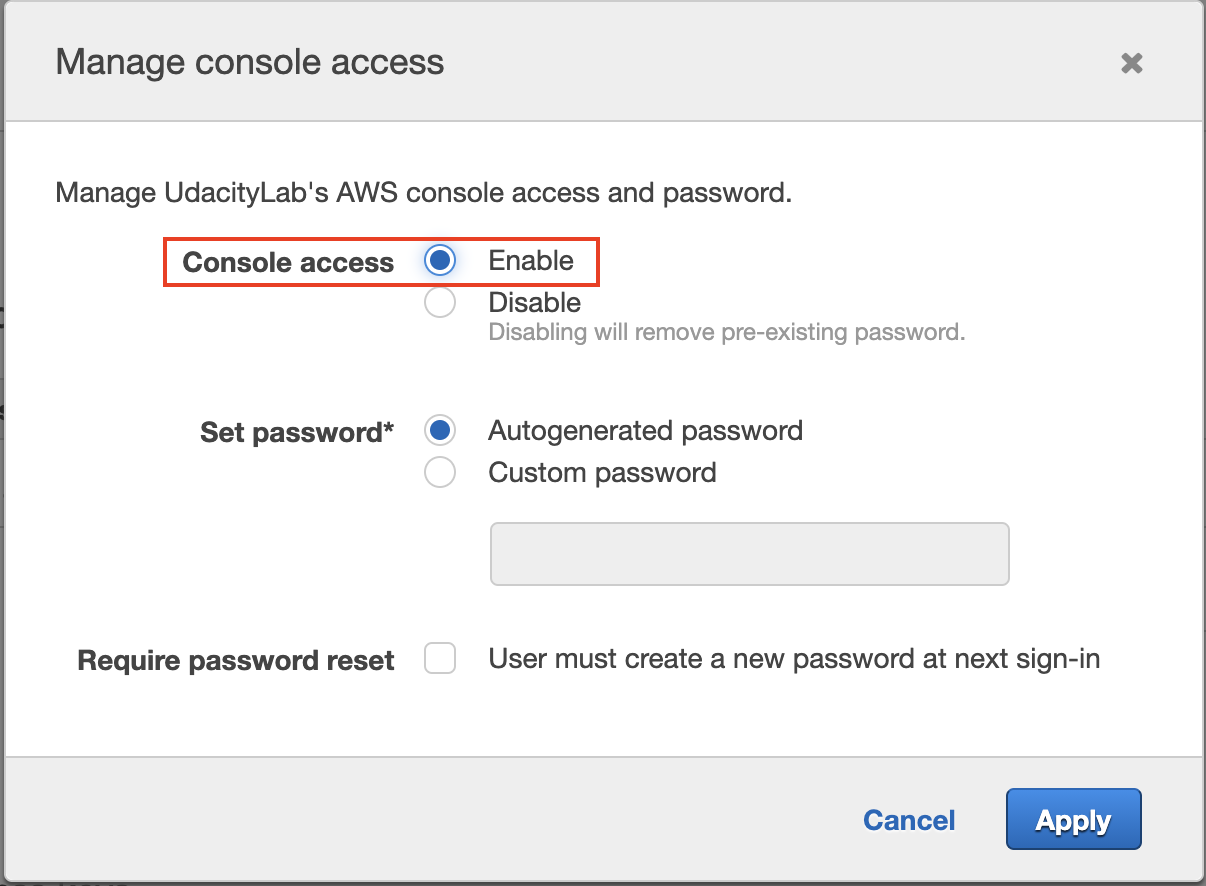
Enable the console access
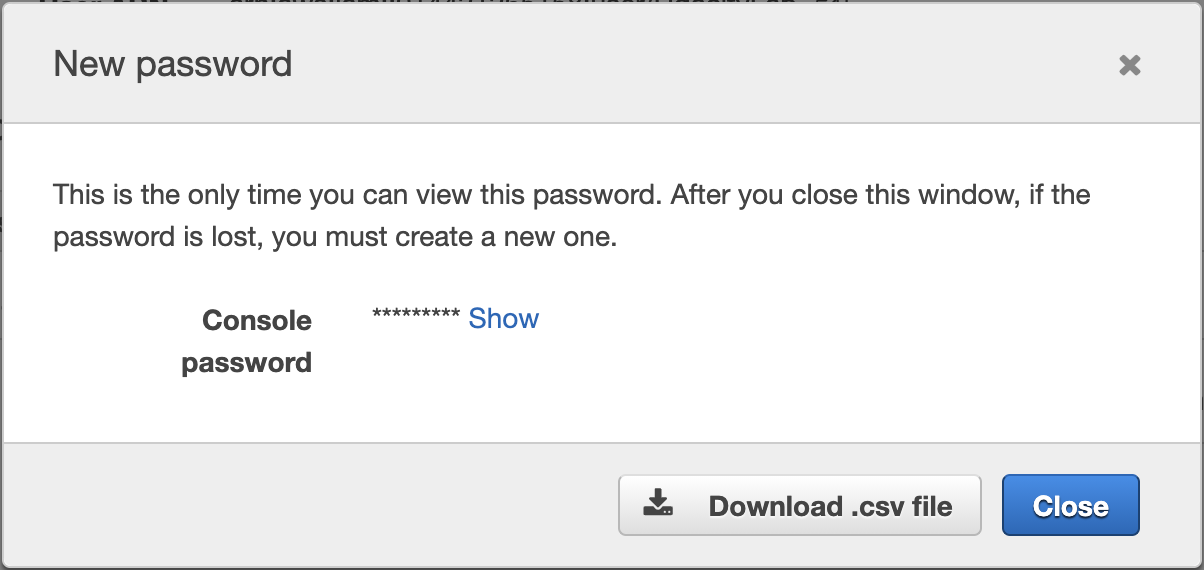
Save the new user's login credentials. The .csv file will contain three items: User name, Password, and Console login link
-
Attach the AmazonRDSFullAccess AWS managed policy
- Go back to the Permissions tab, and select Add permissions.
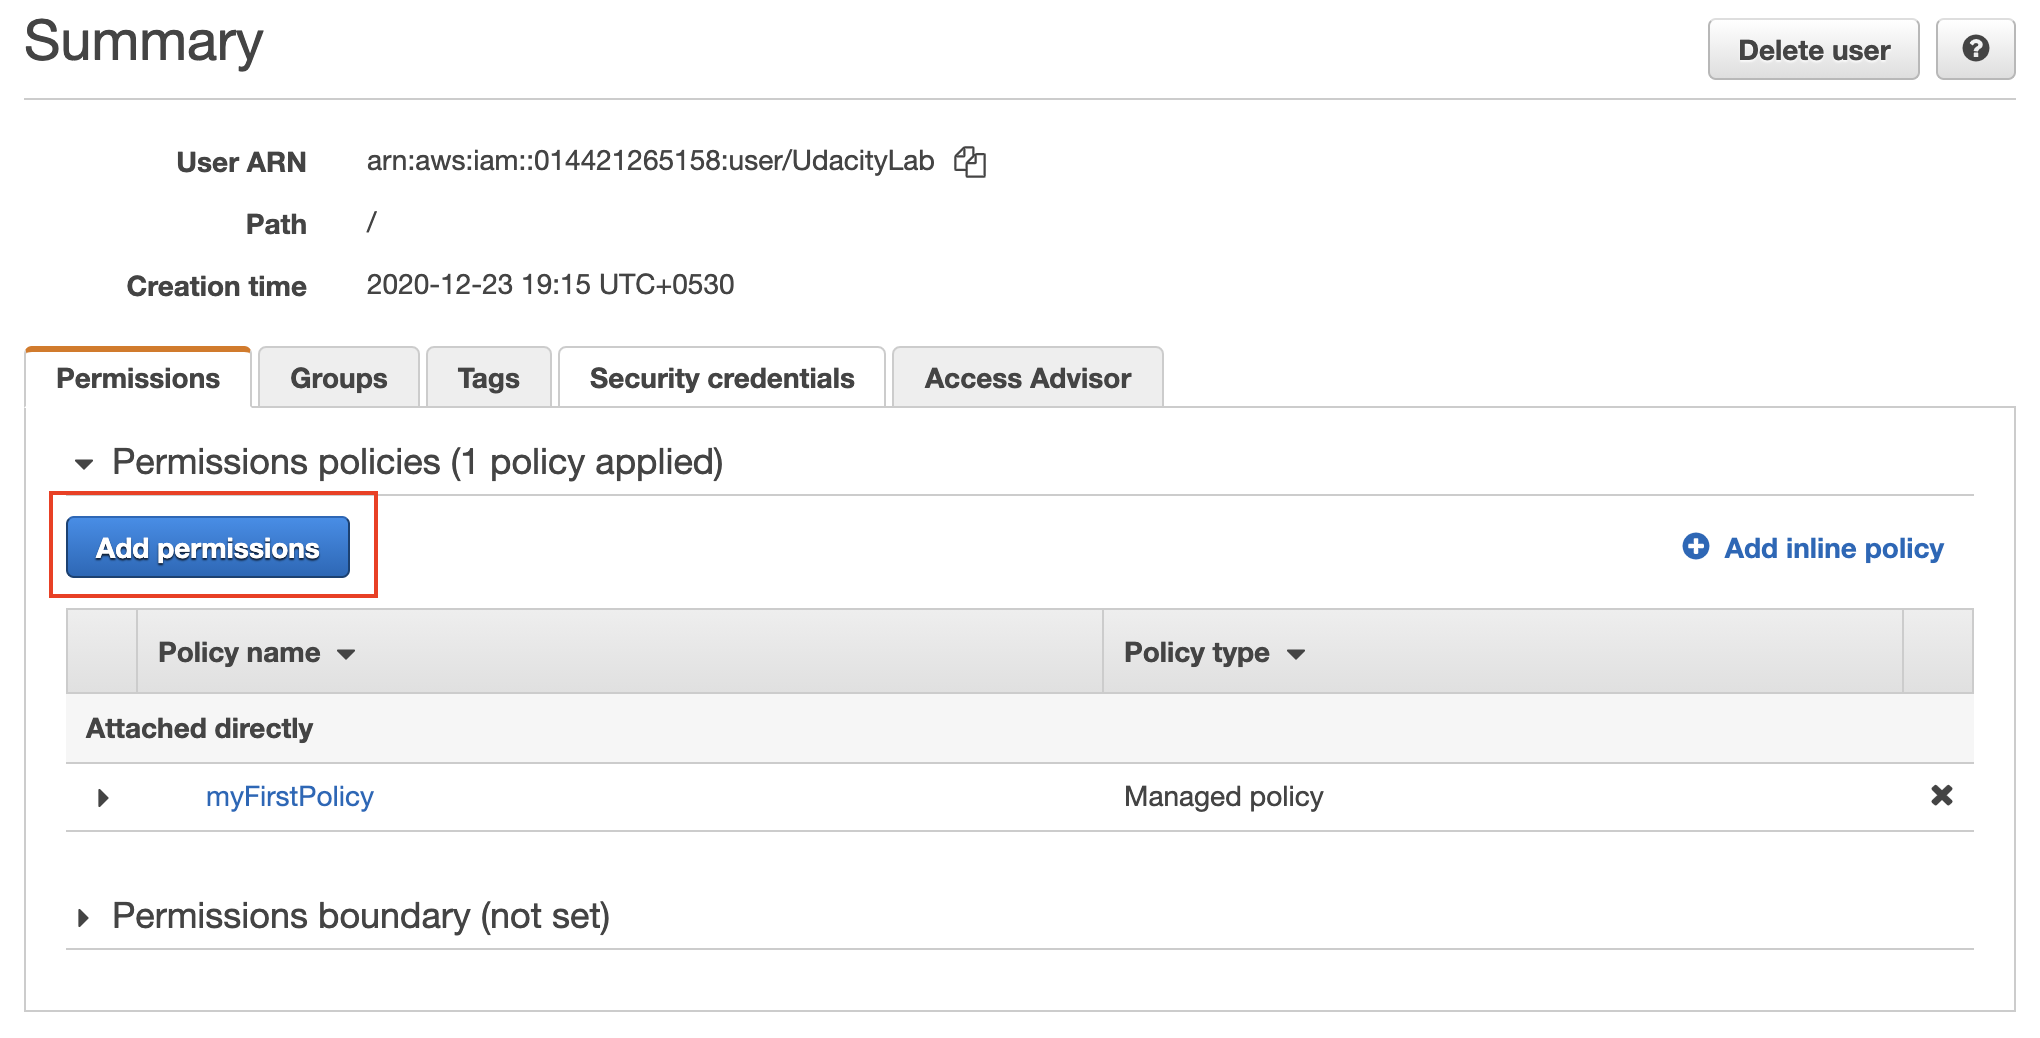
Add new permissions to an existing user
- Attach the AmazonRDSFullAccess AWS managed policy that will provide full access to AWS RDS service via the AWS web console.
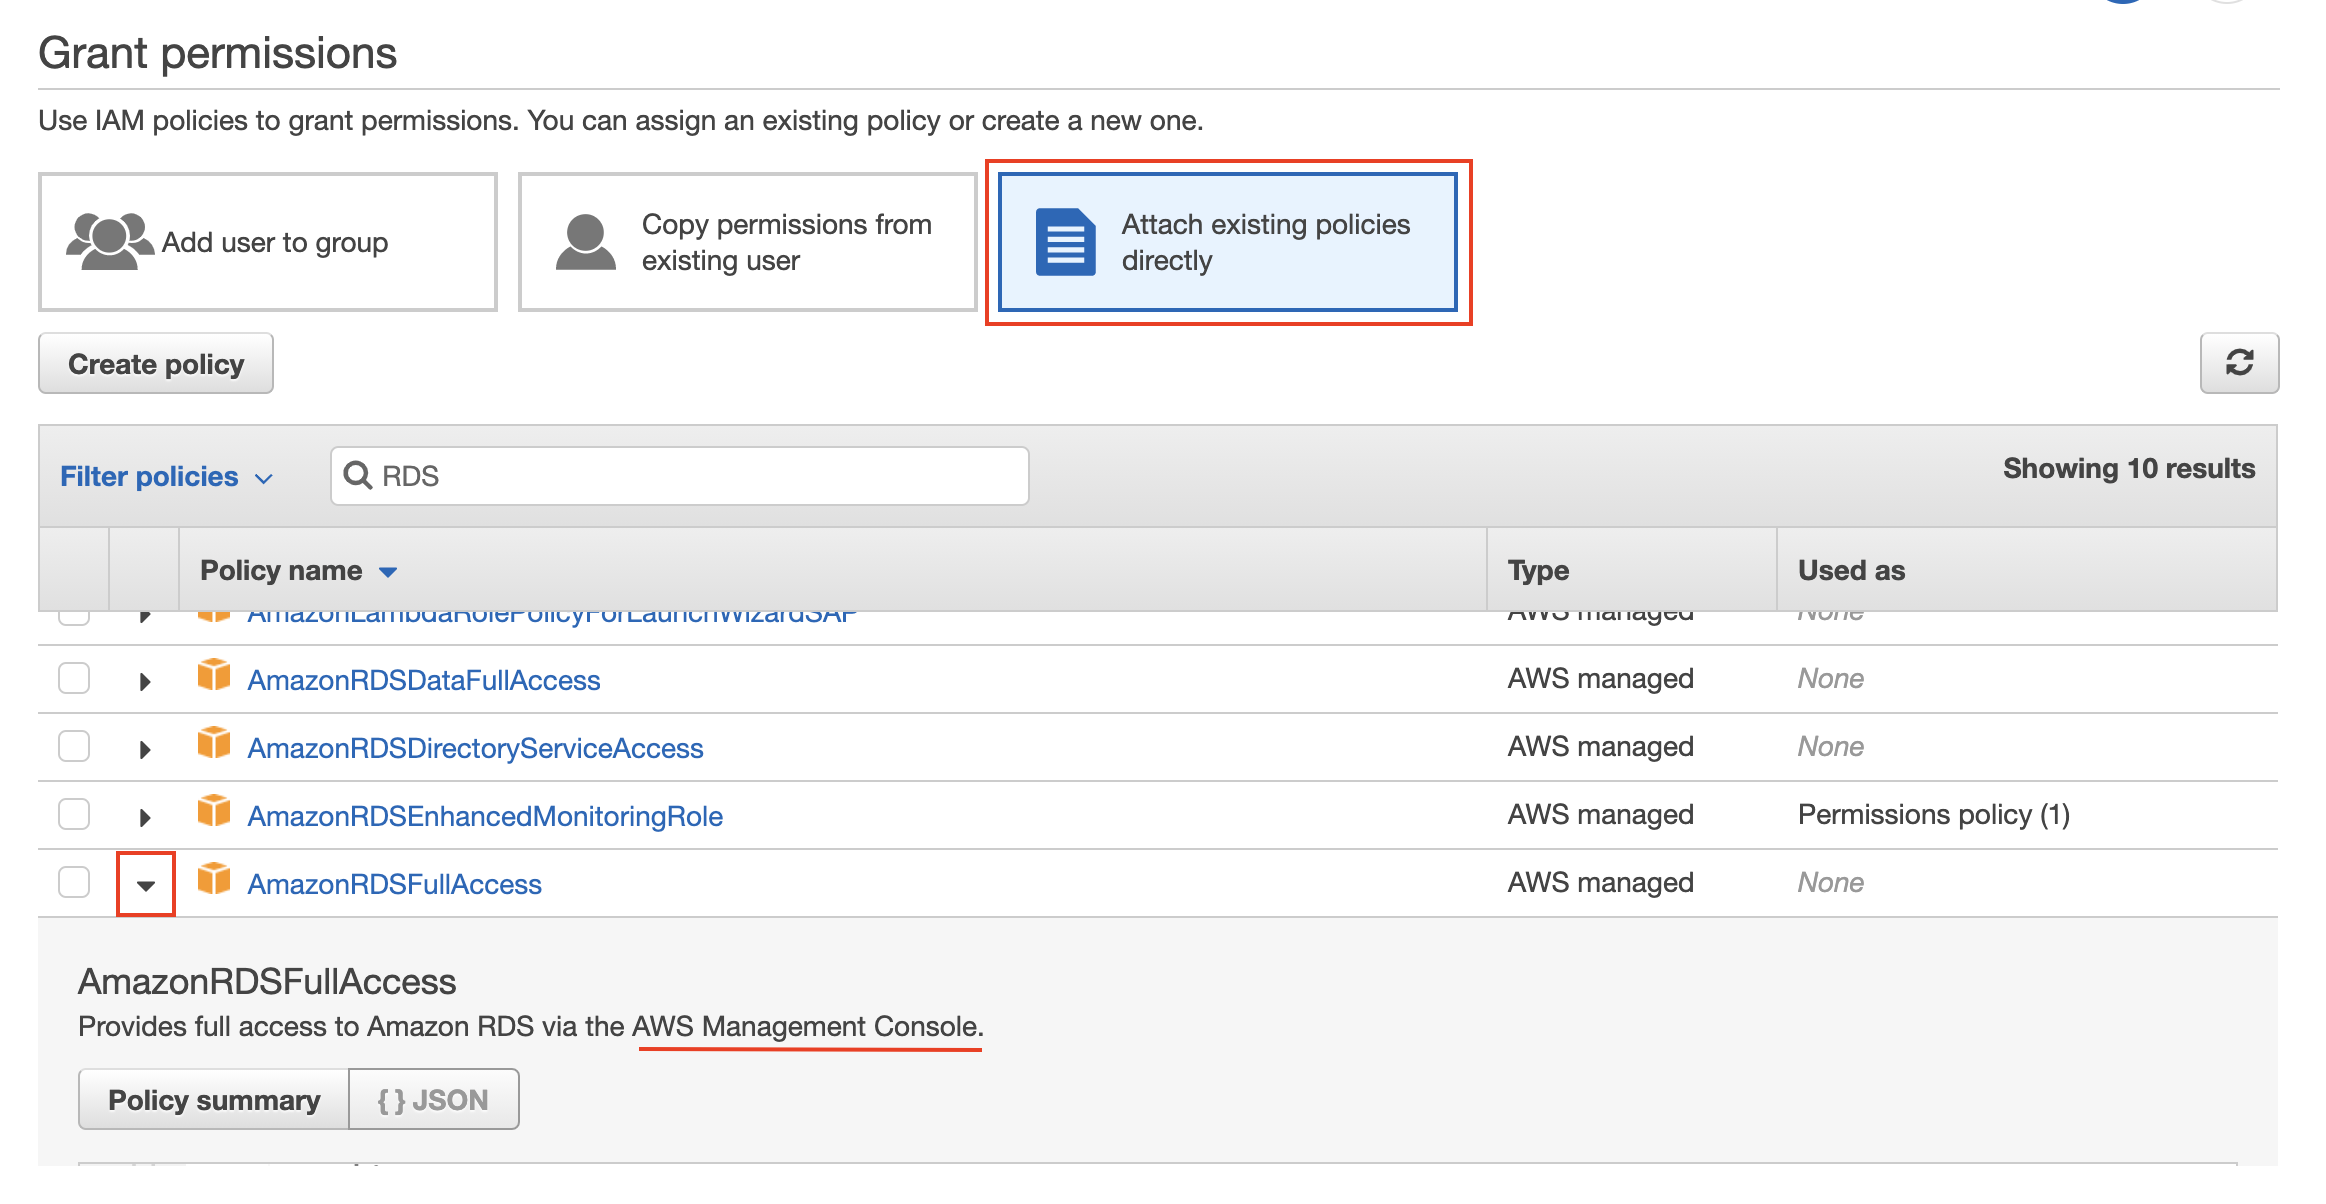
Attach AmazonRDSFullAccess policy to the current user
- Review and add the permissions
- Check the Access Advisor tab again to review the new policies attached to the current user.
Step 4. Log in to AWS management console as an IAM user
Recall that you have saved the new user's login credentials (.csv file) containing three items: User name, Password, and Console login link.
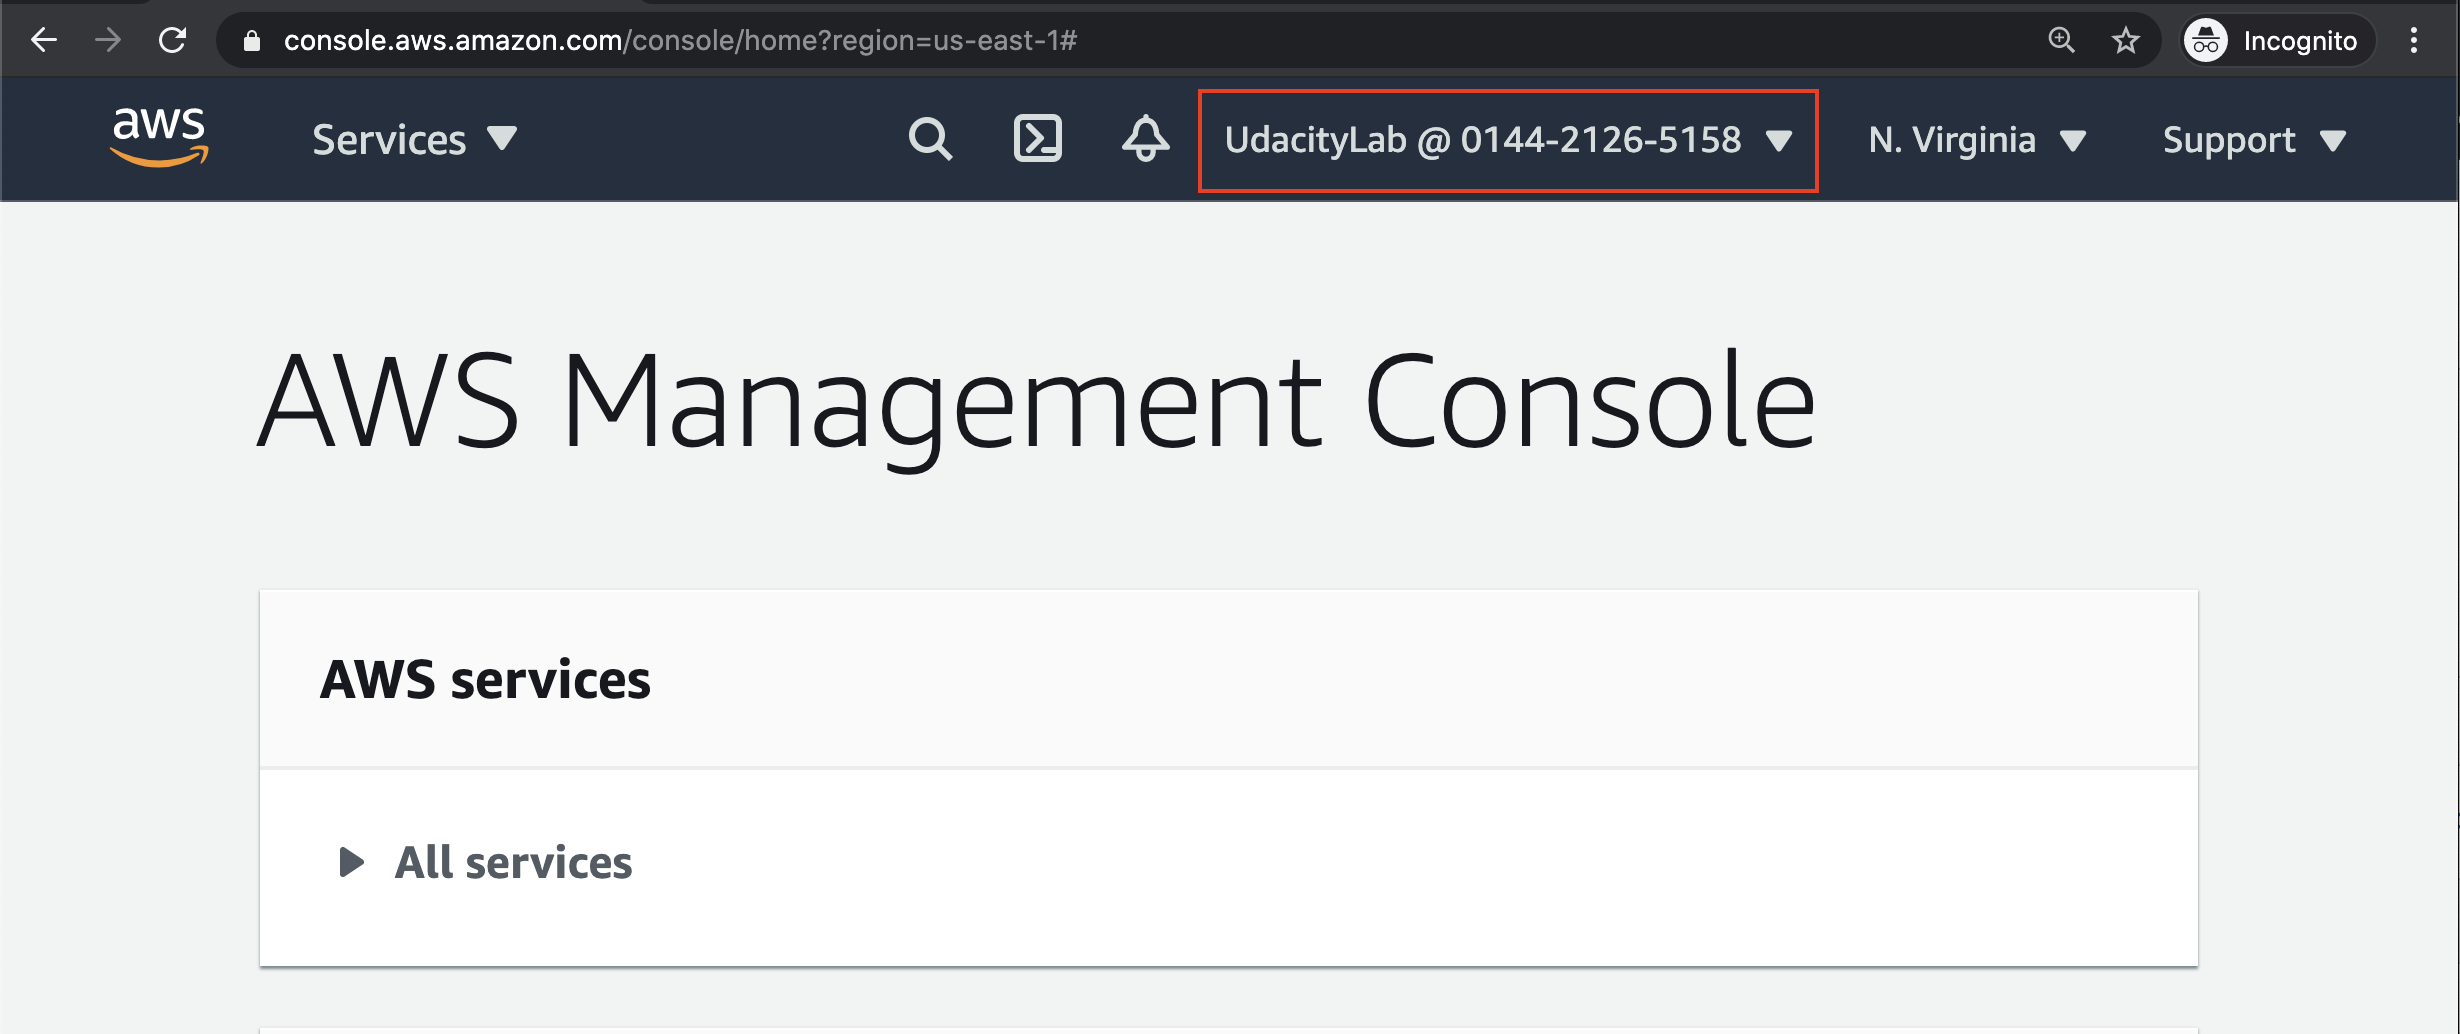
- Using an incognito browser, go to the console login link provided to you, or go to the standard AWS console sign-in page.
- Provide the Account ID, IAN user name, and password.

Log in as an IAM user
- Verify that you are logged in as a new IAM user.
Logged in as an IAM user
- Once the exercise is complete, do not forget to delete the custom policy and the new user you created in the steps above. You would have to logout as an IAM user and then log back into the AWS web console as a root user to do so. Once you are in the IAM service dashboard, the ideal order of deletion would be:
- Detach the policy from the IAM user
- Delete the IAM user
- Delete the IAM policy