一、代理模式
代理模式的分类:
- 静态代理
- 动态代理
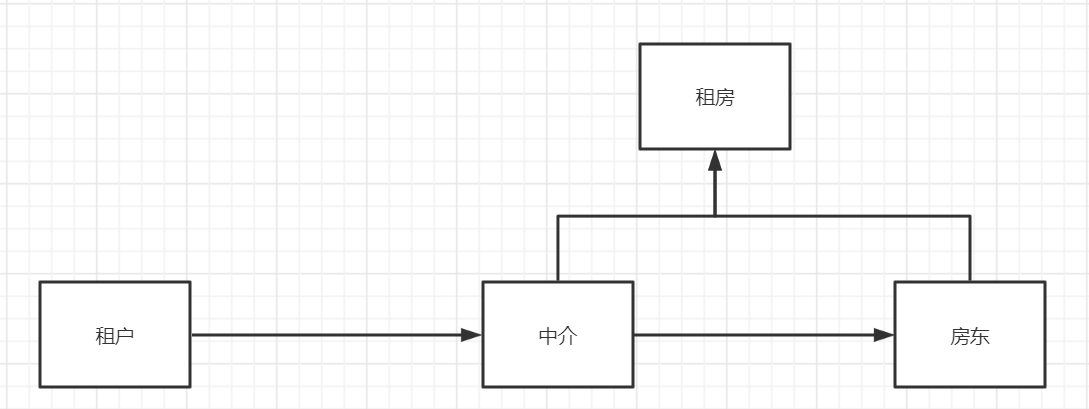
从租房子开始讲起:中介与房东有同一的目标在于租房
1.静态代理
静态代理角色分析:
-
抽象角色:一般使用接口或者抽象类来实现(这里为租房接口)
public interface Rent { void rent(); } -
真实角色:被打理的角色(这里为房东)
public class HouseMaster implements Rent{ public void rent() { System.out.println("房东租房啦!"); } public static void main(String[] args) { HouseMaster houseMaster = new HouseMaster(); Proxy proxy = new Proxy(houseMaster); proxy.rent(); } } -
代理角色:代理真实角色,代理真实角色后,一般会做一些附属操作
public class Proxy { HouseMaster houseMaster; public Proxy() { } public Proxy(HouseMaster houseMaster) { this.houseMaster = houseMaster; } public void rent(){ lookHouse(); houseMaster.rent(); sign(); } public void lookHouse(){ System.out.println("看房子"); } public void sign(){ System.out.println("签合同"); } } -
客户:使用代理角色来进行一些操作
public static void main(String[] args) {
    HouseMaster houseMaster = new HouseMaster();
    Proxy proxy = new Proxy(houseMaster);
    proxy.rent();
}
优点:
(1).真实对象更加纯粹,不在关注一些琐碎的公共事务
(2).公共业务由代理对象完成,有利于公共业务的扩展和管理
缺点:多了代理对象也增加了代码量(所以后面出现了动态代理模式)
-
动态代理
角色分析:与静态代理相同
特点:动态代理的动态类是动态生成的,不是我们直接写好的
分类:
(1).基于接口的动态代理——JDK动态代理(重点理解)
(2).基于类的动态代理——cglib
(3).javasist
核心api:
(1).Proxy:
Proxy提供了创建动态代理类和实例的静态方法,它也是由这些方法创建的所有动态代理类的超类。-
newProxyInstance(ClassLoader loader, 类<?>[] interfaces, InvocationHandler h):返回指定接口的代理类的实例,该接口将方法调用分派给指定的调用处理程序。
参数:
(1).loader类加载器
(2).代理对象的接口
(3).InvocationHandler的实体,因为一般是调用类继承了InvocationHandler,所以许多时候就是this
(2).InvocatioinHandler:
InvocationHandler是由代理实例的调用处理程序实现的接口 。每个代理实例都有一个关联的调用处理程序(也就是一个代理类)。 当在代理实例上调用方法时,方法调用将被编码并分派到其调用处理程序的
invoke方法。-
invoke
参数:
(1).proxy:调用该方法的代理实例
(2).method:所述方法对应于调用代理实例上的接口方法的实例
(3).args:参数,如果没有则为null
使用:
-
构建动态代理对象(这个代理对象可以用于同一个接口的多个实现类)
public class ProxyInvocationHandler implements InvocationHandler { //代理对象 Object target; //设定动态代理的对象 public void setTarget(Object target){ this.target = target; } public Object getProxy(){ return Proxy.newProxyInstance(target.getClass().getClassLoader(),target.getClass().getInterfaces(),this); } public Object invoke(Object proxy, Method method, Object[] args) throws Throwable { Object res = method.invoke(target, args); return res; } } -
测试
public class service { public static void main(String[] args) throws Throwable { ProxyInvocationHandler handler = new ProxyInvocationHandler(); handler.setTarget(new HostImpl()); Host proxy = (Host) handler.getProxy(); proxy.rent(); } } -
解释:从构建动态代理对象的过程查看
(1).设定动态代理对象:setTarget()
(2).获得动态代理getProxy()
(3).使用动态代理,表面上看是调用了proxy.rent,本质上还是调用handler实现的invoke函数,注意该函数的第一个参数proxy用处不大
优点:在静态代理的基础上,静态代理是代理的是一个类;而动态代理是代理一个接口(多个类)
-
二、AOP
AOP:面向切面编程,通过预编译方式和运行期动态代理实现 程序功能的统一维护的一种技术
导入织入包
两种方式:
-
使用api接口
(1).MethodBeforeAdvice:方法的前置增强
(2).AfterReturningAdvice:方法的后置增强
环境搭建:
//接口
public interface service {
    void say();
}

//实例
public class serviceImpl implements service {
    public void say() {
        System.out.println("say some thins");
    }
}

//前置增强
public class beforeSay implements MethodBeforeAdvice {
    public void before(Method method, Object[] objects, Object o) throws Throwable {
        System.out.println("Good Morning!");
    }
}

//后置增强
public class afterSay implements AfterReturningAdvice {
    public void afterReturning(Object o, Method method, Object[] objects, Object o1) throws Throwable {
        System.out.println("后置增强");
    }
}
配置文件:
<?xml version="1.0" encoding="UTF-8"?>
<beans xmlns="http://www.springframework.org/schema/beans"
       xmlns:xsi="http://www.w3.org/2001/XMLSchema-instance" xmlns:aop="http://www.springframework.org/schema/aop"
       xsi:schemaLocation="http://www.springframework.org/schema/beans
        https://www.springframework.org/schema/beans/spring-beans.xsd
        http://www.springframework.org/schema/aop
         https://www.springframework.org/schema/aop/spring-aop.xsd">

    <bean id="serviceImpl" class="com.guan.dao.serviceImpl"/>
    <bean id="beforeSay" class="com.guan.dao.beforeSay"/>
    <bean id="afterSay" class="com.guan.dao.afterSay"/>

    <aop:config>
<!--        choose pointCut-->
<!--        public method.(args)-->
        <aop:pointcut id="point" expression="execution(* com.guan.dao.service.*(..))"/>

        <aop:advisor advice-ref="beforeSay" pointcut-ref="point"/>
        <aop:advisor advice-ref="afterSay" pointcut-ref="point"/>
    </aop:config>

</beans>
注:
(1).
<aop:point>设定切入点(2).
<aop:advisor>设定环绕对象(主要设定前置函数,后置函数及其目标的切入点)(3).
execution(* com.guan.dao.service.*(..))execution(* com.guan.dao.*.*(..)):所有修饰符(public,private) com.guan.dao包下的所有类下的所有方法的所有参数测试:
public static void main(String[] args) {
    ApplicationContext context = new ClassPathXmlApplicationContext("applicationContext.xml");
    service bean = context.getBean("serviceImpl", service.class);
    bean.say();
}
注:这里返回的必须用接口类型(service),而不能用serviceImpl
-
使用切面
环境搭建:package com.guan.dao; public class Advice { public void before(){ System.out.println("before"); } public void after(){ System.out.println("after"); } }配置文件:
<?xml version="1.0" encoding="UTF-8"?>
<beans xmlns="http://www.springframework.org/schema/beans"
       xmlns:xsi="http://www.w3.org/2001/XMLSchema-instance" xmlns:aop="http://www.springframework.org/schema/aop"
       xsi:schemaLocation="http://www.springframework.org/schema/beans
        https://www.springframework.org/schema/beans/spring-beans.xsd
        http://www.springframework.org/schema/aop
         https://www.springframework.org/schema/aop/spring-aop.xsd">

    <bean id="advice" class="com.guan.dao.Advice"></bean>
    <bean id="serviceImpl" class="com.guan.dao.serviceImpl"></bean>

    <aop:config>
        <aop:aspect ref="advice">
            <aop:pointcut id="point" expression="execution(* com.guan.dao.serviceImpl.*(..))"/>
<!--            切面-->
            <aop:before method="before" pointcut-ref="point"></aop:before>
            <aop:after method="after" pointcut-ref="point"></aop:after>
        </aop:aspect>
    </aop:config>

</beans>
测试类:
public static void main(String[] args) {
    ApplicationContext context = new ClassPathXmlApplicationContext("applicationContext.xml");
    service bean = context.getBean("serviceImpl", service.class);
    bean.say();
}
//同上
注:
(1).注意
<aop:aspect>的ref是相关的构成切面的类(2).在这个类的内部还是需要切入点的
-
使用api接口和使用切面比较
(1).使用api接口需要记录相关的文档,但使用切面则可以在xml文件中直接配置
(2).使用api接口需要多个类继承相关的接口,而使用切面只需要一个类承载相关的方法即可
(3).使用api接口由于有对切入点的结果关联,所以和上下文的关联更密切;使用切面则切面的函数与切入点的上下文关系是割裂的
-
使用注解使用AOP
相关注解:
(1).@Aspect:标注这个类是一个切面
(2).@Before("切入点")
(3).@After("切入点后")
(4).@Around:功能复杂,需要相关的方法使用ProceedingJoinPoint类型的参数,且这个参数可以直接调用方法
(5).@EnableAspectJAutoProxy:用于注解开启注解(不用xml配置
<aop:aspectj-autoproxy/>)注意:切入点都要用execution表达式
环境搭建:
@Aspect
public class AnnotationCutPoint {
    @Before("execution(* com.guan.dao.*.*(..))")
    public void before(){
        System.out.println("before");
    }

    @After("execution(* com.guan.dao.*.*(..))")
    public void after(){
        System.out.println("after");
    }

    @Around("execution(* com.guan.dao.*.*(..))")
    public void around(ProceedingJoinPoint joinPoint) throws Throwable {
        System.out.println("around1");
        joinPoint.proceed();
        System.out.println("around2");
    }
}
注意:先要有切面@Aspect,才有切点
<?xml version="1.0" encoding="UTF-8"?>
<beans xmlns="http://www.springframework.org/schema/beans"
       xmlns:xsi="http://www.w3.org/2001/XMLSchema-instance" xmlns:aop="http://www.springframework.org/schema/aop"
       xsi:schemaLocation="http://www.springframework.org/schema/beans
        https://www.springframework.org/schema/beans/spring-beans.xsd
        http://www.springframework.org/schema/aop
         https://www.springframework.org/schema/aop/spring-aop.xsd">


    <bean id="serviceImpl" class="com.guan.dao.serviceImpl"></bean>
    <bean id="annotation" class="com.guan.dao.AnnotationCutPoint"></bean>

    <aop:aspectj-autoproxy/>

</beans>
测试:
public class serviceImpl implements service {
    public void say() {
        System.out.println("say some thins");
    }

    public static void main(String[] args) {
        ApplicationContext context = new ClassPathXmlApplicationContext("applicationContext.xml");
        service bean = context.getBean("serviceImpl", service.class);
        bean.say();
    }
}
注:spring的AOP默认是通过jdk生成,但也可以进行修改
<!--    jdk,默认-->
    <aop:aspectj-autoproxy proxy-target-class="false"/>
<!--    cglib-->
    <aop:aspectj-autoproxy proxy-target-class="true"/>