SeetaFace,根据GitHub上的介绍,就是一个开源的人脸检测、矫正和识别的开源库,是采用C++来编写的,并且是在CPU上执行的,没有用到GPU,但是可以用SSE或者OpenMP来加速。整个库分为三部分,SeetaFace Detection, SeetaFace Alignment 和 SeetaFace Identification,分别对应人脸检测,人脸矫正和人脸识别三个功能。
好了,这一篇就介绍下第一部分Face Detection的编译和使用。
首先是编译工具,这里SeetaFace要用到OpenCV,编译用的VS2013;然后是下载GitHub的源码,GitHub上已经有seetaFace2了,但是我打开之后好像只有一些文件夹,没有具体的文件,所以,估计是暂时还没有吧,所以还是用的seetaFace。

这个编译过程还是比较简单的,步骤如下:
1、打开VS2013后创建一个空的DLL工程:

更改编译其设置为x64,这个看自己需求了,我基本上大部分程序都告别win32了,所以用的x64:

添加include:

添加OpenCV的lib路径和依赖项文件


添加detection的源文件到工程中:
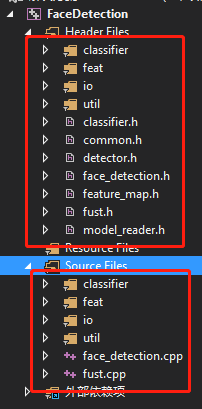
也就是SeetaFaceEngineFaceDetectionsrc下的所有文件和文件夹(除了test)复制到工程下,并添加到工程中,然后修改预编译器设置:

然后打开OpenMP设置:

然后就编译工程就可以了,同样Release下也是这样设置。
2、使用例程:
这里用的是SeetaFace的例子:FaceDetectionsrc est的facedetection_test.cpp
int testFaceDetection(std::string src_Path)
{
    std::string path = "D:/SeetaFaceEngine/include_lib/model/FaceDetection/seeta_fd_frontal_v1.0.bin";
	seeta::FaceDetection detector();

	detector.SetMinFaceSize(40);
	detector.SetScoreThresh(2.f);
	detector.SetImagePyramidScaleFactor(0.8f);
	detector.SetWindowStep(4, 4);

	cv::Mat img = cv::imread(src_Path, cv::IMREAD_UNCHANGED);
	cv::Mat img_gray;

	if (img.channels() != 1)
		cv::cvtColor(img, img_gray, cv::COLOR_BGR2GRAY);
	else
		img_gray = img;

	seeta::ImageData img_data;
	img_data.data = img_gray.data;
	img_data.width = img_gray.cols;
	img_data.height = img_gray.rows;
	img_data.num_channels = 1;

	long t0 = cv::getTickCount();
	std::vector<seeta::FaceInfo> faces = detector.Detect(img_data);
	long t1 = cv::getTickCount();
	double secs = (t1 - t0) / cv::getTickFrequency();

	std::cout << "Detections takes " << secs << " seconds " << std::endl;
#ifdef USE_OPENMP
	std::cout << "OpenMP is used." << std::endl;
#else
	std::cout << "OpenMP is not used. " << std::endl;
#endif

#ifdef USE_SSE
	std::cout << "SSE is used." << std::endl;
#else
	std::cout << "SSE is not used." << std::endl;
#endif

	std::cout << "Image size (wxh): " << img_data.width << "x" << img_data.height << std::endl;

	cv::Rect face_rect;
	int32_t num_face = static_cast<int32_t>(faces.size());

	for (int32_t i = 0; i < num_face; i++)
    {
		face_rect.x = faces[i].bbox.x;
		face_rect.y = faces[i].bbox.y;
		face_rect.width = faces[i].bbox.width;
		face_rect.height = faces[i].bbox.height;

		cv::rectangle(img, face_rect, CV_RGB(0, 0, 255), 2, 8, 0);
	}

	cv::namedWindow("Test", cv::WINDOW_AUTOSIZE);
	cv::imshow("Test", img);
	cv::waitKey(0);
	cv::destroyAllWindows();
	return 0;
}
人脸检测结果如下:

速度上还是慢了一点,可能还跟前面的参数设置有关。
玉阶生白露,夜久侵罗袜。
却下水晶帘,玲珑望秋月。
--李白 《玉阶怨》