原文地址:https://www.wipfli.com/insights/blogs/connect-microsoft-dynamics-365-blog/160810-calling-custom-actions-from-javascript
Overview
Actions in processes are a way to create custom messages in CRM for an entity. For example, let’s say you have an entity record that needs escalation or approval. You could create a custom action that performs the steps needed for this process. Then you could add a button to the form that the user clicks to initiate the process. Out of the box for most entities, you have Create, Update, Delete, Assign, and SetState messages and you have the option of writing custom business logic in the form of Plugins or Workflows on these. With custom actions, you have the ability to create whatever message you need to fulfil your requirements. Then you can attach plugin code to that message and perform any operations you need without restrictions. In this post, I am going to explain how to create a custom action, pass input and output parameters, and call that action from JavaScript. With these basic building blocks, you can create whatever you need.
Overall Process
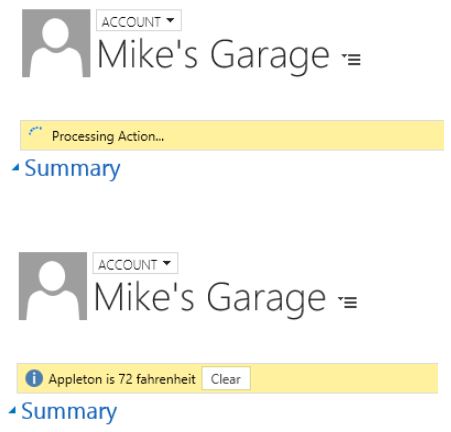
The example I am going to document here will involve a button on the ribbon that, when clicked, will display a notification on the form, call the custom action, will run a plugin, will call a web service to get the temperature for the account's zip code, will return that information, and will display it in a notification on the form. In this case, we are going to have a plugin that will do all the real work. There will be JavaScript that will handle the form notifications and calling the action.
The result will look like this:
To make all this happen, I will be using a couple of JavaScript libraries that make working with custom Actions and Notifications much easier. The first one is called Notify.js and can be found here. This library makes it easy to display form notifications and adds some functionality to the standard CRM notifications. The second one is called Process.js and can be found here. This library simplifies calling custom actions from JavaScript. Calling custom actions involves creating rather lengthy XML Http Requests and this library simplifies that down to a function call with a couple of parameters. It also provides callbacks for success and errors.
The process looks something like this.

The components needed for this are:
- A Custom Action
- JavaScript Web Resource (to call the custom action)
- Custom Ribbon button (to call the JavaScript)
- Plugin to call the weather web service
- Notify.js library
- Process.js library
Components
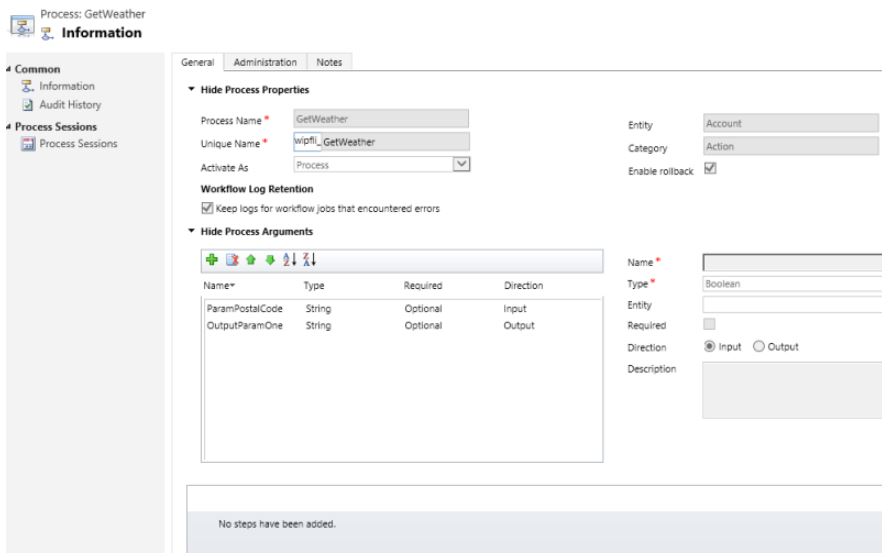
The Custom Action
In this example, the custom action is fairly simple. We just need a couple of parameters. The custom action gives us a way to pass the parameters to and from the plugin. It also allows us to register the plugin step against the custom action message.
JavaScript Web Resource
The JavaScript manages the notifications and calling the custom action. It will validate that we have a Zip Code, load the input parameters, and then call the custom action. When the action completes, it will call the success callback and display the information on the form as a notification. While the action is working, there will be a notification on the form letting the user know that something is happening.
function CallAction() {
//Verify that we have a Zip Code
if (Xrm.Page.getAttribute("address1_postalcode").getValue() == null) {
Notify.add("Zip code is missing", "ERROR", "nozip", null, 5);
}
else {
//Display the notification that we are working on something
Notify.add("Processing Action...", "LOADING", "myProcessing");
//Load the input parameters
var inputParams = [
{ key: "ParamPostalCode", type: Process.Type.String, value: Xrm.Page.getAttribute("address1_postalcode").getValue() },
{ key: "Target", type: Process.Type.EntityReference, value: new Process.EntityReference(Xrm.Page.data.entity.getEntityName(), Xrm.Page.data.entity.getId()) }
];
//Call the custom action
Process.callAction("wipfli_GetWeather", inputParams, successCallback, errorCallback);
}
}
function successCallback(params) {
//Get the result from the plugin and display the information in a notification
var outputParamOne = params["OutputParamOne"];
Notify.add(outputParamOne, "INFO", "mySuccess", [{ type: "button", text: "Clear", callback: function () { Notify.remove("mySuccess"); } }]);
Notify.remove("myProcessing");
}
function errorCallback(error, trace) {
Notify.remove("myProcessing");
Notify.add("Error: " + error, "ERROR", "myError");
}
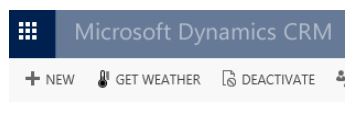
Custom Ribbon Button
The ribbon button just has to call the "CallAction" function from the above JavaScript. Use the Ribbon Workbench for CRM to create a custom button that points to a web resource and calls the CallAction function.
Plugin
The plugin will read the input parameters and then call the weather web service. Using the response from the web service, it will format the output information and then return it in the output parameter. Don’t forget to register the plugin using the Plugin Registration Tool in the CRM SDK. Then register a step on the GetWeather message.
protected override void ExecuteCrmPlugin(LocalPluginContext localContext)
{
if (localContext == null)
{
throw new ArgumentNullException("localContext");
}
//Get the parameters from the Action call
EntityReference accountRef = (EntityReference)localContext.PluginExecutionContext.InputParameters["Target"];
string paramPostalCode = (string)localContext.PluginExecutionContext.InputParameters["ParamPostalCode"];
string webAddress = @"http://api.openweathermap.org/data/2.5/weather?zip=" + paramPostalCode + ",us&mode=xml&units=imperial&appid={your specific APPID}";
string output = "";
try
{
using (WebClient client = new WebClient())
{
Byte[] responseBytes = client.DownloadData(webAddress);
String response = Encoding.UTF8.GetString(responseBytes);
localContext.TracingService.Trace("Response is: " + response);
XmlDocument xmlDoc = new XmlDocument();
xmlDoc.LoadXml(response);
XmlNodeList current = xmlDoc.SelectNodes("/current");
foreach (XmlNode xn in current)
{
output = xn["city"].Attributes["name"].Value + " is " + Math.Round(Double.Parse(xn["temperature"].Attributes["value"].Value), 0) + " " + xn["temperature"].Attributes["unit"].Value;
}
localContext.TracingService.Trace("OUTPUT IS: " + output);
}
}
catch (WebException exception)
{
string str = string.Empty;
if (exception.Response != null)
{
using (StreamReader reader =
new StreamReader(exception.Response.GetResponseStream()))
{
str = reader.ReadToEnd();
}
exception.Response.Close();
}
if (exception.Status == WebExceptionStatus.Timeout)
{
throw new InvalidPluginExecutionException(
"The timeout elapsed while attempting to issue the request.", exception);
}
throw new InvalidPluginExecutionException(String.Format(CultureInfo.InvariantCulture,
"A Web exception occurred while attempting to issue the request. {0}: {1}",
exception.Message, str), exception);
}
localContext.PluginExecutionContext.OutputParameters["OutputParamOne"] = output;
}
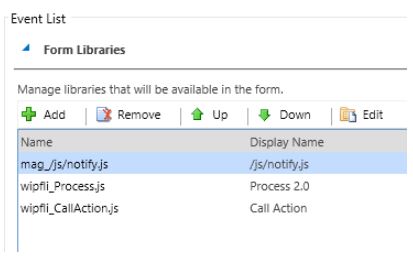
Additional Libraries
The Notifiy.js and Process.js libraries will need to be loaded on the form. To do this, include them as form libraries in the Form Properties.
Conclusion
With all the components in place, clicking the button should produce the weather notification. While this example may not be very useful in the real world, the purpose was to demonstrate some of the basic concepts of custom actions. It shows you how to call a custom action from JavaScript and pass input and output parameters. It also demonstrates triggering a Plugin from a custom action.