原文网址: http://lvwenhan.com/ios/449.html
此系列文章代码仓库在 https://github.com/johnlui/AutoLayout ,有不明白的地方可以参考我的 Auto Layout 设置哦,下载到本地打开就可以了。
简介
本文中,我们将一起使用 Auto Layout 技术,让 UITableViewCell 的高度随其内部的 UILabel 和 UIImageView 的内容自动变化。
搭建界面
恢复之前删除的按钮
放置一个按钮,恢复到 firstTableViewController 的连接:
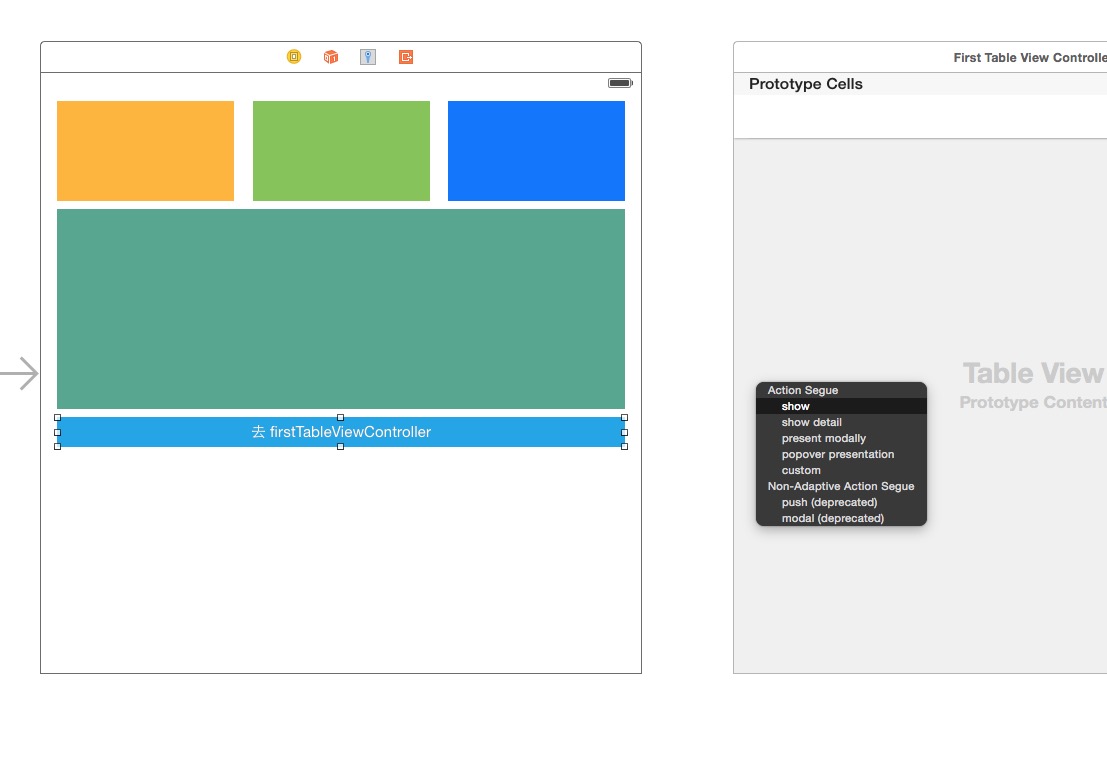
别忘了添加约束让他居中哦。
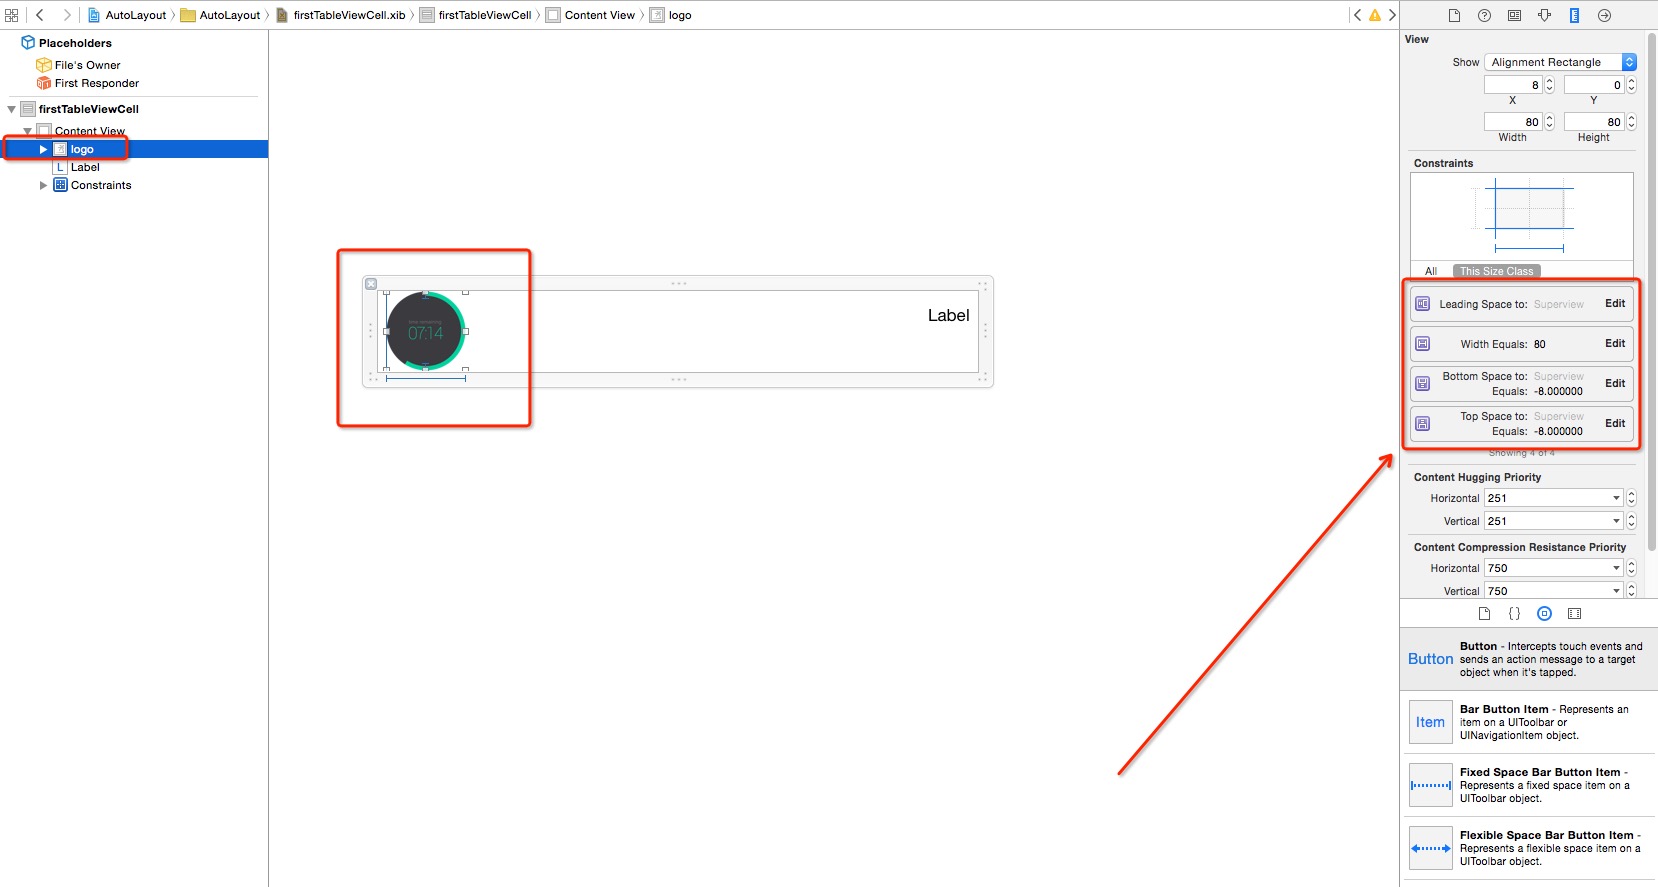
修改 firstTableViewCell
将 firstTableViewCell 的尺寸设置为 600 * 81,将 logo 的尺寸设置为 80 * 80。将 logo 的约束修改为如下图所示:
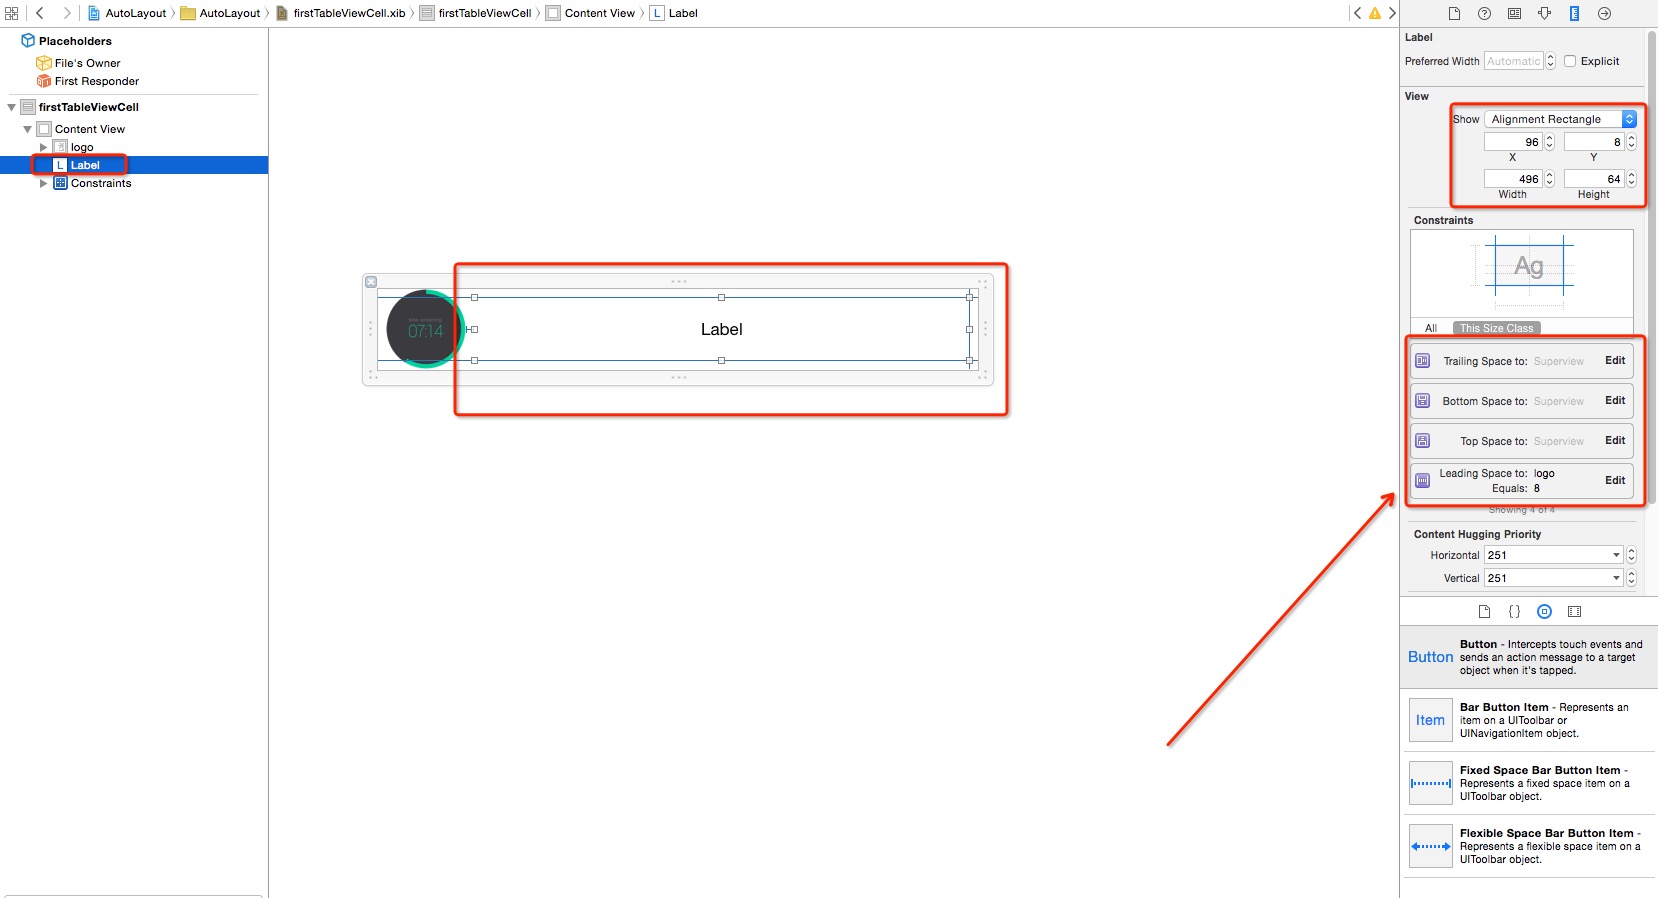
修改 label 的尺寸和位置,添加约束如下图:
给 ViewController 增加 UINavigationController 嵌套
为了便于返回。操作如下图:

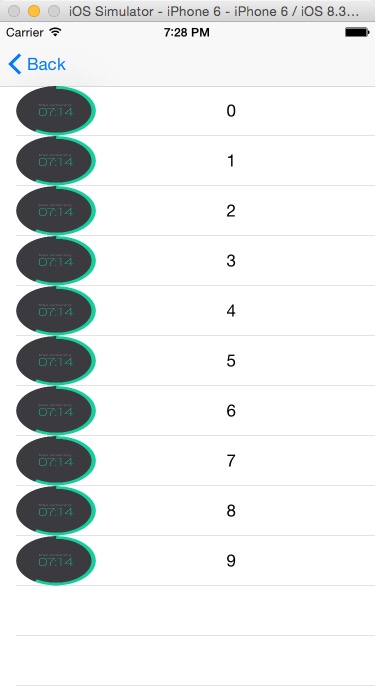
查看结果
根据 label 自动计算 firstTableViewCell 高度
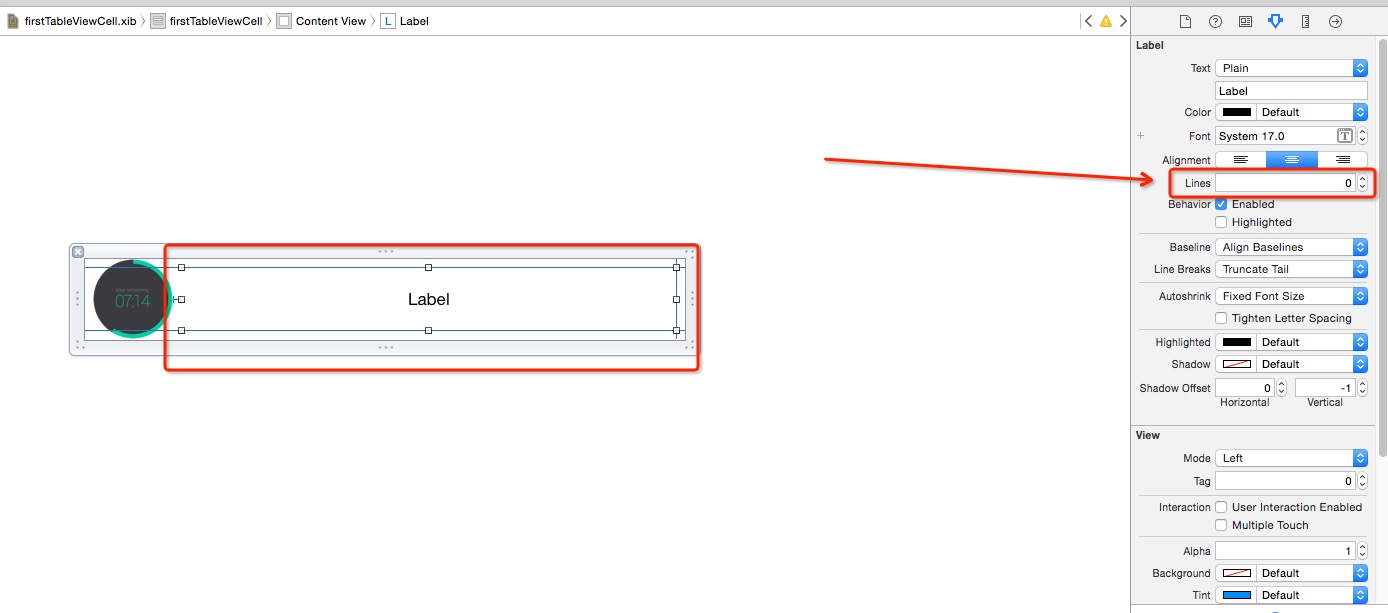
选中 label,设置 lines 行数为 0,表示不限长度自动折行:
修改 label 的文字内容让其超出一行:
import UIKit

class firstTableViewController: UITableViewController {

    var labelArray = Array<String>() // 用于存储 label 文字内容

    override func viewDidLoad() {
        super.viewDidLoad()

        var nib = UINib(nibName: "firstTableViewCell", bundle: nil)
        self.tableView.registerNib(nib, forCellReuseIdentifier: "firstTableViewCell")

        // 循环生成 label 文字内容
        for i in 1...10 {
            var text = ""
            for j in 1...i {
                text += "Auto Layout"
            }
            labelArray.append(text)
        }
    }

    override func didReceiveMemoryWarning() {
        super.didReceiveMemoryWarning()
    }

    // MARK: - Table view data source

    override func tableView(tableView: UITableView, heightForRowAtIndexPath indexPath: NSIndexPath) -> CGFloat {
        return 50
    }
    override func numberOfSectionsInTableView(tableView: UITableView) -> Int {
        return 1
    }

    override func tableView(tableView: UITableView, numberOfRowsInSection section: Int) -> Int {
        return labelArray.count
    }

    override func tableView(tableView: UITableView, cellForRowAtIndexPath indexPath: NSIndexPath) -> UITableViewCell {
        let cell = tableView.dequeueReusableCellWithIdentifier("firstTableViewCell", forIndexPath: indexPath) as! firstTableViewCell

        cell.firstLabel.text = labelArray[indexPath.row]

        return cell
    }
}
现在到了最关键的时刻,驱动 UITableViewCell 适应 Label 内容:
1. 使用 estimatedHeightForRowAtIndexPath 替代 heightForRowAtIndexPath
estimatedHeightForRowAtIndexPath 是 iOS 7 推出的新 API。如果列表行数有一万行,那么 heightForRowAtIndexPath 就会在列表显示之前计算一万次,而 estimatedHeightForRowAtIndexPath 只会计算当前屏幕中显示着的几行,会大大提高数据量很大时候的性能。
2. 新建一个 prototypeCell 成员变量以复用,并在 viewDidLoad 中初始化
class firstTableViewController: UITableViewController {

    var labelArray = Array<String>() // 用于存储 label 文字内容

    var prototypeCell: firstTableViewCell!

    override func viewDidLoad() {
        super.viewDidLoad()

        var nib = UINib(nibName: "firstTableViewCell", bundle: nil)
        self.tableView.registerNib(nib, forCellReuseIdentifier: "firstTableViewCell")

        // 初始化 prototypeCell 以便复用
        prototypeCell = tableView.dequeueReusableCellWithIdentifier("firstTableViewCell") as! firstTableViewCell

......
3. 计算出高度
override func tableView(tableView: UITableView, estimatedHeightForRowAtIndexPath indexPath: NSIndexPath) -> CGFloat {
    let cell = prototypeCell
    cell.firstLabel.text = labelArray[indexPath.row]
    return cell.contentView.systemLayoutSizeFittingSize(UILayoutFittingCompressedSize).height + 1
}
4. 查看效果
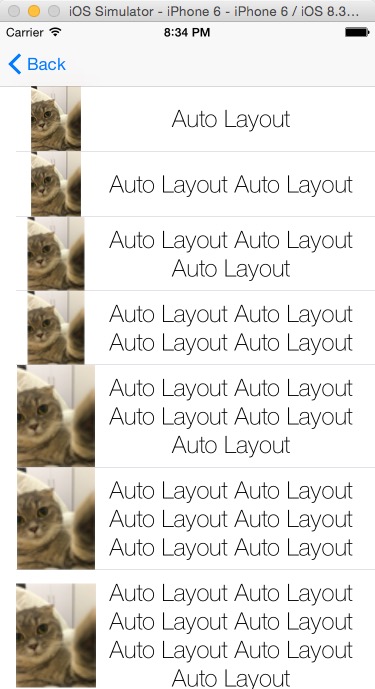
超级大坑
上面让 firstTableViewCell 根据 label 自动计算高度的过程中,有一个超级大坑:如果给左侧 UIImageView 赋的图片较大(大于 80px),将看到如下奇怪的结果:
这只是因为图片把 UITableViewCell 撑大了,并不是我们的计算没有效果。
解决大坑:进攻是最好的防守!根据图片自动计算 firstTableViewCell 高度
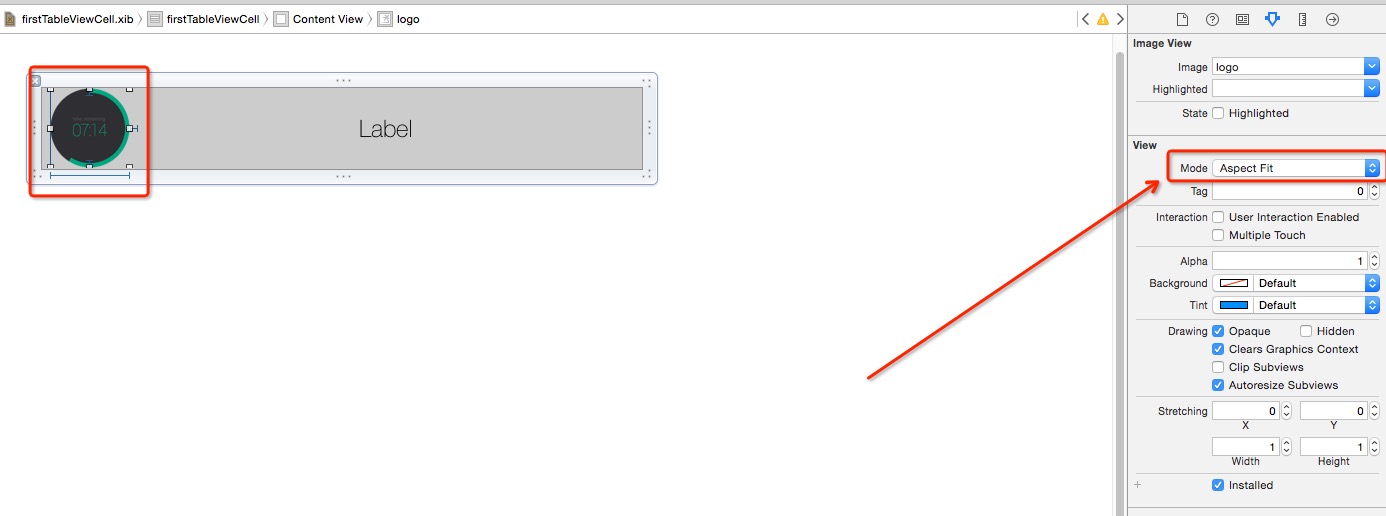
首先,把图片的渲染模式改成 Aspect Fit:
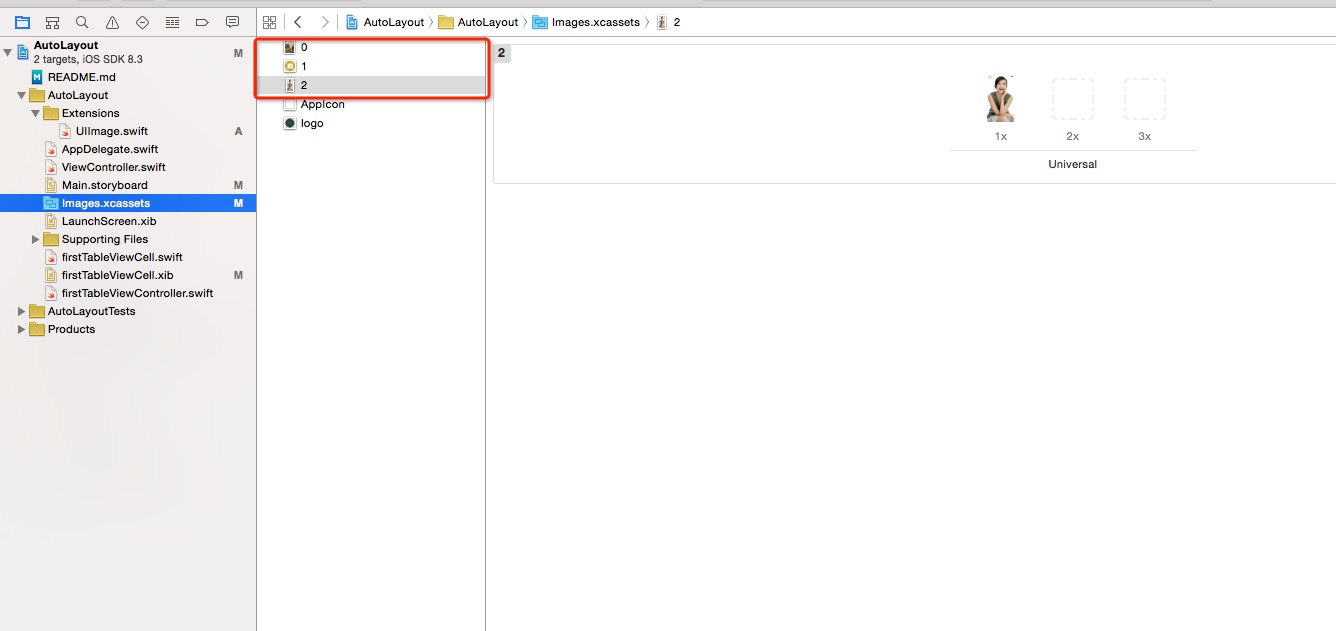
给 Images.xcassets 增加三张图片,命名为 0、1、2,尺寸从小到大:
给 cellForRowAtIndexPath 增加代码:
if indexPath.row < 3 {
    cell.logoImageView.image = UIImage(named: indexPath.row.description)
}
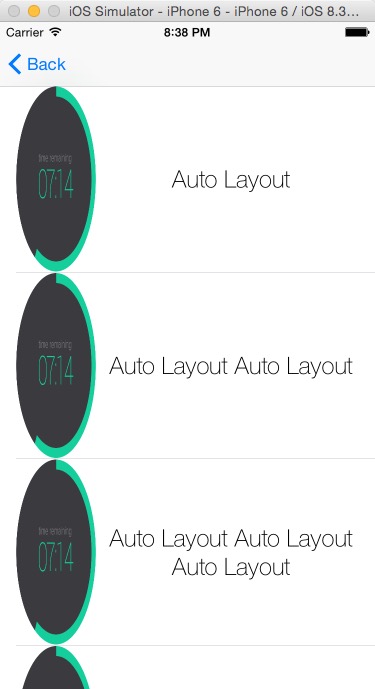
查看效果:
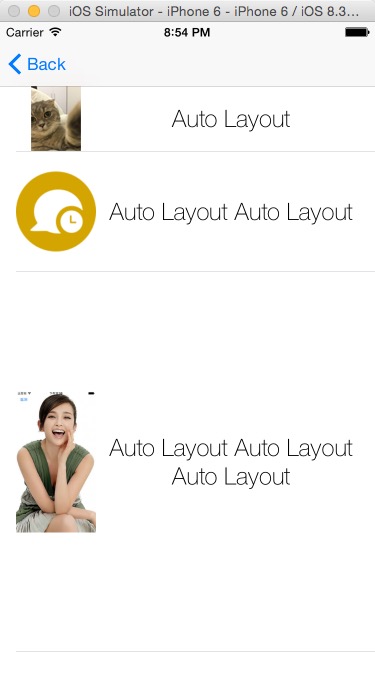
前 两个 cell 看起来比较正常,第三个为什么多出了那么多空白?这就是使用 Auto Layout 限制图片宽度为 80px 的原生问题:宽度虽然限制了,高度却依然是原图的高度。
解决办法也很简单:如果图片宽度大于 80px,就重绘一张 80px 宽度的图片填充进去。
新建一个 Group(虚拟文件夹),叫 Extensions,并在其内部新建 UIImage.swift 文件,内容如下:
import UIKit

extension UIImage {
    func resizeToSize(size: CGSize) -> UIImage {
        UIGraphicsBeginImageContext(size)
        self.drawInRect(CGRectMake(0, 0, size.width, size.height))
        let newImage = UIGraphicsGetImageFromCurrentImageContext()
        UIGraphicsEndImageContext()

        return newImage
    }
}
给 UIImage 类扩展了一个名为 resizeToSize 的方法,返回一个按照要求的大小重绘过的 UIImage 对象。修改 cellForRowAtIndexPath 的代码为:
override func tableView(tableView: UITableView, cellForRowAtIndexPath indexPath: NSIndexPath) -> UITableViewCell {
    let cell = tableView.dequeueReusableCellWithIdentifier("firstTableViewCell", forIndexPath: indexPath) as! firstTableViewCell

    cell.firstLabel.text = labelArray[indexPath.row]

    var image = UIImage(named: (indexPath.row % 3).description)!
    if image.size.width > 80 {
        image = image.resizeToSize(CGSizeMake(80, image.size.height * (80 / image.size.width)))
    }
    cell.logoImageView.image = image

    return cell
}
搞定!
查看效果

从上图可以看出,cell 已经可以根据图片和文字中比较高的一个完全自适应。