基于tf2.0 对Kaggel Google street view characters classify 项目练手, 熟悉一下tf2.0的新特性
tf2.0的新特性主要包含:
1. AutoGraph, 也就是在python function上添加装饰器@tf.function把其变成静态图, 不支持的python function则调用tf.py_function包装
2. eager execution, 2.0默认是开启的, 也就是动态图模式,便于调试(注意,动态图运行速度比静态图慢)
3. Keras high level API
4. gradience tape等
下载下来kaggle的数据集如下:
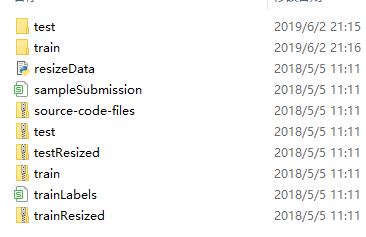
所有训练数据在train文件夹中, labels在trainLabels.cvs文件中, label文件格式如下:
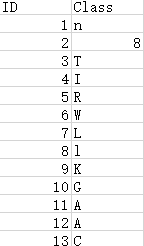
分别每个label对应其图片的名称
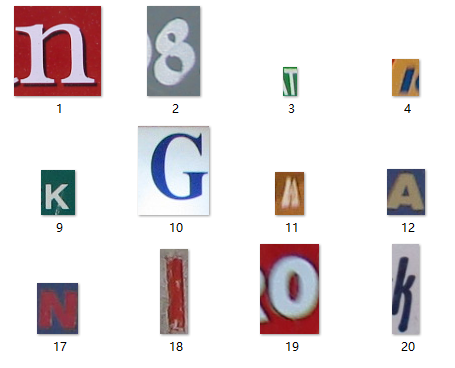
首先对数据进行预处理 总共有61个类别从a-z, A-Z, 0-9等,代码如下:
from __future__ import absolute_import, division, print_function, unicode_literals
import numpy as np
import tensorflow as tf
from tensorflow.python import keras
import csv
import pathlib
keras.backend.clear_session()
csv_filepath = 'E:\work\Kaggle\street-view-getting-started-with-julia\trainLabels.csv'
data_root_path = 'E:\work\Kaggle\street-view-getting-started-with-julia\train'
csv_file = csv.reader(open(csv_filepath, 'r'))
label_container = []
labels = []
all_image_labels = []
AUTOTUNE = tf.data.experimental.AUTOTUNE

for cnt in csv_file:
    if cnt[1] not in labels:
        labels.append(cnt[1])
    label_container.append(cnt)

labels = labels[1:]
label_container = label_container[1:]
labels = np.sort(labels)
labels_to_index = dict((name, index) for index,name in enumerate(labels))

data_root = pathlib.Path(data_root_path)
all_image_paths = list(data_root.glob('*'))
all_image_paths = [str(path) for path in all_image_paths]


for item in data_root.iterdir():
    # all_img_path.append(item)
    name = item.name[:-4]
    for match in label_container:
        if name == match[0]:
           all_image_labels.append(key if value == match[1]
                                    for key, value in enumerate(labels_to_index))
生成的all_image_paths 和 all_image_labels分别包含如下, 每张图片对应其label:

因为测试集没有label,所以把训练集分三份,并用tf.data.Dataset来Represents a potentially large set of elements, 如果数据量很大,则还是推荐使用序列化的tfrecords来读取数据。
train_img_path = all_image_paths[:4000]
val_img_path = all_image_paths[4000:5000]
test_img_path = all_image_paths[5000:]

train_img_labels = all_image_labels[:4000]
val_img_labels = all_image_labels[4000:5000]
test_img_labels = all_image_labels[5000:]


raw_train_ds = tf.data.Dataset.from_tensor_slices((train_img_path, train_img_labels))
raw_val_ds = tf.data.Dataset.from_tensor_slices((val_img_path, val_img_labels))
raw_test_ds = tf.data.Dataset.from_tensor_slices((test_img_path, test_img_labels))
Scale 图片,并对其做数据增强,并concatenate datasets,来满足translation invarience
def preprocess_image(image):
  image = tf.image.decode_jpeg(image, channels=3)
  image = tf.image.resize(image, [40, 40])
  image /= 255.0  # normalize to [0,1] range
  return image


def load_and_preprocess_image(path):
  image = tf.io.read_file(path)
  return preprocess_image(image)


def load_and_preprocess_from_path_label(path, label):
    return load_and_preprocess_image(path), label


def flip(x: tf.Tensor, label):
    x = tf.image.random_flip_left_right(x)
    x = tf.image.random_flip_up_down(x)
    return x, label


def color(x: tf.Tensor, label):
    x = tf.image.random_hue(x, 0.08)
    x = tf.image.random_saturation(x, 0.6, 1.6)
    x = tf.image.random_brightness(x, 0.05)
    x = tf.image.random_contrast(x, 0.7, 1.3)
    return x, label


train_ds = raw_train_ds.map(load_and_preprocess_from_path_label)
val_ds = raw_val_ds.map(load_and_preprocess_from_path_label)
test_ds = raw_test_ds.map(load_and_preprocess_from_path_label)

# Add augmentations
train_ds_flip = train_ds.map(flip)
train_ds_color = train_ds.map(color)

train_ds.concatenate(train_ds_flip)
train_ds.concatenate(train_ds_color)
最后构建一个卷积模型:
BATCH_SIZE = 128
train_ds = train_ds.apply(
    tf.data.experimental.shuffle_and_repeat(4000 * 4))
train_ds = train_ds.batch(BATCH_SIZE).prefetch(buffer_size=AUTOTUNE)
val_ds = val_ds.batch(BATCH_SIZE).prefetch(buffer_size=AUTOTUNE)
test_ds = test_ds.batch(BATCH_SIZE).prefetch(buffer_size=AUTOTUNE)


model = keras.Sequential([
    tf.keras.layers.Conv2D(32, (3, 3), activation='relu', input_shape=(40, 40, 3)),
    tf.keras.layers.MaxPooling2D((2, 2)),
    tf.keras.layers.Conv2D(64, (3, 3), activation='relu'),
    tf.keras.layers.MaxPooling2D((2, 2)),
    tf.keras.layers.Conv2D(32, (3, 3), activation='relu'),
    tf.keras.layers.MaxPooling2D((2, 2)),
    keras.layers.Flatten(),
    keras.layers.Dense(256, activation='relu'),
    keras.layers.Dense(len(labels_to_index), activation='softmax')
])

model.compile(optimizer=keras.optimizers.Adam(),
              loss=keras.losses.sparse_categorical_crossentropy,
              metrics=['acc']
             )
steps_per_epoch = tf.math.ceil(len(train_img_path) * 3/BATCH_SIZE).numpy()
history = model.fit(train_ds, epochs=10, steps_per_epoch=steps_per_epoch, validation_data=val_ds)

result = model.evaluate(test_ds, steps=tf.math.ceil(len(test_img_path)/BATCH_SIZE).numpy())
便可以开始训练,具体参数需要具体调整。
tf2.0在三周年之际带来了小惊喜。。需要仔细阅读一下官网api文档,才能驾驭而行之
文档链接https://www.tensorflow.org/alpha/guide/effective_tf2
