一.Channel概述
channel(通道):进行IO的连接通道,为NIO的几个核心(Buffer,selector,channel)之一,相比于IO的stream具有较高的性能。
IO |
单向传输 |
NIO |
异步双向传输 |
使用时需要和buffer(缓冲区一切使用),将数据暂存入Buffer中,通过channel通道连接传输buffer以此传输数据。

二.channel继承结构

其中主要的几个实现类如下:
-
FileChannel: 本地文件传输通道
-
SocketChannel: 通过TCP传输通道
-
ServerSocketChannel: 监听新的TCP连接,并创建一个新的SocketChannel,通过.open()方法进行创建。
-
DatagramChannel: 发送和接收UDP数据包的channel
通过Buffer的两种传输数据方式:
-
非直接缓冲区传输数据 - - > ByteBuffer.allocate()方法;
-
直接缓冲区传输数据 - - > ByteBuffer.allocateDriect()方法;
几种获取channel的方式:
-
本地通过FileInPutStream/FileOutPutStream 使用getChannel()方法获取;
-
本地FileChannel 的open()方法获取;
-
本地RandomAccessFile的getChannel()方法获取;
-
网络socket、ServerSocket、DatagramSocket
三.FileInputStream获取通道方式
非直接缓冲区方式,再程序与本地磁盘中,并不是直接进行数据的交流。而是在用户和内核之间通过复制的形式。每次read 和write 都在中间进行复制。程序可以控制数据。
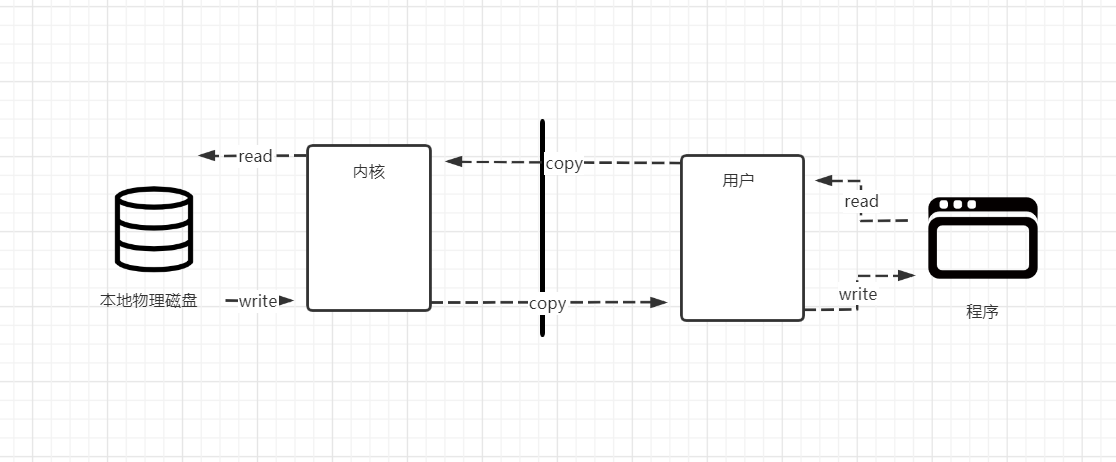
流程:FileInputStream写入文件 --> FileOutputStream的getChannel()获取通道 --> 开辟一个具有一定容量的buffer缓冲区 --> 将缓冲区的内容通过channel传输 --> 关闭流
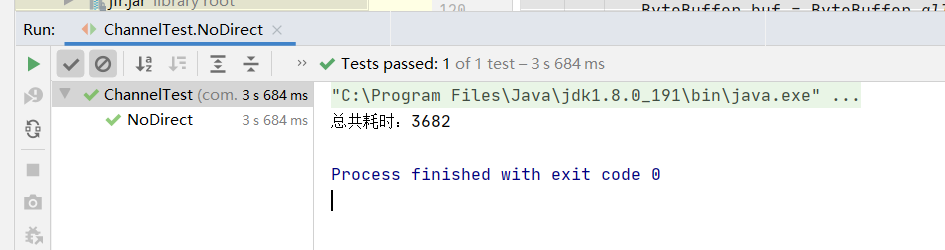
 1 //使用非直接缓冲区 传输数据
 2     //通过流的方式
 3     @Test
 4     public void NoDirect(){
 5
 6         FileInputStream fileInputStream = null;
 7         FileOutputStream fileOutputStream =null;
 8         FileChannel fileInputStreamChannel = null;
 9         FileChannel fileOutputStreamChannel = null;
10         long start = 0;
11
12         try {
13             //查看耗时
14              start = System.currentTimeMillis();
15
16             //写入
17             fileInputStream = new FileInputStream("D:/DataTestFile/1.zip");
18             //读取到
19             fileOutputStream = new FileOutputStream("D:/DataTestFile/2.zip");
20
21             //使用通道进行文件传输
22             //在传输前先获取传输通道channel
23              fileInputStreamChannel = fileInputStream.getChannel();
24              fileOutputStreamChannel = fileOutputStream.getChannel();
25
26             //将数据写入缓冲区 -->   开辟缓冲区容量  --> 后使用通道传输
27             ByteBuffer buf = ByteBuffer.allocate(1024);
28
29             //将通道中的数据送入缓冲区  数据为空时跳出循环
30             while(fileInputStreamChannel.read(buf) != -1){
31                 //切换读写模式
32                 buf.flip();
33                 //读出缓冲区的数据写入通道中
34                 fileOutputStreamChannel.write(buf);
35                 //清空缓冲区
36                 buf.clear();
37             }
38
39
40         } catch (FileNotFoundException e) {
41             e.printStackTrace();
42         } catch (IOException e) {
43             e.printStackTrace();
44         }
45         //最终需要执行的步骤 需要关闭流  和通道
46         finally {
47             //写入流关闭
48             if (fileInputStream != null){
49                 try {
50                     fileInputStream.close();
51                 } catch (IOException e) {
52                     e.printStackTrace();
53                 }
54             }
55             //读出流关闭
56             if (fileOutputStream != null){
57                 try {
58                     fileOutputStream.close();
59                 } catch (IOException e) {
60                     e.printStackTrace();
61                 }
62             }
63            if (fileInputStreamChannel != null){
64                try {
65                    fileInputStreamChannel.close();
66                } catch (IOException e) {
67                    e.printStackTrace();
68                }
69            }
70             //读出通道关闭
71             if (fileOutputStreamChannel != null){
72                 try {
73                     fileOutputStreamChannel.close();
74                 } catch (IOException e) {
75                     e.printStackTrace();
76                 }
77             }
78             //查看耗时
79             long end = System.currentTimeMillis();
80             System.out.println("总共耗时:"+(end-start));
81         }
82
83
84     }
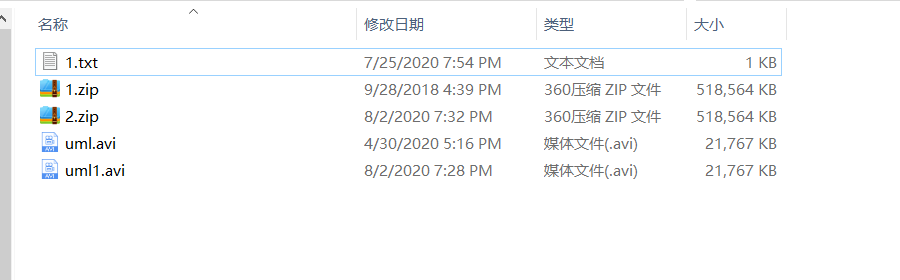
测试数据大小
使用IO流的方式(FileInPutStream/FileOutPutStream)写入文件或者读取文件,FileInPutStream实现方式:(FileOutPutStream 与之类似)
 1   public FileInputStream(String name) throws FileNotFoundException {
 2         this(name != null ? new File(name) : null);
 3     }
 4
 5
 6
 7
 8
  //获取本地文件
 9 public File(String pathname) {
10         if (pathname == null) {
11             throw new NullPointerException();
12         }
13         this.path = fs.normalize(pathname);
14         this.prefixLength = fs.prefixLength(this.path);
15     }
三.FileChannel方式+mapped*ByteBuffer(内存映射文件)传输数据
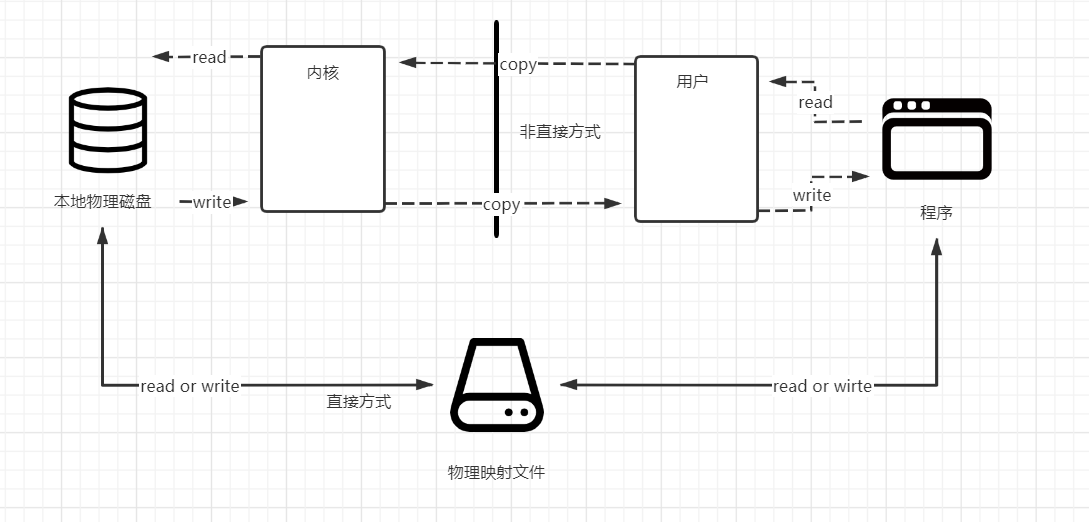
直接传输方式,在本地形成一个本地映射文件,程序通过本地映射直接传输给物理磁盘,没有复制的操作。在传输速度上优于非直接的传输
但是程序的数据一旦交给映射文件,程序将无法控制数据。
流程: FileChannel.open 获取通道 (写入和读取文件,并规定Read Or Write ,create等方式) - - > .map(将通道的一个区域映射到内存中) - - > 将映射文件中的数据存入数组,写入或读出到MappedByteBuffer
 1  /*
 2     * 通过直接缓冲区的方式进行传输数据
 3     * 通过使用映射文件的方式MappedByteBuffer传输
 4     * */
 5     @Test
 6     public void Driect(){
 7
 8         FileChannel fileInChannel = null;
 9         FileChannel fileOutChannel = null;
10         MappedByteBuffer mappedInByteBuffer = null;
11         MappedByteBuffer mappedOutByteBuffer = null;
12         long start = 0;
13
14         try {
15             //耗时查询
16              start = System.currentTimeMillis();
17
18              fileInChannel = FileChannel.open(Paths.get("D:/DataTestFile/1.zip"), StandardOpenOption.READ,StandardOpenOption.WRITE);
19              fileOutChannel = FileChannel.open(Paths.get("D:/DataTestFile/2.zip"), StandardOpenOption.READ, StandardOpenOption.WRITE,StandardOpenOption.CREATE);
20
21             //使用内存映射文件 ,杜绝非直接缓存区中的通过用户态 和核心态的相互复制影响性能的问题
22             //直接通过本地映射文件。但是一旦传输后,不归程序所管理
23              mappedInByteBuffer = fileInChannel.map(FileChannel.MapMode.READ_ONLY, 0, fileInChannel.size());
24              mappedOutByteBuffer = fileOutChannel.map(FileChannel.MapMode.READ_WRITE, 0, fileInChannel.size());
25
26             //直接对缓冲区进行读写操作
27             //定义一个数组,将映射文件的数据存入其中
28             byte[] bt = new byte[mappedInByteBuffer.limit()];
29             //先从本地映射文件中读取  后写入传输
30             mappedInByteBuffer.get(bt);
31             mappedOutByteBuffer.put(bt);
32
33
34         } catch (IOException e) {
35             e.printStackTrace();
36         }
37         finally {
38             if (fileInChannel != null){
39                 try {
40                     fileInChannel.close();
41                 } catch (IOException e) {
42                     e.printStackTrace();
43                 }
44             }
45             if (fileOutChannel != null){
46                 try {
47                     fileOutChannel.close();
48                 } catch (IOException e) {
49                     e.printStackTrace();
50                 }
51             }
52
53             //耗时结束查询
54             long end = System.currentTimeMillis();
55             System.out.println("总共耗时:"+(end-start));
56
57         }

相比较于非直接的方式,在相同资源下的第一次传输,性能更高。传输速度更快。
五.分散传输
将一个整体文件,分散成多个部分,使用多缓冲区分别进行分散。
流程:使用RandomAccessFile读取写入文件 - - > 通过RandomAccessFile.getChannel 获取通道 - - > 将两个开辟的缓冲区,存入数组中,并循环读入通道 - - > 转换成可以直观查看的String类型
 1 package com.cllover.nio;
 2
 3 import org.junit.Test;
 4
 5 import java.io.FileNotFoundException;
 6 import java.io.IOException;
 7 import java.io.RandomAccessFile;
 8 import java.nio.ByteBuffer;
 9 import java.nio.channels.FileChannel;
10
11 /*
12  * @Author chengpunan
13  * @Description //TODO 18609
14  * @Date 7:29 PM 7/25/2020
15  * @Param
16  * @return
17  *
18  * 分散读写和聚集读写测试类
19  * Disperse:分散读写
20  * gather: 聚集读写
21  **/
22 public class DisperseAndGather {
23
24 //    分散读写  将通道中的数据分散到缓冲区中,
25     @Test
26     public void Disperse(){
27         RandomAccessFile randomAccessFile = null;
28         FileChannel randomAccessFileChannel = null;
29
30         try {
31             //随机访问文件流以RW形式访问某文件
32             randomAccessFile = new RandomAccessFile("D:/DataTestFile/1.txt","rw");
33
34             //获取通道
35             randomAccessFileChannel = randomAccessFile.getChannel();
36
37             //开辟两个缓冲区
38             ByteBuffer byteBuffer100 = ByteBuffer.allocate(100);
39             ByteBuffer byteBuffer200 = ByteBuffer.allocate(200);
40
//数值初始化:存入两个缓冲区的数据
41             //分散读取
42             ByteBuffer[] byteBuffer = {byteBuffer100,byteBuffer200};
43
44             //存入读取通道
45             randomAccessFileChannel.read(byteBuffer);
46
47             for (ByteBuffer bf: byteBuffer) {
48                 bf.flip();   //切换读写方式
49             }
50             //转换成字符串
51             //public String(byte bytes[], int offset, int length)
52             System.out.println(new String(byteBuffer[0].array(),0,byteBuffer[0].limit()));
53             System.out.println("----------------------------------");
54             System.out.println(new String(byteBuffer[1].array(),0,byteBuffer[1].limit()));
55
56         } catch (FileNotFoundException e) {
57             e.printStackTrace();
58         } catch (IOException e) {
59             e.printStackTrace();
60         }
61         finally {
62             if (randomAccessFile != null){
63                 try {
64                     randomAccessFile.close();
65                 } catch (IOException e) {
66                     e.printStackTrace();
67                 }
68             }
69             if (randomAccessFileChannel != null){
70                 try {
71                     randomAccessFileChannel.close();
72                 } catch (IOException e) {
73                     e.printStackTrace();
74                 }
75             }
76             if (randomAccessFile != null){
77                 try {
78                     randomAccessFile.close();
79                 } catch (IOException e) {
80                     e.printStackTrace();
81                 }
82             }
83         }
84
85     }
86
87 }
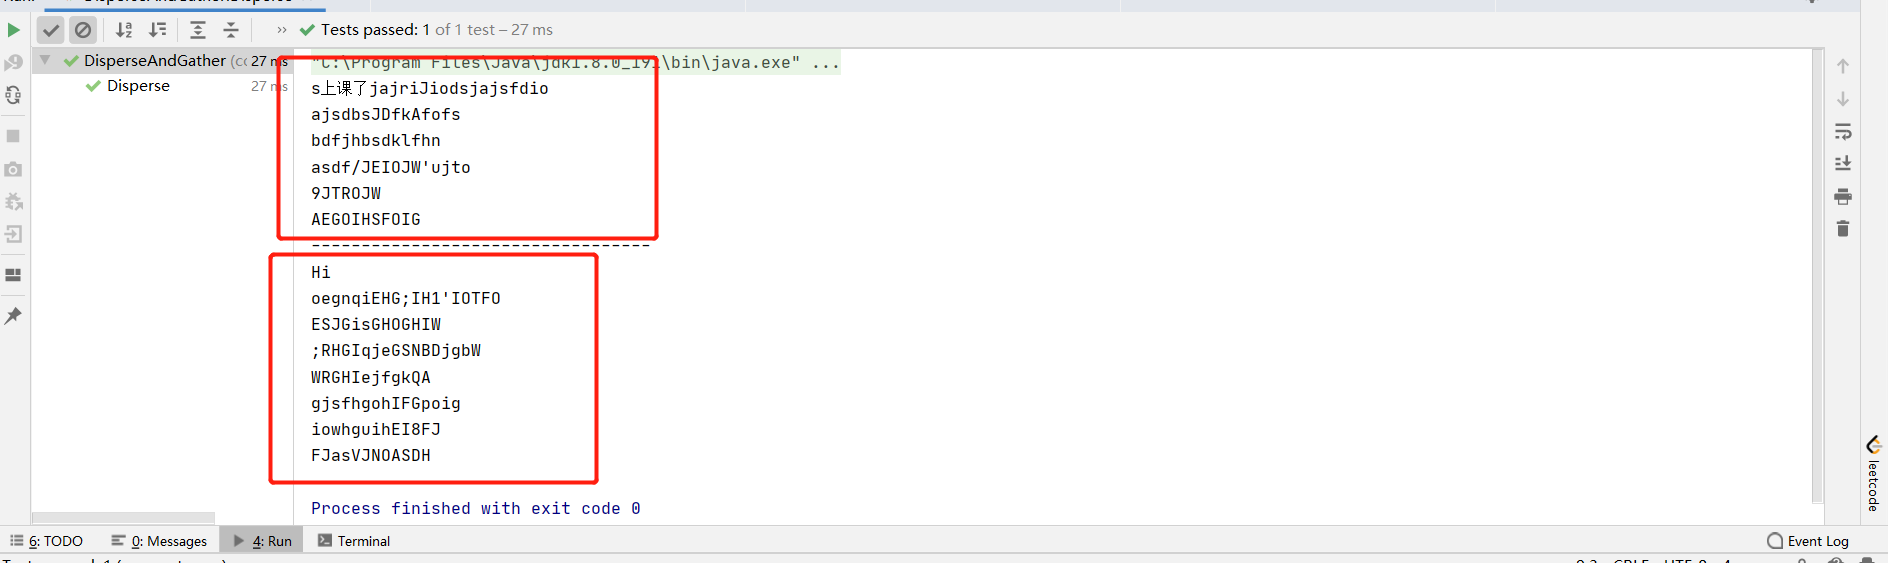
将单独两个开辟的缓冲区,存入数组之中。存入通道后,用foreach循环遍历index[0]和index[1]缓冲区上的内容,并进行写入。
1 //分散读取:数组初始化
2             ByteBuffer[] byteBuffer = {byteBuffer100,byteBuffer200};
3
4             //存入读取通道
5             randomAccessFileChannel.read(byteBuffer);
6
7             for (ByteBuffer bf: byteBuffer) {
8                 bf.flip();   //切换读写方式
9             }
资源内容:

运行结果:
聚集写入:
1  //聚集写入
2             RandomAccessFile randomAccessFile1 = new RandomAccessFile("D:/DataTestFile/2.txt", "rw");
3             FileChannel channel = randomAccessFile1.getChannel();
4             //将全部内容。将上段代码红色部分,存入数组中的数据直接通过通道写入另一个文件中
5             channel.write(byteBuffer);
写入文件后,原本文件中的内容会被覆盖或者丢失。
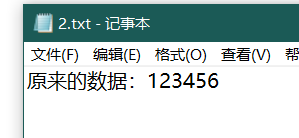
写入后:
