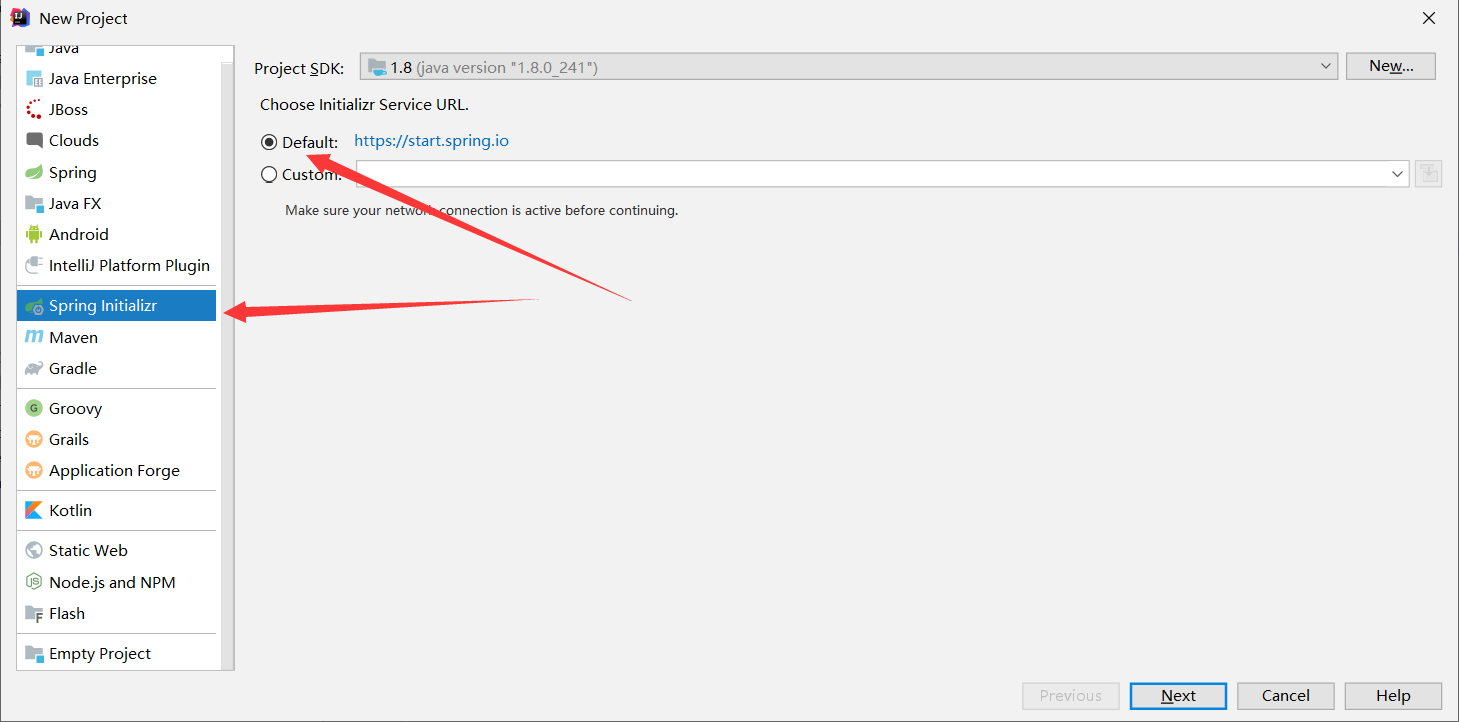
1.第一个springboot
-
-
-
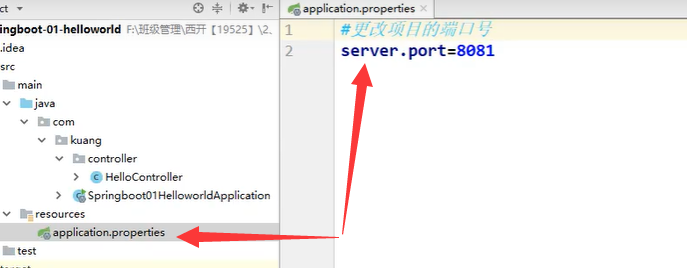
applicat.properties:
server.port=80 可以更改运行端口号
banner.text
-
在resource文件夹中加入banner.text网上搜springboot的运行图行,添加进去就可以改变运行出来的图形了。banner.text:
         /"
        | /|
        |   |
        | ~ |
        |   |
     /'|   |/'
 /"|   |   |   |
|   [ @ ]   |   |
|   |   |   |   |
| ~ ~  ~  ~ |    )
|                   /
                  /
                 /
       _____    /
    |– //''` – |
    | (( =+= )) |
    |– \_|_//– |
2.原理
-
我们来看pom.xml文件,其中它主要是依赖一个父项目:
<parent>
   <groupId>org.springframework.boot</groupId>
   <artifactId>spring-boot-starter-parent</artifactId>
   <version>2.1.9.RELEASE</version>
   <relativePath/> <!-- lookup parent from repository -->
</parent>
进入父项目:
<parent>
  <groupId>org.springframework.boot</groupId>
  <artifactId>spring-boot-dependencies</artifactId>
  <version>2.1.9.RELEASE</version>
  <relativePath>../../spring-boot-dependencies</relativePath>
</parent>
3.SpringBoot配置
模块springboot-02-config
yaml
-
将resource文件夹下的配置文件删掉,换成application.yaml的yaml文件,格式为:key:(空格)vlue。
-
语法:空格缩进极其严格,类似python
#key: value name: lisi #对象 student: name: lisi age: 10 #或者 student: {name: lisi,age: 10} #数组 pets: - cat - dog - pig #或者 pets: [cat,dog,pig] -
通过yaml给类属性赋值:
//绑定yaml文件,yaml文件中赋值
@ConfigurationProperties(prefix = "person")Person.java类:
package com.it.pojo;

import lombok.AllArgsConstructor;
import lombok.NoArgsConstructor;
import lombok.ToString;
import org.springframework.boot.context.properties.ConfigurationProperties;
import org.springframework.stereotype.Component;
import javax.xml.crypto.Data;
import java.util.Date;
import java.util.List;
import java.util.Map;

@lombok.Data
@AllArgsConstructor
@NoArgsConstructor
@ToString
@Component
//绑定yaml文件,yaml文件中赋值
@ConfigurationProperties(prefix = "person")
public class Person {
    private String name;
    private Integer age;
    private Boolean happy;
    private Date birth;
    private Map<String,Object> maps;
    private List<Object> lists;
    private Dog dog;
}
application.yaml:
#名字不能大写和类名一样,类名的小写就可以用
#也可以 age: ${random.int}生成随机的数字串
#也可以 name: ${person.hello:111}如果hello不存在那么name=111,如果存在name就等于存在的值,也就是旺财

#松散绑定:pojo中写lastName,yaml中可以携程last-name,同样可以赋值
person:
  name: lisi
  age: 3
  happy: false
  birth: 2020/01/01
  maps: {k1: v1,k2: v2}
  lists:
    - code
    - music
    - girl
  dog:
    name: 旺财
  age: 3
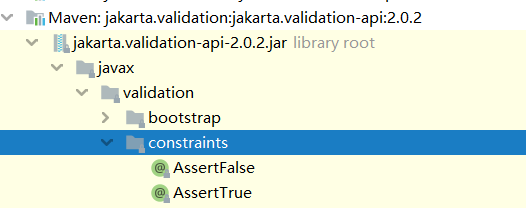
JSR-303校验
-
@Component @ConfigurationProperties(prefix = "person") @Validated //开启校验模式 public class Person { //lastName必须是邮箱格式 @Email(message="邮箱格式错误") //验证是否邮箱格式,并提示信息 //@Value("${person.last‐name}") private String lastName; //@Value("#{11*2}") private Integer age; //@Value("true") private Boolean boss; private Date birth; private Map<String,Object> maps; private List<Object> lists; private Dog dog; } -
/* 空检查 @Null 验证对象是否为null @NotNull 验证对象是否不为null, 无法查检长度为0的字符串 @NotBlank 检查约束字符串是不是Null还有被Trim的长度是否大于0,只对字符串,且会去掉前后空格. @NotEmpty 检查约束元素是否为NULL或者是EMPTY. Booelan检查 @AssertTrue 验证 Boolean 对象是否为 true @AssertFalse 验证 Boolean 对象是否为 false 长度检查 @Size(min=, max=) 验证对象(Array,Collection,Map,String)长度是否在给定的范围之内 @Length(min=, max=) Validates that the annotated string is between min and max included. 日期检查 @Past 验证 Date 和 Calendar 对象是否在当前时间之前,验证成立的话被注释的元素一定是一个过去的日期 @Future 验证 Date 和 Calendar 对象是否在当前时间之后 ,验证成立的话被注释的元素一定是一个将来的日期 @Pattern 验证 String 对象是否符合正则表达式的规则,被注释的元素符合制定的正则表达式,regexp:正则表达式 flags: 指定 Pattern.Flag 的数组,表示正则表达式的相关选项。 数值检查 建议使用在Stirng,Integer类型,不建议使用在int类型上,因为表单值为“”时无法转换为int,但可以转换为Stirng为”“,Integer为null @Min 验证 Number 和 String 对象是否大等于指定的值 @Max 验证 Number 和 String 对象是否小等于指定的值 @DecimalMax 被标注的值必须不大于约束中指定的最大值. 这个约束的参数是一个通过BigDecimal定义的最大值的字符串表示.小数存在精度 @DecimalMin 被标注的值必须不小于约束中指定的最小值. 这个约束的参数是一个通过BigDecimal定义的最小值的字符串表示.小数存在精度 @Digits 验证 Number 和 String 的构成是否合法 @Digits(integer=,fraction=) 验证字符串是否是符合指定格式的数字,interger指定整数精度,fraction指定小数精度。 @Range(min=, max=) 被指定的元素必须在合适的范围内 @Range(min=10000,max=50000,message=”range.bean.wage”) @Valid 递归的对关联对象进行校验, 如果关联对象是个集合或者数组,那么对其中的元素进行递归校验,如果是一个map,则对其中的值部分进行校验.(是否进行递归验证) @CreditCardNumber信用卡验证 @Email 验证是否是邮件地址,如果为null,不进行验证,算通过验证。 @ScriptAssert(lang= ,script=, alias=) @URL(protocol=,host=, port=,regexp=, flags=) */ -
源码位置:
4.多环境配置
-
application.yaml中:
server:     #默认第一个环境
  port: 8080
spring:
  profiles:
    active: text2    #选择text2环境


---         #第二个环境
server:
  port: 8001
spring:
  profiles: text2   #环境名字


---         #第三个环境
server:
  port: 8081
spring:
  profiles: text1    #环境名字
5.SpringBoot Web开发
模块springboot-03-web
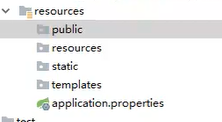
静态资源导入
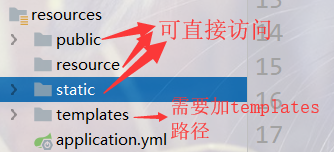
- 优先级resource > static > public,在这些目录下的文件可以直接localhost8080/文件名,直接访问,在根目录下也可以直接访问 /**。
- 也可以通过ocalhost8080/webjars/文件/文件...访问,webjars在官网搜寻
- 图标,版本要求:

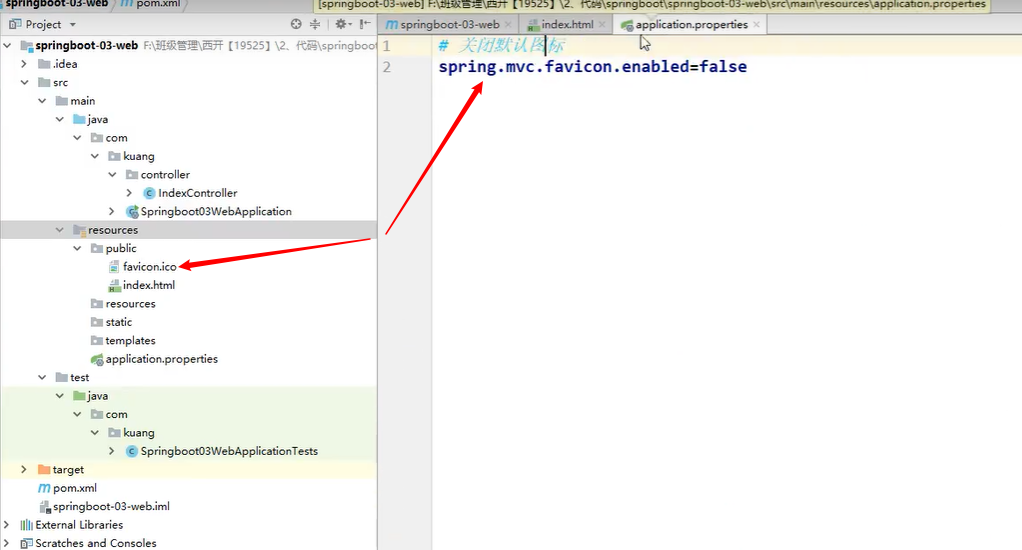
首页图标定制
-
版本控制:
<parent> <groupId>org.springframework.boot</groupId> <artifactId>spring-boot-starter-parent</artifactId> <version>2.1.7.RELEASE</version> <relativePath/> <!-- lookup parent from repository --> </parent> -
yaml:
#关闭默认图标 spring.mvc.favicon.enabled=false -
ico图片放到resource文件夹下的public问价
模板引擎
-
pom依赖:
<dependency> <groupId>org.thymeleaf</groupId> <artifactId>thymeleaf-spring5</artifactId> </dependency> <dependency> <groupId>org.thymeleaf.extras</groupId> <artifactId>thymeleaf-extras-java8time</artifactId> </dependency> -
导入:
<html lang="en" xmlns:th="http://www.thymeleaf.org"> -
将页面写在templates文件夹下面,然后localhost8080/文件名,即可直接访问到
-
templates文件夹下的html页面:
<!DOCTYPE html> <html lang="en" xmlns:th="http://www.thymeleaf.org"> <head> <meta charset="UTF-8"> <title>Title</title> </head> <body> <!--所有的HTML元素都可被Thymeleaf替换接管,th:元素名--> <div th:text="${msg}"></div> </body> </html> -
controller.java:
package com.it.controller;

        import org.springframework.stereotype.Controller;
        import org.springframework.ui.Model;
        import org.springframework.web.bind.annotation.GetMapping;
        import org.springframework.web.bind.annotation.RequestMapping;
        import org.springframework.web.bind.annotation.RestController;

@Controller
public class IndexController {

    @RequestMapping("/h")
    public String hello(Model model){
        model.addAttribute("msg","hellwspringboot");
        return "test";
    }

}
Thymeleaf语法
-
<!--Java中:model.addAttribute("list",Arrays.asList("hahaha","hehehe","xixixi","lalala"));
-->

<!--引入thymeleaf命名空间-->

<!DOCTYPE html>
<html lang="en" xmlns:th="http://www.thymeleaf.org">
<head>
    <meta charset="UTF-8">
    <title>Title</title>
</head>
<body>


<!--utext可转义HTML语句,text不可转义
<div th:utext="${msg}"></div>
<div th:text="${msg}"></div>-->

<!--遍历集合-->
<div th:each="list:${list}" th:text="${list}"></div>

</body>
</html>
MVC配置
-
接管并扩展springmvc,视图解析器:
package com.it.config; import org.springframework.context.annotation.Bean; import org.springframework.context.annotation.Configuration; import org.springframework.web.servlet.View; import org.springframework.web.servlet.ViewResolver; import org.springframework.web.servlet.config.annotation.WebMvcConfigurer; import java.util.Locale; //接管并扩展springmvc,视图解析器 @Configuration //不能写@EnableWebMvc public class MyMvcConfig implements WebMvcConfigurer { @Bean public ViewResolver myVierResolver(){ return new MyViewResolver(); } //实现了视图解析接口的类ViewResolver,就是视图解析器 //自定义了一个视图解析器 public static class MyViewResolver implements ViewResolver{ @Override public View resolveViewName(String s, Locale locale) throws Exception { return null; } } } -
yaml:
# 自定义日期格式化,默认位dd/MM/yyy
#spring:
#  mvc:
#    date-format:
yaml配置
-
#1.自定义日期格式化,默认位dd/MM/yyy
#spring:
#  mvc:
#    date-format: dd-MM-yyy

#2.关闭模板引擎的缓存
#spring:
#  thymeleaf:
#    cache: false

#3.国际化,配置文件的真实路径spring: 要添加国际化的的字段,在标签内添加,例如th:text="#{login.tip}"
#spring:
#  messages:
#    basename: i18n.login 在那个页面实现就 . 那个页面

#4.所有页面的静态资源都需要使用thymeleaf接管,本地href用@{/../../}
#设置首页路径,路径变为localhost:8080/it/index.html或者localhost:8080/it
#server:
#  servlet:
#    context-path: /it

spring:
  thymeleaf:
    cache: false
  messages:
    basename: i18n.login
模拟数据库
-
package com.it.dao;
import com.it.pojo.Department;
import com.it.pojo.Employee;
import org.springframework.beans.factory.annotation.Autowired;
import org.springframework.stereotype.Repository;
import java.util.Collection;
import java.util.HashMap;
import java.util.Map;

@Repository
public class EmployeeDao {

    //    模拟数据库中的数据
    private static Map<Integer,Employee> employees =null;

    @Autowired
    private DepartmentDao departmentDao;

    static {
        employees = new HashMap<Integer, Employee>();
        employees.put(1001,new Employee(1001,"AA","11111111@qq.com",0,new Department(101,"教学部")));
        employees.put(1002,new Employee(1002,"BB","22222222@pp.com",1,new Department(102,"信息部")));
        employees.put(1003,new Employee(1003,"CC","33333333@qq.com",1,new Department(103,"科研部")));
        employees.put(1004,new Employee(1004,"DD","11131111@qq.com",1,new Department(104,"美术部")));
        employees.put(1005,new Employee(1005,"EE","11111711@qq.com",0,new Department(105,"体育部")));
    }

//    主键自增
    private static Integer initId = 1006;
//    增加一个员工
    public void add(Employee employee){
        if (employee.getId() == null){
            employee.setId(initId++);
        }
        employee.setDepartment(departmentDao.getDepartmentById(employee.getDepartment().getId()));
        employees.put(employee.getId(),employee);
    }
//    通过id查询员工
    public Employee select(Integer id){
        return employees.get(id);
    }
//    删除一个员工
    public void delete(Integer id){
        employees.remove(id);
    }
//    获得所有员工
    public Collection<Employee> getAll(){
        return employees.values();
    }

}
国际化+自制视图解析器+拦截器
国际化
-
在resource文件夹下,创建一个i18n文件夹创建login.properties。然后再建一个login_en_US.properties。二者自动合并,然后再直接输入zh_CN,创建一个login_zh_CN.properties。
-
前端页面:
<html lang="en" xmlns:th="http://www.thymeleaf.org"> 用th:接管 <h1 th:text="#{login.tip}">Please sign in</h1> <input type="password" name="password" th:placeholder="#{login.password}" required=""> <input type="checkbox" value="remember-me">[[#{login.remember}]] </html> -
首页,点击中文或者英文,自动跳转:
()为传参数
<a class="btn btn-sm" th:href="@{/index.html(l='zh_CN')}">中文</a>
<a class="btn btn-sm" th:href="@{/index.html(l='en_US')}">English</a>
com.it.config的MyLocaleResolver.java中:
package com.it.config;
import org.springframework.util.StringUtils;
import org.springframework.web.servlet.LocaleResolver;
import javax.servlet.http.HttpServletRequest;
import javax.servlet.http.HttpServletResponse;
import java.util.Locale;
public class MyLocaleResolver implements LocaleResolver {
    //        自制添加一个国际化解析器

    public Locale resolveLocale(HttpServletRequest httpServletRequest) {
        //获取请求中的语言参数
        String language = httpServletRequest.getParameter("l");
        //如果没有就用默认的
        Locale locale = Locale.getDefault();
        //如果带有了国际化请求参数
        if (!StringUtils.isEmpty(language)){
            //zh_CN分割
            String[] s = language.split("_");
            locale = new Locale(s[0], s[1]);
        }
        return locale;
    }
    public void setLocale(HttpServletRequest httpServletRequest, HttpServletResponse httpServletResponse, Locale locale) {}
}
com.it.config的MyMvcConfig.java中:装配到bean:
package com.it.config; import org.springframework.context.annotation.Bean; import org.springframework.context.annotation.Configuration; import org.springframework.web.servlet.HandlerInterceptor; import org.springframework.web.servlet.LocaleResolver; import org.springframework.web.servlet.config.annotation.InterceptorRegistry; import org.springframework.web.servlet.config.annotation.ViewControllerRegistry; import org.springframework.web.servlet.config.annotation.WebMvcConfigurer; @Configuration public class MyMvcConfig implements WebMvcConfigurer { // 自制添加一个视图解析器 @Override public void addViewControllers(ViewControllerRegistry registry) { registry.addViewController("/").setViewName("index"); registry.addViewController("/index.html").setViewName("index"); // 如果路径写main,就跳转到dashboard.html registry.addViewController("/main").setViewName("dashboard"); } //自定义的国际化组件就生效了 @Bean public LocaleResolver localeResolver(){ return new MyLocaleResolver(); } @Override public void addInterceptors(InterceptorRegistry registry) { registry.addInterceptor(new LoginHandlerInterceptor()).addPathPatterns("/**").excludePathPatterns("/","/index.html","/user/login","/css/*","/js/*","/img/*"); } } -
yaml中:
spring:
  thymeleaf:
    cache: false
  messages:
    basename: i18n.login
自制视图解析器
-
com.it.config的MyMvcConfig.java中:直接装配到bean
package com.it.config;
import org.springframework.context.annotation.Bean;
import org.springframework.context.annotation.Configuration;
import org.springframework.web.servlet.HandlerInterceptor;
import org.springframework.web.servlet.LocaleResolver;
import org.springframework.web.servlet.config.annotation.InterceptorRegistry;
import org.springframework.web.servlet.config.annotation.ViewControllerRegistry;import org.springframework.web.servlet.config.annotation.WebMvcConfigurer;
@Configuration
public class MyMvcConfig implements WebMvcConfigurer {

//        自制添加一个视图解析器
        @Override
        public void addViewControllers(ViewControllerRegistry registry) {
                registry.addViewController("/").setViewName("index");
                registry.addViewController("/index.html").setViewName("index");
//                如果路径写main,就跳转到dashboard.html
                registry.addViewController("/main").setViewName("dashboard");
        }
}
拦截器
-
com.it.config的LoginHandlerInterceptor.java中:
package com.it.config;
import org.springframework.web.servlet.HandlerInterceptor;
import org.springframework.web.servlet.ModelAndView;
import javax.servlet.http.HttpServletRequest;
import javax.servlet.http.HttpServletResponse;
public class LoginHandlerInterceptor implements HandlerInterceptor {
    @Override
    public boolean preHandle(HttpServletRequest request, HttpServletResponse response, Object handler) throws Exception {

        Object usersession = request.getSession().getAttribute("usersession");
        if (usersession == null){
            request.setAttribute("msg","没有权限,请先登录");
            request.getRequestDispatcher("/index.html").forward(request,response);
            return false;
        }else {
            return true;
        }
    }

}
com.it.config的MyMvcConfig.java中:装配到bean:
package com.it.config;
import org.springframework.context.annotation.Bean;
import org.springframework.context.annotation.Configuration;
import org.springframework.web.servlet.HandlerInterceptor;
import org.springframework.web.servlet.LocaleResolver;
import org.springframework.web.servlet.config.annotation.InterceptorRegistry;
import org.springframework.web.servlet.config.annotation.ViewControllerRegistry;
import org.springframework.web.servlet.config.annotation.WebMvcConfigurer;
@Configuration
public class MyMvcConfig implements WebMvcConfigurer {
    //意思就是添加那个拦截,排除那个拦截
        public void addInterceptors(InterceptorRegistry registry) {
registry.addInterceptor(new LoginHandlerInterceptor()).addPathPatterns("/**").excludePathPatterns("/","/index.html","/user/login","/css/*","/js/*","/img/*");
        }
}
默认创建日期
-
private Date birth;
public Employee() {
//默认的创建日期
this.birth = new Date();
}
Restful风格
-
1.同样的路径,不同的请求方式,会有不同的代码,不同的效果
@RequestMapping("/emps")@GetMapping("/emp")@PostMapping("/emp")

2.后台:@RequestMapping("/emp/{id}")
    public String toUpdate(Model model,@PathVariable("id") Integer id) {
        return "";
    }
  前端:<a th:href="@{/emp/}+${emp.getId()}">编辑</a>  传一个参数id
页面公共提取
-
再templates下创建commons创建commons.html,用来装公共的页面代码
-
commons.html公共部分:
要添加th:fragment="" <nav th:fragment="topbar"> </nav> -
将公共部分连接到页面:
<!--使用抽取公共的-->
<div th:replace="~{commons/commons.html::topbar}"></div>
修改前端页面
href,src,action用th接管:
<link th:href="@{/css/bootstrap.min.css}" rel="stylesheet">
<img th:src="@{/img/bootstrap-solid.svg}">
<form th:action="@{/updateEmp}" method="post">
判断是否空:
<!--如果msg不为空就显示该代码-->
<p th:text="${msg}" th:if="${not #strings.isEmpty(msg)}"></p>
在进行update的时候:
<!--一到update修改,就要添加id的隐藏域-->
<input type="hidden" name="id" th:value="${emp.getId()}">
<div>
<label>LastName</label>
<!--update修改,就给修改页面的字段赋值-->
<input th:value="${emp.getLastName()}" type="text" name="lastName">
</div>
-
在add添加遇到下拉框数据时,给下拉一个具体的id,每一个部门的id不同,最后提交的是id:
<select class="form-control" name="department.id"> <option th:each="dep:${department}" th:text="${dep.getDepartmentName()}" th:value="${dep.getId()}"></option> </select> -
遍历+三目运算符+三目运算符:
<!--遍历 遍历的名字emp:${emps}后端传来的对象--> <tr th:each="emp:${emps}"> <td th:text="${emp.getId()}"></td> <td>[[${emp.getLastName()}]]</td> <td th:text="${emp.getEmail()}"></td>、 <!--三目运算符--> <td th:text="${emp.getGender()==0?'女':'男'}"></td> <td th:text="${emp.getDepartment()}"></td> <!--三目运算符--> <td th:text="${#dates.format(emp.getBirth(),'yyy-MM-dd HH:mm:ss')}"></td> </tr> -
点一个连接高亮:
<a th:class="${active=='main.html'?'nav-link active':'nav-link'}" th:href="@{/index.html}"> -
error页面:只需要在templates下创建error文件夹,加入error.html,即可
JDBC+Druid
-
com.it.config:DruidConfig.java:
package com.it.config; import com.alibaba.druid.pool.DruidDataSource; import com.alibaba.druid.support.http.StatViewServlet; import com.alibaba.druid.support.http.WebStatFilter; import org.apache.catalina.manager.StatusManagerServlet; import org.springframework.boot.context.properties.ConfigurationProperties; import org.springframework.boot.web.servlet.FilterRegistrationBean; import org.springframework.boot.web.servlet.ServletRegistrationBean; import org.springframework.context.annotation.Bean; import org.springframework.context.annotation.Configuration; import javax.servlet.Filter; import javax.servlet.FilterRegistration; import javax.servlet.Servlet; import javax.sql.DataSource; import java.util.HashMap; import java.util.Map; @Configuration public class DruidConfig { @Bean @ConfigurationProperties(prefix = "spring.datasource") public DataSource dataSource(){ return new DruidDataSource(); } @Bean public ServletRegistrationBean servletRegistrationBean(){ ServletRegistrationBean<Servlet> bean = new ServletRegistrationBean<>(new StatViewServlet(),"/druid/*"); // 账号密码配置 Map<String, String> map = new HashMap<>(); // 增加配置loginUsername,loginPassword固定的 map.put("loginUsername","admin"); map.put("loginPassword","123456"); // 允许谁可以访问,逗号后面加谁就允许谁,不写就是都能访问 map.put("allow",""); // 禁止谁能访问 map.put("91566","192.168.."); bean.setInitParameters(map); return bean; } @Bean // Filter public FilterRegistration filterRegistration(){ FilterRegistrationBean bean = new FilterRegistrationBean(); bean.setFilter(new WebStatFilter()); // 可以过滤那些请求? Map<String, String> map = new HashMap<>(); // 这些东西不进行统计 map.put("exclusions","*.js,*.css,/druid/*"); bean.setInitParameters(map); return (FilterRegistration) bean; } } -
com.it.controller:JDBCController.java:
package com.it.controller;
import org.springframework.beans.factory.annotation.Autowired;
import org.springframework.jdbc.core.JdbcTemplate;
import org.springframework.web.bind.annotation.GetMapping;
import org.springframework.web.bind.annotation.PathVariable;
import org.springframework.web.bind.annotation.RestController;
import java.util.List;
import java.util.Map;
//        xxxx Template : springboot已经配置好的bean模板。直接用
@RestController
public class JDBCController {

    @Autowired
    JdbcTemplate jdbcTemplate;

//    查询数据库的所有信息
//    没有实体类,数据库的东西怎么获取,万能的Map
    @GetMapping("/userList")
    public List<Map<String,Object>> userList(){
        String sql = "select * from user";
        List<Map<String, Object>> maps = jdbcTemplate.queryForList(sql);

        return maps;
    }

    @GetMapping("/addUser")  //自动提交事务
    public String addUser(){
        String sql = "insert into user (id,name,pwd) value (7,'ssss','323232')";
        jdbcTemplate.update(sql);

        return "OK";
    }

    @GetMapping("/updateUser/{id}")  //自动提交事务
    public String updateUser(@PathVariable("id") int id){
        String sql = "update user set name=?,pwd=? where id=" + id;

        Object[] objects = new Object[2];
        objects[0] = "小明";
        objects[1] = "11111";
        jdbcTemplate.update(sql,objects);
        return "OK";
    }

    @GetMapping("/deleteUser/{id}")  //自动提交事务
    public String deleteUser(@PathVariable("id") int id){
        String sql = "delete from user where id=?";
        jdbcTemplate.update(sql,id);

        return "OK";
    }
}
6.整合mybatis
-
pom依赖:
<dependencies> <!--Thymeleaf--> <dependency> <groupId>org.thymeleaf</groupId> <artifactId>thymeleaf-spring5</artifactId> </dependency> <dependency> <groupId>org.thymeleaf.extras</groupId> <artifactId>thymeleaf-extras-java8time</artifactId> </dependency> <dependency> <groupId>org.projectlombok</groupId> <artifactId>lombok</artifactId> <optional>true</optional> </dependency> <dependency> <groupId>org.springframework.boot</groupId> <artifactId>spring-boot-starter-jdbc</artifactId> </dependency> <dependency> <groupId>org.springframework.boot</groupId> <artifactId>spring-boot-starter-web</artifactId> </dependency> <dependency> <groupId>org.mybatis.spring.boot</groupId> <artifactId>mybatis-spring-boot-starter</artifactId> <version>2.1.2</version> </dependency> <dependency> <groupId>org.springframework.boot</groupId> <artifactId>spring-boot-starter-test</artifactId> <scope>test</scope> <exclusions> <exclusion> <groupId>org.junit.vintage</groupId> <artifactId>junit-vintage-engine</artifactId> </exclusion> </exclusions> </dependency> <dependency> <groupId>mysql</groupId> <artifactId>mysql-connector-java</artifactId> </dependency> </dependencies> -
结构:
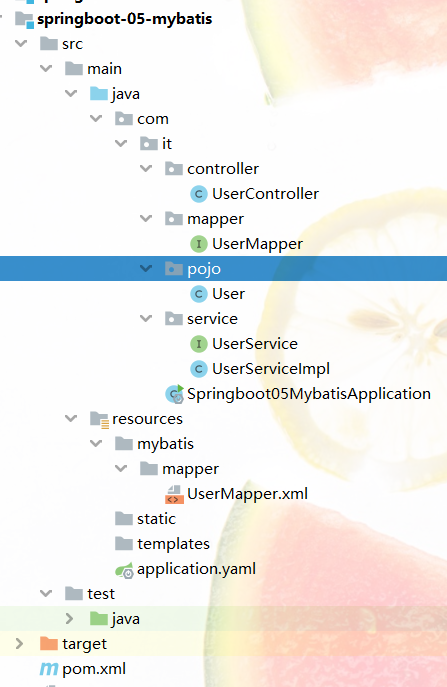
-
application.yaml:
spring: datasource: username: root password: 3105311 url: jdbc:mysql://localhost:3306/mybatis?useSSL=true&useUnicode=true&characterEncoding=UTF-8&serverTimezone=Asia/Shanghai driver-class-name: com.mysql.cj.jdbc.Driver #u6574u5408mybatis mybatis: type-aliases-package: com.it.pojo mapper-locations: classpath:mybatis/mapper/*.xml -
pojo User.java:
package com.it.pojo; import lombok.AllArgsConstructor; import lombok.Data; import lombok.NoArgsConstructor; @Data @AllArgsConstructor @NoArgsConstructor public class User { private int id; private String name; private String pwd; } -
mapper UserMapper.java:
package com.it.mapper; import com.it.pojo.User; import org.apache.ibatis.annotations.Mapper; import org.springframework.stereotype.Repository; import java.util.List; //这个注解表示了这是一个mybatis 的mapper类 @Mapper @Repository public interface UserMapper { List<User> queryUserList(); User queryById(int id); int addUser(User user); int updateUser(User user); int deleteUserById(int id); } -
resource.mybatis.mapper UserMapper.xml:
<?xml version="1.0" encoding="UTF-8" ?> <!DOCTYPE mapper PUBLIC "-//mybatis.org//DTD Mapper 3.0//EN" "http://mybatis.org/dtd/mybatis-3-mapper.dtd"> <!--namespace 绑定一对应的Dao/Mapper接口 --> <!--namespace中的名要和UserMapper.xml的接口一致--> <mapper namespace="com.it.mapper.UserMapper"> <!-- <>中加入useCache="true",开启缓存--> <select id="queryUserList" resultType="User"> select * from user </select> <select id="queryById" resultType="User"> select * from user where id = #{id} </select> <insert id="addUser" parameterType="User"> insert into user (id,name,pwd) value (#{id},#{name},#{pwd}) </insert> <update id="updateUser" parameterType="User"> update user set id = #{id},name = #{name},pwd = #{pwd} </update> <delete id="deleteUserById" parameterType="int"> delete from user where id = #{id} </delete> </mapper> -
service UserService.java:
package com.it.service; import com.it.pojo.User; import java.util.List; public interface UserService { List<User> queryUserList(); User queryById(int id); int addUser(User user); int updateUser(User user); int deleteUserById(int id); } -
service UserServiceImpl.java:
package com.it.service; import com.it.mapper.UserMapper; import com.it.pojo.User; import org.springframework.beans.factory.annotation.Autowired; import org.springframework.stereotype.Service; import java.util.List; @Service public class UserServiceImpl implements UserService { @Autowired private UserMapper userMapper; @Override public List<User> queryUserList() { List<User> userList = userMapper.queryUserList(); return userList; } @Override public User queryById(int id) { return null; } @Override public int addUser(User user) { return 0; } @Override public int updateUser(User user) { return 0; } @Override public int deleteUserById(int id) { return 0; } } -
controller UserController.java:
package com.it.controller;
import com.it.pojo.User;
import com.it.service.UserService;
import org.springframework.beans.factory.annotation.Autowired;
import org.springframework.stereotype.Controller;
import org.springframework.web.bind.annotation.RequestMapping;
import org.springframework.web.bind.annotation.RestController;
import java.util.List;

@Controller
public class UserController {

    @Autowired
    private UserService userService;

    @RequestMapping("/a")
    public String queryUserList(){
        List<User> userList = userService.queryUserList();
        return "";
    }
}
7.SpringSecurity(安全)
授权+认证+注销+防止网站攻击+开启记住我功能+设置前端用户名密码参数名称
-
这样写文件夹下的页面都可以显示
-
加入依赖:
<dependency> <groupId>org.springframework.boot</groupId> <artifactId>spring-boot-starter-security</artifactId> </dependency> <!--Thymeleaf--> <dependency> <groupId>org.thymeleaf</groupId> <artifactId>thymeleaf-spring5</artifactId> </dependency> <dependency> <groupId>org.thymeleaf.extras</groupId> <artifactId>thymeleaf-extras-java8time</artifactId> </dependency> -
yaml开启不保存缓存:
spring: thymeleaf: cache: false -
com.it.config SecurityConfig.java:
package com.it.config;
import org.springframework.security.config.annotation.authentication.builders.AuthenticationManagerBuilder;
import org.springframework.security.config.annotation.web.builders.HttpSecurity;
import org.springframework.security.config.annotation.web.configuration.EnableWebSecurity;
import org.springframework.security.config.annotation.web.configuration.WebSecurityConfigurerAdapter;
import org.springframework.security.crypto.bcrypt.BCryptPasswordEncoder;

@EnableWebSecurity
public class SecurityConfig extends WebSecurityConfigurerAdapter {

//    授权的规则
    @Override
    protected void configure(HttpSecurity http) throws Exception {

//        首页所有人可以访问,功能页vip1,2,3有权限的人可以访问
        http.authorizeRequests()
                .antMatchers("/").permitAll()
                .antMatchers("/level1/**").hasRole("vip1")
                .antMatchers("/level2/**").hasRole("vip2")
                .antMatchers("/level3/**").hasRole("vip3");

        //都要打开源码看其中的方法

//        没有权限,默认到login.html登录页面,需要开启登陆页面loginPage。设置前端用户名密码参数名
        http.formLogin().loginPage("/toLogin")
            .passwordParameter("password")
            .usernameParameter("username");

//        开启了注销功能,点注销到首页
        http.logout().logoutSuccessUrl("/");

//        防止网站攻击
        http.csrf().disable();

//        开启记住我功能,接受前端参数,实现前端自定义名字。<input type="checkbox" name="remember"> 记住我
        http.rememberMe().rememberMeParameter("remember");

    }

//    认证规则,inMemoryAuthentication()从内存中取,自定义了几个数据,正常是可以在数据库取。
//	  roles 授权vip1,2,3
//    密码编码:passwordEncoding,就是密码要加密
    @Override
    protected void configure(AuthenticationManagerBuilder auth) throws Exception {
            auth.inMemoryAuthentication().passwordEncoder(new BCryptPasswordEncoder())
                    .withUser("admin").password(new BCryptPasswordEncoder().encode("123")).roles("vip1","vip2")
                    .and()
                    .withUser("root").password(new BCryptPasswordEncoder().encode("123")).roles("vip3");
    }
}
权限控制:Thymeleaf和springsecurity整合
-
pom依赖:
thymeleaf-extras-springsecurity4,需要springboot2.0.9一下 thymeleaf-extras-springsecurity5,需要springboot2.1.0以上 <!-- thymeleaf-extras-springsecurity4 --> <dependency> <groupId>org.thymeleaf.extras</groupId> <artifactId>thymeleaf-extras-springsecurity5</artifactId> <version>3.0.4.RELEASE</version> </dependency> -
命名空间:
xmlns:th="http://www.thymeleaf.org" xmlns:sec="http://www.thymeleaf.org/thymeleaf-extras-springsecurity4"> -
html:
 <!--如果未登录,就显示登陆-->
<div sec:authorize="!isAuthenticated()">
    <a class="item" th:href="@{/toLogin}">
        <i class="address card icon"></i> 登录
    </a>
</div>

<!--如果登录,就显示登录注销-->
<div sec:authorize="isAuthenticated()">
    <a class="item" th:href="@{/logout}">
        <i class="sign-out icon"></i> 注销
    </a>
</div>

<!--如果登录,就显示用户名角色-->
<div sec:authorize="isAuthenticated()">
    用户名:<span sec:authentication="name"></span></div>

<!--如果权限是vip1,就显示第一个div,以此类推-->
<div class="column" sec:authorize="hasRole('vip1')"></div>

<div class="column" sec:authorize="hasRole('vip2')"></div>

<div class="column" sec:authorize="hasRole('vip3')"></div>
8.shiro-spring整合(未完)
-
pom依赖:
<dependencies> <!--Subject:用户 SecurityManage:管理所有用户 Realm:连接数据--> <!-- shiro-spring整合 --> <dependency> <groupId>org.apache.shiro</groupId> <artifactId>shiro-spring</artifactId> <version>1.5.1</version> </dependency> <dependency> <!-- thymeleaf --> <groupId>org.springframework.boot</groupId> <artifactId>spring-boot-starter-thymeleaf</artifactId> </dependency> <dependency> <groupId>org.springframework.boot</groupId> <artifactId>spring-boot-starter-web</artifactId> </dependency> <dependency> <groupId>org.springframework.boot</groupId> <artifactId>spring-boot-starter-test</artifactId> <scope>test</scope> <exclusions> <exclusion> <groupId>org.junit.vintage</groupId> <artifactId>junit-vintage-engine</artifactId> </exclusion> </exclusions> </dependency> </dependencies> <build> <plugins> <plugin> <groupId>org.springframework.boot</groupId> <artifactId>spring-boot-maven-plugin</artifactId> </plugin> </plugins> </build> </project> -
config包 UserRealm.java:
package com.it.config; import org.apache.shiro.authc.AuthenticationException; import org.apache.shiro.authc.AuthenticationInfo; import org.apache.shiro.authc.AuthenticationToken; import org.apache.shiro.authz.AuthorizationInfo; import org.apache.shiro.realm.AuthorizingRealm; import org.apache.shiro.subject.PrincipalCollection; //自定义的Realm public class UserRealm extends AuthorizingRealm { // 授权 @Override protected AuthorizationInfo doGetAuthorizationInfo(PrincipalCollection principalCollection) { System.out.println("授权"); return null; } // 认证 @Override protected AuthenticationInfo doGetAuthenticationInfo(AuthenticationToken authenticationToken) throws AuthenticationException { System.out.println("认证"); return null; } } -
config包 ShiroConfig.java:
package com.it.config;
import org.apache.shiro.spring.web.ShiroFilterFactoryBean;
import org.apache.shiro.web.mgt.DefaultWebSecurityManager;
import org.springframework.beans.factory.annotation.Qualifier;
import org.springframework.context.annotation.Bean;
import org.springframework.context.annotation.Configuration;

@Configuration
public class ShiroConfig {

//    Subject:用户 -> ShiroFilterFactoryBean:3
    @Bean
    public ShiroFilterFactoryBean shiroFilterFactoryBean(@Qualifier("defaultWebSecurityManager") DefaultWebSecurityManager defaultWebSecurityManager){
//        关联DefaultWebSecurityManager
        ShiroFilterFactoryBean shiroFilterFactoryBean = new ShiroFilterFactoryBean();
        shiroFilterFactoryBean.setSecurityManager(defaultWebSecurityManager);
        return shiroFilterFactoryBean;
    }


//    SecurityManage:管理所有用户 -> DefaultWebSecurityManager:2
    @Bean //也可以写成@Bean(name = " "),通过name就可以获取到它了
    public DefaultWebSecurityManager defaultWebSecurityManager(@Qualifier("userRealm") UserRealm userRealm){
        DefaultWebSecurityManager defaultWebSecurityManager = new DefaultWebSecurityManager();
//        关联Realm
        defaultWebSecurityManager.setRealm(userRealm);

        return defaultWebSecurityManager;
    }


//    Realm:连接数据 -> 创建realm对象:1
    @Bean
    public UserRealm userRealm(){
        return new UserRealm();
}
}