在设计第一人称射击游戏以及RPG游戏时,往往需要在主角身上或者近邻位置设置一个摄像机,使其能够跟随主角的移动,提升游戏体验,这里介绍三种实现摄像机跟随的方法。
(一)固定摄像机方法,常用于RPG游戏
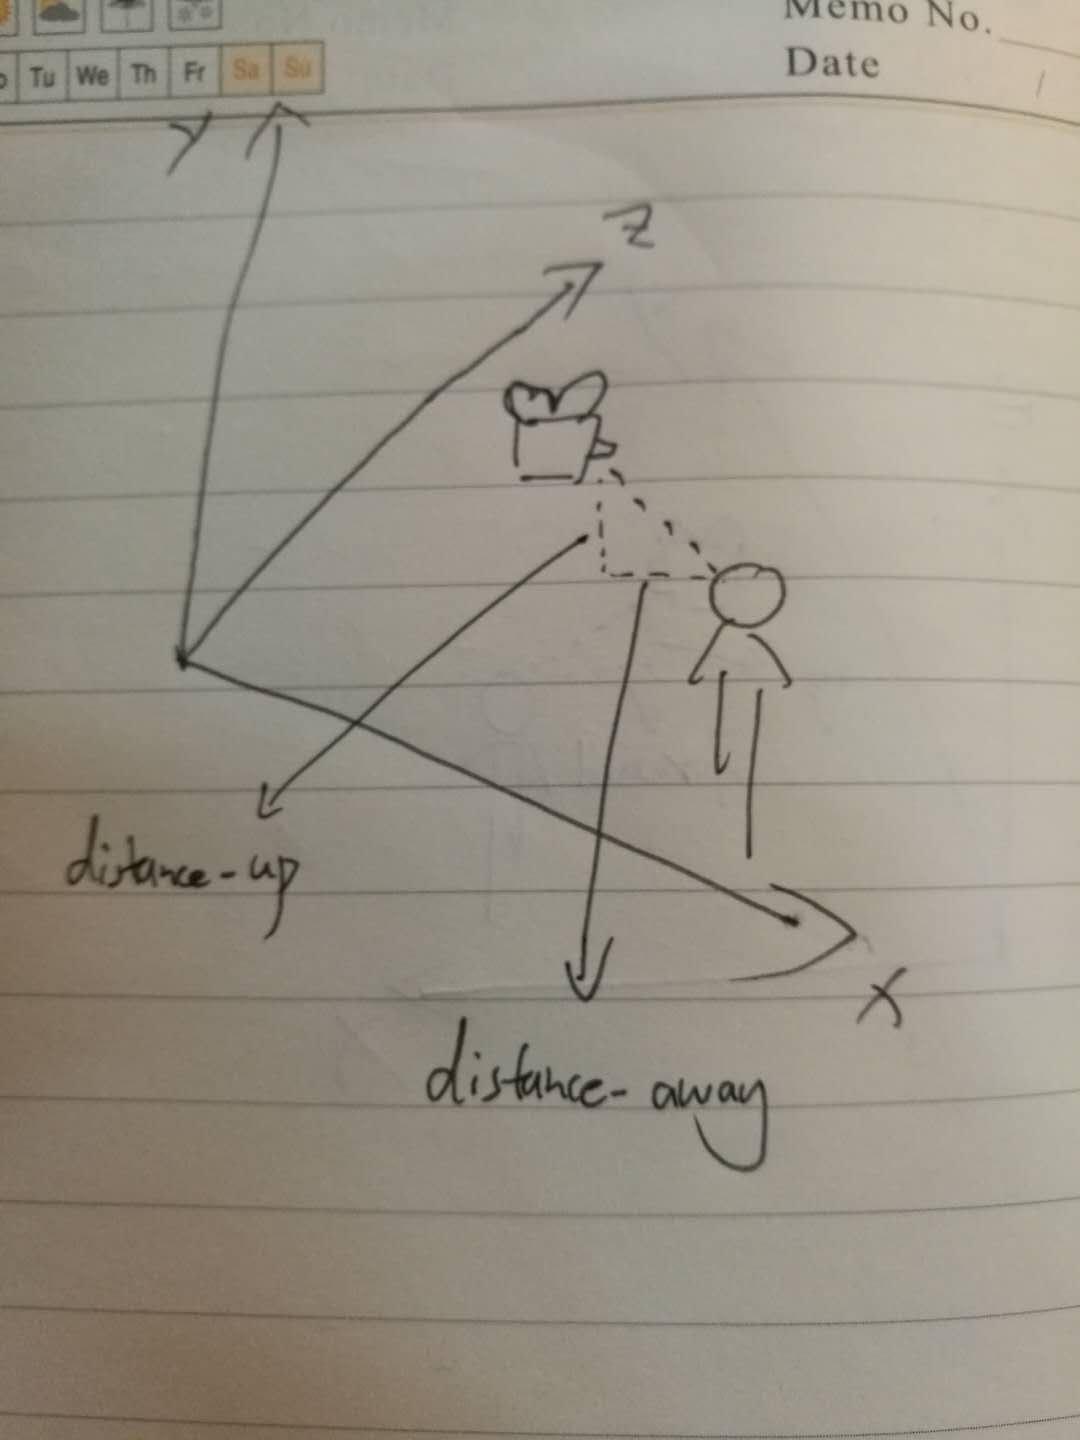
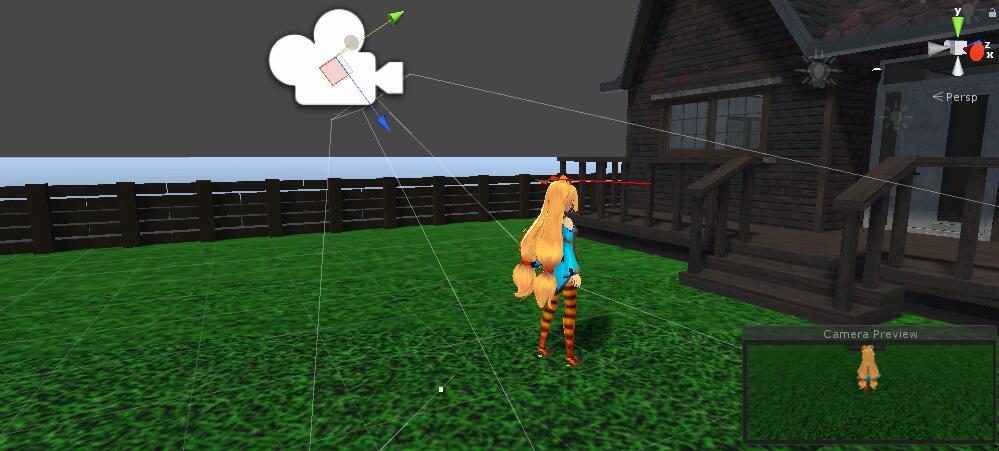
第一种方法,在Unity的坐标系中,我将摄像机固定在主角头部上边靠后位置,这样,主角在移动过程中,摄像机也随着移动,最后在游戏场景中大概是这个样子:
也就是说,摄像机相对于主角,总是在Vector3.forward方向上靠后一些,在Vector3.up方向上偏上一些。同时为了使摄像机的移动更加平滑,避免掉帧现象,引入差值函数Vector3.Lerp(),使摄像机的移动更加圆润。
相关代码如下:
-
using UnityEngine;
-
using System.Collections;
-
-
/// <summary>
-
/// Third person camera.
-
/// </summary>
-
public class TheThirdPersonCamera : MonoBehaviour
-
{
-
public float distanceAway=1.7f;
-
public float distanceUp=1.3f;
-
public float smooth=2f; // how smooth the camera movement is
-
-
private Vector3 m_TargetPosition; // the position the camera is trying to be in)
-
-
Transform follow; //the position of Player
-
-
void Start(){
-
follow = GameObject.FindWithTag ("Player").transform;
-
}
-
-
void LateUpdate ()
-
{
-
// setting the target position to be the correct offset from the
-
m_TargetPosition = follow.position + Vector3.up * distanceUp - follow.forward * distanceAway;
-
-
// making a smooth transition between it's current position and the position it wants to be in
-
transform.position = Vector3.Lerp(transform.position, m_TargetPosition, Time.deltaTime * smooth);
-
-
// make sure the camera is looking the right way!
-
transform.LookAt(follow);
-
}
-
}
(二)摄像机替代主角方法,常用于第一人称射击
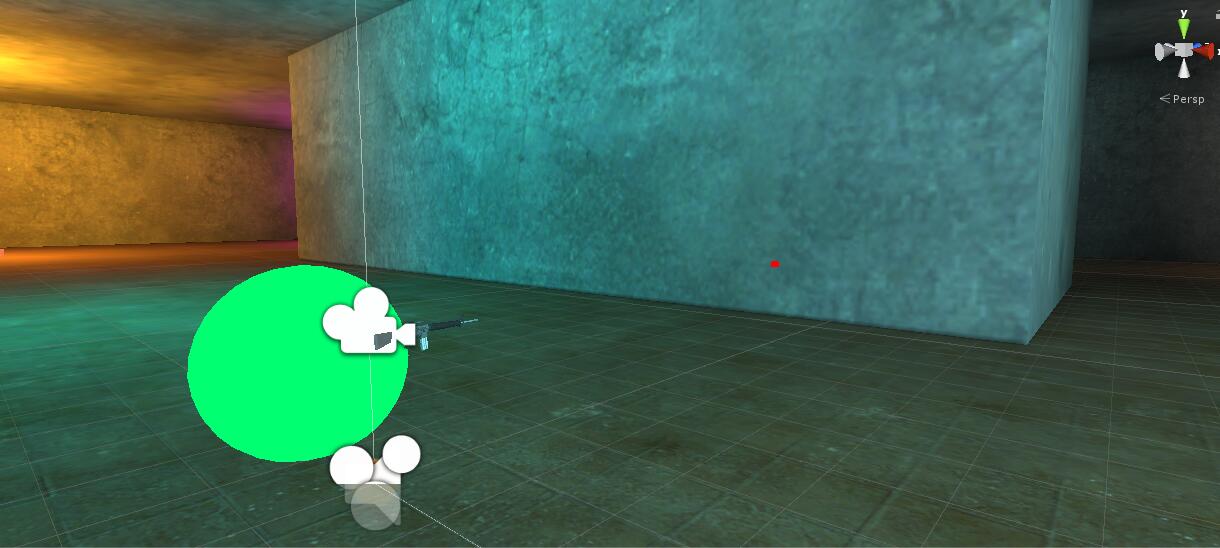
如图所示,直接用摄像机替代主角视角,摄像机看到的便是玩家在游戏场景中看到的。首先在Hierachy视图中建立空物体作为Player,使其旋转方向与摄像机保持一致。
相关代码如下:
// 摄像机Transform-
Transform m_camTransform;
-
-
// 摄像机旋转角度
-
Vector3 m_camRot;
-
-
// 摄像机高度(即表示主角的身高)
-
float m_camHeight = 1.4f;
-
void Start () {
-
-
m_transform = this.transform;
-
-
-
// 获取摄像机
-
m_camTransform = Camera.main.transform;
-
-
// 设置摄像机初始位置
-
m_camTransform.position = m_transform.TransformPoint(0, m_camHeight, 0); //摄像机初始位置从本地坐标转化成世界坐标,且在X-Z平面的初始位置
-
-
// 设置摄像机的旋转方向与主角一致
-
m_camTransform.rotation = m_transform.rotation; //rotation为物体在世界坐标中的旋转角度,用Quaternion赋值
-
m_camRot = m_camTransform.eulerAngles; //在本游戏实例中用欧拉角表示旋转
-
}
-
void Control()
-
{
-
-
//获取鼠标移动距离
-
float rh = Input.GetAxis("Mouse X");
-
float rv = Input.GetAxis("Mouse Y");
-
-
// 旋转摄像机
-
m_camRot.x -= rv;
-
m_camRot.y += rh;
-
m_camTransform.eulerAngles = m_camRot; //通过改变XYZ轴的旋转改变欧拉角
-
-
// 使主角的面向方向与摄像机一致
-
Vector3 camrot = m_camTransform.eulerAngles;
-
camrot.x = 0; camrot.z = 0;
-
m_transform.eulerAngles = camrot;
}(三)类似于第一种方法
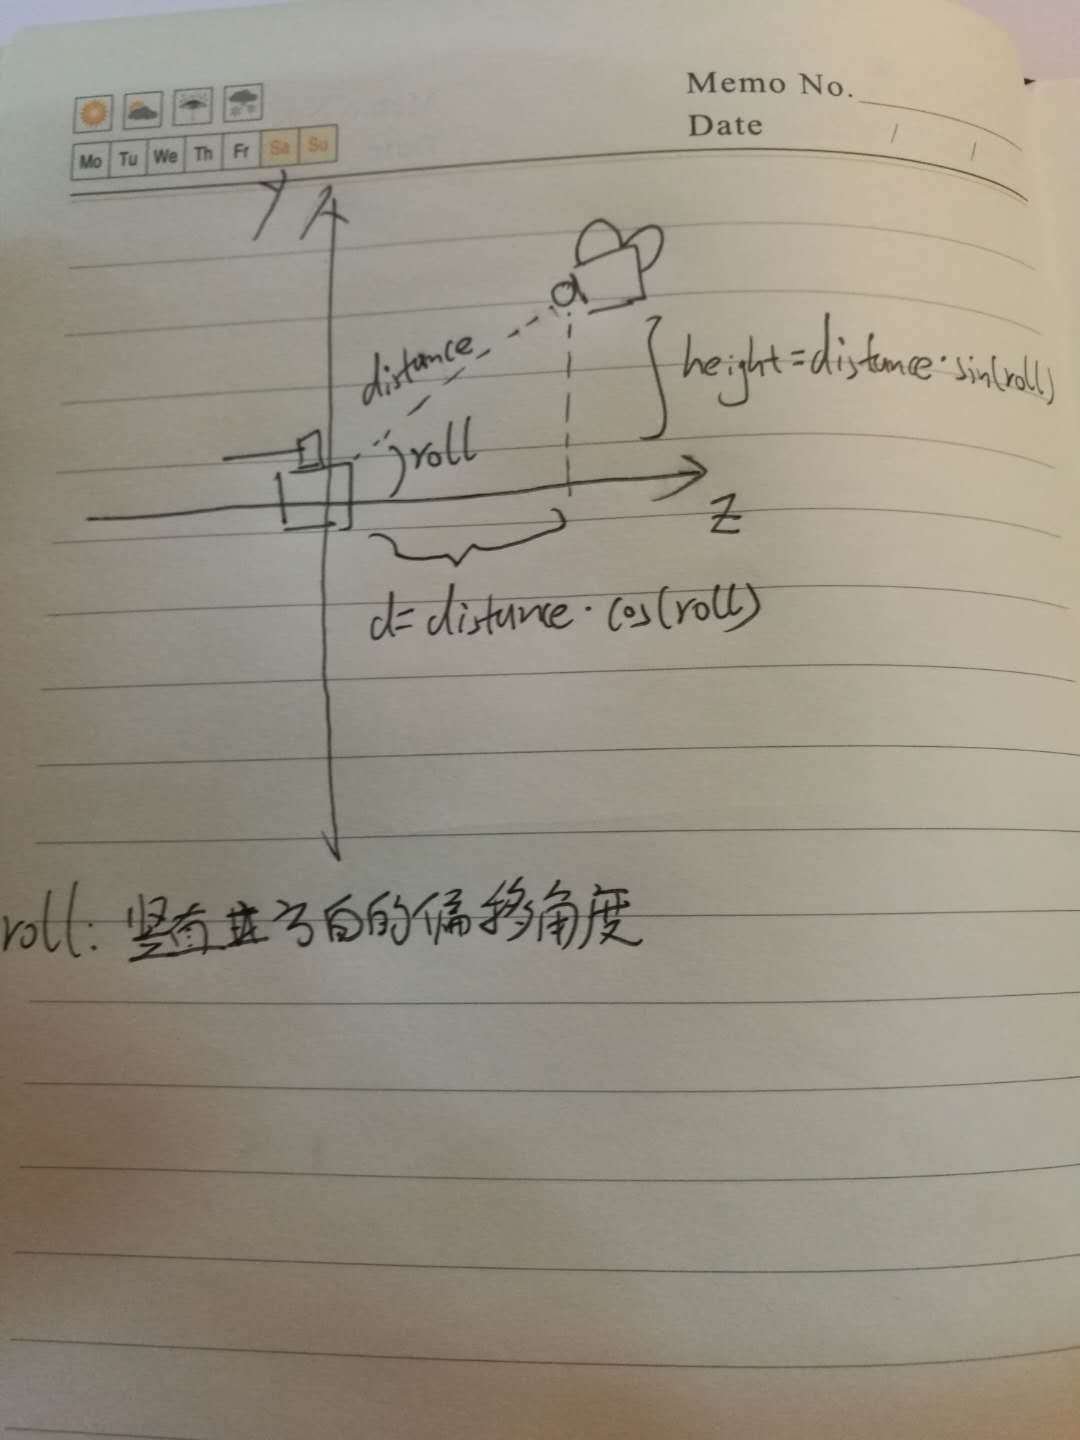
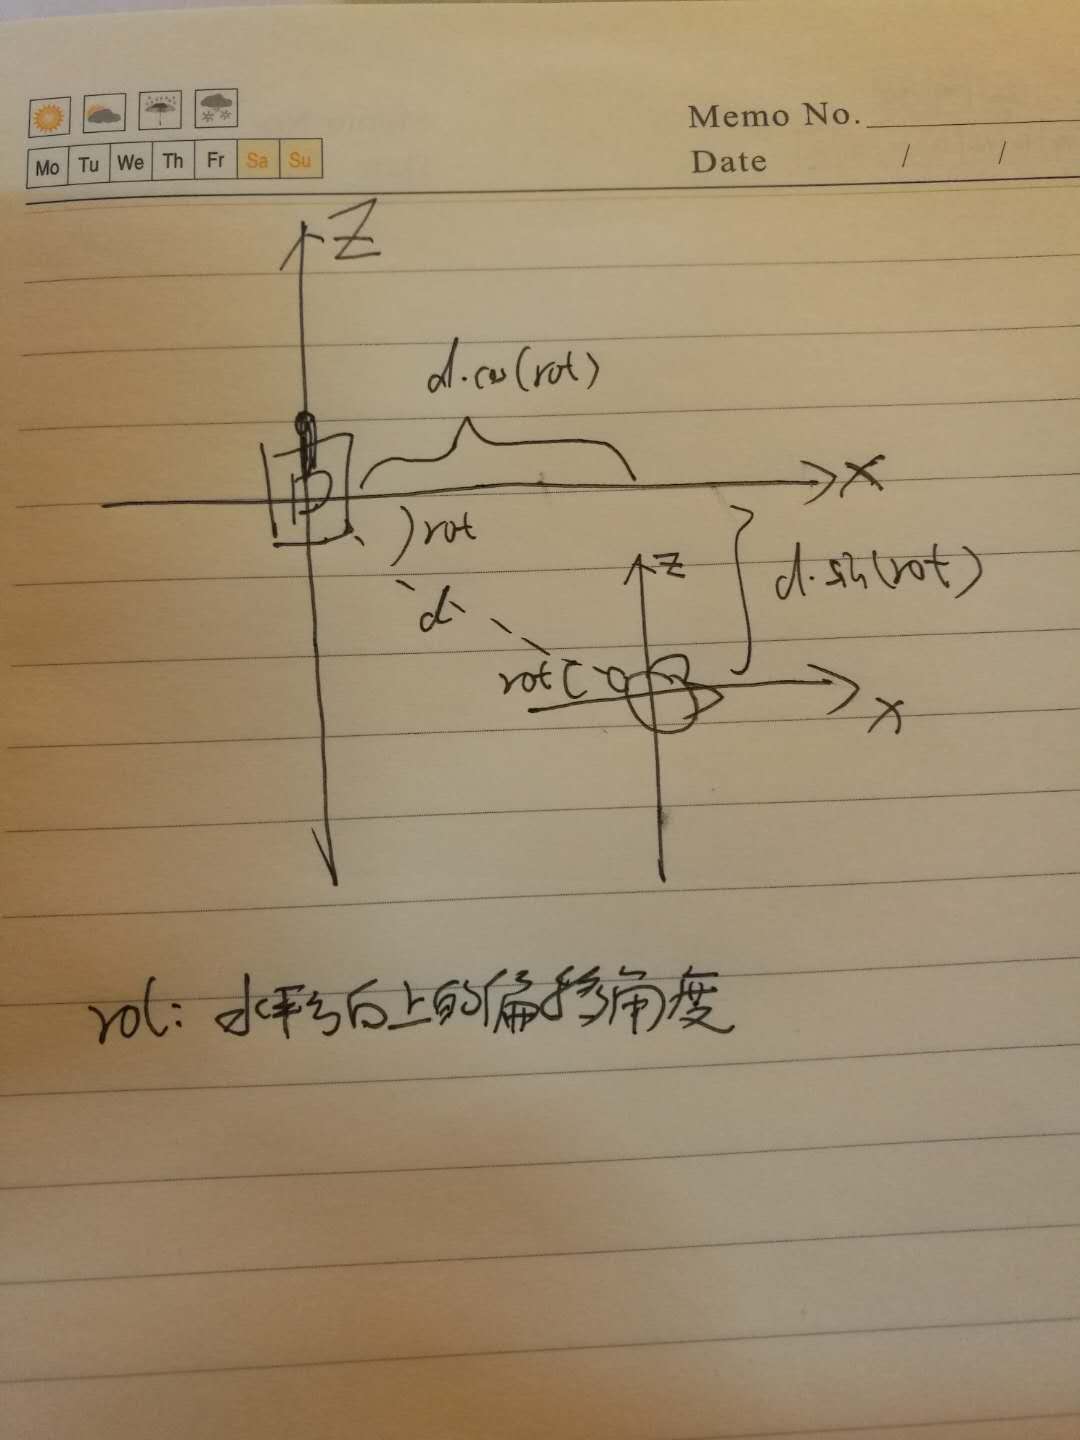
此方法在学习制作一款坦克大战时用到,原理其实和第一种方法类似,只不过用到了正余弦函数。
相关代码如下:
-
public float distance = 8;
-
//横向角度
-
public float rot = 0; //用弧度表示
-
//纵向角度
-
private float roll = 30f * Mathf.PI * 2 / 360; //弧度
-
//目标物体
-
private GameObject target;
-
void Start()
-
{
-
//找到坦克
-
target = GameObject.Find("Tank");
-
-
}
- <code class="language-csharp">void LateUpdate()
- {
- //一些判断
- if (target == null)
- return;
- if (Camera.main == null)
- return;
- //目标的坐标
- Vector3 targetPos = target.transform.position;
- //用三角函数计算相机位置
- Vector3 cameraPos;
- float d = distance *Mathf.Cos (roll);
- float height = distance * Mathf.Sin(roll);
- cameraPos.x = targetPos.x +d * Mathf.Cos(rot);
- cameraPos.z = targetPos.z + d * Mathf.Sin(rot);
- cameraPos.y = targetPos.y + height;
- Camera.main.transform.position = cameraPos;
- //对准目标
- Camera.main.transform.LookAt(target.transform);
- }</code>
