注意,我们并不需要把新增的node ip加入到证书里重新生成!!!
一、添加集群里个节点的hostname并设置好对应主机名
[root@izj6c35dldj2al3fw5p1p5z ~]# cat /etc/hosts
127.0.0.1   localhost localhost.localdomain localhost4 localhost4.localdomain4
::1         localhost localhost.localdomain localhost6 localhost6.localdomain6
172.31.182.144 master
172.31.182.146 node01
172.31.182.147 node02
172.31.182.149 node03
172.31.182.150 node04
[root@izj6c35dldj2al3fw5p1p5z ~]# hostnamectl set-hostname node03
二、配置系统环境变量并重启
systemctl stop firewalld
systemctl disable firewalld
sed -i 's/SELINUX=enforcing/SELINUX=disabled/g' /etc/selinux/config
swapoff -a
sed -i 's//dev/mapper/centos-swap/#/dev/mapper/centos-swap/g' /etc/fstab
yum -y install ntp
systemctl enable ntpd
systemctl start ntpd
ntpdate -u cn.pool.ntp.org
hwclock --systohc
timedatectl set-timezone Asia/Shanghai
yum install wget vim lsof net-tools lrzsz -y
curl -o /etc/yum.repos.d/CentOS-Base.repo http://mirrors.aliyun.com/repo/Centos-7.repo
wget -O /etc/yum.repos.d/epel.repo http://mirrors.aliyun.com/repo/epel-7.repo
yum makecache
#设置内核参数
echo "* soft nofile 190000" >> /etc/security/limits.conf
echo "* hard nofile 200000" >> /etc/security/limits.conf
echo "* soft nproc 252144" >> /etc/security/limits.conf
echo "* hadr nproc 262144" >> /etc/security/limits.conf
tee /etc/sysctl.conf <<-'EOF'
# System default settings live in /usr/lib/sysctl.d/00-system.conf.
# To override those settings, enter new settings here, or in an /etc/sysctl.d/<name>.conf file
#
# For more information, see sysctl.conf(5) and sysctl.d(5).

net.ipv4.tcp_tw_recycle = 0
net.ipv4.ip_local_port_range = 10000 61000
net.ipv4.tcp_syncookies = 1
net.ipv4.tcp_fin_timeout = 30
net.ipv4.ip_forward = 1
net.core.netdev_max_backlog = 2000
net.ipv4.tcp_mem = 131072  262144  524288
net.ipv4.tcp_keepalive_intvl = 30
net.ipv4.tcp_keepalive_probes = 3
net.ipv4.tcp_window_scaling = 1
net.ipv4.tcp_syncookies = 1
net.ipv4.tcp_max_syn_backlog = 2048
net.ipv4.tcp_low_latency = 0
net.core.rmem_default = 256960
net.core.rmem_max = 513920
net.core.wmem_default = 256960
net.core.wmem_max = 513920
net.core.somaxconn = 2048
net.core.optmem_max = 81920
net.ipv4.tcp_mem = 131072  262144  524288
net.ipv4.tcp_rmem = 8760  256960  4088000
net.ipv4.tcp_wmem = 8760  256960  4088000
net.ipv4.tcp_keepalive_time = 1800
net.ipv4.tcp_sack = 1
net.ipv4.tcp_fack = 1
net.ipv4.tcp_timestamps = 1
net.ipv4.tcp_syn_retries = 1
EOF
cat > /etc/sysctl.d/k8s.conf << EOF
net.bridge.bridge-nf-call-ip6tables = 1
net.bridge.bridge-nf-call-iptables = 1
EOF
sysctl --system
sysctl -p
reboot
三、安装docker
# step 1: 安装必要的一些系统工具
yum install -y yum-utils device-mapper-persistent-data lvm2 unzip
# Step 2: 添加软件源信息
yum-config-manager --add-repo http://mirrors.aliyun.com/docker-ce/linux/centos/docker-ce.repo
# Step 3: 更新并安装 Docker-CE
yum makecache fast
yum install https://download.docker.com/linux/centos/7/x86_64/stable/Packages/docker-ce-selinux-17.03.2.ce-1.el7.centos.noarch.rpm -y
yum install docker-ce-17.03.2.ce-1.el7.centos -y
# Step 4: 开启Docker服务
service docker start
systemctl enable docker
四、从已经安装好的node上拷贝安装目录/opt/kubernetes 及docker.service,flanneld.service,kubelet.service,kube-proxy.service
[root@node01 ~]# scp -r  /opt/kubernetes/ 172.31.182.149:/opt/
[root@node01 ~]# scp -r /usr/lib/systemd/system/{docker.service,flanneld.service,kubelet.service,kube-proxy.service} 172.31.182.149:/usr/lib/systemd/system/
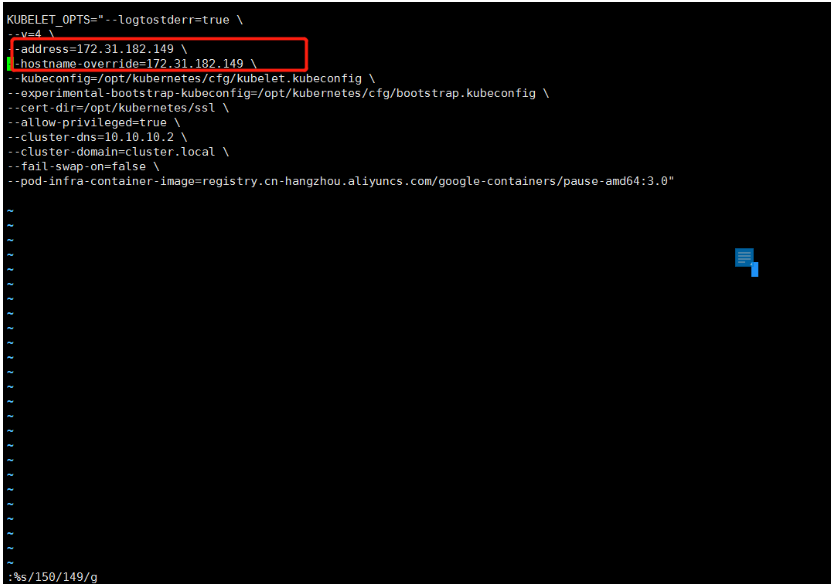
五、登录node4修改/opt/kubernetes/cfg路径下的配置文件
1./opt/kubernetes/cfg/kubelet
2./opt/kubernetes/cfg/kube-proxy

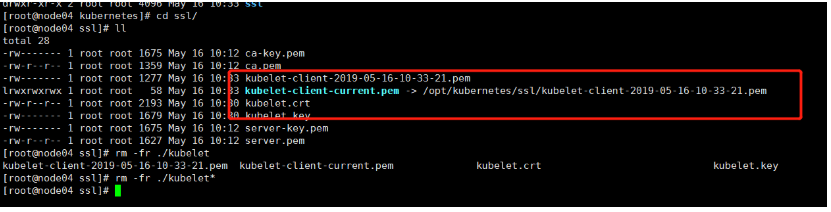
六、删除复制过来的证书,因为启动新的node时会自动去master下载自己的证书。
七、启动相关组件服务
systemctl daemon-reload
systemctl start flanneld
systemctl restart docker
systemctl start kubelet
systemctl start kube-proxy
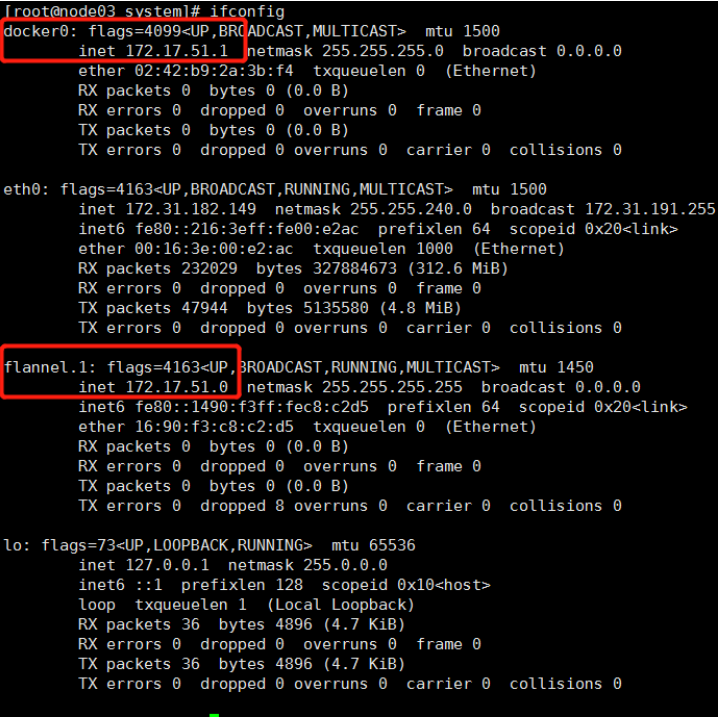
这时我们能看到flanned与docker 0是在同一网段内,说明没问题。
八、master授权加入
1.我们用kubectl get csr查看新的node连接处于Pending状态。

2.绑定
[root@master ~]# kubectl certificate approve node-csr6h9JJiwmXDnKzBaQiQKF6xTuigTK_kcQbDWDfYv224Q

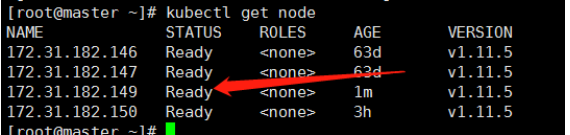
3.node成功加入k8s集群