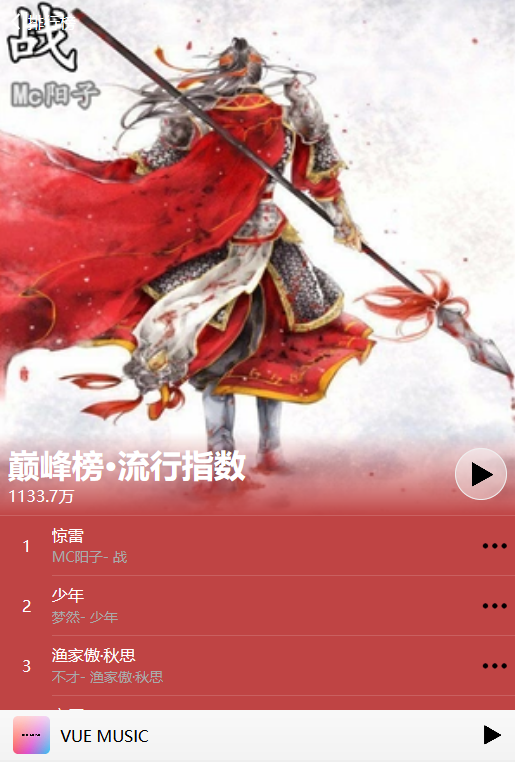
今天,我们接着上一节继续向下进行,完成当用户点击自己想听的排行榜时,显示的界面 ,该界面要讲解的知识点较多。文件位置:srccomponentsRankPage.vue ,效果图:
讲解重点:
1、由 Rank.vue 页面传来的 排行榜id ,获取相应排行榜的歌单(这个页面的前端布局细节有点多,fixed定位、元素居中、设置背景渐变色、判断背景是否为深色、移动端1px边框过粗等)。
2、点击 排行榜标题右侧的 较大播放按钮,将全部歌单加入到 播放列表中。
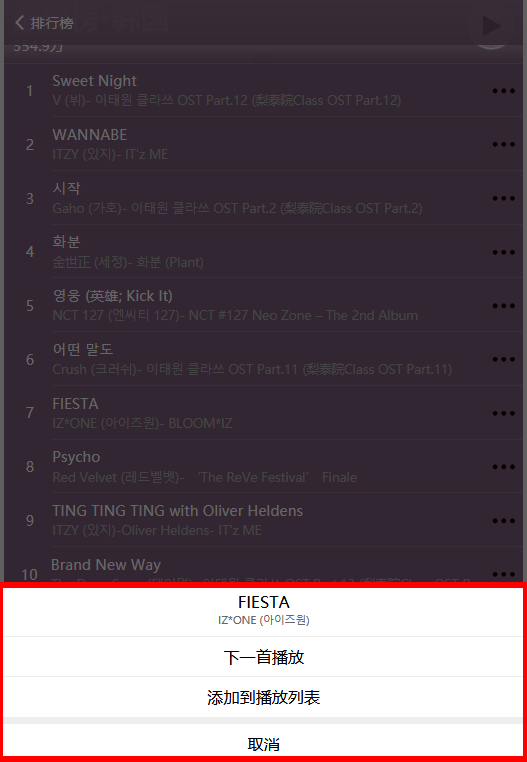
3、 点击歌曲右侧的 ‘三点图片’,弹出 weui 的 ActionSheet ,并显示菜单(上面右图效果)。
4、 任意点击歌曲,实现歌曲的播放功能,用到 qm-player 。
5、CSS3 的 transition 过渡效果以及 transform的 translate
1、vue-router 路由传参:
router.js 给 RankPage 页面设置如下路由:
{path:'/rankpage/:id', name: 'rankpage', component: RankPage} //path 属性中 ':id' 前也有个 '/'
Rank.vue 页面设置路由跳转:
this.$router.push({name: 'rankpage', params: {id : id}}) //笔者测试过,传参必须用 'params' ,其他的都会报错, 'param'也会报错
RankPage.vue 页面接收 传过来的参数:
data() {
  return {
    id: this.$route.params.id,      //注意是'$route', 不是'$router'
  }
}
另外,需要在 App.vue 中添加 <router-view></router-view> 才可以显示路由跳转页面。
2、前端布局:

实现页面左上角的 返回上一界面按钮 ,该按钮位置相对于浏览器窗口固定,不随屏幕滑动而变动, 显然,需要用到 "position: fixed" ,这里需要注意和 "position: absolute" 的区别, absolute 定位设置父元素为非static(默认)定位,如 relative,再设置 top、 left,其元素的位置就会相对 父元素定位,而 fixed定位特殊,其定位只相对于浏览器的当前视窗,与父元素 是否设置非static定位无关。
当需要调节 fixed 定位的元素位置时, 使用 margin 或 padding,若直接使用 top 或 left 会导致意外的结果。
元素居中:


左侧图片是我们想要实现的 按钮效果,但是 html 代码运行的却是右侧图片的效果,播放按钮 在水平和垂直方向都不居中,很简单,对图片的父元素用 display: flex 实现:
// html
<div class="play-button">
  <img src="../assets/icon-play.png">   //播放按钮图片
</div>
//CSS
.play-button {
    display: flex;
    justify-content: center;  //水平居中
    align-items: center;      //垂直居中
}
移动端1px边框过粗:
看对比图:


同样是设置 border: 1px solid ,细看就会发现图一比图二的边框更细,也更美观、精致,放大以后对比更明显,图三和图四肉眼可见,这个问题的原因,需要明确两个概念:逻辑像素和物理像素。
简单来说,CSS 设置的像素为 逻辑像素, 物理像素为手机屏幕上的 实实在在的发光点。最开始,两个像素的比例为1:1,后来随着手机屏幕像素的增加,比例变为1:2,即两个物理像素 表示一个逻辑像素,这就导致了 CSS设置 1px,而到了手机屏幕,就显示为2px的效果。
处理这个问题很简单,只需要在CSS添加代码:
@media (-webkit-min-device-pixel-ratio: 1.5), (min-device-pixel-ratio: 1.5) {
    .border-1px:after, .border-1px:before {
      -webkit-transform: scaleY(.7);
      -webkit-transform-origin: 0 0;
      transform: scaleY(.7);
    }

    .border-1px:after {
      -webkit-transform-origin: left bottom;
    }
  }

  @media (-webkit-min-device-pixel-ratio: 2), (min-device-pixel-ratio: 2) {
    .border-1px:after, .border-1px:before {
      -webkit-transform: scaleY(.5);
      transform: scaleY(.5);
    }
  }
设置渐变色&判断背景是否为深色:
computed: {                         //vue 计算属性
  color: function () {              //color 方法 将接口返回的数据 "this.topListData.color" 解析为16进制颜色代码
    if (this.topListData !== null) {
      var fixed = '00000' + this.topListData.color.toString(16)
        return '#' + fixed.substr(fixed.length - 6)
    } else {
      return '#ffffff'
    }
  },
  gradientcolor: function () {     //设置颜色颜色 linear-gradient 从top开始渐变
    return '-webkit-linear-gradient(top, rgba(' + this.r + ',' + this.g + ',' + this.b + ', 0), ' + this.color + ')'
  },
  isDark: function () {            //判断是否为深色
    var grayLevel = this.r * 0.299 + this.g * 0.587 + this.b * 0.114
    return (grayLevel < 192)       //若 grayLevel < 192, 返回 true,否则返回 fslae
  },
  r: function () {                 //获取 r 两位颜色代码
    return parseInt(this.color.slice(1, 3), 16)
  },
  g: function () {
    return parseInt(this.color.slice(3, 5), 16)
  },
  b: function () {
    return parseInt(this.color.slice(5, 7), 16)
  }
}
3、 点击按钮 弹出 weui 的 ActionSheet :
首先需要安装 weui ,
npm install weui
默认安装的是最新版本,现在是 weui 2.3.0,注意新旧版本的 css文件中 定义的类名会有不同,比如,2.3.0版本,弹出的菜单类名为 “weui-actionsheet__menu” ,而老版本为: “weui-actionsheet-menu”。
安装完毕后,我们在项目根目录下的 node_modules 文件夹下,找到 weui,这里不得不说 weui 团队有点坑的地方,开源的 weui 竟然没有开发手册。
我们在运用的时候,首先要看懂组件的 CSS 代码,所有的 CSS 代码 在 '.weuisrcstylewidget' 里,看懂每一个类名对应的 CSS 效果,这样运用起来就得心应手了。
.weuisrcexample 里是所有的组件demo,查看组件的 html 结构和 DOM 的类名 然后根据自己的需要, 粘贴过来需要用到的 DOM 类名即可。
因为我们已经在 main.js 里 import weui, 因此不需要再引入css文件, 这里我们针对 actionsheet 的 css 文件中的重点,进行分析(文件位置: .weuisrcstylewidgetweui-tipsweui-actionsheet.less)
.weui-actionsheet {
  position: fixed;
  left: 0;
  bottom: 0;                           //与下一行结合着看
  transform: translate(0, 100%);       //沿Y轴向下移动一倍,原本bottom:0,再向下移动则 实现隐藏效果
  transition: tranform 0.3s;           //由隐藏到显示的0.3s过渡 动画效果
}
.weui-actionsheet_toggle {
    transform: translate(0, 0);       //位移到 bottom 0,实现 actionsheet 的显示}
ActionSheet中菜单的内容,通过 this.$store.dispatch('notifyActionSheet',{ ... }) 传递到store:
showMenu: function(index) {
  this.menuedIndex = index
  let that = this
  this.$store.dispatch('notifyActionSheet',{           //荷载方式分发到 actions
    menus: {                                           //发送数据一: menus对象
      'title.noop': this.topListData.songlist[index].data.songorig + '<br/><span style="color:#666;font-size:12px;">' +this.getSingerStr(this.topListData.songlist[index].data.singer) + '</span>',
      playAsNext : '下一曲播放' ,
      addToPlayList : '添加到播放列表' ,
    },
    handler: {                                         //发送数据二: handler,注意:handler 的函数名 和 menus 里的属性名完全一致,为下一步在actions里,添加点击菜单的事件处理
      ['cancle']() {
      },
      ['playAsNext'](){
        that.$store.commit('addToPlayListAsNextPlay', { //提交到 matutions
          id: that.topListData.songlist[that.menuedIndex].data.songid,
          mid: that.topListData.songlist[that.menuedIndex].data.songmid,
          name: that.topListData.songlist[that.menuedIndex].data.songorig,
          singer: that.topListData.songlist[that.menuedIndex].data.singer,
          albummid: that.topListData.songlist[that.menuedIndex].data.albummid
        })
      },
      ['addToPlayList'](){
        that.$store.commit('addToPlayList', {         //提交到 matutions
          id: that.topListData.songlist[that.menuedIndex].data.songid,
          mid: that.topListData.songlist[that.menuedIndex].data.songmid,
          name: that.topListData.songlist[that.menuedIndex].data.songorig,
          singer: that.topListData.songlist[that.menuedIndex].data.singer,
          albummid: that.topListData.songlist[that.menuedIndex].data.albummid
        })
      }
    }
  })
},
actions 再提交到 mutations,mutations 更改 state.menus 。
state: {
  actionSheet: {
    show: false,
    menus: [],
    subject: null
  },
  playingList: {
    show: false
  }
},
getters: {
  getShow(state) {
    return state.actionSheet.show
  },
  getMenus(state) {
    return state.actionSheet.menus
  }
},
actions: {
  notifyActionSheet ({state,commit}, options) {
    commit('showActionSheet', options.menus)
  }
},
mutations: {
  showActionSheet(state, menus){
    state.actionSheet.menus = menus
    state.actionSheet.show = true
  },
  closeActionSheet(state) {
    state.actionSheet.show = false;
  }
}
然后在 ActionSheet.vue 里, 添加计算属性,就可以通过 store 的 getters 获取到刚刚添加的菜单:
computed: {
  show() {
    return this.$store.getters.getShow;
  },
  menus() {
    return this.$store.getters.getMenus;
  }
}
此时,我们的ActionSheet就可以正常显示啦。
还剩下最后一步,向ActionSheet.vue 里实现添加菜单响应:
methods:{
      emitEvent(event, menu) {
        if (event === 'on-click-menu' && !/.noop/.test(menu)) {       // /.noop/为 正则表达式语法
          this.$store.dispatch('responceFromActionSheet',menu);     // 将点击的菜单 分发到 responceFromActionSheet 中 AsyncSubject,通过.next() 调用 menu 对应的 handler
        }
      }
    },
好了,RankPage.vue 页面就到这里了,内容有点多,特别是 weui 的 actionsheet 显示自定义菜单并绑定 handler 这里,初次接触可能有点难以理解,慢慢来,多看几遍代码,慢慢理清思路。
下一节,我们来研究播放器的播放控制界面,文件位置:srccomponentsPlay.vue.