FileProvider
在Android7.0及之后我们无法直接将一个FileUri共享给另一个程序进行使用。系统会抛出一个异常FileUriExposedException。官方是这样描述的:
The exception that is thrown when an application exposes a file:// Uri to another app.
当一个应用程序暴漏一个file:// Uri给另一个app时就会抛出这个异常。
This exposure is discouraged since the receiving app may not have access to the shared path. For example, the receiving app may not have requested the Manifest.permission.READ_EXTERNAL_STORAGE runtime permission, or the platform may be sharing the Uri across user profile boundaries.
由于需要接收fileURI的应用程序可能无法访问共享的路径,因此不建议这样做。这可能是由于使用了Manifest.permission.READ_EXTERNAL_STORAGE权限导致,或者平台可以跨越用户配置边界共享Uri。
PS:这个很好理解,比如说我有一个app被装在了手机上,但是没有申请READ_EXTERNAL_STORAGE权限(6.0后需要动态申请),但是我在另一个程序中请求这个app来读取这个文件是不是就会出现问题了,肯定就会出现异常了。所以说使用了内容提供程序,数据的读取是由内容提供者进行读取的,这样就要求数据提供者必须具有这个权限,也保证了数据安全。
Instead, apps should use content:// Uris so the platform can extend temporary permission for the receiving app to access the resource.
我们应该使用content:// Uris对其进行替换,以便平台可以为需要访问特定资源的app扩展临时权限。
This is only thrown for applications targeting Build.VERSION_CODES#N or higher. Applications targeting earlier SDK versions are allowed to share file:// Uri, but it's strongly discouraged.
这个异常只会在目标版本大于等于7.0时抛出。之前的版本可以继续使用fileURI,不过不推荐这样做。
这些都是由于7.0开启了严格模式(StrictMode)造成的,官方在7.0的变更中是这么说的:
对于面向 Android 7.0 的应用,Android 框架执行的 StrictMode API 政策禁止在您的应用外部公开 file:// URI。如果一项包含文件 URI 的 intent 离开您的应用,则应用出现故障,并出现 FileUriExposedException 异常。
FileProvider类的继承关系
java.lang.Object
       android.content.ContentProvider
            android.support.v4.content.FileProvider
官方介绍
FileProvider is a special subclass of ContentProvider that facilitates secure sharing of files associated with an app by creating a content:// Uri for a file instead of a file:/// Uri.
FileProvider 是ContentProvider的子类,它通过为一个文件创建content:// Uri 来替换file:/// Uri,以此来达到文件的安全共享。
核心步骤
1、定义FileProvider
2、定义可用的文件路径
3、为定义的FileProvider添加文件路径
4、为特定文件生成ContentURI
5、授予ContentURI授予临时权限
1、定义FileProvider
由于FileProvider提供了ContentURI的生成方法,所以我们无需在代码中定义写一个它的子类。以下代码中的name属性是固定的,authorities可以自己定义,一般是包名字加上.fileprovider。exported设置为false,因为通常是拒绝外部直接访问的。grantUriPermissions需要为true,需要授予临时的Uri权限。
<manifest>
    ...
    <application>
        ...
        <provider
            android:name="android.support.v4.content.FileProvider"
            android:authorities="com.mydomain.fileprovider"
            android:exported="false"
            android:grantUriPermissions="true">
            ...
        </provider>
        ...
    </application>
</manifest>
2、定义可用的文件路径
FileProvider只能为预先指定的目录中的文件生成可用的ContentURI。要指定目录,需要使用<paths>
该文件需要建立在res目录下名为xml的目录下,xml目录需要自己建立。
<?xml version="1.0" encoding="utf-8"?>
<paths xmlns:android="http://schemas.android.com/apk/res/android">
    <!--定义APP的存放目录-->
    <external-path
        name="AppInstaller"
        path="/Download"></external-path>
</paths>paths下可以包含一个或者多个子节点。
<root-path/> 代表设备的根目录new File("/");//很少用
//app内部存储
<files-path/> 代表context.getFilesDir()
<cache-path/> 代表context.getCacheDir()
//sd卡存储
<external-path/> 代表Environment.getExternalStorageDirectory()
<external-files-path>代表context.getExternalFilesDirs()
<external-cache-path>代表getExternalCacheDirs()我们还可以在path中用.代替所有目录。
3、为定义的FileProvider添加文件路径
这里我们加入刚才添加的path文件,注意meta-data中的name项必须是android.support.FILE_PROVIDER_PATHS。
<provider
    android:name="android.support.v4.content.FileProvider"
    android:authorities="com.mydomain.fileprovider"
    android:exported="false"
    android:grantUriPermissions="true">
    <meta-data
        android:name="android.support.FILE_PROVIDER_PATHS"
        android:resource="@xml/my_path"></meta-data>
</provider>
记不住这个name怎么办?好上头!!!!懒人总是有办法。在FileProvider类的内部正好有一个定义可供我们Copy。
private static final String META_DATA_FILE_PROVIDER_PATHS = "android.support.FILE_PROVIDER_PATHS";4、为特定文件生成ContentURI
FileProvider提供了getUriForFile函数帮助我们生成ContentURI。这里需要注意的是我们使用的文件路径必须是前边在path中定义的。否则要path何用....。
第一个参数为context,第二个是定义的provider中设置的authorities,第三个是一个File对象。
//文件路径
File file =
    new File(Environment.getExternalStoragePublicDirectory(Environment.DIRECTORY_DOWNLOADS).getCanonicalPath()
        + "/apps/MyApp.apk");
//获取文件对应的content类型Uri
Uri uri = FileProvider.getUriForFile(this, "com.mydomain.fileprovider", file);
观察我们生成的Uri示例,上边是我们普通的fileUri下边是我们生成的ContentUri,区别就在于ContentUri没有暴露具体的文件路径。
//普通的fileUri(通过Uri.fromFile(file)获取)
file:///storage/emulated/0/Download/apps/MyApp.apk
//contentUri
content://com.qylost.fileproviderdemo.fileprovider/AppInstaller/MyApp.apk
常见使用场景
1、跨程序共享文件
以下我们通过两个app演示两个程序使用FileProvider共享数据。提供数据的被称为:ServerApp,接受数据的被称为:ClientApp。
ServerApp:
主要是如上所说的在Manfiest中定义provider,以及定义共享路径。
<provider
    android:name="android.support.v4.content.FileProvider"
    android:authorities="com.qylost.fileproviderdemo.fileprovider"
    android:exported="false"
    android:grantUriPermissions="true">
    <meta-data
        android:name="android.support.FILE_PROVIDER_PATHS"
        android:resource="@xml/my_path"></meta-data>
</provider><paths xmlns:android="http://schemas.android.com/apk/res/android">
<files-path
name="ShareToMyApp"
path="."></files-path>
</paths>ClientApp:
这里我们新增了一个Main2Activity,在这里读取ServerApp通过FileProvider传来的数据。
public class Main2Activity extends AppCompatActivity {

    @Override
    protected void onCreate(Bundle savedInstanceState) {
        super.onCreate(savedInstanceState);
        setContentView(R.layout.activity_main2);
        Intent intent = getIntent();
        if (intent != null && intent.getData() != null) {
            try {
                ParcelFileDescriptor parcelFileDescriptor = getContentResolver().openFileDescriptor(intent.getData(), "r");
                FileReader reader = new FileReader(parcelFileDescriptor.getFileDescriptor());
                BufferedReader bufferedReader = new BufferedReader(reader);
                String res = new Scanner(bufferedReader).useDelimiter("\A").next();//解析传来的数据
                Toast.makeText(this, res, Toast.LENGTH_SHORT).show();//弹出
            } catch (FileNotFoundException e) {
                e.printStackTrace();
            }
        }
    }
}
这里加入intent-filter,定义了action的名称,以及mimeType,这个在请求的时候需要用到。注意category不可少。
<activity android:name=".Main2Activity">
    <intent-filter>
        <data android:mimeType="share/text" />
        <action android:name="com.qylost.fileproviderdatareceverdemo.SHARE"/>
        <category android:name="android.intent.category.DEFAULT"/>
    </intent-filter>
</activity>
在ServerApp中调用如下代码,共享数据:
//在files目录下写入测试数据
writeTestData();//这里在内部files文件目录下写入了文本内容Hello File Provider!文件名为:FileProviderTest.txt
//开始共享数据
File file = new File(getFilesDir(), "FileProviderTest.txt");
Uri uri = FileProvider.getUriForFile(this, "com.qylost.fileproviderdemo.fileprovider", file);
Intent intent = new Intent("com.qylost.fileproviderdatareceverdemo.SHARE");//这个就是在上边配置intent-filter时设置的action name
intent.setDataAndType(uri, "share/text");//在上边intent-filter中设置的mimeType
intent.setFlags(Intent.FLAG_GRANT_READ_URI_PERMISSION);//授予临时读取权限
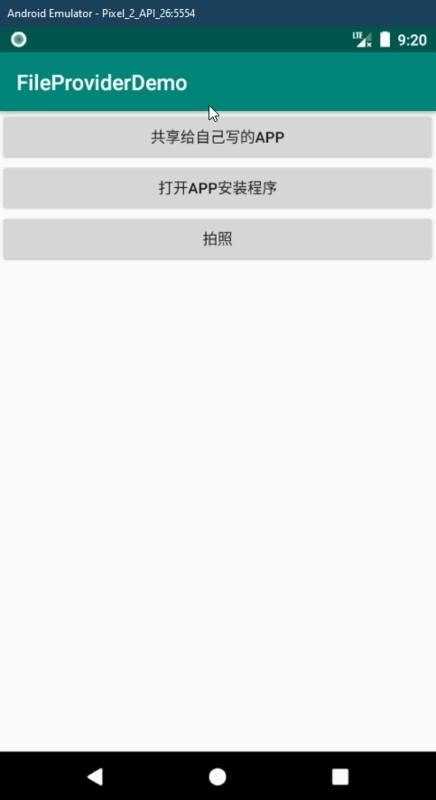
startActivity(intent);效果图:
2、打开App安装程序
//文件路径
File file = new File(Environment.getExternalStoragePublicDirectory(Environment.DIRECTORY_DOWNLOADS).getCanonicalPath() + "/MyApp.apk");
Intent intent = new Intent(Intent.ACTION_VIEW);
//获取文件对应的content类型Uri
Uri uri = FileProvider.getUriForFile(this, "com.qylost.fileproviderdemo.fileprovider", file);
intent.setDataAndType(uri, "application/vnd.android.package-archive");
//intent.setFlags(Intent.FLAG_ACTIVITY_NEW_TASK);//可以不加
intent.setFlags(Intent.FLAG_GRANT_READ_URI_PERMISSION);
startActivity(intent);
3、拍照
//定义文件名称
String fileName = new SimpleDateFormat("yyyyMMddHHmmss").format(new Date()) + ".jpg";
String path = Environment.getExternalStoragePublicDirectory(Environment.DIRECTORY_PICTURES).getCanonicalPath()
    + "/" + fileName;
//获取文件的ContentURI
File file = new File(path);
Uri uri = FileProvider.getUriForFile(this, "com.qylost.fileproviderdemo.fileprovider", file);
//定义Intent对象
Intent intent = new Intent(MediaStore.ACTION_IMAGE_CAPTURE);//设置Action为MediaStore下的ACTION_IMAGE_CAPTURE
intent.putExtra(MediaStore.EXTRA_OUTPUT, uri);//设置Extra标志为输出类型
intent.setFlags(Intent.FLAG_GRANT_WRITE_URI_PERMISSION);//授予临时权限
startActivityForResult(intent, 1);

//接收拍照结果
@Override
protected void onActivityResult(int requestCode, int resultCode, @Nullable Intent data) {
    //拍照成功(这里可以将请求拍照的File对象定义为成员变量,这样成功后就可以拿到图片了)
    if (requestCode == 1 && resultCode == RESULT_OK) {
        Toast.makeText(this, "Success", Toast.LENGTH_SHORT).show();
    }
    super.onActivityResult(requestCode, resultCode, data);
}
基本工作原理
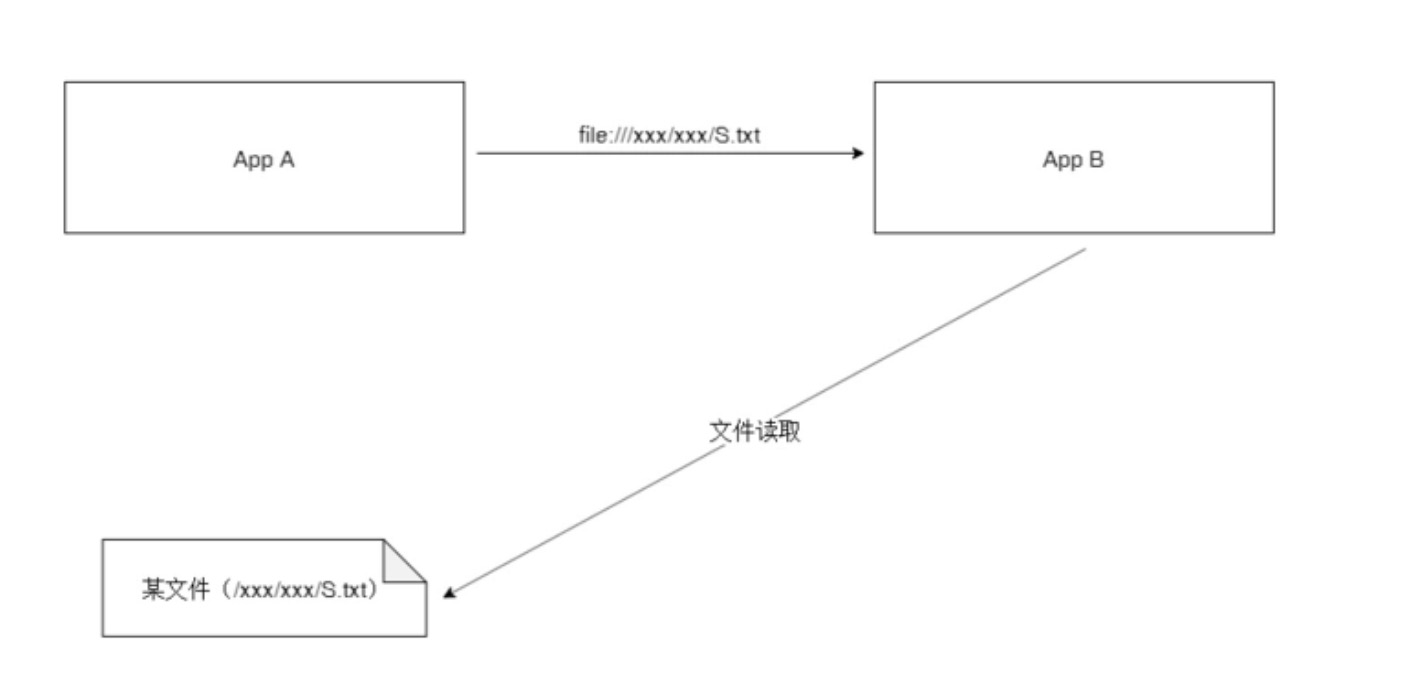
使用fileUri的工作流程图:
1、A共享文件绝对路径给B
2、B通过路径读取数据
通过fileUri共享文件简单粗暴,直接将路径进行共享,这样做会存在一些问题:
1、文件路径暴露。
2、这个文件路径可能是一个外部存储路径(外部存储路径需要申请权限,可能App B没有这个权限,就会出现异常。再或者AppA没有外部存储读写权限,那么将文件读取交给了一个具有外部存储读写权限的App就会存在安全隐患)。
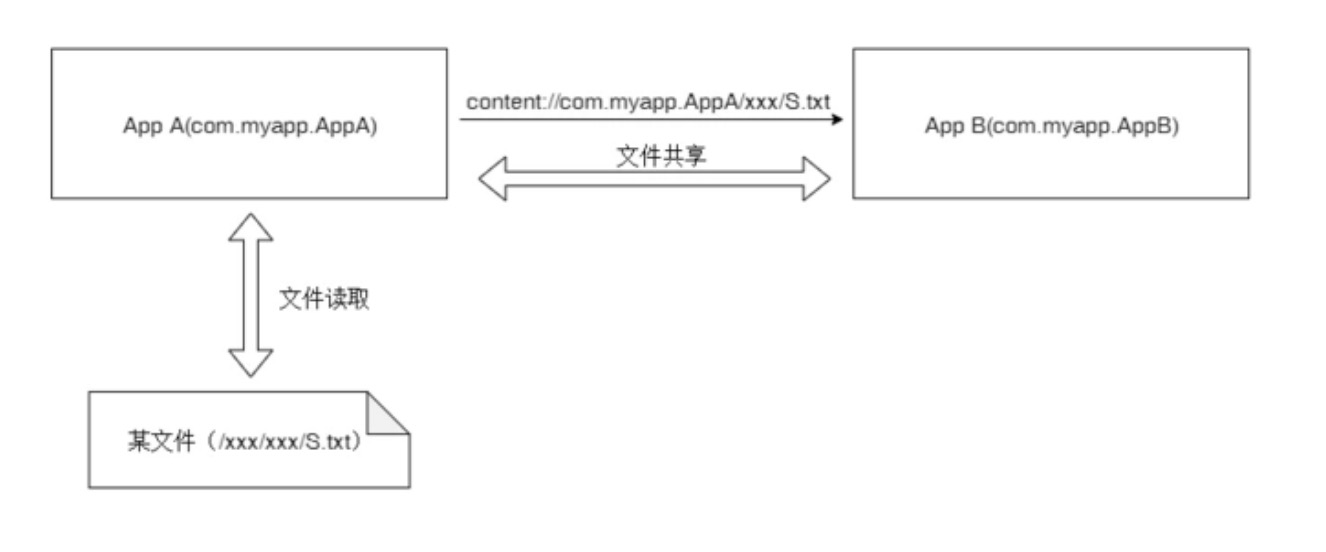
为了解决这两个问题,所以使用contentURI,使用“相对“路径解决路径暴露问题,数据读取是交由提供者来完成的。
使用ContentUri的工作流程图:
A仅仅给B分享了ContentURI,具体的文件读取是由内容/数据提供方(App A)来完成的,App B只能去问App A拿数据。
1、A共享ContentURI给B
2、B拿着这个URI找A要数据
3、A读取文件中的数据给B
手动关闭严格模式
不推荐这么来搞,不过还是要知道的。
//手动关闭严格模式
StrictMode.VmPolicy.Builder builder = new StrictMode.VmPolicy.Builder();
builder.detectAll();
StrictMode.setVmPolicy(builder.build());
参考文献
1、https://developer.android.com...
2、https://blog.csdn.net/chen_wh...
3、https://blog.csdn.net/Next_Se...
4、https://developer.android.com...(需要梯子)