Eureka服务端的配置
1、创建eureka子模块

2、pom中的依赖,这里相较于之前,多了一个eureka注册中心。
    <parent>
        <groupId>org.springframework.boot</groupId>
        <artifactId>spring-boot-starter-parent</artifactId>
        <version>2.2.5.RELEASE</version>
        <relativePath/> <!-- lookup parent from repository -->
    </parent>
    <groupId>com.demo</groupId>
    <artifactId>eurekaserver8761</artifactId>
    <version>0.0.1-SNAPSHOT</version>
    <name>eurekaserver8761</name>
    <description>Demo project for Spring Boot</description>
    <properties>
        <java.version>1.8</java.version>
        <spring-cloud.version>Hoxton.SR6</spring-cloud.version>
    </properties>

    <dependencyManagement>
        <dependencies>
            <dependency>
                <groupId>org.springframework.cloud</groupId>
                <artifactId>spring-cloud-dependencies</artifactId>
                <version>${spring-cloud.version}</version>
                <type>pom</type>
                <scope>import</scope>
            </dependency>
        </dependencies>
    </dependencyManagement>
    <dependencies>
        <dependency>
            <groupId>org.springframework.boot</groupId>
            <artifactId>spring-boot-starter-web</artifactId>
        </dependency>

        <dependency>
            <groupId>org.springframework.boot</groupId>
            <artifactId>spring-boot-starter-test</artifactId>
            <scope>test</scope>
        </dependency>

        <!--引入eureka注册中心-->
        <dependency>
            <groupId>org.springframework.cloud</groupId>
            <artifactId>spring-cloud-starter-netflix-eureka-server</artifactId>
        </dependency>
    </dependencies>

    <build>
        <plugins>
            <plugin>
                <groupId>org.springframework.boot</groupId>
                <artifactId>spring-boot-maven-plugin</artifactId>
            </plugin>
        </plugins>
    </build>
3、添加application.properties配置,这里后两项配置请注意,为了不让eureka自己把自己注册。
#端口
server.port=8761
#eureka服务中心注册的名称
spring.application.name=eurekaserver
#注册中心的地址
eureka.client.service-url.defaultZone=http://localhost:8761/eureka
#不将自己同时作为客户端进行注册
eureka.client.register-with-eureka=false
#关闭作为客户端 从eureka server获取服务信息
eureka.client.fetch-registry=false

4、启动类要添加注解
@SpringBootApplication
@EnableEurekaServer   //注册中心的注解
public class Eurekaserver8761Application {

    public static void main(String[] args) {
        SpringApplication.run(Eurekaserver8761Application.class, args);
    }

}
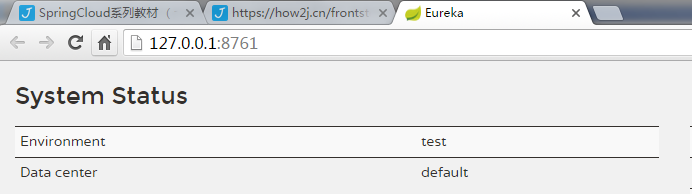
5、每次引入了依赖后,进行install,防止错误,启动该启动类,并且访问eureka地址:http://localhost:8761/
Eureka客户端的配置
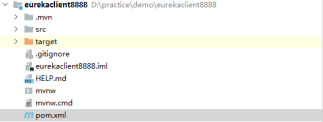
1、同上创建一个client客户端项目
2、pom.xml文件中进行版本管理配置
    <properties>
        <java.version>1.8</java.version>
        <spring-cloud.version>Hoxton.SR6</spring-cloud.version>
    </properties>

    <dependencyManagement>
        <dependencies>
            <dependency>
                <groupId>org.springframework.cloud</groupId>
                <artifactId>spring-cloud-dependencies</artifactId>
                <version>${spring-cloud.version}</version>
                <type>pom</type>
                <scope>import</scope>
            </dependency>
        </dependencies>
    </dependencyManagement>

<!--引入客户端包-->
        <dependency>
            <groupId>org.springframework.cloud</groupId>
            <artifactId>spring-cloud-starter-netflix-eureka-client</artifactId>
        </dependency>
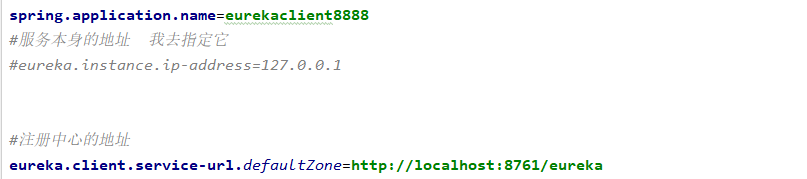
3、properties文件配置
#端口
server.port=8888
#eureka服务中心注册的名称
spring.application.name=eurekaclient8888
#注册中心的地址
eureka.client.service-url.defaultZone=http://localhost:8761/eureka
#用来修改eureka server默认接收心跳的最大时间  默认是90秒
eureka.instance.lease-expiration-duration-in-seconds=10
#server发送一次心跳 默认四30秒
eureka.instance.lease-renewal-interval-in-seconds=5
4、启动类添加注解
package com.demo.eurekaclient8888;

import org.springframework.boot.SpringApplication;
import org.springframework.boot.autoconfigure.SpringBootApplication;
import org.springframework.cloud.netflix.eureka.EnableEurekaClient;

@SpringBootApplication
@EnableEurekaClient
public class Eurekaclient8888Application {

    public static void main(String[] args) {
        SpringApplication.run(Eurekaclient8888Application.class, args);
    }

}
5、访问效果,将自己注册到了eureka中心


注意
注册中心有两种方式:1、要么服务端拉取客户端服务的连接,客户端不用配置注册地址

2、要么client客户端将自己主动送到服务端去,服务端不用配置注册地址,但是很明显客户端要方便得多