从零开始,搭建一个简单的购物平台(十四)前端商城部分:
https://blog.csdn.net/time_____/article/details/108545330
项目源码(持续更新):https://gitee.com/DieHunter/myCode/tree/master/shopping
上篇文章对主页和部分公共组件进行了界面和功能实现,之前对项目用到的工具类,路由,全局状态进行了封装,这篇文章将对商品分类,商品主题界面进行介绍,实现过程同样是用到了组件内单独异步请求,减少数据堵塞
商品分类:
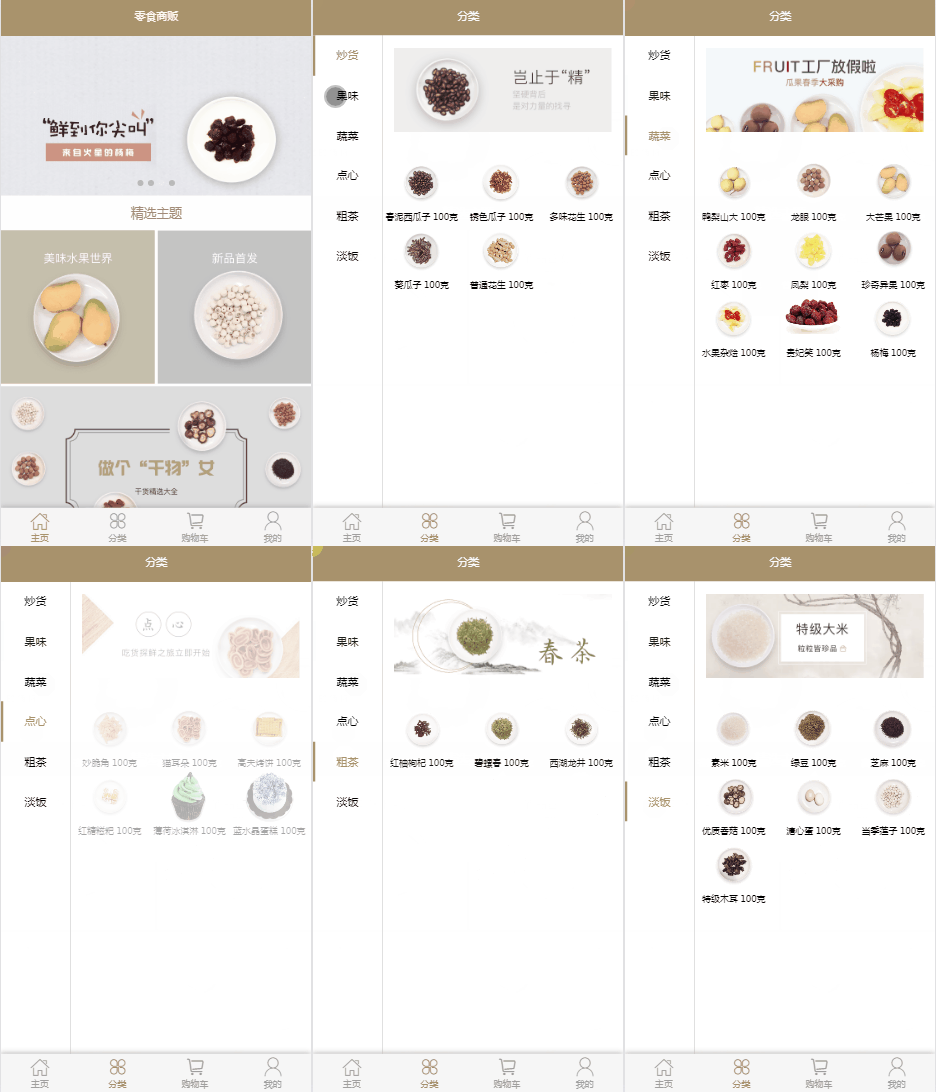
界面样式及效果

注意:由于分类商品列表和主页的商品不会时常发生变化,我们可以使用Vue中的keep-alive组件,它的作用是在组件切换时将状态保留在内存中,防止重复渲染DOM,也就是保存组件不被销毁,防止每次加载页面都做不必要的请求,实现效果如下

在app.vue中添加keep-alive组件包裹路由组件
<keep-alive include="Home,Kind">
   <router-view class="appView"></router-view>
</keep-alive>
这里我们将分类列表左右分别分成两个组件,组成一个tab切换栏,通过左边的分类菜单进行选择切换,从而重新渲染右边的商品列表
- 左边切换组件leftMenu.vue
<template> <div id="left"> <div v-for="(item,index) in list" :key="index" @click="sel(item.val)" :class="item.val==onesel?'selec':''" >{{item.name}}</div> </div> </template> <script> import Config from "../../config/config"; import ShopType from "../../config/shopType"; const { EventName } = Config; export default { data() { return { list: ShopType.shopType, onesel: "0"//默认选中第一项 }; }, methods: { sel(item) { if (this.onesel == item) return;//防止重复点击同一个选项 this.onesel = item; this.$events.emitEvent(EventName.SelectKind, item);//触发选中商品类型事件 } } }; </script> <style lang="less" scoped> @import "../../style/init.less"; #left { .w(215); height: 100%; position: fixed; .f_s(34); border-right: unit(1 / @pxtorem, rem) solid #d6d6d6; margin-right: unit(215 / @pxtorem, rem); div { .h(125); .l_h(125); text-align: center; } .selec { border-left: unit(8 / @pxtorem, rem) solid @mainColor; text-indent: unit(-8 / @pxtorem, rem); color: @mainColor; } } </style> -
右边商品列表组件rightShop.vue
<template> <transition name="fade"> <div class="rightShop" v-if="transitionSwitch"> <h2 id="head"> <img :src="imgPath+themeList.shopPic" v-if="themeList.shopPic" alt /> </h2> <ul> <li v-for="(item,index) in list" :key="index" @click="clickHandler(item)"> <img :src="imgPath+item.shopPic" /> <span>{{item.shopName}} {{item.shopScale}}克</span> </li> </ul> </div> </transition> </template> <script> import Config from "../../config/config"; import RightShopBussiness from "./bussiness"; const { EventName } = Config; export default { data() { return { themeList: {}, list: [], imgPath: Config.RequestPath, rightShopBussiness: null, transitionSwitch: true, beforeIndex: 0 }; }, created() { this.rightShopBussiness = new RightShopBussiness(this); this.rightShopBussiness.initPageConfig(this.beforeIndex); this.$events.onEvent(EventName.SelectKind, data => {//监听选择种类事件 this.transitionSwitch = false;//通过v-show实现fade动画效果 this.rightShopBussiness.initPageConfig(data); }); }, destroyed() { this.$events.offEvent(EventName.SelectKind);//销毁事件监听 }, methods: { clickHandler(data) { this.$router.push({ name: "ShopInfo", query: { ...data } }); } } }; </script> <style lang="less" scoped> @import "../../style/init.less"; .rightShop { padding-left: unit(215 / @pxtorem, rem); img { 90%; display: block; margin: unit(40 / @pxtorem, rem) auto; } ul { margin-top: unit(70 / @pxtorem, rem); margin-bottom: unit(110 / @pxtorem, rem); li { display: inline-block; 33%; vertical-align: top; text-align: center; img { 70%; margin: 0 auto; } span { .f_s(28); text-align: center; } } } } </style> -
将商品分类页面加入到router配置中,与主页和购物车界面同级page下新建kind页面,商品分类页面就已经完成
<template>
  <div>
    <Top title="分类"></Top>
    <div class="content">
      <leftMenu></leftMenu>
      <rightShop></rightShop>
    </div>
    <TabBar></TabBar>
  </div>
</template>

<script>
import TabBar from "../../components/tabBar/tabBar";
import Top from "../../components/top/top";
import leftMenu from "../../components/leftMenu/leftMenu";
import rightShop from "../../components/rightShop/rightShop";
export default {
  name: "Kind",
  components: {
    Top,
    leftMenu,
    rightShop,
    TabBar
  }
};
</script>

<style lang="less" scoped>
@import "../../style/init.less";
</style>
商品主题
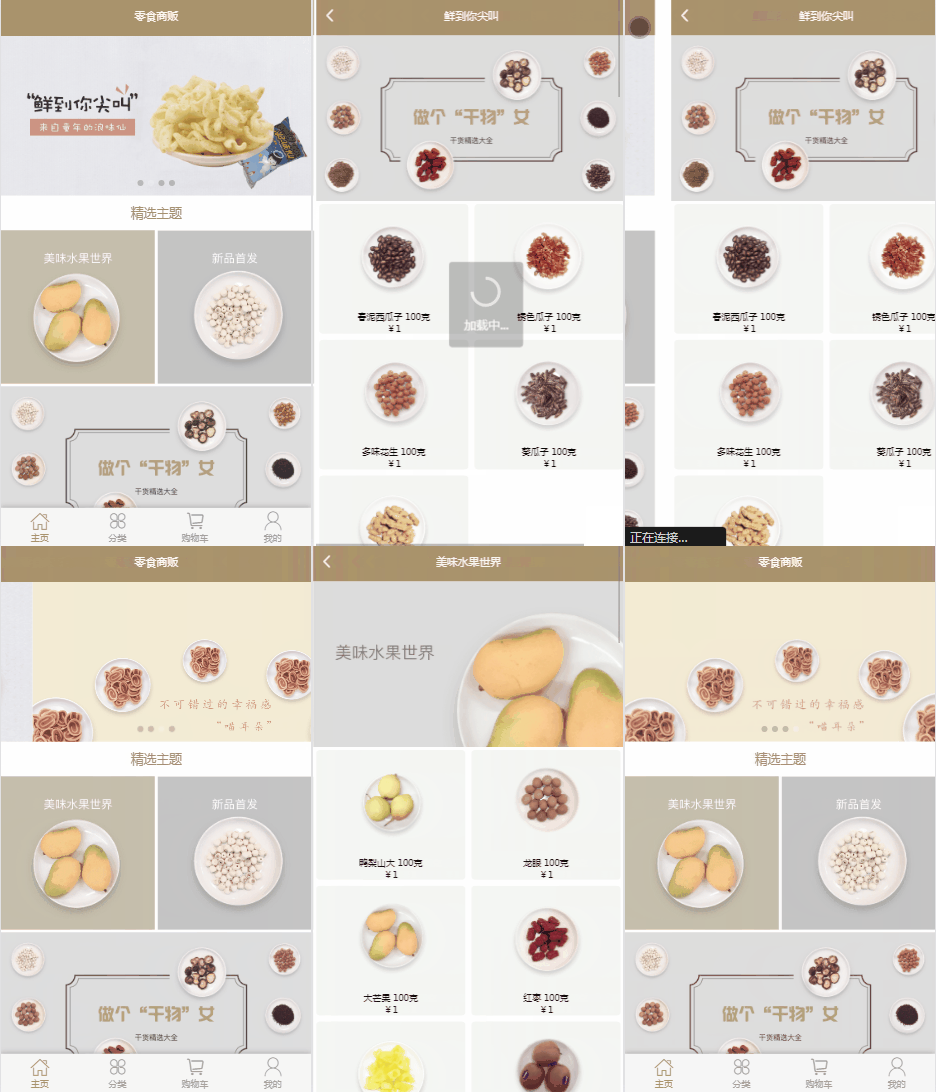
商品主题页是用户通过点击首页的轮播图和主题模块进入到主题商品列表子页面,其中商品列表的单个商品可以通过主页的组件进行复用

其中themeList是广告标题图片,通过shopType区分首页的商品列表和主题页的商品列表,从而引入shopItem组件
- themeList.vue广告标题
<template>
  <div class="themeContent">
    <h2>
      <img v-if="themeList.shopPic" :src="imgPath+themeList.shopPic" alt />
    </h2>
  </div>
</template>

<script>
import Config from "../../config/config";
import ThemeListBussiness from "./bussiness";
export default {
  data() {
    return {
      themeList: {},
      imgPath: Config.RequestPath,
      themeListBussiness: null
    };
  },
  created() {
    this.themeListBussiness = new ThemeListBussiness(this);
    this.themeListBussiness.initPageConfig(this.$route.query);
  },
  methods: {}
};
</script>

<style lang="less" scoped>
@import "../../style/init.less";
.themeContent {
  h2 {
     100%;
    img {
       100%;
    }
  }
}
</style>
- 最后新建shopTheme的page页面,引入之前两个组件
<template>
  <div>
    <Top :title="title" :isBack="true"></Top>
    <div class="content">
      <ThemeList></ThemeList>
      <ShopItem :shopType="shopType"></ShopItem>
    </div>
  </div>
</template>

<script>
import Top from "../../components/top/top";
import ThemeList from "../../components/themeList/themeList";
import ShopItem from "../../components/shopItem/shopItem";
export default {
  name: "ShopTheme",
  data() {
    return {
      shopType: this.$route.query._type,
      title: this.$route.query._shopName
    };
  },
  components: {
    Top,
    ThemeList,
    ShopItem
  }
};
</script>

<style lang="less" scoped>
@import "../../style/init.less";
.content {
  padding-bottom: 0;
}
</style>
至此商品分类和主题列表页面就实现完成
最后提供商品数据库数据下载(都是一个一个手动输入的),远程仓库地址,可以通过Robo3t进行导入
本篇文章结束,下一篇将介绍商品详情页的实现