转载请标明出处:http://blog.csdn.net/lmj623565791/article/details/37992017
上篇博客中已经介绍了Fragment产生原因,以及一些基本的用法和各种API,如果你还不了解,请看:Android Fragment 真正的完全解析(上)。
本篇将介绍上篇博客提到的:如何管理Fragment回退栈,Fragment如何与Activity交互,Fragment与Activity交互的最佳实践,没有视图的Fragment的用处,使用Fragment创建对话框,如何与ActionBar,MenuItem集成等~~
1、管理Fragment回退栈
类似与Android系统为Activity维护一个任务栈,我们也可以通过Activity维护一个回退栈来保存每次Fragment事务发生的变化。如果你将Fragment任务添加到回退栈,当用户点击后退按钮时,将看到上一次的保存的Fragment。一旦Fragment完全从后退栈中弹出,用户再次点击后退键,则退出当前Activity。
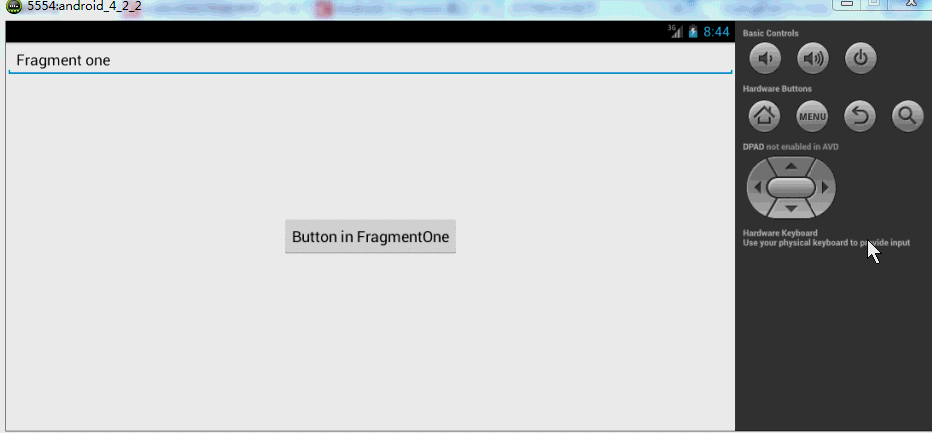
看这样一个效果图:

点击第一个按钮,切换到第二个界面,点击第二个按钮,切换到第三个界面,然后点击Back键依次回退。这像不像初学Android时的Activity跳转,当然了,这里肯定不是,不然我就跪了。这里是Fragment实现的,用户点击Back,实际是Fragment回退栈不断的弹栈。
如何添加一个Fragment事务到回退栈:
FragmentTransaction.addToBackStack(String)
下面讲解代码:很明显一共是3个Fragment和一个Activity.
先看Activity的布局文件:
-
<RelativeLayout xmlns:android="http://schemas.android.com/apk/res/android"
-
xmlns:tools="http://schemas.android.com/tools"
-
android:layout_width="match_parent"
-
android:layout_height="match_parent" >
-
-
<FrameLayout
-
android:id="@+id/id_content"
-
android:layout_width="fill_parent"
-
android:layout_height="fill_parent" >
-
</FrameLayout>
-
-
</RelativeLayout>
MainActivity.java
-
package com.zhy.zhy_fragments;
-
-
import android.app.Activity;
-
import android.app.FragmentManager;
-
import android.app.FragmentTransaction;
-
import android.os.Bundle;
-
import android.view.Window;
-
-
public class MainActivity extends Activity
-
{
-
-
-
-
protected void onCreate(Bundle savedInstanceState)
-
{
-
super.onCreate(savedInstanceState);
-
requestWindowFeature(Window.FEATURE_NO_TITLE);
-
setContentView(R.layout.activity_main);
-
-
FragmentManager fm = getFragmentManager();
-
FragmentTransaction tx = fm.beginTransaction();
-
tx.add(R.id.id_content, new FragmentOne(),"ONE");
-
tx.commit();
-
}
-
-
}
下面是FragmentOne
-
package com.zhy.zhy_fragments;
-
-
import android.app.Fragment;
-
import android.app.FragmentManager;
-
import android.app.FragmentTransaction;
-
import android.os.Bundle;
-
import android.view.LayoutInflater;
-
import android.view.View;
-
import android.view.View.OnClickListener;
-
import android.view.ViewGroup;
-
import android.widget.Button;
-
-
public class FragmentOne extends Fragment implements OnClickListener
-
{
-
-
private Button mBtn;
-
-
-
public View onCreateView(LayoutInflater inflater, ViewGroup container,
-
Bundle savedInstanceState)
-
{
-
View view = inflater.inflate(R.layout.fragment_one, container, false);
-
mBtn = (Button) view.findViewById(R.id.id_fragment_one_btn);
-
mBtn.setOnClickListener(this);
-
return view;
-
}
-
-
-
public void onClick(View v)
-
{
-
FragmentTwo fTwo = new FragmentTwo();
-
FragmentManager fm = getFragmentManager();
-
FragmentTransaction tx = fm.beginTransaction();
-
tx.replace(R.id.id_content, fTwo, "TWO");
-
tx.addToBackStack(null);
-
tx.commit();
-
-
}
-
-
}
我们在点击FragmentOne中的按钮时,使用了replace方法,如果你看了前一篇博客,一定记得replace是remove和add的合体,并且如果不添加事务到回退栈,前一个Fragment实例会被销毁。这里很明显,我们调用tx.addToBackStack(null);将当前的事务添加到了回退栈,所以FragmentOne实例不会被销毁,但是视图层次依然会被销毁,即会调用onDestoryView和onCreateView,证据就是:仔细看上面的效果图,我们在跳转前在文本框输入的内容,在用户Back得到第一个界面的时候不见了。
接下来FragmentTwo
-
package com.zhy.zhy_fragments;
-
-
import android.app.Fragment;
-
import android.app.FragmentManager;
-
import android.app.FragmentTransaction;
-
import android.os.Bundle;
-
import android.view.LayoutInflater;
-
import android.view.View;
-
import android.view.View.OnClickListener;
-
import android.view.ViewGroup;
-
import android.widget.Button;
-
-
public class FragmentTwo extends Fragment implements OnClickListener
-
{
-
-
private Button mBtn ;
-
-
public View onCreateView(LayoutInflater inflater, ViewGroup container,
-
Bundle savedInstanceState)
-
{
-
View view = inflater.inflate(R.layout.fragment_two, container, false);
-
mBtn = (Button) view.findViewById(R.id.id_fragment_two_btn);
-
mBtn.setOnClickListener(this);
-
return view ;
-
}
-
-
public void onClick(View v)
-
{
-
FragmentThree fThree = new FragmentThree();
-
FragmentManager fm = getFragmentManager();
-
FragmentTransaction tx = fm.beginTransaction();
-
tx.hide(this);
-
tx.add(R.id.id_content , fThree, "THREE");
-
// tx.replace(R.id.id_content, fThree, "THREE");
-
tx.addToBackStack(null);
-
tx.commit();
-
}
-
-
-
}
这里点击时,我们没有使用replace,而是先隐藏了当前的Fragment,然后添加了FragmentThree的实例,最后将事务添加到回退栈。这样做的目的是为了给大家提供一种方案:如果不希望视图重绘该怎么做,请再次仔细看效果图,我们在FragmentTwo的EditText填写的内容,用户Back回来时,数据还在~~~
最后FragmentThree就是简单的Toast了:
-
package com.zhy.zhy_fragments;
-
-
import android.app.Fragment;
-
import android.os.Bundle;
-
import android.view.LayoutInflater;
-
import android.view.View;
-
import android.view.View.OnClickListener;
-
import android.view.ViewGroup;
-
import android.widget.Button;
-
import android.widget.Toast;
-
-
public class FragmentThree extends Fragment implements OnClickListener
-
{
-
-
private Button mBtn;
-
-
-
public View onCreateView(LayoutInflater inflater, ViewGroup container,
-
Bundle savedInstanceState)
-
{
-
View view = inflater.inflate(R.layout.fragment_three, container, false);
-
mBtn = (Button) view.findViewById(R.id.id_fragment_three_btn);
-
mBtn.setOnClickListener(this);
-
return view;
-
}
-
-
-
public void onClick(View v)
-
{
-
Toast.makeText(getActivity(), " i am a btn in Fragment three",
-
Toast.LENGTH_SHORT).show();
-
}
-
-
}
好了,经过上面的介绍,应该已经知道Fragment回退栈是怎么一回事了,以及hide,replace等各自的应用的场景。
这里极其注意一点:上面的整体代码不具有任何参考价值,纯粹为了显示回退栈,在后面讲解了Fragment与Activity通信以后,会重构上面的代码!
2、Fragment与Activity通信
因为所有的Fragment都是依附于Activity的,所以通信起来并不复杂,大概归纳为:
a、如果你Activity中包含自己管理的Fragment的引用,可以通过引用直接访问所有的Fragment的public方法
b、如果Activity中未保存任何Fragment的引用,那么没关系,每个Fragment都有一个唯一的TAG或者ID,可以通过getFragmentManager.findFragmentByTag()或者findFragmentById()获得任何Fragment实例,然后进行操作。
c、在Fragment中可以通过getActivity得到当前绑定的Activity的实例,然后进行操作。
注:如果在Fragment中需要Context,可以通过调用getActivity(),如果该Context需要在Activity被销毁后还存在,则使用getActivity().getApplicationContext()。
3、Fragment与Activity通信的最佳实践
因为要考虑Fragment的重复使用,所以必须降低Fragment与Activity的耦合,而且Fragment更不应该直接操作别的Fragment,毕竟Fragment操作应该由它的管理者Activity来决定。
下面我通过两种方式的代码,分别重构,FragmentOne和FragmentTwo的点击事件,以及Activity对点击事件的响应:
首先看FragmentOne
-
package com.zhy.zhy_fragments;
-
-
import android.app.Fragment;
-
import android.os.Bundle;
-
import android.view.LayoutInflater;
-
import android.view.View;
-
import android.view.View.OnClickListener;
-
import android.view.ViewGroup;
-
import android.widget.Button;
-
-
public class FragmentOne extends Fragment implements OnClickListener
-
{
-
private Button mBtn;
-
-
/**
-
* 设置按钮点击的回调
-
* @author zhy
-
*
-
*/
-
public interface FOneBtnClickListener
-
{
-
void onFOneBtnClick();
-
}
-
-
-
public View onCreateView(LayoutInflater inflater, ViewGroup container,
-
Bundle savedInstanceState)
-
{
-
View view = inflater.inflate(R.layout.fragment_one, container, false);
-
mBtn = (Button) view.findViewById(R.id.id_fragment_one_btn);
-
mBtn.setOnClickListener(this);
-
return view;
-
}
-
-
/**
-
* 交给宿主Activity处理,如果它希望处理
-
*/
-
-
public void onClick(View v)
-
{
-
if (getActivity() instanceof FOneBtnClickListener)
-
{
-
((FOneBtnClickListener) getActivity()).onFOneBtnClick();
-
}
-
}
-
-
}
可以看到现在的FragmentOne不和任何Activity耦合,任何Activity都可以使用;并且我们声明了一个接口,来回调其点击事件,想要管理其点击事件的Activity实现此接口就即可。可以看到我们在onClick中首先判断了当前绑定的Activity是否实现了该接口,如果实现了则调用。
再看FragmentTwo
-
package com.zhy.zhy_fragments;
-
-
import android.app.Fragment;
-
import android.os.Bundle;
-
import android.view.LayoutInflater;
-
import android.view.View;
-
import android.view.View.OnClickListener;
-
import android.view.ViewGroup;
-
import android.widget.Button;
-
-
public class FragmentTwo extends Fragment implements OnClickListener
-
{
-
-
-
private Button mBtn ;
-
-
private FTwoBtnClickListener fTwoBtnClickListener ;
-
-
public interface FTwoBtnClickListener
-
{
-
void onFTwoBtnClick();
-
}
-
//设置回调接口
-
public void setfTwoBtnClickListener(FTwoBtnClickListener fTwoBtnClickListener)
-
{
-
this.fTwoBtnClickListener = fTwoBtnClickListener;
-
}
-
-
public View onCreateView(LayoutInflater inflater, ViewGroup container,
-
Bundle savedInstanceState)
-
{
-
View view = inflater.inflate(R.layout.fragment_two, container, false);
-
mBtn = (Button) view.findViewById(R.id.id_fragment_two_btn);
-
mBtn.setOnClickListener(this);
-
return view ;
-
}
-
-
public void onClick(View v)
-
{
-
if(fTwoBtnClickListener != null)
-
{
-
fTwoBtnClickListener.onFTwoBtnClick();
-
}
-
}
-
-
}
与FragmentOne极其类似,但是我们提供了setListener这样的方法,意味着Activity不仅需要实现该接口,还必须显示调用mFTwo.setfTwoBtnClickListener(this)。
最后看Activity :
-
package com.zhy.zhy_fragments;
-
-
import android.app.Activity;
-
import android.app.FragmentManager;
-
import android.app.FragmentTransaction;
-
import android.os.Bundle;
-
import android.view.Window;
-
-
import com.zhy.zhy_fragments.FragmentOne.FOneBtnClickListener;
-
import com.zhy.zhy_fragments.FragmentTwo.FTwoBtnClickListener;
-
-
public class MainActivity extends Activity implements FOneBtnClickListener,
-
FTwoBtnClickListener
-
{
-
-
private FragmentOne mFOne;
-
private FragmentTwo mFTwo;
-
private FragmentThree mFThree;
-
-
-
protected void onCreate(Bundle savedInstanceState)
-
{
-
super.onCreate(savedInstanceState);
-
requestWindowFeature(Window.FEATURE_NO_TITLE);
-
setContentView(R.layout.activity_main);
-
-
mFOne = new FragmentOne();
-
FragmentManager fm = getFragmentManager();
-
FragmentTransaction tx = fm.beginTransaction();
-
tx.add(R.id.id_content, mFOne, "ONE");
-
tx.commit();
-
}
-
-
/**
-
* FragmentOne 按钮点击时的回调
-
*/
-
-
public void onFOneBtnClick()
-
{
-
-
if (mFTwo == null)
-
{
-
mFTwo = new FragmentTwo();
-
mFTwo.setfTwoBtnClickListener(this);
-
}
-
FragmentManager fm = getFragmentManager();
-
FragmentTransaction tx = fm.beginTransaction();
-
tx.replace(R.id.id_content, mFTwo, "TWO");
-
tx.addToBackStack(null);
-
tx.commit();
-
}
-
-
/**
-
* FragmentTwo 按钮点击时的回调
-
*/
-
-
public void onFTwoBtnClick()
-
{
-
if (mFThree == null)
-
{
-
mFThree = new FragmentThree();
-
-
}
-
FragmentManager fm = getFragmentManager();
-
FragmentTransaction tx = fm.beginTransaction();
-
tx.hide(mFTwo);
-
tx.add(R.id.id_content, mFThree, "THREE");
-
// tx.replace(R.id.id_content, fThree, "THREE");
-
tx.addToBackStack(null);
-
tx.commit();
-
}
-
-
}
代码重构结束,与开始的效果一模一样。上面两种通信方式都是值得推荐的,随便选择一种自己喜欢的。这里再提一下:虽然Fragment和Activity可以通过getActivity与findFragmentByTag或者findFragmentById,进行任何操作,甚至在Fragment里面操作另外的Fragment,但是没有特殊理由是绝对不提倡的。Activity担任的是Fragment间类似总线一样的角色,应当由它决定Fragment如何操作。另外虽然Fragment不能响应Intent打开,但是Activity可以,Activity可以接收Intent,然后根据参数判断显示哪个Fragment。
4、如何处理运行时配置发生变化
运行时配置发生变化,最常见的就是屏幕发生旋转,如果你不知道如何处理屏幕变化可以参考:Android 屏幕旋转 处理 AsyncTask 和 ProgressDialog 的最佳方案
这里提一下:很多人觉得强制设置屏幕的方向就可以了,但是有一点,当你的应用被至于后台(例如用户点击了home),长时间没有返回的时候,你的应用也会被重新启动。比如上例:如果你把上面的例子你至于FragmentThree界面,然后处于后台状态,长时间后你会发现当你再次通过home打开时,上面FragmentThree与FragmentOne叠加在一起,这就是因为你的Activity重新启动,在原来的FragmentThree上又绘制了一个FragmentOne。
好了,下面看一段代码:
Activity:
-
package com.zhy.zhy_fragments;
-
-
import android.app.Activity;
-
import android.app.FragmentManager;
-
import android.app.FragmentTransaction;
-
import android.os.Bundle;
-
import android.view.Window;
-
-
public class MainActivity extends Activity
-
-
{
-
private FragmentOne mFOne;
-
-
-
protected void onCreate(Bundle savedInstanceState)
-
{
-
super.onCreate(savedInstanceState);
-
requestWindowFeature(Window.FEATURE_NO_TITLE);
-
setContentView(R.layout.activity_main);
-
-
mFOne = new FragmentOne();
-
FragmentManager fm = getFragmentManager();
-
FragmentTransaction tx = fm.beginTransaction();
-
tx.add(R.id.id_content, mFOne, "ONE");
-
tx.commit();
-
-
}
-
-
}
Fragment
-
package com.zhy.zhy_fragments;
-
-
import android.app.Fragment;
-
import android.os.Bundle;
-
import android.util.Log;
-
import android.view.LayoutInflater;
-
import android.view.View;
-
import android.view.ViewGroup;
-
-
public class FragmentOne extends Fragment
-
{
-
private static final String TAG = "FragmentOne";
-
-
-
public View onCreateView(LayoutInflater inflater, ViewGroup container,
-
Bundle savedInstanceState)
-
{
-
Log.e(TAG, "onCreateView");
-
View view = inflater.inflate(R.layout.fragment_one, container, false);
-
return view;
-
}
-
-
-
public void onCreate(Bundle savedInstanceState)
-
{
-
// TODO Auto-generated method stub
-
super.onCreate(savedInstanceState);
-
-
Log.e(TAG, "onCreate");
-
}
-
-
-
public void onDestroyView()
-
{
-
// TODO Auto-generated method stub
-
super.onDestroyView();
-
Log.e(TAG, "onDestroyView");
-
}
-
-
-
public void onDestroy()
-
{
-
// TODO Auto-generated method stub
-
super.onDestroy();
-
Log.e(TAG, "onDestroy");
-
}
-
-
}
很简单的代码,当你运行之后,不断的旋转屏幕,你会发现每旋转一次屏幕,屏幕上就多了一个FragmentOne的实例,并且后台log会打印出许多套生命周期的回调。
类似:
-
07-20 08:18:46.651: E/FragmentOne(1633): onCreate
-
07-20 08:18:46.651: E/FragmentOne(1633): onCreate
-
07-20 08:18:46.651: E/FragmentOne(1633): onCreate
-
07-20 08:18:46.681: E/FragmentOne(1633): onCreateView
-
07-20 08:18:46.831: E/FragmentOne(1633): onCreateView
-
07-20 08:18:46.891: E/FragmentOne(1633): onCreateView
这是为什么呢,因为当屏幕发生旋转,Activity发生重新启动,默认的Activity中的Fragment也会跟着Activity重新创建;这样造成当旋转的时候,本身存在的Fragment会重新启动,然后当执行Activity的onCreate时,又会再次实例化一个新的Fragment,这就是出现的原因。
那么如何解决呢:
其实通过检查onCreate的参数Bundle savedInstanceState就可以判断,当前是否发生Activity的重新创建:
默认的savedInstanceState会存储一些数据,包括Fragment的实例:通过打印可以看出:
07-20 08:23:12.952: E/FragmentOne(1782): Bundle[{android:fragments=android.app.FragmentManagerState@40d0b7b8, android:viewHierarchyState=Bundle[{android:focusedViewId=2131230721, android:views=android.util.SparseArray@40d0af68}]}]
-
package com.zhy.zhy_fragments;
-
-
import android.app.Activity;
-
import android.app.FragmentManager;
-
import android.app.FragmentTransaction;
-
import android.os.Bundle;
-
import android.util.Log;
-
import android.view.Window;
-
-
public class MainActivity extends Activity
-
-
{
-
private static final String TAG = "FragmentOne";
-
private FragmentOne mFOne;
-
-
-
protected void onCreate(Bundle savedInstanceState)
-
{
-
super.onCreate(savedInstanceState);
-
requestWindowFeature(Window.FEATURE_NO_TITLE);
-
setContentView(R.layout.activity_main);
-
-
Log.e(TAG, savedInstanceState+"");
-
-
if(savedInstanceState == null)
-
{
-
mFOne = new FragmentOne();
-
FragmentManager fm = getFragmentManager();
-
FragmentTransaction tx = fm.beginTransaction();
-
tx.add(R.id.id_content, mFOne, "ONE");
-
tx.commit();
-
}
-
-
-
-
}
-
-
}
现在无论进行多次旋转都只会有一个Fragment实例在Activity中。
现在还存在一个问题,就是重新绘制时,Fragment发生重建,原本的数据如何保持?
其实和Activity类似,Fragment也有onSaveInstanceState的方法,在此方法中进行保存数据,然后在onCreate或者onCreateView或者onActivityCreated进行恢复都可以。
由于篇幅原因,就不贴测试代码了。
5、Fragmeny与ActionBar和MenuItem集成
Fragment可以添加自己的MenuItem到Activity的ActionBar或者可选菜单中。
a、在Fragment的onCreate中调用 setHasOptionsMenu(true);
b、然后在Fragment子类中实现onCreateOptionsMenu
c、如果希望在Fragment中处理MenuItem的点击,也可以实现onOptionsItemSelected;当然了Activity也可以直接处理该MenuItem的点击事件。
代码:
Fragment
-
package com.zhy.zhy_fragments;
-
-
import android.app.Fragment;
-
import android.os.Bundle;
-
import android.view.LayoutInflater;
-
import android.view.Menu;
-
import android.view.MenuInflater;
-
import android.view.MenuItem;
-
import android.view.View;
-
import android.view.ViewGroup;
-
import android.widget.Toast;
-
-
public class FragmentOne extends Fragment
-
{
-
-
-
public void onCreate(Bundle savedInstanceState)
-
{
-
super.onCreate(savedInstanceState);
-
setHasOptionsMenu(true);
-
}
-
-
-
public View onCreateView(LayoutInflater inflater, ViewGroup container,
-
Bundle savedInstanceState)
-
{
-
View view = inflater.inflate(R.layout.fragment_one, container, false);
-
return view;
-
}
-
-
-
public void onCreateOptionsMenu(Menu menu, MenuInflater inflater)
-
{
-
inflater.inflate(R.menu.fragment_menu, menu);
-
}
-
-
-
public boolean onOptionsItemSelected(MenuItem item)
-
{
-
switch (item.getItemId())
-
{
-
case R.id.id_menu_fra_test:
-
Toast.makeText(getActivity(), "FragmentMenuItem1", Toast.LENGTH_SHORT).show();
-
break;
-
}
-
return true;
-
}
-
-
}
Activity
-
package com.zhy.zhy_fragments;
-
-
import android.app.Activity;
-
import android.app.FragmentManager;
-
import android.app.FragmentTransaction;
-
import android.os.Bundle;
-
import android.util.Log;
-
import android.view.Menu;
-
import android.view.MenuItem;
-
import android.view.Window;
-
import android.widget.Toast;
-
-
public class MainActivity extends Activity
-
-
{
-
private static final String TAG = "FragmentOne";
-
private FragmentOne mFOne;
-
-
-
protected void onCreate(Bundle savedInstanceState)
-
{
-
super.onCreate(savedInstanceState);
-
requestWindowFeature(Window.FEATURE_NO_TITLE);
-
setContentView(R.layout.activity_main);
-
-
Log.e(TAG, savedInstanceState + "");
-
-
if (savedInstanceState == null)
-
{
-
mFOne = new FragmentOne();
-
FragmentManager fm = getFragmentManager();
-
FragmentTransaction tx = fm.beginTransaction();
-
tx.add(R.id.id_content, mFOne, "ONE");
-
tx.commit();
-
}
-
-
}
-
-
-
public boolean onCreateOptionsMenu(Menu menu)
-
{
-
super.onCreateOptionsMenu(menu);
-
getMenuInflater().inflate(R.menu.main, menu);
-
return true;
-
}
-
-
-
public boolean onOptionsItemSelected(MenuItem item)
-
{
-
switch (item.getItemId())
-
{
-
case R.id.action_settings:
-
Toast.makeText(this, "setting", Toast.LENGTH_SHORT).show();
-
return true;
-
default:
-
//如果希望Fragment自己处理MenuItem点击事件,一定不要忘了调用super.xxx
-
return super.onOptionsItemSelected(item);
-
}
-
}
-
-
}
效果图:
好了,可以很好的看到,Fragment可以添加MenuItem,也可以自己处理点击~~~
6、没有布局的Fragment的作用
没有布局文件Fragment实际上是为了保存,当Activity重启时,保存大量数据准备的
请参考博客:Android 屏幕旋转 处理 AsyncTask 和 ProgressDialog 的最佳方案
7、使用Fragment创建对话框
这是Google推荐的方式,我也单独写过博客介绍,请参考:Android 官方推荐 : DialogFragment 创建对话框
好了,终于把Fragment相关的联系到一起了,上述基本包含了Fragment所有的用法~~~相信大家如果能够看完,一定有不少的收获~~~
有任何问题,欢迎留言~~~
两篇结束,相信你对Fragment已经有了一定的了解,那么在项目中的最佳实践是什么呢?请移步:Android Fragment 你应该知道的一切