flume常用命令
//复制 文件 cp exec.conf tcp.conf
flume-ng agent -c . -f avro.conf -n a1 -Dflume.root.logger=info,console
flume-ng avro-client -c . -H linux05 -p 8888 -F /project/age.txt
flume-ng version
---------------------------------------------------------------------------------------------
linux里面不存在扩展名
1.两台机器都安装
2. 上传 解压tar -zxvf apache-flume-1.6.0-bin.tar.gz
3.vim /etc/profile
source /etc/profile
//配置环境变量
export FLUME_HOME=/root/Downloads/apache-flume-1.6.0-bin
export PATH=$PATH:$FLUME_HOME/bin
4.flume-ng version 检查是否安装成功

5.04机器 监控机器 :
[root@linux05 conf]#
----------------------------
//配置文件 在/root/Downloads/apache-flume-1.6.0-bin/conf
1.Avro可以发送一个给定的文件给Flume,Avro 源使用AVRO RPC机制。
创建agent配置文件
vim avro.txt 不同的机器上
a1.sources=r1 #a1是我们要启动的Agent名字
a1.channels=c1 #sources为r1 sinks为k1 channels 为c1
a1.sinks=k1
a1.sources.r1.type=avro #指定r1的类型为AVRO
a1.sources.r1.bind=linux05 #将Source与IP地址绑定(这里指本机)
a1.sources.r1.port=8888 #指定通讯端口为4141
a1.channels.c1.type=memory #指定Channel的类型为Memory
a1.channels.c1.capacity=1000 #设置Channel的最大存储event数量为1000
a1.channels.transactionCapacity=100 #每次最大可以source中拿到或者送到sink中的event数量也是100
a1.sinks.k1.type=logger #指定k1的类型为Logger(不产生实体文件,只在控制台显示)
a1.sources.r1.channels=c1
a1.sinks.k1.channel=c1
----------------------------------------------
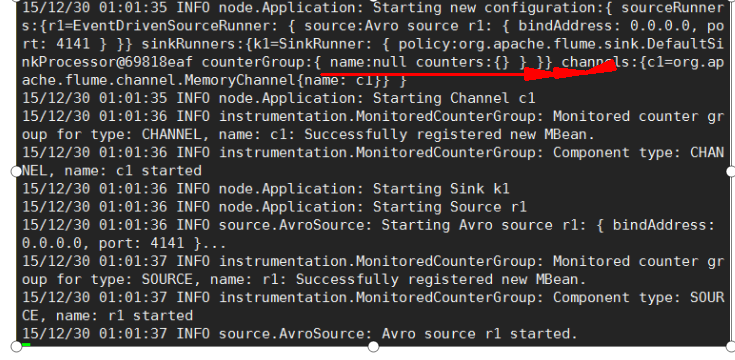
6. //启动flume 并且 打印在控制台
flume-ng agent -c . -f avro.conf -n a1 -Dflume.root.logger=info,console
-c:使用配置文件所在目录(这里指默认路径,即$FLUME_HOME/conf)
-f:flume定义组件的配置文件?
-n:启动Agent的名称,该名称在组件配置文件中定义?
-Dflume.root.logger:flume自身运行状态的日志,按需配置,详细信息,控制台打印
--------------------------------------------------------------------------------------------------------------
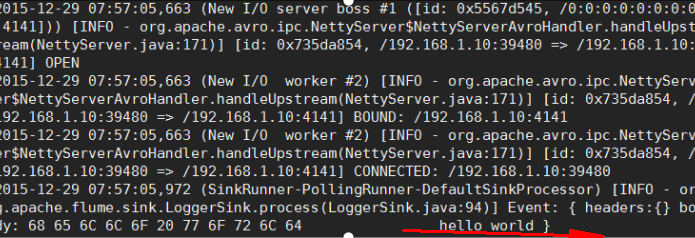
7.[root@linux06 conf]# flume-ng avro-client -c . -H linux05 -p 8888 -F /project/age.txt //启动客户端
=======================================================
2) Exec--- 监听本地文件 aa.txt
tomcat日志会打印在catalina.out 每天生成一个 tail -f catalina.out 监控 同一台机器上
1.vim exec.conf
----------------
a1.sources = r1
a1.sinks = k1
a1.channels = c1
a1.sources.r1.type = exec
a1.sources.r1.command = tail -f /aa.txt
a1.sinks.k1.type = logger
a1.channels.c1.type = memory
a1.channels.c1.capacity = 1000
a1.channels.c1.transactionCapacity = 100
a1.sources.r1.channels = c1
a1.sinks.k1.channel = c1
----------------------
2. 命令:flume-ng agent -c . -f exec.conf -n a1 -Dflume.root.logger=info,console
3.[root@linux05 /]# vim aa.txt
[root@linux05 /]# echo "1111">>aa.txt
4.

3.Spool 本地模式 监听本地文件夹 同一台机器
Spool监测配置的目录下新增的文件,并将文件中的数据读取出来。需要注意两点:
拷贝到spool目录下的文件不可以再打开编辑。
spool目录下不可包含相应的子目录
创建agent配置文件
缺点:指定文件下不能有重名(如:kk.log 和 kk.log. COMPLETED),会报错 是的flume死掉
vim spool.conf
a1.sources=r1
a1.channels=c1
a1.sinks=k1
a1.sources.r1.type=spooldir
a1.sources.r1.spoolDir=/flume
a1.channels.c1.type=memory
a1.channels.c1.capacity=1000
a1.channels.c1.transactionCapacity=100
a1.sinks.k1.type=logger
a1.sinks.k1.channel=c1
a1.sources.r1.channels=c1
---------------------------------------------------------------
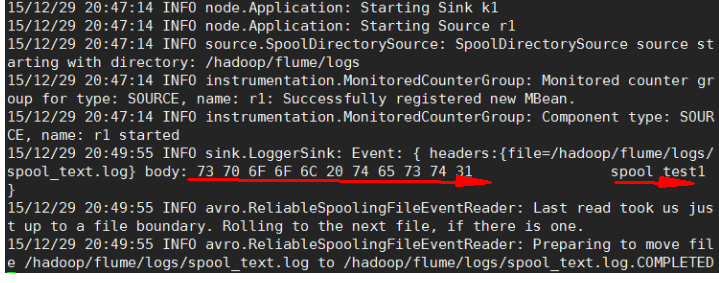
[root@linux05 conf]# flume-ng agent -c . -f spool.conf -n a1 -Dflume.root.logger=info,console
[root@linux05 flume]# echo 123222 >> /flume/mm.txt
vim spool.conf //在flume的conf下面编辑 加自定义标示
a1.sources=r1
a1.channels=c1
a1.sinks=k1
a1.sources.r1.type=spooldir
a1.sources.r1.spoolDir=/flume
a1.sources.r1.fileSuffix=.fuck
a1.channels.c1.type=memory
a1.channels.c1.capacity=1000
a1.channels.c1.transactionCapacity=100
a1.sinks.k1.type=logger
a1.sinks.k1.channel=c1
a1.sources.r1.channels=c1
*********************************************************
//多加一句话   Spool2—自定义后缀
a1.sources.r1.fileSuffix = .fuck
4.Syslogtcp
Syslogtcp监听TCP的端口做为数据源
创建agent配置文件
tcp.conf 本地 监控
1. vim tcp.conf
a1.sources = r1
a1.sinks = k1
a1.channels = c1

a1.sources.r1.type = syslogtcp
a1.sources.r1.host=linux05
a1.sources.r1.port=8888

a1.sinks.k1.type = logger

a1.channels.c1.type = memory
a1.channels.c1.capacity = 1000
a1.channels.c1.transactionCapacity = 100

a1.sources.r1.channels = c1
a1.sinks.k1.channel = c1
***********************************************************
2.[root@linux05 conf]# flume-ng agent -c . -f tcp.conf -n a1 -Dflume.root.logger=info,console
3.上传nc tar =============
[root@linux05 Downloads]# rpm -ivh nc-1.84-22.el6.x86_64.rpm

4.[root@linux05 Downloads]# nc linux05 8888
//输入内容

5.看监控 ===如图

//用java代码
1. vim tcp.conf
a1.sources = r1
a1.sinks = k1
a1.channels = c1

a1.sources.r1.type = syslogtcp
a1.sources.r1.host=linux05
a1.sources.r1.port=8888

a1.sinks.k1.type = logger

a1.channels.c1.type = memory
a1.channels.c1.capacity = 1000
a1.channels.c1.transactionCapacity = 100

a1.sources.r1.channels = c1
a1.sinks.k1.channel = c1
***********************************************************
2.[root@linux05 conf]# flume-ng agent -c . -f tcp.conf -n a1 -Dflume.root.logger=info,console

在eclipse
package com.bw.tcp;

import java.io.OutputStream;
import java.io.PrintWriter;
import java.net.InetSocketAddress;
import java.net.Socket;
import java.net.SocketAddress;

public class TcpTest{
    public static void main(String[] args) throws Exception {
        Socket socket=new Socket();
        SocketAddress address=new InetSocketAddress("linux05",8888);//连接
        socket.connect(address);
        OutputStream outputStream = socket.getOutputStream();//写入
        PrintWriter pw = new PrintWriter(outputStream);
        pw.write("fuck u
");
        pw.flush();
        outputStream.flush();
        pw.close();
        outputStream.close();
    }
}

5...JSONHandler
- 创建agent配置文件
vim http.conf //本地监控
a1.sources = r1
a1.sinks = k1
a1.channels = c1

a1.sources.r1.type = org.apache.flume.source.http.HTTPSource
a1.sources.r1.port=8888

a1.sinks.k1.type = logger

a1.channels.c1.type = memory
a1.channels.c1.capacity = 1000
a1.channels.c1.transactionCapacity = 100

a1.sources.r1.channels = c1
a1.sinks.k1.channel = c1
****************************************************************************************************
[root@linux05 conf]# flume-ng agent -c . -f http.conf -n a1 -Dflume.root.logger=info,console
//生成JSON 格式的POST request
//客户端命令发送的
[root@linux05 Downloads]# curl -X POST -d '[{ "headers" :{"a" : "a1","b" : "b1"},"body" : "idoall.org_body"}]' http://linux05:8888
//master监控 看见如图:

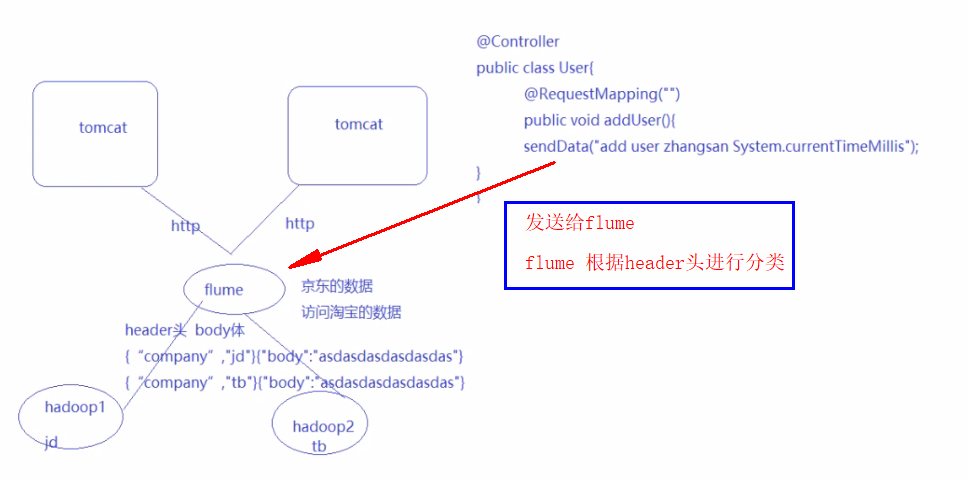
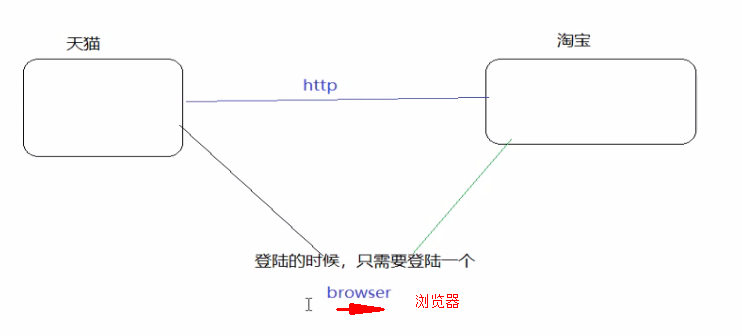
用java代码实现 http协议 一个用户等陆 可以显示天猫跳转淘宝 浏览器
 Post方法发送json数据
----------------------------------
a1.sources = r1
a1.sinks = k1
a1.channels = c1

a1.sources.r1.type = org.apache.flume.source.http.HTTPSource
a1.sources.r1.port=8888

a1.sinks.k1.type = logger

a1.channels.c1.type = memory
a1.channels.c1.capacity = 1000
a1.channels.c1.transactionCapacity = 100

a1.sources.r1.channels = c1
a1.sinks.k1.channel = c1
----------
[root@linux05 conf]# flume-ng agent -c . -f http.conf -n a1 -Dflume.root.logger=info,console

java代码
package com.bw.tcp;

import java.io.BufferedOutputStream;
import java.io.BufferedReader;
import java.io.InputStreamReader;
import java.io.OutputStream;
import java.io.PrintWriter;
import java.net.HttpURLConnection;
import java.net.InetSocketAddress;
import java.net.Socket;
import java.net.SocketAddress;
import java.net.URL;
import java.util.Date;

public class TcpTest {
    public static void main(String[] args) throws Exception {
        sendData();
    }

    public static void sendData() {
        try {
            URL url = new URL("http://linux05:8888");
            HttpURLConnection connection = (HttpURLConnection) url.openConnection();

            connection.setDoInput(true); // 设置可输入
            connection.setDoOutput(true); // 设置该连接是可以输出的
            connection.setRequestMethod("POST"); // 设置请求方式
            connection.setRequestProperty("Content-Type", "application/json;charset=UTF-8");

            PrintWriter pw = new PrintWriter(new BufferedOutputStream(connection.getOutputStream()));
            pw.write("[{ "headers" :{"a" : "a1","b" : "b1"},"body" : "test java http"}]");
            pw.flush();
            pw.close();

            BufferedReader br = new BufferedReader(new InputStreamReader(connection.getInputStream(), "utf-8"));
            String line = null;
            StringBuilder result = new StringBuilder();
            while ((line = br.readLine()) != null) { // 读取数据
                result.append(line + "
");
            }
            connection.disconnect();

            System.out.println(result.toString());
        } catch (Exception e) {
            e.printStackTrace();
        }

    }

}