配置嵌入式Servlet容器
SpringBoot默认用的是Tomcat作为嵌入式的Servlet容器
如何定制和修改servlet容器的相关配置
-
修改和server有关的配置(ServerProperties)
    private final ServerProperties.Servlet servlet;
    private final ServerProperties.Tomcat tomcat;
    private final ServerProperties.Jetty jetty;
    private final ServerProperties.Netty netty;
    private final ServerProperties.Undertow undertow;
server.port=8080 //通用的Servler容器设置 server.xxx //Tomcat的设置 server.tomcat.xxx server.tomcat.uri-encoding=UTF-8 //其他的类似 -
编写一个 WebServerFactoryCustomizer
嵌入式的servlet容器的定制器,ConfigurableServletWebServerFactory中有很多方法调用,来修改servlet容器的配置 @Bean public WebServerFactoryCustomizer<ConfigurableServletWebServerFactory> customizationBean(){ return new WebServerFactoryCustomizer<ConfigurableServletWebServerFactory>() { @Override public void customize(ConfigurableServletWebServerFactory factory) { factory.setPort(8083); } }; }注册三大组件
-
注册Servlet:ServletRegistrationBean
//定制自己的servlet

public class MyServlet extends HttpServlet {
    @Override
    protected void doGet(HttpServletRequest req, HttpServletResponse resp) throws ServletException, IOException {
        doPost(req, resp);
    }

    @Override
    protected void doPost(HttpServletRequest req, HttpServletResponse resp) throws ServletException, IOException {
        resp.getWriter().write("hello MyServlet");
    }
}
@Bean public ServletRegistrationBean MyServlet(){ ServletRegistrationBean registrationBean = new ServletRegistrationBean(new MyServlet(),"/myServlet"); return registrationBean; } -
-
注册Filter
//定制了Filter
public class MyFilter implements Filter {
@Bean public FilterRegistrationBean MyFilter(){ FilterRegistrationBean filterRegistrationBean = new FilterRegistrationBean(); filterRegistrationBean.setFilter(new MyFilter()); filterRegistrationBean.setUrlPatterns(Arrays.asList("/myServlet","/hello")); return filterRegistrationBean; } -
注册Listener
//定制监听器
public class MyListener implements ServletContextListener {
@Bean public ServletListenerRegistrationBean MyListener(){ ServletListenerRegistrationBean<MyListener> myListenerServletRegistrationBean = new ServletListenerRegistrationBean<MyListener>(new MyListener()); return myListenerServletRegistrationBean; }
Spring帮我们自动配置SpringMVC的时候,自动的注册SpringMVC的前端控制器;DidpatcherServlet
@Bean(
    name = {"dispatcherServletRegistration"}
)
@ConditionalOnBean(
    value = {DispatcherServlet.class},
    name = {"dispatcherServlet"}
)
public DispatcherServletRegistrationBean dispatcherServletRegistration(DispatcherServlet dispatcherServlet, WebMvcProperties webMvcProperties, ObjectProvider<MultipartConfigElement> multipartConfig) {
    DispatcherServletRegistrationBean registration = new DispatcherServletRegistrationBean(dispatcherServlet, webMvcProperties.getServlet().getPath());
    //        private String path = "/";
    //		   默认拦截所有路径,包含静态资源
    //可以通过server.servletPath来修改拦截请求
    registration.setName("dispatcherServlet");
    registration.setLoadOnStartup(webMvcProperties.getServlet().getLoadOnStartup());
    multipartConfig.ifAvailable(registration::setMultipartConfig);
    return registration;
}
SpringBoot切换其他的Servlet容器
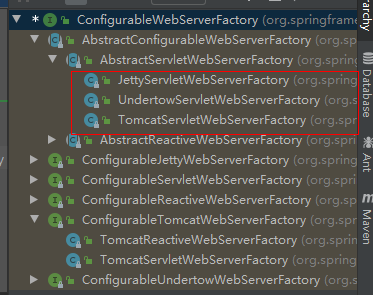
SpringBoot的ConfigurableServletWebServerFactory 有Jetty,Undertow,Tomcat三个实现类
默认支持这三种容器:
-
Tomcat
-
Jetty(长连接)-- web聊天
-
Undertow(不支持JSP)
移除tomcat后注入新的依赖切换
嵌入式Servlet容器自动配置原理(2.3.0版本)
EmbeddedWebServerFactoryCustomizerAutoConfiguration:嵌入式的servlet容器自动配置
@Configuration(
    proxyBeanMethods = false
)
@ConditionalOnWebApplication
@EnableConfigurationProperties({ServerProperties.class})
public class EmbeddedWebServerFactoryCustomizerAutoConfiguration {
-
该类中有对应支持的Servlet容器内部类
- TomcatWebServerFactoryCustomizerConfiguration
- JettyWebServerFactoryCustomizerConfiguration
- UndertowWebServerFactoryCustomizerConfiguration
- NettyWebServerFactoryCustomizerConfiguration
-
每个类都有@ConditionalOnClass注解,判断是否引入了对应的依赖,引入了对应依赖的即创建一个xxxWebServerFactoryCustomizer来构建Servlet容器工厂
//以Tomcat为例 @Configuration( proxyBeanMethods = false ) @ConditionalOnClass({Tomcat.class, UpgradeProtocol.class}) public static class TomcatWebServerFactoryCustomizerConfiguration { public TomcatWebServerFactoryCustomizerConfiguration() { } @Bean public TomcatWebServerFactoryCustomizer tomcatWebServerFactoryCustomizer(Environment environment, ServerProperties serverProperties) { return new TomcatWebServerFactoryCustomizer(environment, serverProperties); } } -
在TomcatWebServerFactoryCustomizer中的customize里从容器中获取了对应的ConfigurableWebServerFactory工厂来构建容器配置,被SpringBoot使用,以下以Tomcat为例
public class TomcatWebServerFactoryCustomizer implements WebServerFactoryCustomizer<ConfigurableTomcatWebServerFactory>, Ordered {
    private final Environment environment;
    private final ServerProperties serverProperties;

    public void customize(ConfigurableTomcatWebServerFactory factory) {
ConfigurableWebServerFactory 接口如下:
-
而SpringBoot已经通过ServletWebServerFactoryConfiguration 配置类放置了支持容器对应的ConfigurableWebServerFactory 实现类,如果用户配置了自己的servlet容器,SpringBoot则不放入默认的Servlet容器
- ServletWebServerFactoryConfiguration 配置Servlet工厂,内部定义了EmbeddedTomcat,EmbeddedJetty,EmbeddedUndertow三个内部类,以下EmbeddedTomcat为例,@ConditionalOnMissingBean用来判断,如果用户没有定义自己的ServletWebServerFactory,则生效配置默认的容器TomcatServletWebServerFactory,被TomcatWebServerFactoryCustomizer调用后创建了一个Tomcat对象
@Configuration(
    proxyBeanMethods = false
)
class ServletWebServerFactoryConfiguration {
    @Configuration(
        proxyBeanMethods = false
    )
    @ConditionalOnClass({Servlet.class, Tomcat.class, UpgradeProtocol.class})
    @ConditionalOnMissingBean(
        value = {ServletWebServerFactory.class},
        search = SearchStrategy.CURRENT
    )
    static class EmbeddedTomcat {
        EmbeddedTomcat() {
        }

        @Bean
        TomcatServletWebServerFactory tomcatServletWebServerFactory(ObjectProvider<TomcatConnectorCustomizer> connectorCustomizers, ObjectProvider<TomcatContextCustomizer> contextCustomizers, ObjectProvider<TomcatProtocolHandlerCustomizer<?>> protocolHandlerCustomizers) {
            TomcatServletWebServerFactory factory = new TomcatServletWebServerFactory();
            factory.getTomcatConnectorCustomizers().addAll((Collection)connectorCustomizers.orderedStream().collect(Collectors.toList()));
            factory.getTomcatContextCustomizers().addAll((Collection)contextCustomizers.orderedStream().collect(Collectors.toList()));
            factory.getTomcatProtocolHandlerCustomizers().addAll((Collection)protocolHandlerCustomizers.orderedStream().collect(Collectors.toList()));
            return factory;
        }
    }
//TomcatServletWebServerFactory public class TomcatServletWebServerFactory extends AbstractServletWebServerFactory implements ConfigurableTomcatWebServerFactory, ResourceLoaderAware { //创建Tomcat对象 Tomcat tomcat = new Tomcat(); //配置Tomcat的基本环节 File baseDir = this.baseDirectory != null ? this.baseDirectory : this.createTempDir("tomcat"); tomcat.setBaseDir(baseDir.getAbsolutePath()); Connector connector = new Connector(this.protocol); connector.setThrowOnFailure(true); tomcat.getService().addConnector(connector); this.customizeConnector(connector); tomcat.setConnector(connector); tomcat.getHost().setAutoDeploy(false); this.configureEngine(tomcat.getEngine()); Iterator var5 = this.additionalTomcatConnectors.iterator(); while(var5.hasNext()) { Connector additionalConnector = (Connector)var5.next(); tomcat.getService().addConnector(additionalConnector); } this.prepareContext(tomcat.getHost(), initializers); //将配置好的Tomcat传入进去,返回一个TomcatWebServer,在TomcatWebServer对象的initialize()中有个关键的代码 //this.tomcat.start();启动Tomcat return this.getTomcatWebServer(tomcat); }
用户定义的配置修改是怎么生效的
-
配置文件的修改是直接修改ServletProperties的属性,对默认配置进行修改,使用的还是默认的容器
-
在EmbeddedWebServerFactoryCustomizerAutoConfiguration的@EnableConfigurationProperties注解里传入了一个@Import({EnableConfigurationPropertiesRegistrar.class}) 配置注册器:获取我们的配置来初始化
class EnableConfigurationPropertiesRegistrar implements ImportBeanDefinitionRegistrar {
    EnableConfigurationPropertiesRegistrar() {
    }

    public void registerBeanDefinitions(AnnotationMetadata metadata, BeanDefinitionRegistry registry) {
        //在getTypes方法中获取了
        registerInfrastructureBeans(registry);
        ConfigurationPropertiesBeanRegistrar beanRegistrar = new ConfigurationPropertiesBeanRegistrar(registry);
        //在该方法获取我们自定义的配置并初始.....(待研究)
        this.getTypes(metadata).forEach(beanRegistrar::register);
    }
    private Set<Class<?>> getTypes(AnnotationMetadata metadata) {
    return (Set)metadata.getAnnotations().stream(EnableConfigurationProperties.class).flatMap((annotation) -> {
        return Arrays.stream(annotation.getClassArray("value"));
    }).filter((type) -> {
        return Void.TYPE != type;
    }).collect(Collectors.toSet());
}
嵌入式Servlet容器启动原理
-
SpringBoot应用启动运行run方法
-
先创建IOC容器对象,初始化容器,并创建容器中的每一个组件
context = this.createApplicationContext();
exceptionReporters = this.getSpringFactoriesInstances(SpringBootExceptionReporter.class, new Class[]{ConfigurableApplicationContext.class}, context);
this.prepareContext(context, environment, listeners, applicationArguments, printedBanner);
this.refreshContext(context);
//判断创建的是不是web应用及其类型,创建相应的对象容器 protected ConfigurableApplicationContext createApplicationContext() { Class<?> contextClass = this.applicationContextClass; if (contextClass == null) { try { switch(this.webApplicationType) { case SERVLET: contextClass = Class.forName("org.springframework.boot.web.servlet.context.AnnotationConfigServletWebServerApplicationContext"); break; case REACTIVE: contextClass = Class.forName("org.springframework.boot.web.reactive.context.AnnotationConfigReactiveWebServerApplicationContext"); break; default: contextClass = Class.forName("org.springframework.context.annotation.AnnotationConfigApplicationContext"); } } } -
调用refresh刷新创建好的容器,this.refresh((ApplicationContext)context);调用了父容器的刷新方法
private void refreshContext(ConfigurableApplicationContext context) {
        this.refresh((ApplicationContext)context);
try { this.postProcessBeanFactory(beanFactory); this.invokeBeanFactoryPostProcessors(beanFactory); this.registerBeanPostProcessors(beanFactory); this.initMessageSource(); this.initApplicationEventMulticaster(); this.onRefresh(); this.registerListeners(); this.finishBeanFactoryInitialization(beanFactory); this.finishRefresh(); -
onRefresh方法:web的ioc容器重写了onRefresh方法,创建了webserver
protected void onRefresh() { super.onRefresh(); try { this.createWebServer(); } catch (Throwable var2) { throw new ApplicationContextException("Unable to start web server", var2); } } -
webserver创建第一步获取了嵌入式servlet容器工厂ServletWebServerFactory,就是上述提到的调用嵌入式servlet自动配置来判断创建哪个serlvet容器工厂
private void createWebServer() { WebServer webServer = this.webServer; ServletContext servletContext = this.getServletContext(); if (webServer == null && servletContext == null) { ServletWebServerFactory factory = this.getWebServerFactory(); -
触发上述的EnableConfigurationPropertiesRegistrar作用,配置Servlet容器
-
使用容器工厂获取嵌入式的servlet容器
this.webServer = factory.getWebServer(new ServletContextInitializer[]{this.getSelfInitializer()}); -
嵌入式的servlet容器创建对象并启动Servlet容器,再将ioc容器中剩下没有创建出来的对象获取出来,最后才完成ioc容器的刷新
Tomcat tomcat = new Tomcat();