0x00 概述
ES集群又慢查询记录到log的功能,有时候研发反应es查询比较慢,此时在确认集群健康,green,indices数据green,集群负载正常后,可以打开该功能排查es查询慢的问题。
elasticsearch提供了非常灵活的搜索条件给我们使用,在使用复杂表达式的同时,如果使用不当,可能也会为我们带来了潜在的风险,因为影响查询性能的因素很多很多,这篇笔记主要记录一下慢查询可能的原因,及其优化的方向。
本文讨论的es版本为7.0+。
0x01 慢查询现象
1.1 查询服务超时
-
最直观的现象就是提供查询的服务响应超时。
大量连接被拒绝

我们有时候写查询,为了图方遍,经常使用通配符*来查询,这有可能会匹配到多个索引,由于索引下分片太多,超过了集群中的核心数。就会在搜索线程池中造成排队任务,从而导致搜索拒绝。
1.2 查询延迟
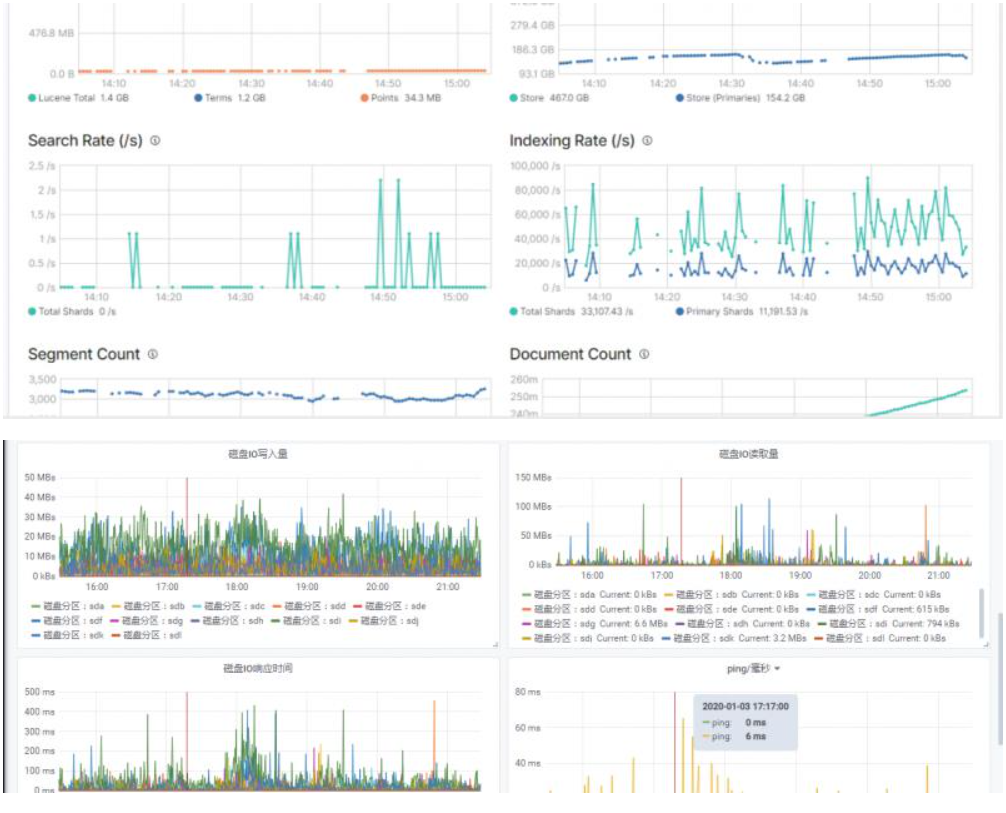
主机CPU飙高
- 另一个常见原因是磁盘 I/O 速度慢,导致搜索排队或在某些情况下 CPU 完全饱和。
- 除了文件系统缓存,Elasticsearch 还使用查询缓存和请求缓存来提高搜索速度。 所有这些缓存都可以使用搜索请求进行优化,以便每次都将某些搜索请求路由到同一组分片,而不是在不同的可用副本之间进行交替。这将更好地利用请求缓存、节点查询缓存和文件系统缓存。Es默认会在内存使用75%时发生FullGC ,做好主机和节点的监控同样重要。

0x02 优化方法
2.1 根据查询时间段动态计算索引
- elasticsearch支持同时查询多个索引,为了提高查询效率,避免使用通配符查询,我们可以计算枚举出所有的目标索引,一般es的数据都是按时间分索引,我们可以根据前端传入的时间段,计算出目标索引。
2.2 控制分片数量
- 分片的数量和节点和内存有一定的关系。
- 最理想的分片数量应该依赖于节点的数量。 数量是节点数量的1.5到3倍。
- 每个节点上可以存储的分片数量,和堆内存成正比。官方推荐:1GB 的内存,分片配置最好不要超过20。
注意from/to查询带来的深度分页问题
- 举例假如每页为 10 条数据,你现在要查询第 200 页,实际上是会把每个 Shard 上存储的前 2000条数据都查到一个协调节点上。
如果你有 5 个 分片,那么就有 10000 条数据,接着协调节点对这 10000 条数据进行一些合并、处理,再获取到最终第 200 页的 10 条数据。实在需要查询很多数据,可以使用scroll API 滚动查询。
2.3 为你的索引配置索引模板
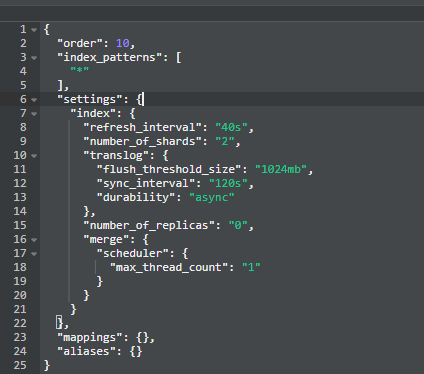
- 在低版本的es中默认的分片是5个,在高版本中改成了1,我们需要根据索引的索引量来动态调整分片数量,这里推荐设置一个默认匹配规则,将优先级设置高一些(ps:order高的会覆盖order低的模板),避免查询扫描过多的分片,合理利用集群资源。

2.4 避免数据分桶太多
对于分桶数量太大的聚合请求,应该将所有数据切片,比如按时间分片,多次请求,来提高查询效率,并且避免内存OOM。
2.5 独立协调节点
- 集群中应该有独立的协调节点,专门用于数据请求(node.master=false node.data=false),并给它们设置足够的内存。通过数据节点与协调节点分离,可以避免节点挂掉之后,导致整个集群不可用,或者长时间响应迟钝。
2.6 适当的增加刷新间隔
- es是一个准实时的搜索框架,这就意味着,从索引一个文档直到文档能够被搜索到有一个轻微的延迟,也就是 index.refresh_ interval ,默认值是1秒,适当的增加这个值,可以避免创建过多的segment(segment是最小的检索单元)。
2.7 配置慢查询日志
- 通过在 Elasticsearch 中启用 slowlogs 来识别运行缓慢的查询。slowlogs 专门用于分片级别,仅适用于数据节点。协调/客户端节点不具备慢日志分析功能,因为它们不保存数据。通过它,我们可以在日志中看到,那个查询语句耗时长,从而制定优化措施。
index.search.slowlog.threshold.query.warn: 10s
index.search.slowlog.threshold.query.info: 5s
index.search.slowlog.threshold.query.debug: 2s
index.search.slowlog.threshold.query.trace: 500ms

index.search.slowlog.threshold.fetch.warn: 1s
index.search.slowlog.threshold.fetch.info: 800ms
index.search.slowlog.threshold.fetch.debug: 500ms
index.search.slowlog.threshold.fetch.trace: 200ms

index.search.slowlog.level: info
2.8 配置熔断策略
- es7.0后版本提供一系列的断路器,用于防止操作引起OutOfMemoryError。每个断路器都指定了可以使用多少内存的限制。此外,还有一个父级断路器,用于指定可在所有断路器上使用的内存总量。
indices.breaker.request.limit:请求中断的限制,默认为JVM堆的60%。

indices.breaker.total.limit:总体父中断程序的启动限制,如果indices.breaker.total.use_real_memory为,则默认为JVM堆的70% false。如果indices.breaker.total.use_real_memory 为true,则默认为JVM堆的95%。

network.breaker.inflight requests.limit 限制当前通过HTTP等进来的请求使用内存不能超过Node内存的指定值。这个内存主要是限制请求内容的长度。 默认100%。

script.max_compilations_rate:在允许的时间间隔内限制动态脚本的并发执行数量。默认值为75 / 5m,即每5分钟75。
0x03 配置慢查询日志
3.1 通过修改elasticsearch.yml来启用慢查询(需要重启集群,不推荐)
vim elasticsearch.yml
Search Slow Log配置
###Search Slow Log :查询慢日志配置,日志记录在以“_index_isearch_slowlog.log”  结尾的文件中


#注:配置不一定都需要,自己选择需要那种级别(warn、info、debug、trace)日志,关闭的话配置成-1 就可以了,注释掉重启也可以
index.search.slowlog.threshold.query.warn: 10s  #超过10秒的query产生1个warn日志
index.search.slowlog.threshold.query.info: 5s  #超过5秒的query产生1个info日志
index.search.slowlog.threshold.query.debug: 2s #超过2秒的query产生1个debug日志
index.search.slowlog.threshold.query.trace: 500ms #超过500毫秒的query产生1个trace日志


index.search.slowlog.threshold.fetch.warn: 1s  ##fetch阶段的配置
index.search.slowlog.threshold.fetch.info: 800ms
index.search.slowlog.threshold.fetch.debug: 500ms
index.search.slowlog.threshold.fetch.trace: 200ms
Index Slow log配置
###Index Slow log:索引慢日志配置  ,日志记录在以“_index_indexing_slowlog.log”  结尾的文件中

#注:上边四个配置不一定都需要,自己选择需要那种级别(warn、info、debug、trace)日志关闭的话配置成-1就可以了
index.indexing.slowlog.threshold.index.warn: 10s   ##索引数据超过10秒产生一个warn日志
index.indexing.slowlog.threshold.index.info: 5s  ##索引数据超过5秒产生一个info日志
index.indexing.slowlog.threshold.index.debug: 2s ##索引数据超过2秒产生一个ddebug日志
index.indexing.slowlog.threshold.index.trace: 500ms ##索引数据超过500毫秒产生一个trace日志
3.2 通过API动态的修改配置
https://www.elastic.co/guide/en/elasticsearch/reference/7.x/index-modules-slowlog.html 官网参考
这是一个索引级别的设置,也就是说可以独立应用给单个索引:这个配置是永久的,配置后即使集群重启也会保留。如果关闭日志记录的话将选项修改成-1即可(例如: "index.search.slowlog.threshold.query.warn" : -1)
Search Slow Log配置
curl -user 用户名:密码 -X PUT "192.168.1.3:9200/索引名字/_settings?pretty" -H 'Content-Type: application/json' -d'
{
  "index.search.slowlog.threshold.query.warn": "10s",
  "index.search.slowlog.threshold.query.info": "5s",
  "index.search.slowlog.threshold.query.debug": "2s",
  "index.search.slowlog.threshold.query.trace": "500ms",
  "index.search.slowlog.threshold.fetch.warn": "1s",
  "index.search.slowlog.threshold.fetch.info": "800ms",
  "index.search.slowlog.threshold.fetch.debug": "500ms",
  "index.search.slowlog.threshold.fetch.trace": "200ms",
  "index.search.slowlog.level": "info"
}
'
Index Slow log配置
curl  -user 用户名:密码 -X PUT "192.168.1.3:9200/索引名字/_settings?pretty" -H 'Content-Type: application/json' -d'
{
  "index.indexing.slowlog.threshold.index.warn": "10s",
  "index.indexing.slowlog.threshold.index.info": "5s",
  "index.indexing.slowlog.threshold.index.debug": "2s",
  "index.indexing.slowlog.threshold.index.trace": "500ms",
  "index.indexing.slowlog.level": "info",
  "index.indexing.slowlog.source": "1000"
}
'
0x04 参考
https://www.cnblogs.com/hyq0823/p/12165113.html
https://blog.csdn.net/donghaixiaolongwang/article/details/79208457