SpringBoot是为了简化Spring应用的创建、运行、调试、部署等一系列问题而诞生的产物,
自动装配的特性让我们可以更好的关注业务本身而不是外部的XML配置,我们只需遵循规范,引入相关的依赖就可以轻易的搭建出一个 WEB 工程
实际项目开发中,程序往往会发生各式各样的异常情况,特别是身为服务端开发人员的我们,
总是不停的编写接口提供给前端调用,分工协作的情况下,避免不了异常的发生,如果直接将错误的信息直接暴露给用户,
这样的体验可想而知,且对黑客而言,详细异常信息往往会提供非常大的帮助…
初窥异常
一个简单的异常请求的接口
@GetMapping("/test1")
public String test1() {
    // 这里只是模拟异常,假设业务处理的时候出现错误了,或者空指针了等等...
    int i = 10 / 0;
    return "test1";
}
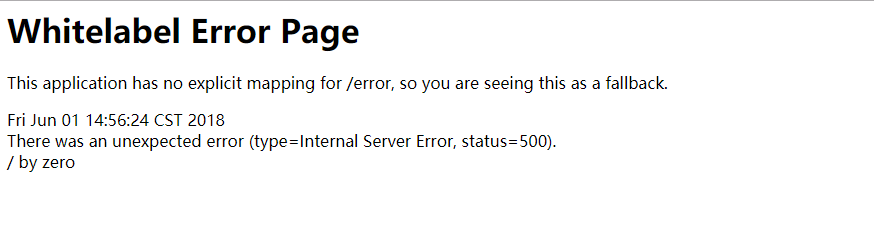
打开浏览器访问它的时候发现
又或者是用postman等模拟工具
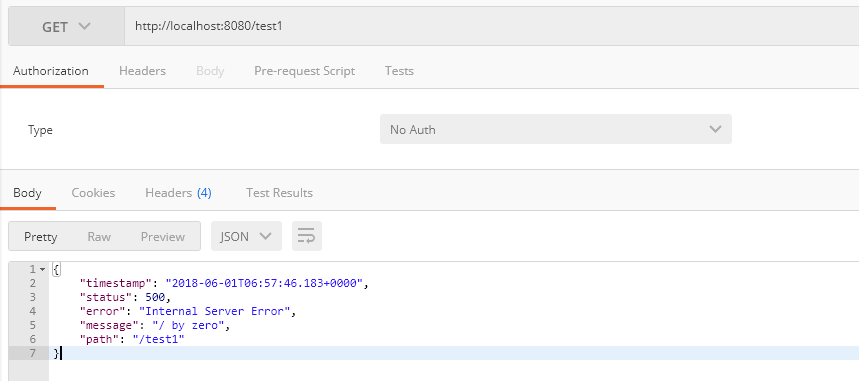
如果这接口是给第三方调用或者是自己公司的系统,看到这种错误估计得暴走吧….
笨方法(极其不建议)
采用try-catch的方式,手动捕获异常信息,然后返回对应的结果集,相信很多人都看到过类似的代码(如:封装成Result对象);
该方法虽然间接性的解决错误暴露的问题,同样的弊端也很明显,增加了大量的代码量,当异常过多的情况下对应的catch层愈发的多了起来,
很难管理这些业务异常和错误码之间的匹配,所以最好的方法就是通过简单配置全局掌控….
@GetMapping("/test2")
public Map<String, String> test2() {
    Map<String, String> result = new HashMap<>(16);
    // TODO 直接捕获所有代码块,然后在 cache
    try {
        int i = 10 / 0;
        result.put("code", "200");
        result.put("data", "具体返回的结果集");
    } catch (Exception e) {
        result.put("code", "500");
        result.put("message", "请求错误");
    }
    return result;
}
具体代码
通过上面的阅读大家也大致能了解到为啥需要对异常进行全局捕获了,接下来就看看Spring Boot提供的解决方案
导入依赖
在pom.xml中添加上spring-boot-starter-web的依赖即可
<dependencies>
    <dependency>
        <groupId>org.springframework.boot</groupId>
        <artifactId>spring-boot-starter-web</artifactId>
    </dependency>
    <dependency>
        <groupId>org.springframework.boot</groupId>
        <artifactId>spring-boot-starter-test</artifactId>
        <scope>test</scope>
    </dependency>
</dependencies>
自定义异常
在应用开发过程中,除系统自身的异常外,不同业务场景中用到的异常也不一样,为了与标题轻松搞定全局异常更加的贴切,定义个自己的异常,看看如何捕获…
/**
 * 自定义异常
 */
public class CustomException extends RuntimeException {
    private static final long serialVersionUID = 4564124491192825748L;

    private int code;

    public CustomException() {
        super();
    }
    public CustomException(int code, String message) {
        super(message);
        this.setCode(code);
    }
    public int getCode() {
        return code;
    }
    public void setCode(int code) {
        this.code = code;
    }
}
异常信息模板
定义返回的异常信息的格式,这样异常信息风格更为统一
/**
 * 异常信息模板
 */
public class ErrorResponseEntity {

    private int code;
    private String message;

    public ErrorResponseEntity(int code, String message) {
        this.code = code;
        this.message = message;
    }
    // 省略 get/set
}
控制层
仔细一看是不是和平时正常写的代码没啥区别,不要急,接着看….
import com.winterchen.exception.CustomException;
import org.springframework.web.bind.annotation.GetMapping;
import org.springframework.web.bind.annotation.RestController;

@RestController
public class ExceptionController {

    @GetMapping("/test3")
    public String test3(Integer num) {
        // TODO 演示需要,实际上参数是否为空通过 @RequestParam(required = true)  就可以控制
        if (num == null) {
            throw new CustomException(400, "num不能为空");
        }
        int i = 10 / num;
        return "result:" + i;
    }
}
异常处理(关键)
注解概述
@ControllerAdvice捕获Controller层抛出的<wiz_tmp_highlight_tag class="cm-searching">异常,如果添加@ResponseBody返回信息则为JSON格式。@RestControllerAdvice相当于@ControllerAdvice与@ResponseBody的结合体。@ExceptionHandler统一处理一种类的<wiz_tmp_highlight_tag class="cm-searching">异常,减少代码重复率,降低复杂度。
创建一个GlobalExceptionHandler类,并添加上@RestControllerAdvice注解就可以定义出异常通知类了,然后在定义的方法中添加上@ExceptionHandler即可实现异常的捕捉…
import com.winterchen.exception.CustomException;
import com.winterchen.exception.ErrorResponseEntity;
import org.springframework.http.HttpHeaders;
import org.springframework.http.HttpStatus;
import org.springframework.http.ResponseEntity;
import org.springframework.web.bind.MethodArgumentNotValidException;
import org.springframework.web.bind.annotation.ExceptionHandler;
import org.springframework.web.bind.annotation.RestControllerAdvice;
import org.springframework.web.context.request.WebRequest;
import org.springframework.web.method.annotation.MethodArgumentTypeMismatchException;
import org.springframework.web.servlet.mvc.method.annotation.ResponseEntityExceptionHandler;

import javax.servlet.http.HttpServletRequest;
import javax.servlet.http.HttpServletResponse;

/**
 * 全局异常处理
 */
@RestControllerAdvice
public class GlobalExceptionHandler extends ResponseEntityExceptionHandler {

    /**
     * 定义要捕获的异常 可以多个 @ExceptionHandler({})
     * @param request  request
     * @param e        exception
     * @param response response
     * @return 响应结果
     */
    @ExceptionHandler(CustomException.class)
    public ErrorResponseEntity customExceptionHandler(HttpServletRequest request, final Exception e, HttpServletResponse response) {
        response.setStatus(HttpStatus.BAD_REQUEST.value());
        CustomException exception = (CustomException) e;
        return new ErrorResponseEntity(exception.getCode(), exception.getMessage());
    }

    /**
     * 捕获  RuntimeException 异常
     * 如果你觉得在一个 exceptionHandler 通过  if (e instanceof xxxException) 太麻烦
     * 那么你还可以自己写多个不同的 exceptionHandler 处理不同异常
     * @param request  request
     * @param e        exception
     * @param response response
     * @return 响应结果
     */
    @ExceptionHandler(RuntimeException.class)
    public ErrorResponseEntity runtimeExceptionHandler(HttpServletRequest request, final Exception e, HttpServletResponse response) {
        response.setStatus(HttpStatus.BAD_REQUEST.value());
        RuntimeException exception = (RuntimeException) e;
        return new ErrorResponseEntity(400, exception.getMessage());
    }

    /**
     * 通用的接口映射异常处理方
     */
    @Override
    protected ResponseEntity<Object> handleExceptionInternal(Exception ex, Object body, HttpHeaders headers, HttpStatus status, WebRequest request) {
        if (ex instanceof MethodArgumentNotValidException) {
            MethodArgumentNotValidException exception = (MethodArgumentNotValidException) ex;
            return new ResponseEntity<>(new ErrorResponseEntity(status.value(), exception.getBindingResult().getAllErrors().get(0).getDefaultMessage()), status);
        }
        if (ex instanceof MethodArgumentTypeMismatchException) {
            MethodArgumentTypeMismatchException exception = (MethodArgumentTypeMismatchException) ex;
            logger.error("参数转换失败,方法:" + exception.getParameter().getMethod().getName() + ",参数:" + exception.getName()
                    + ",信息:" + exception.getLocalizedMessage());
            return new ResponseEntity<>(new ErrorResponseEntity(status.value(), "参数转换失败"), status);
        }
        return new ResponseEntity<>(new ErrorResponseEntity(status.value(), "参数转换失败"), status);
    }
}
主函数
import org.springframework.boot.SpringApplication;
import org.springframework.boot.autoconfigure.SpringBootApplication;

@SpringBootApplication
public class SpringBootExceptionApplication {
    public static void main(String[] args) {
        SpringApplication.run(SpringBootExceptionApplication.class, args);
    }
}
测试
完成准备事项后,启动Chapter17Application,通过下面的测试结果可以发现,真的是so easy,代码变得整洁了,扩展性也变好了…
{"code":400,"message":"num不能为空"}
访问http://localhost:8080/test3?num=0
{"code":400,"message":"/ by zero"}
访问http://localhost:8080/test3?num=5
result:2
转载链接:http://blog.battcn.com/2018/06/01/springboot/v2-other-exception/