项目结构
先来一张项目结构图,因为LZ是用的IDEAL,网上的大部分都是用的eclipse来实现:
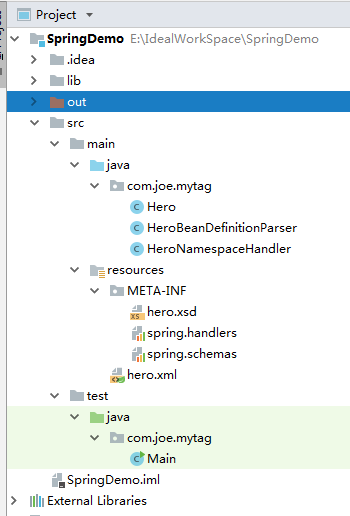
这里也大致说一下项目的新建,考虑到有的读者会想LZ一样对IDEAL的使用不是很熟练。
新建一个spring项目(不会的话网上搜索一下,很简单的),建好之后,再新建这些文件夹,点击File—>Project Structure --->Modules,设置文件夹的意义。LZ设置的java源文件是(Source Folders):srcmainjava;资源文件(Resource Folders):srcmain esources;测试文件(Test Source Folders):src estjava。
设置好这些以后,就可以正式开始自定义Spring标签了。
自定义Spring标签
1.定义一个JavaBean:
package com.joe.mytag;

public class Hero {

        private  String name;
        private  int    age;

        public String getName() {
            return name;
        }

        public void setName(String name) {
            this.name = name;
        }

        public int getAge() {
            return age;
        }

        public void setAge(int age) {
            this.age = age;
        }
}
2.hero.xsd文件:
<xsd:schema
        xmlns="http://joe.com/schema"
        xmlns:xsd="http://www.w3.org/2001/XMLSchema"
        targetNamespace="http://joe.com/schema"><!-- 目标命名空间,xmlns要与它一致 -->
    <xsd:complexType name="myTagcomplexType">
        <xsd:attribute name="name" type="xsd:string">
            <xsd:annotation>
                <xsd:documentation><![CDATA[ The myTag name. ]]></xsd:documentation>
            </xsd:annotation>
        </xsd:attribute>
        <xsd:attribute name="age" type="xsd:int">
            <xsd:annotation>
                <xsd:documentation><![CDATA[ The myTag age. ]]></xsd:documentation>
            </xsd:annotation>
        </xsd:attribute>
    </xsd:complexType>

    <xsd:element name="myTag" type="myTagcomplexType">
        <xsd:annotation>
            <xsd:documentation><![CDATA[ myTag的文档 ]]></xsd:documentation>
        </xsd:annotation>
    </xsd:element>
</xsd:schema>
这里需要注意几点:
(1)定义targetNamespace(目标命名空间),xmlns的值要与其一致;
(2)<xsd:element>定义的就是将会在xml文件中使用的元素,例如<hero:myTag>中的myTag;
(3)<xsd:attribute>定义的就是JavaBean中的属性,例如<hero:myTag name="age">中的name,就是bean中的属性name,并且还可以通过type来指定属性类型,进而起到检测的作用(比如我们定义的类型是int,如果xml中的值是非int类型的,就会直接报错)。
3.编写spring.schemas:
http://joe.com/schema/hero.xsd=META-INF/hero.xsd
注意:这里红色加粗的部分要与hero.xsd文件中的targetNamespace一致。
4.编写自定义BeanDefinition解析器
package com.joe.mytag;

import org.springframework.beans.factory.config.BeanDefinition;
import org.springframework.beans.factory.support.BeanDefinitionRegistry;
import org.springframework.beans.factory.support.RootBeanDefinition;
import org.springframework.beans.factory.xml.BeanDefinitionParser;
import org.springframework.beans.factory.xml.ParserContext;
import org.w3c.dom.Element;

//自定义BeanDefinition解析器
public class HeroBeanDefinitionParser implements BeanDefinitionParser {

        private final Class<?> beanClass;

        public HeroBeanDefinitionParser(Class<?> beanClass) {
            this.beanClass = beanClass;
        }

        public BeanDefinition parse(Element element, ParserContext parserContext) {
            //创建用于属性承载的BeanDefinition
            RootBeanDefinition beanDefinition = new RootBeanDefinition();
            //设置bean的对应class
            beanDefinition.setBeanClass(beanClass);
            //设置延迟加载为否
            beanDefinition.setLazyInit(false);
            //获取对应的属性值,并设置到BeanDefinition中
            beanDefinition.getPropertyValues().add("name", element.getAttribute("name"));
            beanDefinition.getPropertyValues().add("age", element.getAttribute("age"));
            //获取BeanDefinition的注册器
            BeanDefinitionRegistry beanDefinitionRegistry = parserContext.getRegistry();
            //注册bean到BeanDefinitionRegistry中
            beanDefinitionRegistry.registerBeanDefinition(beanClass.getName(),beanDefinition);
            return beanDefinition;
        }
}
5.编写命名空间的处理器
其作用主要是用来注册自定义的BeanDefinition解析器。
package com.joe.mytag;

import org.springframework.beans.factory.xml.NamespaceHandlerSupport;

public class HeroNamespaceHandler  extends NamespaceHandlerSupport {
    public void init() {
        //注册自定义的BeanDefinition解析处理器
        registerBeanDefinitionParser("myTag", new HeroBeanDefinitionParser(Hero.class));
    }
}
说明:通常为每一个xsd:element都要注册一个BeanDefinitionParser。
6.编写spring.handlers文件:
http://joe.com/schema=com.joe.mytag.HeroNamespaceHandler
作用:主要用于关联命名空间处理器和xsd中的targetNamespace。
注意:这里红色加粗的部分要与hero.xsd文件中的targetNamespace一致。
7.编写hero.xml文件:
<?xml version="1.0" encoding="UTF-8"?>
<beans xmlns="http://www.springframework.org/schema/beans"
       xmlns:xsi="http://www.w3.org/2001/XMLSchema-instance"
       xmlns:hero="http://joe.com/schema"
       xsi:schemaLocation="http://www.springframework.org/schema/beans http://www.springframework.org/schema/beans/spring-beans.xsd
       http://joe.com/schema http://joe.com/schema/hero.xsd">

    <hero:myTag name="joe" age="25"/>
</beans>
说明:
(1)xmlns:hero的value是xsd文件中的targetNamespace;
(2)xmlns:hero可以写成xmlns:xxx,此时<hero:myTag/>就要写成<xxx:myTag/>;
8.测试自定义标签:
package com.joe.mytag;

import org.springframework.context.ApplicationContext;
import org.springframework.context.support.ClassPathXmlApplicationContext;

public class Main {
    public static void main(String[] args) {
        ApplicationContext applicationContext = new ClassPathXmlApplicationContext("hero.xml");
        Hero hero = (Hero) applicationContext.getBean(Hero.class.getName());
        System.out.println("name: " + hero.getName() + " age: " + hero.getAge());
    }
}
输出结果:
十二月 17, 2018 10:49:59 上午 org.springframework.context.support.ClassPathXmlApplicationContext prepareRefresh
信息: Refreshing org.springframework.context.support.ClassPathXmlApplicationContext@5910e440: startup date [Mon Dec 17 10:49:59 CST 2018]; root of context hierarchy
十二月 17, 2018 10:49:59 上午 org.springframework.beans.factory.xml.XmlBeanDefinitionReader loadBeanDefinitions
信息: Loading XML bean definitions from class path resource [hero.xml]
name: joe age: 25
如何在spring中自定义xml标签的方法就结束了。在实际中,随着注解和javaconfg的盛行,xml的方式渐渐的会淡出舞台,但是spring的启动流程还是会的。说一下上述代码涉及到的流程:
(1)使用ResourceLoader将配置文件xml装载为Resource对象;
(2)使用BeanDefinitionReader解析配置信息:将每一个<bean>解析为一个BeanDefinition对象,然后存储到BeanDefinitionRegistry中;
(3)实际上是BeanDefinitionReader调用BeanDefinitionParser进行了解析操作,解析完成后注册到BeanDefinitionRegistry(代码看上边的HeroBeanDefinitionParser);
踩过的坑
(1)项目中spring包错误,在新建项目时,有的包(不止一个)不会加载完全导致项目出错。(解决方式:网上下载新包,替换即可)。
(2)没有加上xsd:前缀,导致解析hero.xsd文件报错。
至此,简单的自定义标签完成。