第十九组 rm -f队
一、认识
朱庆章:
1.认识程度:虽然自己还没用过,但是之前看同学用过。4B上市后还是比较心动的,相对3提升很大,最高支持到4G的内存就是飞跃了,一度想买不过没啥时间玩放弃了。
2.可以用来做什么:见过做智能家居物联网这类的,也有看过搭网站的,后面有空跑一个人脸识别吧,家里还有一个I2C的12864OLED看看到时候可以玩啥。
陈梦雪:
1.认识程度:有听说过这个名字,但是不知道它到底是干嘛的
2.用途:可以用在机器人等智能设备上 如果是我我会用在动态只能摄像头上
潘海东:
1.应该算半个树莓派爱好者吧,接触树莓派2年多时间了,自己买过两个树莓派,虽然大部分时间都是在吃灰,但一出新版还是忍不住想买。特别是这次的4,大内存+USB3可太令人满意了,之前好多想玩的项目就是因为会爆内存做不了,这次有了4G内存,能玩多新花样。也在树莓派上玩过挺多项目,搭过web服务器,做过NAS,还做过多媒体服务器,有时也会跑一些简单的Python脚本。
2.可以用来做什么:树莓派价格友好,且是一种介于PC机和单片机之间的形态,不仅具有单片机的特点,还有着远超单片机的性能,能够完成很多很多工作。如微型服务器、对计算量有一定要求的嵌入式系统、机器人、甚至还有人用几百台树莓派组成超级计算机进行大规模运算。
想用树莓派来做什么:因为接触树莓派已经有一段时间了,一些比较正常的项目都已经自己尝试过了,但是最近偶然发现了一个好项目,树莓派版“小爱同学”,利用树莓派搭建一个AI智能助手,看上去挺好玩的,而且实现好像也不是很困难,但就是对硬件有一定要求,如果能凑齐硬件,应该会试着实现一下。
二、系统烧录和备份
1.下载镜像
访问官网(https://www.raspberrypi.org/downloads/raspbian/)下载镜像

Lite版本是最小化安装,没有桌面环境;
Desktop版本则带有桌面;
Desktop and recommended software版本带有推荐软件,比较大
2.烧录镜像
烧录软件很多,我比较常用的还是Rufus,当然软碟通之类的同理都可以,大同小异
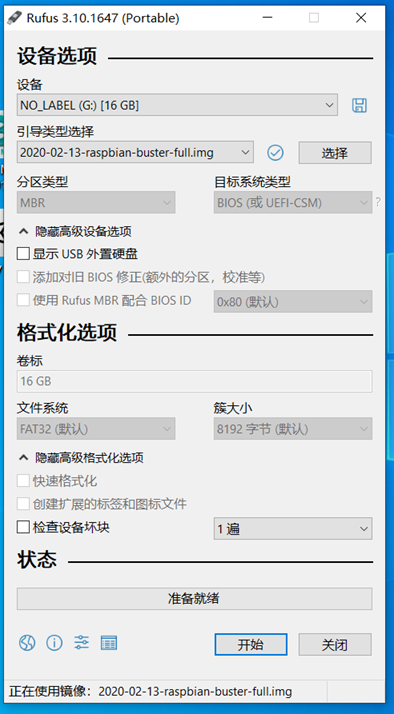
引导类型选择一栏右侧的选择按钮选择你的镜像
点击开始写入镜像
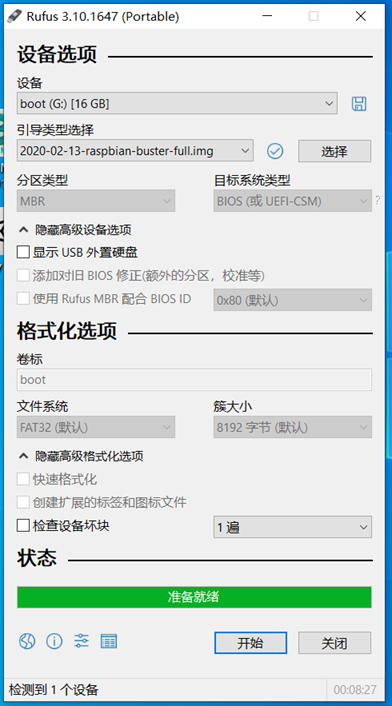
写入完毕
3.备份
备份工具也有很多,这里我用win32diskimager
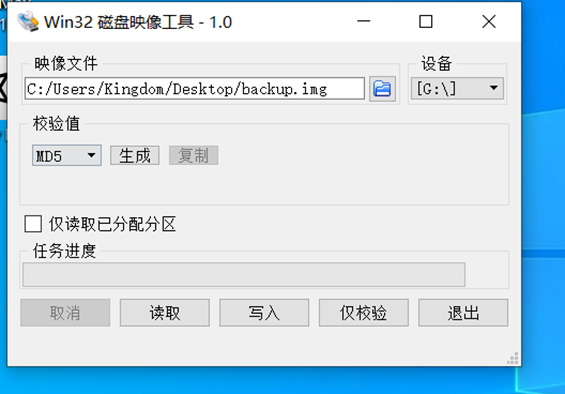
在你指定的目录下创建一个空的.img文件,点击读取即可
三、访问树莓派
因为目前手上没有显示器,这里使用SSH和VNC访问树莓派
1.开启ssh并配置网络
创建一个空白的文件ssh用来开启ssh
编辑创建一个wpa_supplicant.conf用于联网,根据你的实际情况填写ssid和psk
country=CN
ctrl_interface=DIR=/var/run/wpa_supplicant GROUP=netdev
update_config=1

network={
	ssid="TP-LINK_ED40"
	psk="18750060424"
	priority=1
}
然后把这两个文件放到SD卡的根目录
SD卡插入树莓派,插电开机
2.ssh
访问路由器管理界面,获取到树莓派的IP地址

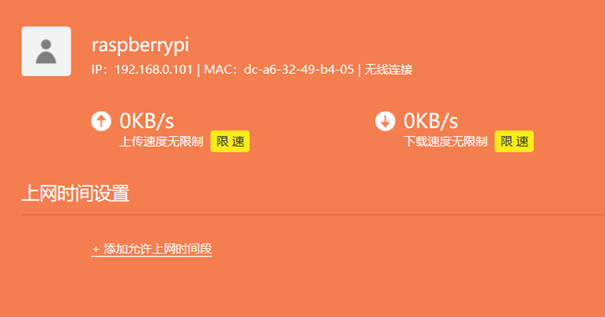
可以看到树莓派的IP地址
如果你使用Windows,可以安装一个openssh(只安装客户端即可)
openssh的官网(https://www.mls-software.com/opensshd.html)
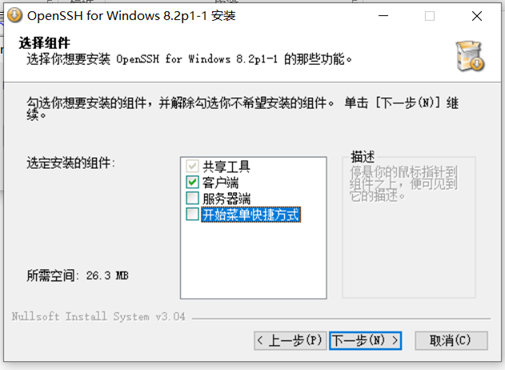
只勾选客户端即可,其余一路默认
当然这里也可以用Putty替代openssh,大同小异
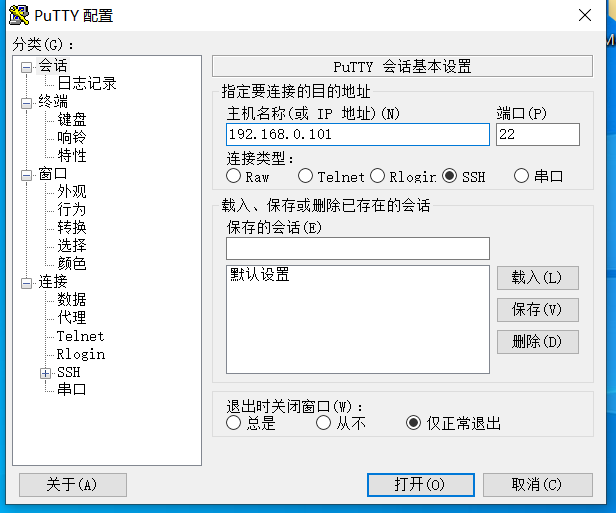
打开cmd,通过ssh登录到你的树莓派
初始默认用户名pi 密码raspberry
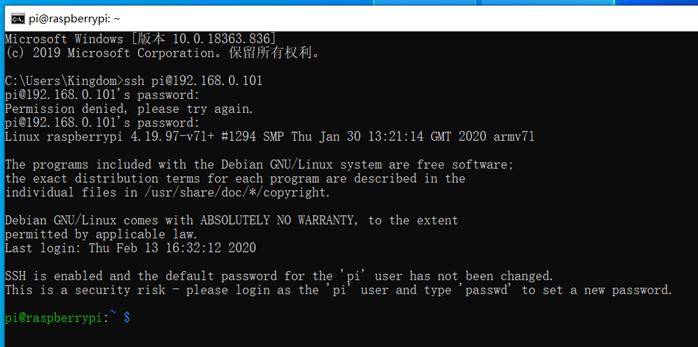
登录后可以尝试进行改密码的操作
修改默认pi账户的密码

3.VNC
ssh登录后开启VNC以便我们连接时使用图形化界面
sudo raspi-config
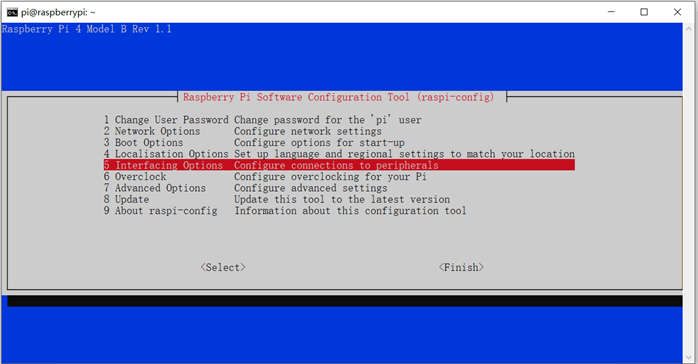
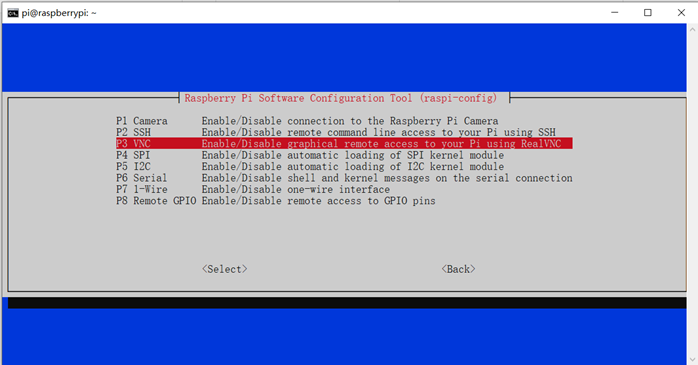
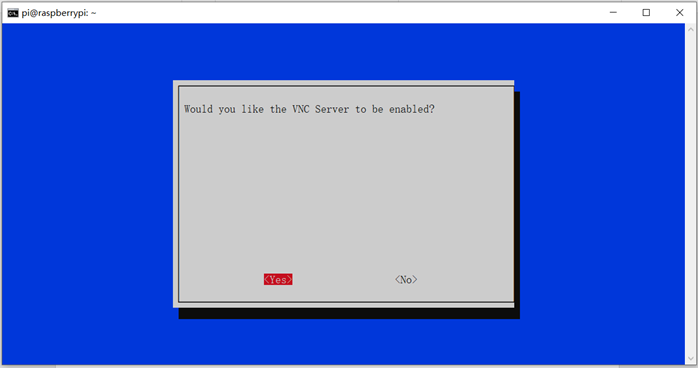
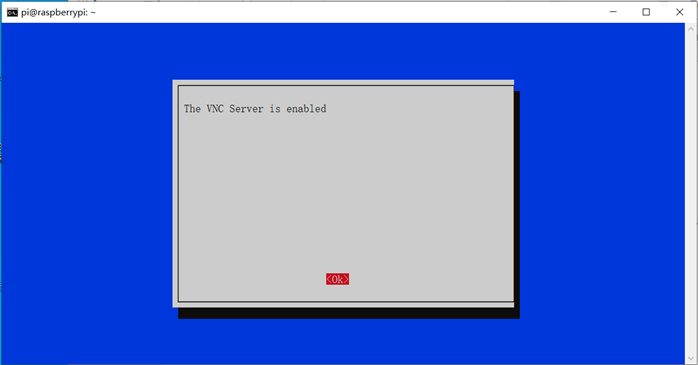

在自己的机器上下载VNC
官网(https://www.realvnc.com/en/connect/download/viewer/windows/)
直接输入树莓派的IP访问
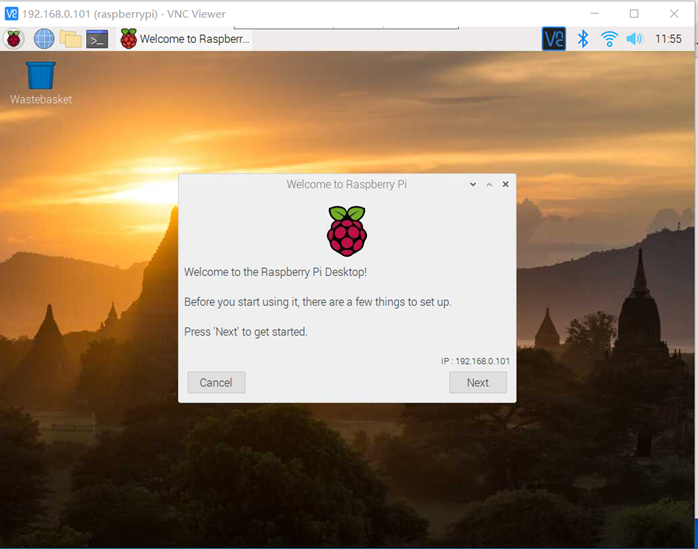
如果需要使队友也可以远程访问的话,建议做内网穿透。可以用花生壳、蒲公英这类的东西。
有动手能力的话,推荐Padavan,可以把花生壳集成在路由中。
但是因为我目前在家使用广电网络,入户前套了多层NAT,网络质量感人,做内网穿透没有很大意义。
4.文件传输
(1).WinSCP
原理是SFTP
为了方便传输文件,可以安装一个winscp
官网(https://winscp.net/eng/download.php)
官网访问挺慢的,以前玩路由有装一个winscp就直接用了
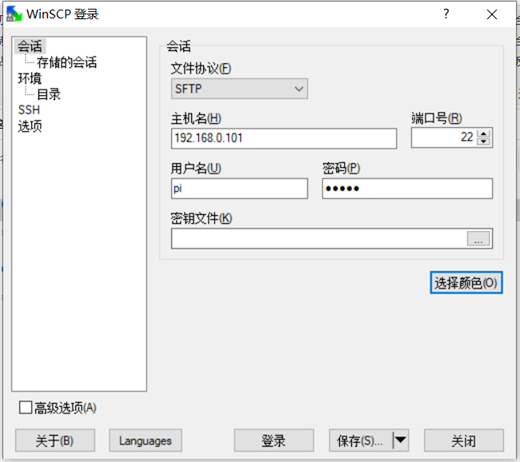
填好相关信息就可以登录了
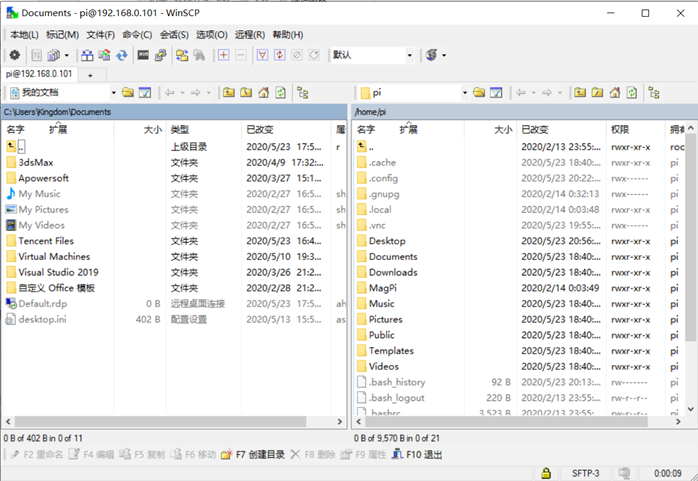
winscp支持直接拖拽
举个栗子,把后面提到拍照生成的test.jpg拉下来。

(2).使用VNC进行树莓派与PC端之间的文件双向传输
树莓派向PC发送文件
点击树莓派顶部状态栏中的VNC图标

点击右上方菜单栏图标

选择文件传输功能

选择好需要传输的文件,就可以向PC传输文件。

PC向树莓派传文件
点击VNC界面中间的文件传输图标

同样,选择好想要传输的文件即可。

四、接入摄像头
1.开启摄像头
关机插入摄像头排线,再开机
首先在设置中打开摄像头的连接
sudo raspi-config选择interfacing opinions,选择Camera,并Enable
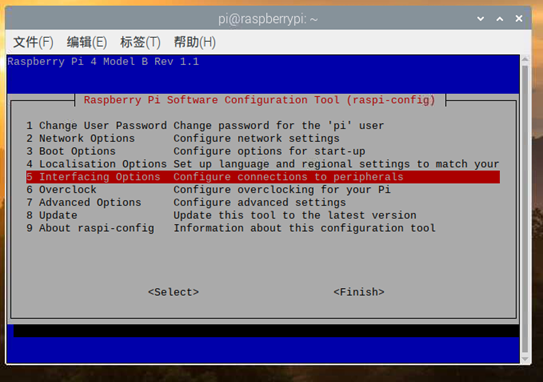
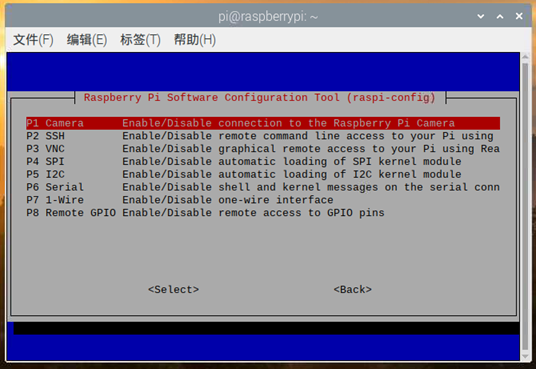
然后重启
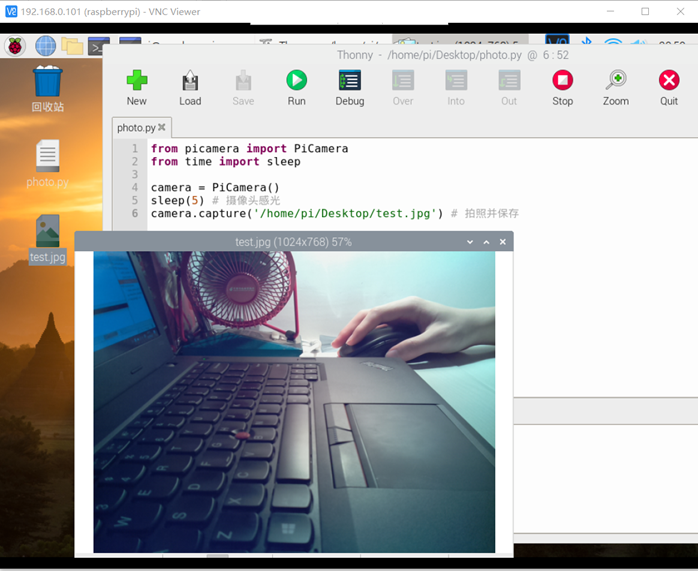
2.控制摄像头拍照
from picamera import PiCamera
from time import sleep

camera = PiCamera()
sleep(5) # 摄像头感光
camera.capture('/home/pi/Desktop/test.jpg') # 拍照并保存
3.实时视频监控
我拍摄了下面五种方法效果视频,从视频中可以直观地看出各个方法的延迟,视频附在博客中了(特别鸣谢:海东同学的图床)
如果博客中看不了可能是我们的图床流量爆掉了,请在评论提醒我们。
也可以点击后方链接观看,视频我已上传B站,链接:(https://b23.tv/BhWRGr)。视频BV号:BV1r5411s7Lg
或B站搜索我用户名JanOJorgensen。
方法(3)(4)(5)都比vlc直接接收网络视频流延迟低。
速度慢的原因分析在遇到的问题3中。
(暗示加分)
(1).OpenCV
import cv2

cap = cv2.VideoCapture(0)
while(1):
    ret, frame = cap.read()
    cv2.imshow("capture", frame)
    if cv2.waitKey(1) & 0xFF == ord('q'):
        break
cap.release()
cv2.destroyAllWindows()
这个方法只能在本地窗口中显示,虽然画面延迟很低但是对于实时监控的意义不大。
opencv本地:
(2).raspivid +vlc获取实时视频流
通过vlc实时读取摄像头捕获的影像,也就是老师博客里的方法了。这个方法延迟非常高。
延迟高的原因我在遇到的问题中详细分析。
raspivid -o - -t 0 -w 640 -h 360 -fps 15|cvlc -vvv stream:///dev/stdin --sout '#standard{access=http,mux=ts,dst=:8090}' :demux=h264
官网资料:(https://www.raspberrypi.org/documentation/usage/camera/raspicam/raspivid.md)
access=http 使用http协议传输视频流
-h          视频高度
-w          视频宽度
-o -        输出写到stdout
-t 0        无延时
-fps        每秒传输帧数
dst         网络端口
demux h264  视频压缩格式
然后vlc里选择打开网络串流
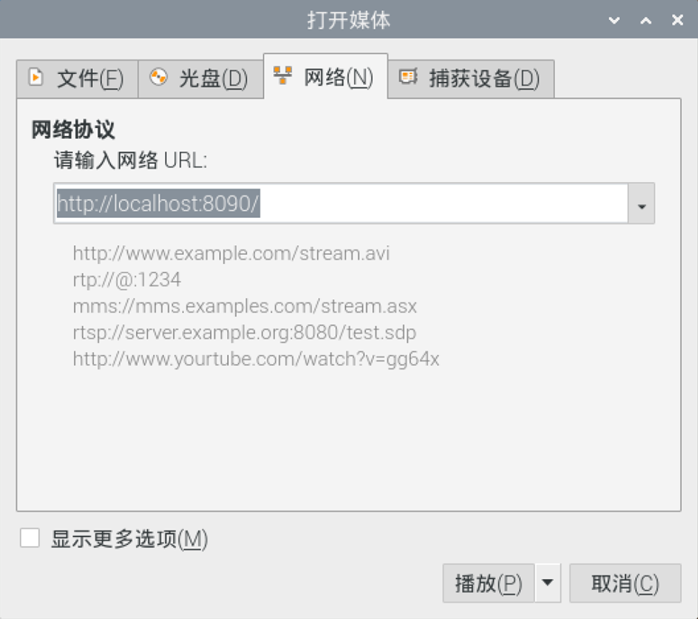
这个方法非常慢,虽然局域网其他机器也可以通过vlc获取到树莓派拍摄视频流,但是延迟非常高,大约快到五秒了。可以看我视频中向下转动摄像头的动作,很明显延迟巨大。
vlc串流:
(3).motion
motion官网(http://www.lavrsen.dk/foswiki/bin/view/Motion)
motion的特点在于运动物体的检测,可以在画面中出现活动物体时才开始拍摄并记录
安装
sudo apt-get install motion
编辑设置
sudo nano /etc/motion/motion.conf
然后修改
deamon off 改成 on
分辨率帧率访问端口等等都可以自己设置
启动
sudo motion
然后在浏览器查看
http://localhost:8080/
效果在上面提到的视频链接
最后关闭
sudo killall -TERM motion
motion:
(4).Pi Video Streaming Demo
项目GitHub地址:(https://github.com/waveform80/pistreaming)
原理上是在客户端使用了基于JavaScript的MPEG1解码器
js解码器的GitHub:(https://github.com/phoboslab/jsmpeg)
这个方法的流畅程度和下面的方法(5)不相上下的。
安装依赖
pip3 install ws4py
clone项目到本地
git clone https://github.com/waveform80/pistreaming.git
运行
cd pistreaming/
python3 server.py
浏览器打开
http://localhost:8082/
Pi Video Streaming Demo:
(5).mjpeg-streamer
安装依赖
sudo apt-get install cmake libjpeg8-dev
项目git(https://github.com/jacksonliam/mjpg-streamer/)
下载mjpeg-streamer的源码
并解压到用户主目录

进入到源码的mjpg-streamer-experimental目录,然后编译
cd mjpg-streamer-master/mjpg-streamer-experimental/
make
编译结束安装
sudo make install
然后就可以运行了
根据你的摄像头选择参数,他也支持uvc
/usr/local/bin/mjpg_streamer -i "/usr/local/lib/mjpg-streamer/input_raspicam.so -fps 15" -o "/usr/local/lib/mjpg-streamer/output_http.so -p 8080 -w /usr/local/share/mjpg-streamer/www"
然后打开浏览器
访问http://localhost:8080/


延迟和上面提到的第四种方法使用js解码器是接近的,会略好一些
mjpg:
五、遇到的问题和解决方法
问题1:VNC无法显示桌面
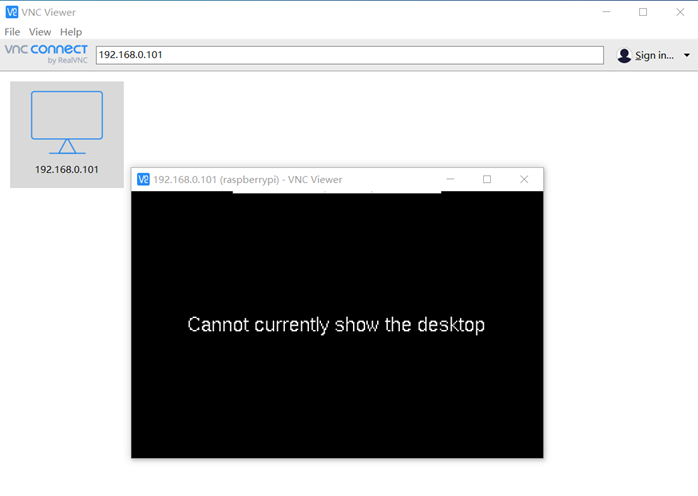
解决方法:
ssh进去调整一下分辨率
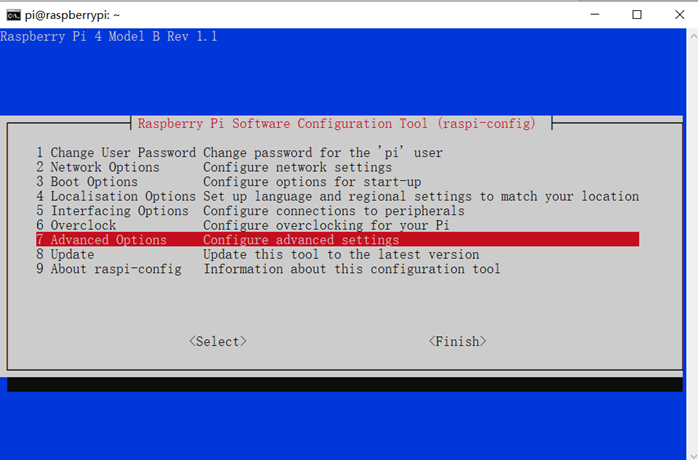
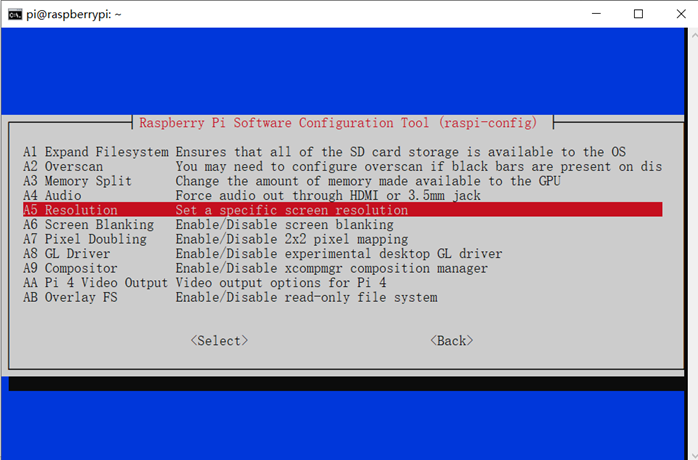
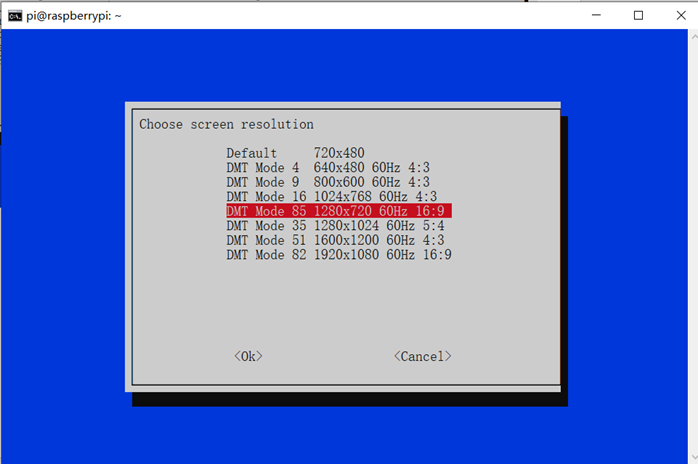
修改后会提示重启机器。
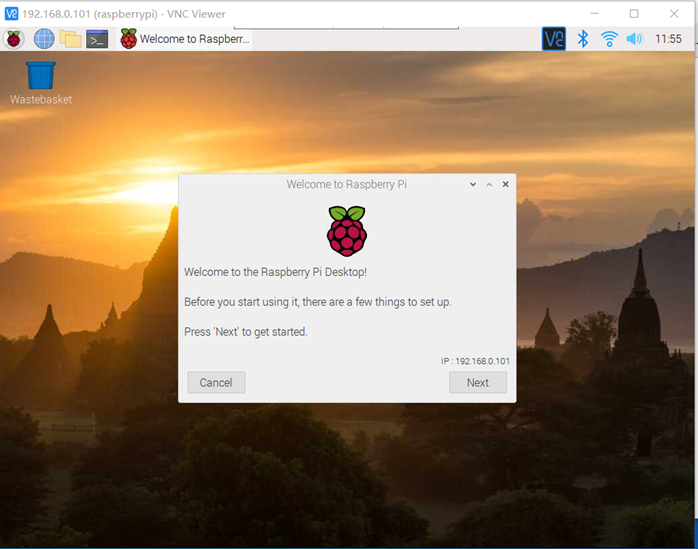
问题2:OpenCV无法import
首先,树莓派的官方镜像里不只有python3也有python2,所以在pip install的时候,如果你想使用python3运行程序,请用pip3 install
然后是版本的问题,虽然在老师博客(https://www.cnblogs.com/fjlinww/p/11956264.html)上我看到4B+python3.7+opencv4.1.2可以使用,
但在我这出现了问题(依赖我也都装了)。故尝试降低版本,退到3尝试成功了。

我的建议:
pip3 install opencv-python==3.4.6.27
下次实验我会再尝试一次4B+python3.7+opencv4.1.2
问题3:为什么使用vlc接受网络串流的时候速度这么慢?
我翻到的一篇文章,可供参考
节选了重点内容:(文章比较长我就不翻译了,没有什么生僻词,内容还是比较容易读懂的)
When streaming JPEGs, the camera captures a full frame, encodes it, and dumps it over the net. The client now has a full frame to display (and decoding time is negligible) so the latency is down to the capture, encoding, and transmission time of the frame. In practice, capture and encoding are tiny too, so we'll say it's all down to transmission time.
When streaming H.264 (or any MPEG-ish format in general) things are a tad more complex but not much so. The first frame output by the encoder will be an I-frame (a full frame), so this case is exactly like JPEG (except H.264 I-frames are better quality for the same number of bits): the latency is down to transmission time of the frame. The next frame output by the encoder will most likely be a P-frame (a "predicted" frame) which can't be decoded without knowledge of the preceding frame. All that really means in practice though is that it's much smaller; again, latency is down to transmission time.
What if the prior frame got dropped (you are using UDP after all)? Assuming no re-transmissions, you can't (accurately) decode further frames until the next I-frame. This doesn't exactly affect latency, but in the JPEG scenario it would result in one corrupt frame; in the H.264/MPEG scenario it results in multiple corrupt frames (how many depends on the I-frame period - it's typical to set this quite low when streaming, e.g. once every second or two).
So far, both schemes are looking exactly the same for latency (except H.264 suffers more with dropped packets, but provides better quality). When dealing with camera output that is indeed the case: there's no reason H.264 should have any worse latency than JPEG (and given the smaller transmission sizes it should actually be a bit better). So why does streaming H.264 give poor latency with things like this recipe?
There's another frame-type we haven't considered in the H.264/MPEG scenario: B-frames ("bi-directional predicted" frames). These can't be decoded without knowledge of prior and subsequent frames. Obviously, in a streaming application this will incur latency as you have to wait for the next frame before you can decode the current one. However, we don't have to worry about that because the Pi's H.264 encoder never produces B-frames (I have heard it's common for most video cameras to only produce I-frames and P-frames, which makes perfect sense when you consider they're encoding live material, not pre-recorded stuff where they can look at the next frame to produce a B-frame). So, on the camera side of things B-frames aren't relevant...
But what about the client side? H.264/MPEG players don't know that their source is never going to produce a B-frame. They also assume (not unreasonably) that the network is not reliable and that uninterrupted playback is the primary goal, rather than low latency. Their solution is simple, but effective: buffering. This solves uninterrupted playback and providing space for decoding B-frames based on subsequent frames all in one shot. Unfortunately it also introduces as much latency as there are frames in the buffer!
So, your major issue is on the client side: you need to write/find/coerce client software into forgoing buffering to immediately decode and display incoming frames. Sadly, this is where my knowledge runs out. While mplayer can be cajoled into low latency playback by seeking forwards after playback starts, that's a nasty hack and I'm not aware of ways to accomplish this in other software (VLC, HTML5 <video> tags, etc.), or ways to reliably automate it either.
问题4:mjpg-streamer源码编译出错
这个问题出现在我尝试各个版本的mjpg-streamer时。
版本r172在树莓派4B的最新系统上编译会出现问题(前文我提到的使用方法用的不是r172)
这个版本可以在(https://sourceforge.net/p/mjpg-streamer/code/HEAD/tree/)找到
需要用svn下载
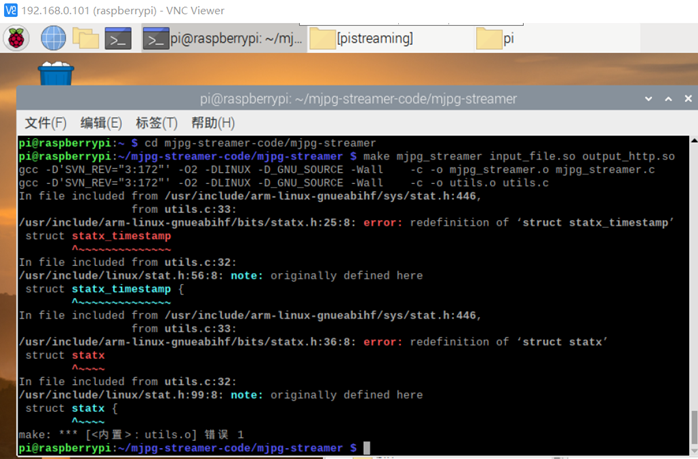
解决方法:修改源码的utils.c
sudo nano utils.c
注释掉
#include <linux/stat.h>
#include <sys/stat.h>

问题5:重新烧入系统后ssh登陆失败
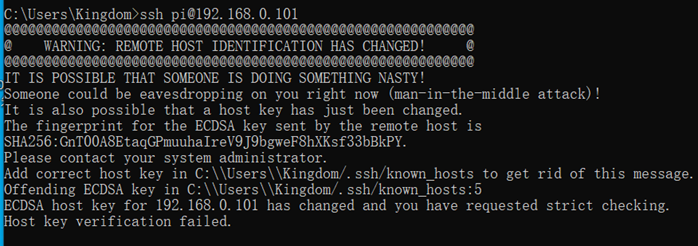
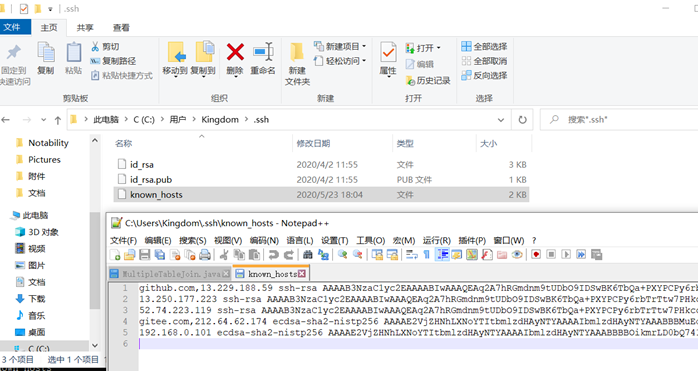
删除原有的记录就好
六、小组协作
组员
朱庆章 | 031702426 | 负责实际操作 |
陈梦雪 | 031702405 | 负责查找资料 |
潘海东 | 031702428 | 负责提供指导意见和博客图床搭建 |
我们组的树莓派是寄到我这的,不过海东自己也有一台并翻出来一个USB接口的摄像头,我在机器上实验的时候海东也可以在自己的机器上实验
小组内主要通过视频和图片分享协作

