本文介绍在Windows下安装使用SigPack库,涉及Armadillo、OpenBLAS安装使用说明,最终实现对SigPack示例CPP基于MinGW64在Sublime Text3下的编译运行,并对在VS中的使用做了部分示例。
目录
一、SIGPACK简介
二、在WINDOWS下安装介绍
三、安装OpenBALS
四、安装Armadillo
五、安装SigPack
一、SIGPACK简介
(官方介绍,不做累述)
SigPack - the C++ signal processing library
SigPack - general
SigPack is a C++ signal processing library using the library Armadilloas a base. The API will be familiar for those who has used IT++ and Octave/Matlab. The intention is to keep it small and only implement the fundamental signal processing algorithms.
SigPack - features
- Easy to use, based on Armadillo library
- API similar to Matlab/Octave and IT++
- FIR/IIR filter
- Window functions - Hanning, Hamming, Bartlett, Kaiser ...
- Spectrum and spectrogram
- Timing/Delay
- Gnuplot support
- Up/Downsampling
- Config file parser
- FFTW 1-D and 2-D support
- Simple image I/O functions for pbm, pgm and ppm format
- Adaptive FIR filters - LMS, N-LMS, RLS, Kalman and Newton
- Linear, Extended and Unscented Kalman filters and RTS smoothers
Download and installation
Download Armadilloand SigPackand install/extract them to your install directory. I recommend OpenBLAS and FFTW installed from source to get the optimum performance.
For Windows 64bit users: make sure your path to the .lib and .dll files are updated in your environment variables. Armadillo have some prebuilt libs at <install dir>\examples\lib_win64
二、在WINDOWS下安装介绍
SIGPACK需用到Armadillo、OpenBLAS、FFTW等,打开Armadillo介绍,会发现,它需要BLAS和LAPACK库,或者OpenBLAS库,因此,首先应该考虑安装OpenBLAS库,然后再安装Armadillo库,然后再安装SIGPACK库,进行测试使用。
三、安装OpenBALS
OpenBLAS是高性能多核BLAS库,是GotoBLAS2 1.13 BSD版本的衍生版。项目主页是 https://github.com/xianyi/OpenBLAS。
另可参考:
l 矩阵运算库Armadillo,Eigen,MATCOM在windows+vs2010环境下的安装和测评
1、下载安装OpenBLAS,发现其需要pkg-config,下载并添加其bin目录到系统路径中。
Step-by-step procedure to get pkg-config working on Windows:
MinGW was installed to C:\MinGW. There were multiple versions of the packages available, downloaded the latest version.
- go to http://ftp.gnome.org/pub/gnome/binaries/win32/dependencies/ OR http://ftp.gnome.org/pub/gnome/binaries/win64/dependencies/
- download the file pkg-config_0.26-1_win32.zip OR pkg-config_0.23-2_win64.zip
- extract the file bin/pkg-config.exe to C:\MinGW\bin OR your GNU bin path
- download the file gettext-runtime_0.18.1.1-2_win32.zip OR gettext-runtime_0.18.1.1-2_win64.zip
- extract the file bin/intl.dll (OR libintl-8.dll)to C:\MinGW\bin
- go to http://ftp.gnome.org/pub/gnome/binaries/win32/glib/2.28 OR http://ftp.gnome.org/pub/gnome/binaries/win64/glib/2.26/
- download the file glib_2.28.8-1_win32.zip OR glib_2.26.1-1_win64.zip
- extract the file bin/libglib-2.0-0.dll to C:\MinGW\bin
Now CMake will be able to use pkg-config if it is configured to use MinGW.

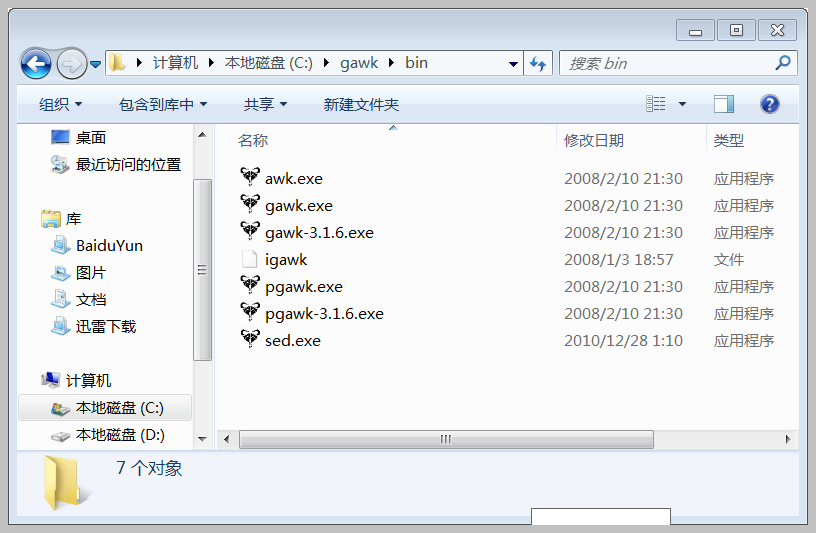
2、还需要gawk和sed,在GNUwin32中有,下载bin版即可
https://sourceforge.net/projects/gnuwin32/files/
SED: https://sourceforge.net/projects/gnuwin32/files/sed/4.2.1/sed-4.2.1-bin.zip/download;
AND https://sourceforge.net/projects/gnuwin32/files/sed/4.2.1/sed-4.2.1-dep.zip/download
GAWK: https://sourceforge.net/projects/gnuwin32/files/gawk/3.1.6-1/gawk-3.1.6-1-bin.zip/download
解压后,将bin中的文件放在你的GNU bin目录中,然后,将bin路径添加到系统路径中。
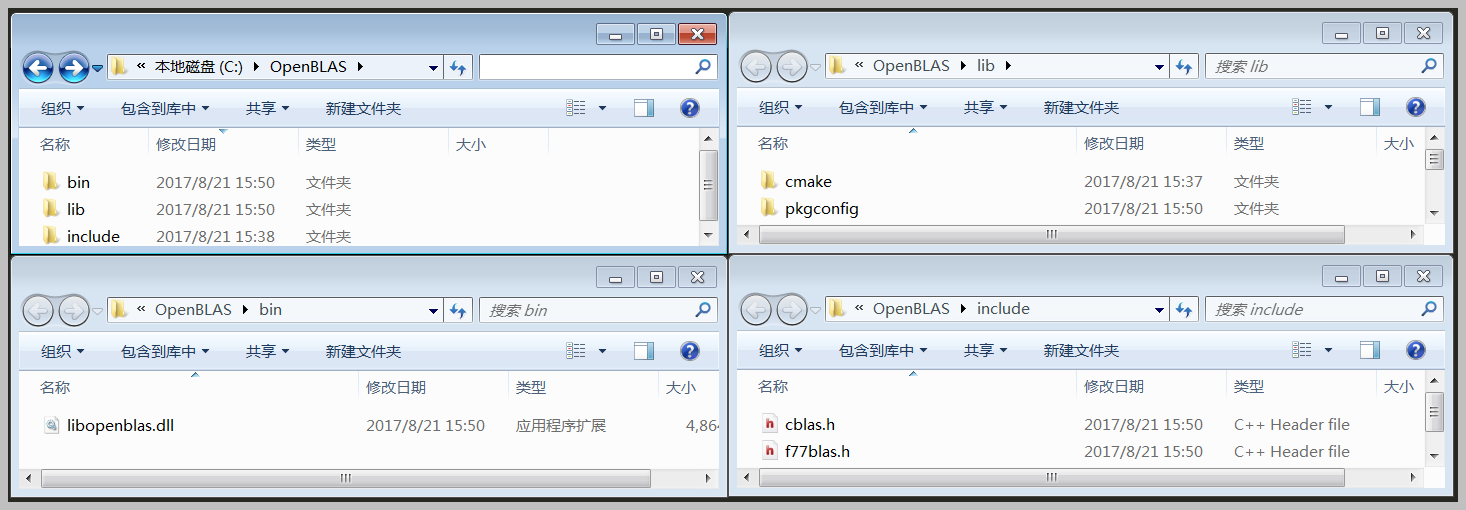
3、下载OpenBLAS源码,编译生成动态库和静态库,添加路径到系统PATH中。
- 方法1—用CMAKE+VS编译OpenBLAS动态库
用CMAKE对OpenBLAS源码按目录外方式生成VS项目解决方案,对ALL BUILD进行debug和release用win64方式生成,成功后得到libopenblas.dll、libopenblas.lib等文件,用于在VS项目中调用,官方文档说明此方式编译生成的库文件,仅DLL库可用,但需要进行一些加载设置。对此,经测试,在VS2015下新建空控制台项目测试,针对项目属性进行配置:C/C++——常规——附加包含目录:<OpenBLAS install dir>\include;链接器——输入——附加依赖项:<OpenBLAS build dir>\lib\RELEASE\libopenblas.lib 或者 <OpenBLAS build dir>\lib\DEBUG\libopenblas.lib,可以在x64方式正常调用并通过编译。

- 方法2—用MinGW编译OpenBLAS静态库和动态库
- Install the MinGW (GCC) compiler suite, either 32-bit (http://www.mingw.org/) or 64-bit (http://mingw-w64.sourceforge.net/). In addition, please install MSYS with MinGW.
- Build OpenBLAS in the MSYS shell. Usually, you can just type "make". OpenBLAS will detect the compiler and CPU automatically. Download [msys binary packages]
- After the build is complete, OpenBLAS will generate the static library "libopenblas.a" and the shared dll library "libopenblas.dll" in the folder. You can type "make PREFIX=/your/installation/path install" to install the library to a certain location.
Generate import library (0.2.10 and after version),OpenBLAS already generated the import library "libopenblas.dll.a" for "libopenblas.dll".
4、Using the library
- Link shared library
gcc -o test test.c -I /your_path/OpenBLAS/include/ -L/your_path/OpenBLAS/lib -lopenblas
If the library is multithreaded, please add -lpthread. If the library contains LAPACK functions, please add -lgfortran or other Fortran libs.
- Link static library
gcc -o test test.c /your/path/libopenblas.a
You can download test.c from https://gist.github.com/xianyi/5780018
5、Code examples
Call CBLAS interface
This example shows calling cblas_dgemm in C. https://gist.github.com/xianyi/6930656
#include <cblas.h>
#include <stdio.h>
int main()
{
int i=0;
double A[6] = {1.0,2.0,1.0,-3.0,4.0,-1.0};
double B[6] = {1.0,2.0,1.0,-3.0,4.0,-1.0};
double C[9] = {.5,.5,.5,.5,.5,.5,.5,.5,.5};
cblas_dgemm(CblasColMajor, CblasNoTrans, CblasTrans,3,3,2,1,A, 3, B, 3,2,C,3);
for(i=0; i<9; i++) printf("%lf ", C[i]);
printf("\n");
return 0;
// Expected output: 11.000000 -9.000000 5.000000 -9.000000 21.000000 -1.000000 5.000000 -1.000000 3.000000
}
gcc -o test_cblas_open test_cblas_dgemm.c -I /your_path/OpenBLAS/include/ -L/your_path/OpenBLAS/lib -lopenblas -lpthread -lgfortran
- 附:使用Sublime Text3编译使用了OpenBLAS库的C源程序,可以在ST3新建一个编译环境文件,复制粘贴下面内容,并对其中引用的路径修改为正确路径,即可在ST3中进行编译使用了。
// Put this file ([Your Build Name].sublime-build) here:
// "C:\Users\[User Name]\AppData\Roaming\Sublime Text 3\Packages\User"
// Use "Ctrl+B" to Build and "Crtl+Shift+B" to Build or Run the project.
// OR use "Tools -> Build System -> New Build System..." and put the code there.
{
//用GCC编译C程序,支持MinGW编译C文件使用了OpenBLAS库,命名为GCCOpenBLAS.sublime-build
"shell_cmd": "gcc \"${file}\" -o \"${file_path}/${file_base_name}\" -I \"c:/OpenBLAS/include/\" -L\"c:/OpenBLAS/lib\" -lopenblas -lpthread -lgfortran",
"file_regex": "^(..[^:]*):([0-9]+):?([0-9]+)?:? (.*)$",
"working_dir": "${file_path}",
"selector": "source.c",
"shell": true,
"variants":
[
{
"name": "Run",
"shell_cmd": "gcc \"${file}\" -o \"${file_path}/${file_base_name}\" -I \"c:/OpenBLAS/include/\" -L\"c:/OpenBLAS/lib\" -lopenblas -lpthread -lgfortran && start cmd /c \"\"${file_path}/${file_base_name}\" & pause\""
}
]
//命令行GCC
//gcc -o file_base_name file_name.c -I c:/OpenBLAS/include/ -Lc:/OpenBLAS/lib -lopenblas -lpthread -lgfortran
}
四、安装Armadillo
参考:How to use Armadillo on Windows
Getting started with Armadillo a C++ Linear Algebra Library on Windows, Mac and Linux
Armadillo is a C++ template library for linear algebra. It is built upon LAPACK and BLAS. It offers a simple API that is similar to that of Matlab.
1. Download the source code of Armadillo from here . Unzip the source code of Armadillo to a directory.
2. Create an environment variable named ARMADILLO_ROOT with a value of the Armadillo directory.
3. Armadillo requires LAPACK and BLAS libraries for any non-trivial matrix operation. To enable it to use these libraries, open $(ARMADILLO_ROOT)/include/armadillo_bits/config.hpp and uncomment the defines of ARMA_USE_LAPACK and ARMA_USE_BLAS.
- 使用方法1—基于VC++或VS
4. To use Armadillo in your Visual C++ project, add $(ARMADILLO_ROOT)/include as an Include directory.
5. Since Armadillo source code uses LAPACK and BLAS, your project needs to link with these libraries. Armadillo ships with pre-built 32-bit .lib and .dll files for LAPACK and BLAS. Add $(ARMADILLO_ROOT)/examples/lib_win32 as Library directory to your project. Add blas_win32_MT.lib and lapack_win32_MT.lib as additional dependencies to your project.
6. Include the armadillo header file in your source code. Use the Armadillo classes and methods in your code. Remember to use the namespace arma:: Your code should compile to an EXE file without any further problems.
7. Copy the blas_win32_MT.dll and lapack_win32_MT.dll files from $(ARMADILLO_ROOT)/examples/lib_win32 to the directory that contains your EXE file. Your program should execute successfully now.
- 使用方法2—基于MinGW的g++
4. 因为编译生成静态库,所以无法使用"-larmadillo"参数生成,可用其示例中已编译好的BLAS和LAPACK库(新的版本中都是基于win64编译的,对应文件为${ARMADILLO_ROOT}\examples\lib_win64\blas_win64_MT和lapack_win64_MT)和OpenBLAS一起使用,来替换"-larmadillo"参数。
5、在具体编译项目CPP时,将${ARMADILLO_ROOT}\examples\lib_win64\目录下的blas_win64_MT.dll和lapack_win64_MT.dll复制到项目CPP同目录下,或者将${ARMADILLO_ROOT}\examples\lib_win64目录添加到系统PATH中。
6、在g++命令行中添加“-IC:/Armadillo/include -IC:/OpenBLAS/include -LC:/OpenBLAS/lib -LC:/Armadillo/examples/lib_win64 -llapack_win64_MT -lopenblas -lpthread -lgfortran”参数,即可通过编译了。
- 示例代码(详见本节参考链接2):
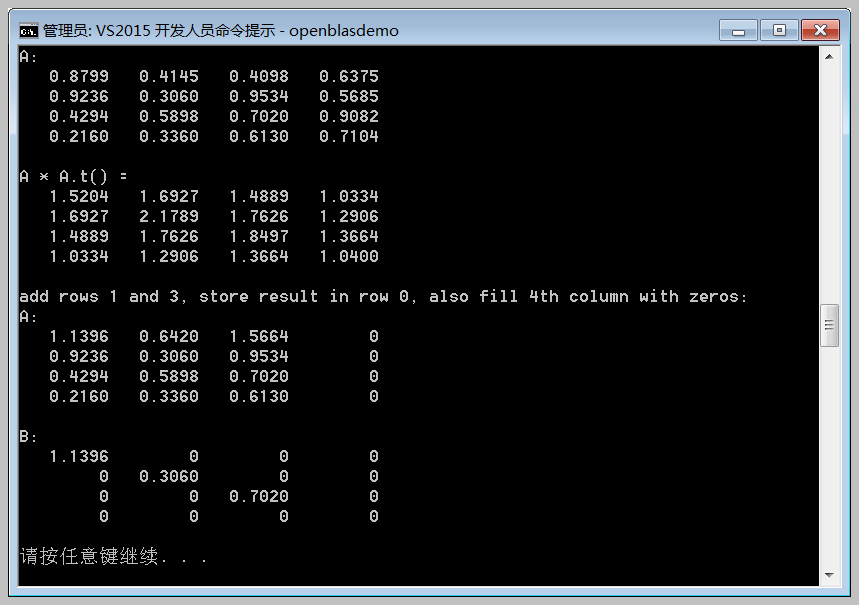
#include <iostream>
#include <armadillo>

int main(int argc, const char **argv) {
    // Initialize the random generator
    arma::arma_rng::set_seed_random();

    // Create a 4x4 random matrix and print it on the screen
    arma::Mat<double> A = arma::randu(4, 4);
    std::cout << "A:\n" << A << "\n";

    // Multiply A with his transpose:
    std::cout << "A * A.t() =\n";
    std::cout << A * A.t() << "\n";

    // Access/Modify rows and columns from the array:
    A.row(0) = A.row(1) + A.row(3);
    A.col(3).zeros();
    std::cout << "add rows 1 and 3, store result in row 0, also fill 4th column with zeros:\n";
    std::cout << "A:\n" << A << "\n";

    // Create a new diagonal matrix using the main diagonal of A:
    arma::Mat<double>B = arma::diagmat(A);
    std::cout << "B:\n" << B << "\n";

    // Save matrices A and B:
    A.save("A_mat.txt", arma::arma_ascii);
    B.save("B_mat.txt", arma::arma_ascii);

    system("pause");
    return 0;
}
运行结果示例:
五、安装SigPack
1、下载SigPack,在自定义目录解压。
2、下载Gnuplot,因在SigPack的示例中要用到二维图形显示,需要此库。添加<gnuplot install dir>\bin目录到系统PATH中即可。
3、下载FFTW (Precompiled FFTW Windows DLLs),用于计算离散傅里叶变换(DFT)的C语言开源库,将.zip压缩包解压到< FFTW install dir >,如果需要针对VS的静态库,可使用lib.exe(windows自带的有)对目录中.def生成.lib文件(针对64位系统需要添加“/machine:x64”参数),如:
针对32-bit:
lib /def:libfftw3-3.def
lib /def:libfftw3f-3.def
lib /def:libfftw3l-3.def
针对64-bit:
lib /machine:x64 /def:libfftw3-3.def
lib /machine:x64 /def:libfftw3f-3.def
lib /machine:x64 /def:libfftw3l-3.def
针对MinGW的静态库生成,使用MinGW提供的DLLTOOL命令对.def生成.a文件,如:(生成libfftw3.a后可在g++编译参数中直接使用“-lbfftw3”参数,否则会提示找不到此库)
dlltool -d libfftw3-3.def -l libfftw3.a
dlltool -d libfftw3f-3.def -l libfftw3f.a
dlltool -d libfftw3l-3.def -l libfftw3l.a
然后在使用g++进行编译时添加“-L< FFTW install dir >”及“-lbfftw3”参数即可实现对FFTW库的调用了。
4、在用g++对项目CPP进行编译时,添加“-I<SigPack install dir>/sigpack”参数即可。
5、对demo_c++目录下的示例CPP进行编译,可使用如下命令:
g++ -o sp_demo_112 sp_demo_112.cpp -IC:/Armadillo/include -IC:/SigPack -IC:/OpenBLAS/include -LC:/OpenBLAS/lib -LC:/Armadillo/examples/lib_win64 -LC:/FFTW64 -llapack_win64_MT -lbfftw3 -lopenblas -lpthread -lgfortran
附:使用Sublime Text3编译使用了SigPack库的CPP源程序,可以在ST3新建一个编译环境文件,复制粘贴下面内容,并对其中引用的路径修改为正确路径,即可在ST3中进行编译使用了。
// Put this file ([Your Build Name].sublime-build) here:
// "C:\Users\[User Name]\AppData\Roaming\Sublime Text 3\Packages\User"
// Use "Ctrl+B" to Build and "Crtl+Shift+B" to Build or Run the project.
// OR use "Tools -> Build System -> New Build System..."
{
//用GCC编译C程序,支持MinGW编译C文件使用了OpenBLAS库,命名为GCCOpenBLAS.sublime-build
"shell_cmd": "g++ -o \"${file_path}/${file_base_name}\" \"${file}\" -I\"C:/Armadillo/include\" -I\"C:/SigPack\" -I\"C:/OpenBLAS/include\" -L\"C:/OpenBLAS/lib\" -L\"C:/Armadillo/examples/lib_win64\" -L\"C:/FFTW64\" -llapack_win64_MT -lfftw3 -lopenblas -lpthread -lgfortran",
"file_regex": "^(..[^:]*):([0-9]+):?([0-9]+)?:? (.*)$",
"working_dir": "${file_path}",
"selector": "source.c, source.c++",
"variants":
[
{
"name": "Run",
"shell_cmd": "g++ -o \"${file_path}/${file_base_name}\" \"${file}\" -I\"C:/Armadillo/include\" -I\"C:/SigPack\" -I\"C:/OpenBLAS/include\" -L\"C:/OpenBLAS/lib\" -L\"C:/Armadillo/examples/lib_win64\" -L\"C:/FFTW64\" -llapack_win64_MT -lfftw3 -lopenblas -lpthread -lgfortran && start cmd /c \"\"${file_path}/${file_base_name}\" & pause\""
}
]
//命令行GCC
//g++ -o sp_demo_112 sp_demo_112.cpp -IC:/Armadillo/include -IC:/SigPack -IC:/OpenBLAS/include -LC:/OpenBLAS/lib -LC:/Armadillo/examples/lib_win64 -llapack_win64_MT -lopenblas -lpthread –lgfortran
}

(本文部分内容来源于网络,感谢原文作者分享。)