在网站立初明,我们一般都使用单台机器对外提供集中式服务;
但是随着业务量的增大,我们一台服务器不够用,此时就会把多台机组成一个集群对外提供服务;
但是,我们网站对外提供的访问入口通常只有一个,比如www.web.com;
那么当用户在浏览器输入 www.web. com进行访问的时候,如可将用户的清求分发到集群中不司的机器上呢,这就是负载均要做的事情;
负载均通常是将请求“均匀"分摊到群中多个服务器节点上执行,这甲的均匀是在一个比较大的统计范内是基本均匀的,井不是完全均匀;
2 负载均衡的实现方式:
(一)硬件负载均衡
比如F5、深信服、Array等
优点是有厂商专业的技术服务团队提供支持,性能稳定;
缺点是费用昂贵,对于规横较小的网络应用成本太高
(二)软件负载均衡
如Nginx、LVS、 HAProxy等;
优点是免费开源,成本低廉;
(3)静态代理
(4)动静分离
(5)虚拟主机
3.nginx负载均衡的实现方式
(1)通过配置Nginx的nginx.conf文件进行配置即可实现
架构图 :

(2)配置如下:(配置两步即可)
1.在http模块加上:(举例)
  #一般upstream  域名{}
  upstream www.myweb.com{
      server 127.0.0.1:9100 weight=3;
      server 127.0.0.1:9200 weight=1;
  }
其中 weight=3表示权重,用于后端服务器性能不均的情况,访问比约等于权重之比,权重越大访问机会越多;
upstream是配置nginx与后端服务负载均衡非常重要的一个模块,并且它还能对后端的服务器的健康状态进行检查,若后端服务器中的一台发生故障,则前端的请求不会转发到该故障的机器;
(3)在server模块里添加:(举例)
    location /myweb {
             proxy_pass http://www.myweb.com;
          }
其中www.myweb.com字符串要和upstream后面的字符串相等;
二.案列完善部分
1.最后的配置截图如下(标红部分):
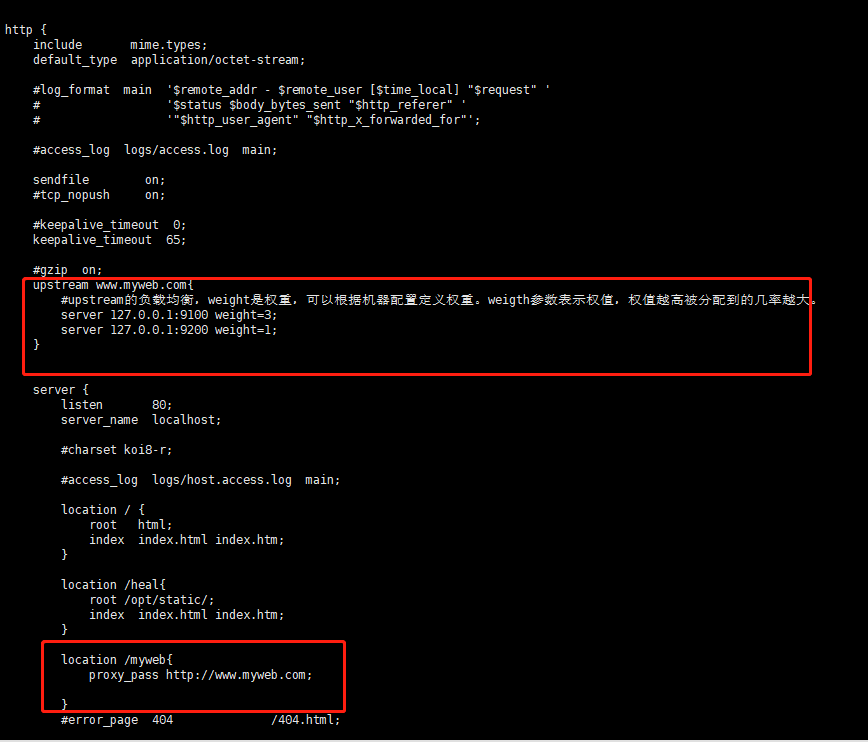
#user  nobody;
worker_processes  1;

#error_log  logs/error.log;
#error_log  logs/error.log  notice;
#error_log  logs/error.log  info;

#pid        logs/nginx.pid;
events {
    worker_connections  1024;
}

http {
    include       mime.types;
    default_type  application/octet-stream;

    #log_format  main  '$remote_addr - $remote_user [$time_local] "$request" '
    #                  '$status $body_bytes_sent "$http_referer" '
    #                  '"$http_user_agent" "$http_x_forwarded_for"';

    #access_log  logs/access.log  main;

    sendfile        on;
    #tcp_nopush     on;

    #keepalive_timeout  0;
    keepalive_timeout  65;

    #gzip  on;
    upstream www.myweb.com{
        #upstream的负载均衡,weight是权重,可以根据机器配置定义权重。weigth参数表示权值,权值越高被分配到的几率越大。
        server 127.0.0.1:9100 weight=3;
        server 127.0.0.1:9200 weight=1;
    }


    server {
        listen       80;
        server_name  localhost;

        #charset koi8-r;

        #access_log  logs/host.access.log  main;

        location / {
            root   html;
            index  index.html index.htm;
        }

        location /heal{
            root /opt/static/;
            index  index.html index.htm;
        }

        location /myweb{
            proxy_pass http://www.myweb.com;

        }
        #error_page  404              /404.html;

        # redirect server error pages to the static page /50x.html
        #
        error_page   500 502 503 504  /50x.html;
        location = /50x.html {
            root   html;
        }

        # proxy the PHP scripts to Apache listening on 127.0.0.1:80
        #
        #location ~ .php$ {
        #    proxy_pass   http://127.0.0.1;
        #}

        # pass the PHP scripts to FastCGI server listening on 127.0.0.1:9000
        #
        #location ~ .php$ {
        #    root           html;
        #    fastcgi_pass   127.0.0.1:9000;
        #    fastcgi_index  index.php;
        #    fastcgi_param  SCRIPT_FILENAME  /scripts$fastcgi_script_name;
        #    include        fastcgi_params;
        #}

        # deny access to .htaccess files, if Apache's document root
        # concurs with nginx's one
        #
        #location ~ /.ht {
        #    deny  all;
        #}
    }


    # another virtual host using mix of IP-, name-, and port-based configuration
    #
    #server {
    #    listen       8000;
    #    listen       somename:8080;
    #    server_name  somename  alias  another.alias;

    #    location / {
    #        root   html;
    #        index  index.html index.htm;
    #    }
    #}


    # HTTPS server
    #
    #server {
    #    listen       443 ssl;
    #    server_name  localhost;

    #    ssl_certificate      cert.pem;
    #    ssl_certificate_key  cert.key;

    #    ssl_session_cache    shared:SSL:1m;
    #    ssl_session_timeout  5m;

    #    ssl_ciphers  HIGH:!aNULL:!MD5;
    #    ssl_prefer_server_ciphers  on;

    #    location / {
    #        root   html;
    #        index  index.html index.htm;
    #    }
    #}

}
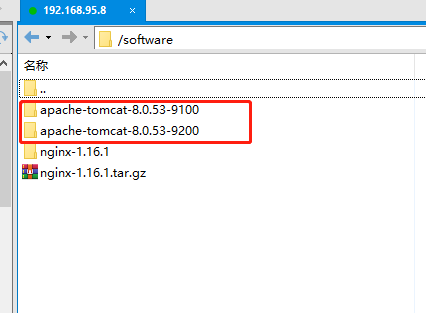
2.在我的linux服务器上/software目录下分别准备有有两个tomcat,端口分别改为是9100和9200
第二台服务器注意事项,避免冲突,需要更改三个地方():
(1)
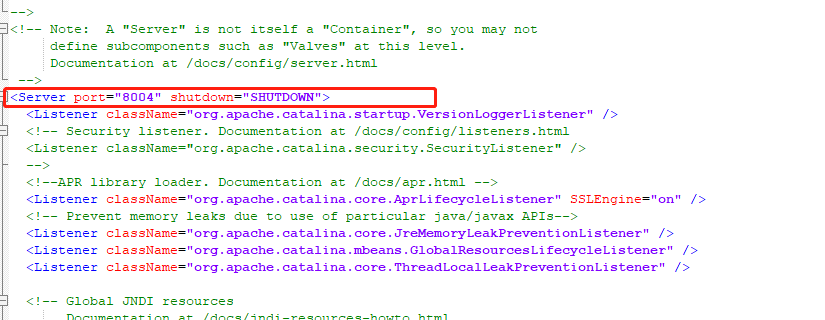
(2)

(3)

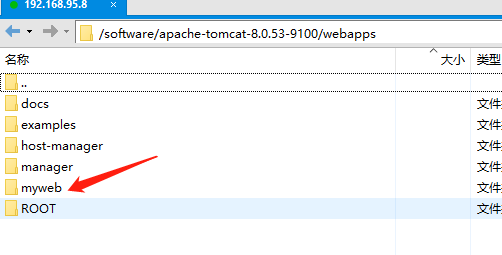
3.把一个静态页面的项目复制到tomcat的webapp目录下,把不同tomcat下的首页做一个属于tomcat的标识,等下调用时可以区别负载均衡的调用

4.启动tomcat
bin/startup.sh |tail -f logs/catalina.out
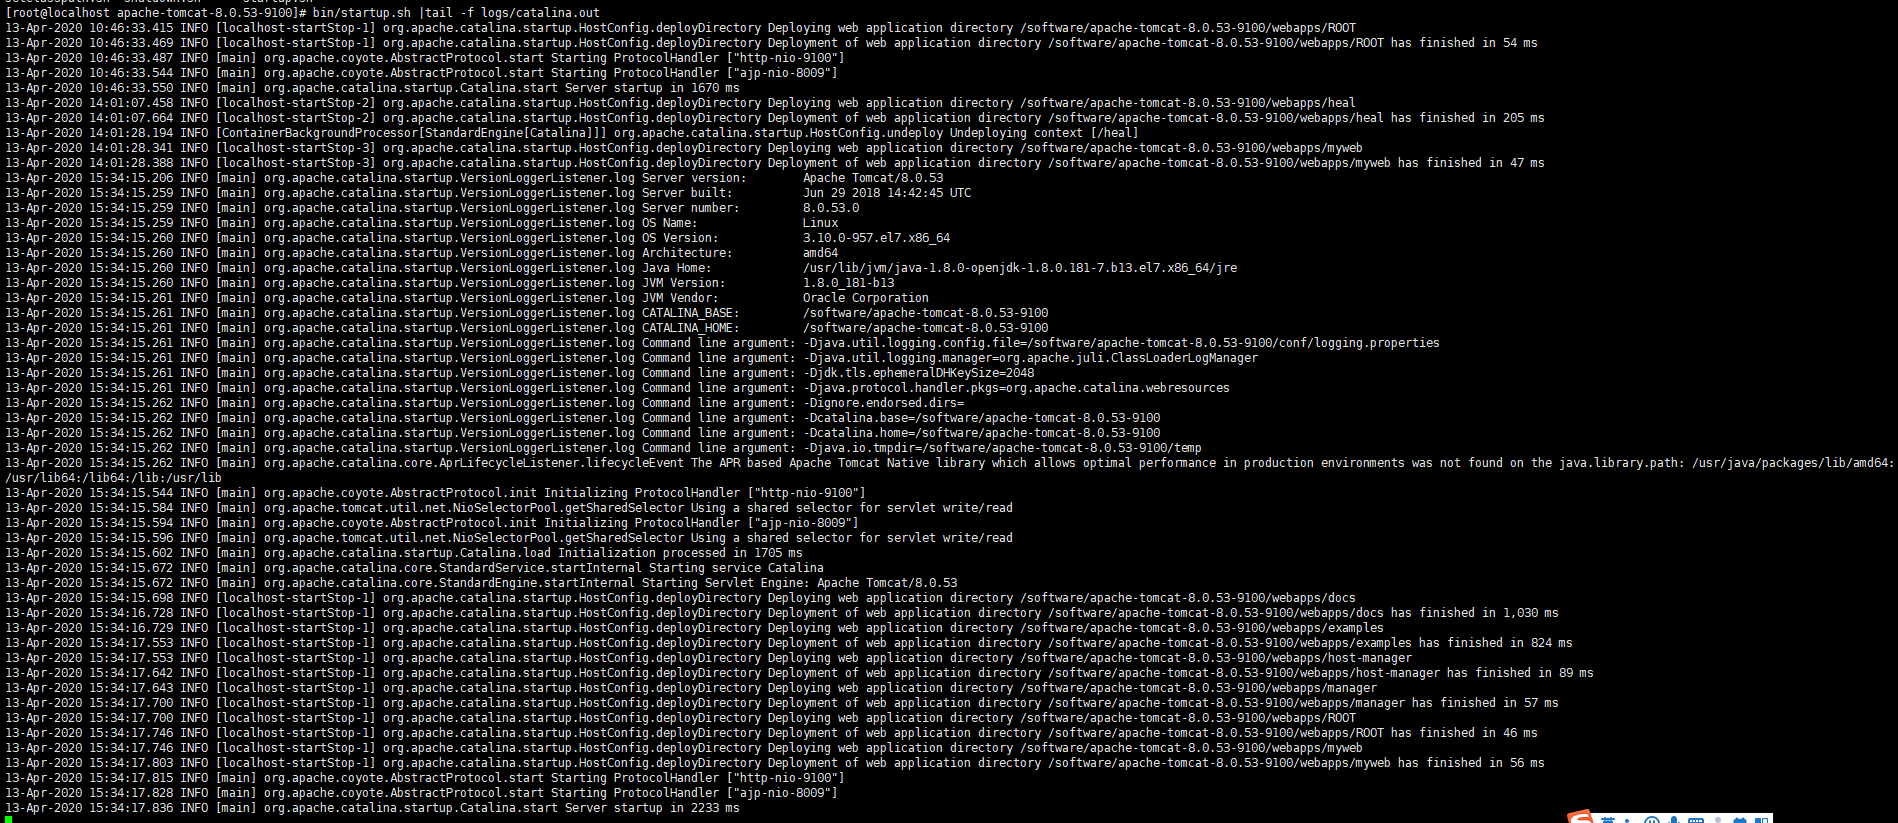
5.确认tomcat的启动
ps -aef |grep tomcat

6.防火墙开启端口
#查看防火墙状态
systemctl status firewalld
#开启9100端口
firewall-cmd --zone=public --add-port=9100/tcp --permanent
#开启9200端口
firewall-cmd --zone=public --add-port=9200/tcp --permanent
#重启防火墙:
firewall-cmd --reload

#查看端口是否开放
/sbin/iptables -L -n
端口开启成功
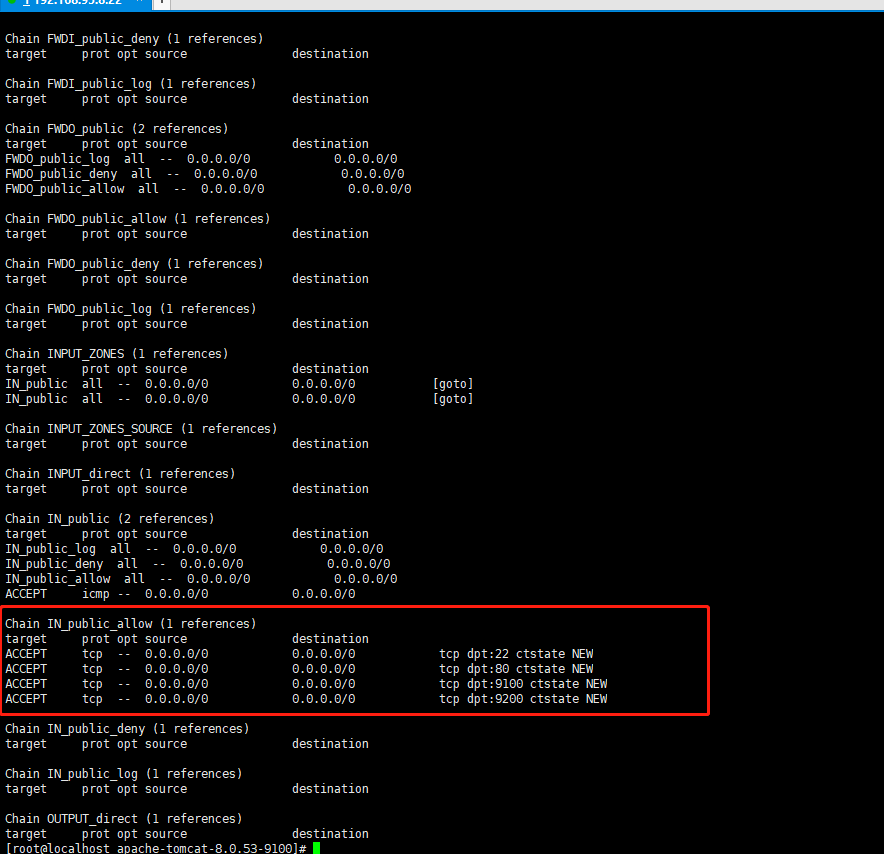
7.访问tomcat资源
http://192.168.95.8:9100/myweb/
http://192.168.95.8:9200/myweb/


8.nginx负载均衡访问
配置的时候设置的权重是3比1,所以你重复刷新的话会发现三次9100的资源后会出现一次9200的资源,根据权重设置而来的,入需变动,直接改配置文件重启nginx就可以了
http://192.168.95.8/myweb/
