步骤1:先运行,看到效果,再学习
步骤2:模仿和排错
步骤3:本知识点效果
步骤4:MYSQL 表的类型必须是INNODB才支持事务
步骤5:导入JAR包
步骤6:CategoryService
步骤7:CategoryServiceImpl
步骤8:修改测试类,观察效果
步骤9:进行事务配置
步骤10:使用注解方式
步骤11:运行测试类,观察效果
步骤12:使用XML配置方式
步骤13:运行测试类,观察效果
步骤14:为什么不启动Web应用进行测试?
步骤 1 : 先运行,看到效果,再学习
老规矩,先下载下载区(点击进入)的可运行项目,配置运行起来,确认可用之后,再学习做了哪些步骤以达到这样的效果。
效果: 运行MybatisTest故意制造错误,会观察到被事务管理的方法:addTwo,因为某一条sql语句失败了,另一个sql语句也没有成功生效(要么都成功,要么都失败)
步骤 2 : 模仿和排错
在确保可运行项目能够正确无误地运行之后,再严格照着教程的步骤,对代码模仿一遍。
模仿过程难免代码有出入,导致无法得到期望的运行结果,此时此刻通过比较正确答案 ( 可运行项目 ) 和自己的代码,来定位问题所在。
采用这种方式,学习有效果,排错有效率,可以较为明显地提升学习速度,跨过学习路上的各个槛。
推荐使用diffmerge软件,进行文件夹比较。把你自己做的项目文件夹,和我的可运行项目文件夹进行比较。
这个软件很牛逼的,可以知道文件夹里哪两个文件不对,并且很明显地标记出来
这里提供了绿色安装和使用教程:diffmerge 下载和使用教程
步骤 3 : 本知识点效果
本知识点将演示,使用事务之前和使用事务之后的效果区别,以及分别使用注解和XML方式在SSM中配置事务。
本知识点基于SSM整合的基础上进行
步骤 4 : MYSQL 表的类型必须是INNODB才支持事务
在Mysql中,只有当表的类型是INNODB的时候,才支持事务,所以需要把表的类型设置为INNODB,否则无法观察到事务.
修改表的类型为INNODB的SQL:
|
alter table category_ ENGINE = innodb;
|
查看表的类型的SQL
|
show table status from how2java;
|
不过有个前提,就是当前的MYSQL服务器本身要支持INNODB,如果不支持,请看 开启MYSQL INNODB的办法
步骤 5 : 导入JAR包
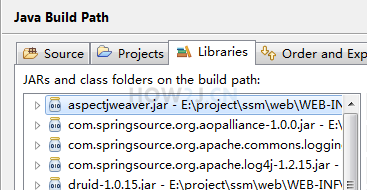
做事务管理需要额外的jar才行,所以先在下载区(点击进入)下载aspectjweaver.jar,
把jar包导入到项目中,导包办法:右键 project->properties->java build path->libaries->add external jars
步骤 6 : CategoryService
为接口CategoryService增加addTwo和deleteAll方法
|
package com.how2java.service;
import java.util.List;
import com.how2java.pojo.Category;
public interface CategoryService {
List<Category> list();
void addTwo();
void deleteAll();
}
|
步骤 7 : CategoryServiceImpl
在CategoryServiceImpl中实现deleteAll和addTwo方法。
分别做如下事情:
1. 删除所有Category
2. 增加2个Category对象,第一个可以正常增加,第二个因为名字太长,加入会失败。
|
package com.how2java.service.impl;
import java.util.List;
import org.springframework.beans.factory.annotation.Autowired;
import org.springframework.stereotype.Service;
import org.springframework.transaction.annotation.Propagation;
import org.springframework.transaction.annotation.Transactional;
import com.how2java.mapper.CategoryMapper;
import com.how2java.pojo.Category;
import com.how2java.service.CategoryService;
@Service
public class CategoryServiceImpl implements CategoryService{
@Autowired
CategoryMapper categoryMapper;
public List<Category> list(){
return categoryMapper.list();
}
public void deleteAll() {
List<Category> cs = list();
for (Category c : cs) {
categoryMapper.delete(c.getId());
}
}
@Override
public void addTwo() {
Category c1 = new Category();
c1.setName("短的名字");
categoryMapper.add(c1);
Category c2 = new Category();
c2.setName("名字长对应字段放不下,名字长对应字段放不下,名字长对应字段放不下,名字长对应字段放不下,名字长对应字段放不下,名字长对应字段放不下,名字长对应字段放不下,名字长对应字段放不下,");
categoryMapper.add(c2);
};
}
|
步骤 8 : 修改测试类,观察效果
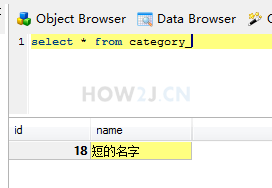
修改测试类MybatisTest :注入CategoryService 对象,并调用deleteAll和addTwo方法,运行后在数据库中发现只有只有一条数据插入成功了,说明addTwo方法不是事务管理的。 如果是事务管理的,那么就应该都成功,或者都失败。

|
package com.how2java.test;
import org.junit.Test;
import org.junit.runner.RunWith;
import org.springframework.beans.factory.annotation.Autowired;
import org.springframework.test.context.ContextConfiguration;
import org.springframework.test.context.junit4.SpringJUnit4ClassRunner;
import com.how2java.service.CategoryService;
@RunWith(SpringJUnit4ClassRunner.class)
@ContextConfiguration("classpath:applicationContext.xml")
public class MybatisTest {
@Autowired
private CategoryService categoryService;
@Test
public void testAddTwo() {
categoryService.deleteAll();
categoryService.addTwo();
}
}
|
步骤 9 : 进行事务配置
修改applicationContext.xml,添加事务管理器和事务注解扫描器
|
<?xml version="1.0" encoding="UTF-8"?>
<beans xmlns="http://www.springframework.org/schema/beans"
xmlns:xsi="http://www.w3.org/2001/XMLSchema-instance"xmlns:aop="http://www.springframework.org/schema/aop"
xmlns:tx="http://www.springframework.org/schema/tx"xmlns:jdbc="http://www.springframework.org/schema/jdbc"
xmlns:context="http://www.springframework.org/schema/context"
xmlns:mvc="http://www.springframework.org/schema/mvc"
xsi:schemaLocation="
http://www.springframework.org/schema/context http://www.springframework.org/schema/context/spring-context-3.0.xsd
http://www.springframework.org/schema/beans http://www.springframework.org/schema/beans/spring-beans-3.0.xsd
http://www.springframework.org/schema/jdbc http://www.springframework.org/schema/jdbc/spring-jdbc-3.0.xsd
http://www.springframework.org/schema/tx http://www.springframework.org/schema/tx/spring-tx-3.0.xsd
http://www.springframework.org/schema/aop http://www.springframework.org/schema/aop/spring-aop-3.0.xsd
http://www.springframework.org/schema/mvc http://www.springframework.org/schema/mvc/spring-mvc.xsd">
<context:annotation-config />
<context:component-scan base-package="com.how2java.service" />
<bean id="dataSource" class="org.springframework.jdbc.datasource.DriverManagerDataSource">
<property name="driverClassName">
<value>com.mysql.jdbc.Driver</value>
</property>
<property name="url">
<value>jdbc:mysql://localhost:3306/how2java?characterEncoding=UTF-8</value>
</property>
<property name="username">
<value>root</value>
</property>
<property name="password">
<value>admin</value>
</property>
</bean>
<bean id="sqlSession" class="org.mybatis.spring.SqlSessionFactoryBean">
<property name="typeAliasesPackage" value="com.how2java.pojo" />
<property name="dataSource" ref="dataSource"/>
<property name="mapperLocations" value="classpath:com/how2java/mapper/*.xml"/>
</bean>
<bean class="org.mybatis.spring.mapper.MapperScannerConfigurer">
<property name="basePackage" value="com.how2java.mapper"/>
</bean>
<tx:annotation-driven transaction-manager="transactionManager"/>
<bean id="transactionManager"class="org.springframework.jdbc.datasource.DataSourceTransactionManager">
<property name="dataSource" ref="dataSource" />
</bean>
</beans>
|
步骤 10 : 使用注解方式
为addTwo方法加上事务注解
|
package com.how2java.service.impl;
import java.util.List;
import org.springframework.beans.factory.annotation.Autowired;
import org.springframework.stereotype.Service;
import org.springframework.transaction.annotation.Propagation;
import org.springframework.transaction.annotation.Transactional;
import com.how2java.mapper.CategoryMapper;
import com.how2java.pojo.Category;
import com.how2java.service.CategoryService;
@Service
public class CategoryServiceImpl implements CategoryService{
@Autowired
CategoryMapper categoryMapper;
public List<Category> list(){
return categoryMapper.list();
}
public void deleteAll() {
List<Category> cs = list();
for (Category c : cs) {
categoryMapper.delete(c.getId());
}
}
@Override
@Transactional(propagation=Propagation.REQUIRED,rollbackForClassName="Exception")
public void addTwo() {
Category c1 = new Category();
c1.setName("短的名字");
categoryMapper.add(c1);
Category c2 = new Category();
c2.setName("名字长对应字段放不下,名字长对应字段放不下,名字长对应字段放不下,名字长对应字段放不下,名字长对应字段放不下,名字长对应字段放不下,名字长对应字段放不下,名字长对应字段放不下,");
categoryMapper.add(c2);
};
}
|
步骤 11 : 运行测试类,观察效果
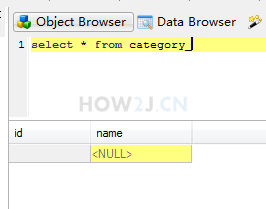
运行测试类MybatisTest发现数据库里是空的。因为第二个数据插入不进去,所以第一个数据的插入也回滚了。
步骤 12 : 使用XML配置方式
修改applicationContext,以支持AOP方式
|
<?xml version="1.0" encoding="UTF-8"?>
<beans xmlns="http://www.springframework.org/schema/beans"
xmlns:xsi="http://www.w3.org/2001/XMLSchema-instance"xmlns:aop="http://www.springframework.org/schema/aop"
xmlns:tx="http://www.springframework.org/schema/tx"xmlns:jdbc="http://www.springframework.org/schema/jdbc"
xmlns:context="http://www.springframework.org/schema/context"
xmlns:mvc="http://www.springframework.org/schema/mvc"
xsi:schemaLocation="
http://www.springframework.org/schema/context http://www.springframework.org/schema/context/spring-context-3.0.xsd
http://www.springframework.org/schema/beans http://www.springframework.org/schema/beans/spring-beans-3.0.xsd
http://www.springframework.org/schema/jdbc http://www.springframework.org/schema/jdbc/spring-jdbc-3.0.xsd
http://www.springframework.org/schema/tx http://www.springframework.org/schema/tx/spring-tx-3.0.xsd
http://www.springframework.org/schema/aop http://www.springframework.org/schema/aop/spring-aop-3.0.xsd
http://www.springframework.org/schema/mvc http://www.springframework.org/schema/mvc/spring-mvc.xsd">
<context:annotation-config />
<context:component-scan base-package="com.how2java.service" />
<bean id="dataSource" class="org.springframework.jdbc.datasource.DriverManagerDataSource">
<property name="driverClassName">
<value>com.mysql.jdbc.Driver</value>
</property>
<property name="url">
<value>jdbc:mysql://localhost:3306/how2java?characterEncoding=UTF-8</value>
</property>
<property name="username">
<value>root</value>
</property>
<property name="password">
<value>admin</value>
</property>
</bean>
<bean id="sqlSession" class="org.mybatis.spring.SqlSessionFactoryBean">
<property name="typeAliasesPackage" value="com.how2java.pojo" />
<property name="dataSource" ref="dataSource"/>
<property name="mapperLocations" value="classpath:com/how2java/mapper/*.xml"/>
</bean>
<bean class="org.mybatis.spring.mapper.MapperScannerConfigurer">
<property name="basePackage" value="com.how2java.mapper"/>
</bean>
<!-- <tx:annotation-driven transaction-manager="transactionManager"/> -->
<bean id="transactionManager"class="org.springframework.jdbc.datasource.DataSourceTransactionManager">
<property name="dataSource" ref="dataSource" />
</bean>
<tx:advice id="txadvice" transaction-manager="transactionManager">
<tx:attributes>
<tx:method name="add*" propagation="REQUIRED" rollback-for="Exception" />
<tx:method name="del*" propagation="REQUIRED" rollback-for="Exception"/>
<tx:method name="edit*" propagation="REQUIRED" rollback-for="Exception" />
<tx:method name="update*" propagation="REQUIRED" rollback-for="Exception"/>
<tx:method name="list*" propagation="REQUIRED" rollback-for="Exception"/>
</tx:attributes>
</tx:advice>
<aop:config>
<aop:pointcut id="serviceMethod" expression="execution(* com.how2java.service.*.*(..))"/>
<aop:advisor pointcut-ref="serviceMethod" advice-ref="txadvice"/>
</aop:config>
</beans>
|
步骤 13 : 运行测试类,观察效果
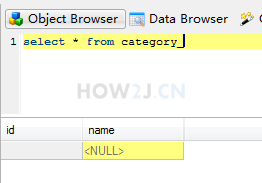
运行MybatisTest可以看到一样的事务效果,即都没有插入成功

步骤 14 : 为什么不启动Web应用进行测试?
为什么不启动Web应用进行测试? 而是要用一个MybatisTest这种方式?
因为根据前面的教材,都是基于一个实体类做管理的ssm应用,不方便重现事务出问题的现象。
通过本教材的方式,也是修改Service以提供事务管理的支持,其效果也是能够运用在web应用的。
更多内容,点击了解: https://how2j.cn/k/ssm/ssm-transaction/1150.html