概述
Windows 服务就是运行在windows 系统的一个进程的开发,可以把它做成一个Timer,也可以做成while循环,每隔一段时间起一个线程来运行.
windows install开发是利用msi.dll 提供方法,来安装一个存放有安装程序目录的任务.
windows 服务开发
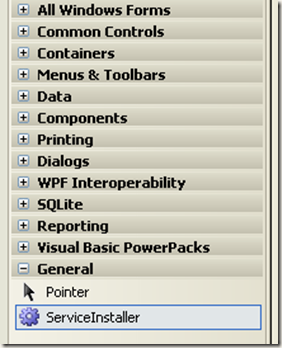
先在VS中
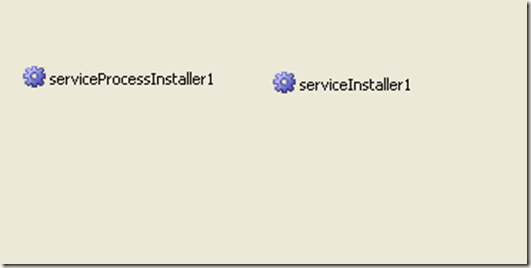
增加到
在ProjectInstaller.cs中代码设计如下
|
1
2
3
4
5
6
7
8
|
[RunInstaller(true)]public partial class ProjectInstaller : Installer{ public ProjectInstaller() { InitializeComponent(); }} |
在ProjectInstaller中代码如下
|
1
2
3
4
5
6
7
8
9
10
11
12
13
14
15
16
17
18
19
20
21
22
23
24
25
26
27
28
29
30
31
32
33
34
35
36
37
38
39
40
41
42
43
44
45
46
47
48
49
50
51
52
53
54
55
56
57
|
partial class ProjectInstaller { /// <summary> /// Required designer variable. /// </summary> private System.ComponentModel.IContainer components = null; /// <summary> /// Clean up any resources being used. /// </summary> /// <param name="disposing">true if managed resources should be disposed; otherwise, false.</param> protected override void Dispose(bool disposing) { if (disposing && (components != null)) { components.Dispose(); } base.Dispose(disposing); } #region Component Designer generated code /// <summary> /// Required method for Designer support - do not modify /// the contents of this method with the code editor. /// </summary> private void InitializeComponent() { this.serviceProcessInstaller1 = new System.ServiceProcess.ServiceProcessInstaller(); this.serviceInstaller1 = new System.ServiceProcess.ServiceInstaller(); // // serviceProcessInstaller1 // this.serviceProcessInstaller1.Account = System.ServiceProcess.ServiceAccount.LocalSystem; this.serviceProcessInstaller1.Password = null; this.serviceProcessInstaller1.Username = null; // // serviceInstaller1 // this.serviceInstaller1.Description = "用来处理所有的异步操作,如发送邮件,发送短信"; this.serviceInstaller1.DisplayName = "AsynchronismServices"; this.serviceInstaller1.ServiceName = "AsynchronismService"; this.serviceInstaller1.StartType = System.ServiceProcess.ServiceStartMode.Automatic; // // ProjectInstaller // this.Installers.AddRange(new System.Configuration.Install.Installer[] { this.serviceProcessInstaller1, this.serviceInstaller1}); } #endregion private System.ServiceProcess.ServiceProcessInstaller serviceProcessInstaller1; private System.ServiceProcess.ServiceInstaller serviceInstaller1; } |
windows install开发
先定义一个MSIInstallerManager类
|
1
2
3
4
5
6
7
8
9
10
11
12
13
14
15
16
17
18
19
20
21
22
23
|
/// <summary> /// Import the windows installer dll /// </summary> internal class MSIInstallerManager { /// <summary> /// Indicate the WindowsInstaller UI level /// </summary> public enum INSTALLUILEVEL { /// <summary> /// authored UI with wizards, progress, errors /// </summary> INSTALLUILEVEL_FULL = 5, } [DllImport("msi.dll")] public static extern uint MsiInstallProduct(string szPackagePath, string szCommandLine); [DllImport("msi.dll", SetLastError = true)] public static extern int MsiSetInternalUI(INSTALLUILEVEL dwUILevel, ref IntPtr phWnd); } |
然后增加如下方法
|
1
2
3
4
5
6
7
8
9
10
11
12
13
14
15
16
17
18
19
20
21
22
|
/// <summary>/// Install the specified msi file into local computer/// </summary>/// <param name="filePath">the path of specified msi file </param>/// <returns>if the msi file is installed successfully,return true,otherwise return false</returns>private bool Installfile(string filePath){ IntPtr myPtr = new IntPtr(); MSIInstallerManager.MsiSetInternalUI(MSIInstallerManager.INSTALLUILEVEL.INSTALLUILEVEL_FULL, ref myPtr); ////install the specified msi file uint result = MSIInstallerManager.MsiInstallProduct(filePath, string.Empty); ////if the result value is 0 ,the installation will be completed successfully if (0 == result) { return true; } else { return false; }} |
总结
windows服务开发一般用于win service开发,windows install开发用于sofeware update的开发.
欢迎各位参与讨论,如果觉得对你有帮助,请点击 推荐下,万分谢谢.
作者:spring yang
出处:http://www.cnblogs.com/springyangwc/
本文版权归作者和博客园共有,欢迎转载,但未经作者同意必须保留此段声明,且在文章页面明显位置给出原文连接,否则保留追究法律责任的权利。


