主要实现三个功能:显示备忘录,新建备忘录,备忘录的详细信息(可以显示图片)


这个备忘录程序是一个很简单的小项目,不过里边包含了不少重要的知识,如TableView的用法,文本、图片的保存等。
新建“Empty Application” ,命名为MemorandumBook
新建三个UIViewController视图,分别命名为HomeViewController,AddViewController,DetailsViewController。三个视图分别来实现对应的三个功能。
1.在AppDelegate.m中添加代码:
(1)添加导航控制器
(2) 将homeViewController添加到导航器
(3) 将导航器添加到启动的主视图

self.window = [[[UIWindow alloc] initWithFrame:[[UIScreen mainScreen] bounds]] autorelease];
// Override point for customization after application launch.
self.window.backgroundColor = [UIColor whiteColor];
navigationController = [[UINavigationController alloc] init];
HomeViewController *homeViewController = [[HomeViewController alloc] init];
homeViewController.title = @"备忘录";
[navigationController pushViewController:homeViewController animated:NO];//压入栈
[self.window addSubview:navigationController.view];
[homeViewController release];
[self.window makeKeyAndVisible];
return YES;
}
2.


下面在HomeViewController视图,来实现上图的效果:
添加一个data.plist,存放备忘录

在该视图上添加一个TableView, 在HomeViewController上添加 NSMutableArray *booksArray 存放备忘录信息,添加 - (void)initData方法,来读取plist中的数据
// HomeViewController.h
#import <UIKit/UIKit.h>
@interface HomeViewController : UIViewController
@property (retain, nonatomic) IBOutlet UITableView *tableView;
@property (nonatomic, retain) NSMutableArray *booksArray;
- (void)initData;
- (void)didFinishAddingNewBook:(NSDictionary *)theBook;
@end
// HomeViewController.m
#import "HomeViewController.h"
#import "AddBookViewController.h"
#import "DetailsViewController.h"
@interface HomeViewController ()
@end
@implementation HomeViewController
@synthesize tableView;
@synthesize booksArray;
//数据显示到主视图中
- (void)initData
{
//读取data.plist数据
NSString *filePath = [[NSBundle mainBundle]pathForResource:@"data" ofType:@"plist"];
booksArray = [[NSMutableArray alloc]initWithContentsOfFile:filePath];
}
- (void)viewDidLoad
{
[super viewDidLoad];
//数据保存
/*booksArray是程序的数据源,在开发的时候,从data.plist中读出数据赋值给它。在程序结束之前,所有的更改都需要被保存到data.plist中去。要做到这点,可以让BookTableViewController在“感知”到程序快要结束时保存数据*/
//为对象添加一个“观察者”
UIApplication *app = [UIApplication sharedApplication];
[[NSNotificationCenter defaultCenter] addObserver:self selector:@selector(applicationWillTerminate:) name:UIApplicationWillTerminateNotification object:app];
[self initData];//显示数据
//左Bar
UIBarButtonItem *leftBarBtn = [[[UIBarButtonItem alloc] initWithBarButtonSystemItem:UIBarButtonSystemItemEdit target:self action:@selector(editAction:)] autorelease];
self.navigationItem.leftBarButtonItem = leftBarBtn;
//右Bar
UIBarButtonItem *rightBarBtn = [[[UIBarButtonItem alloc] initWithBarButtonSystemItem:UIBarButtonSystemItemAdd target:self action:@selector(addAction:)] autorelease];
self.navigationItem.rightBarButtonItem = rightBarBtn;
//self.view.backgroundColor =[UIColor colorWithPatternImage:[UIImage imageNamed:@"bg.png"]];
//设置背景
CGRect frame = self.view.bounds;
UIImageView *bg = [[UIImageView alloc] initWithFrame:frame];
bg.image = [UIImage imageNamed:@"bg.png"];
[self.view addSubview:bg];
[bg release];
self.tableView = [[UITableView alloc] initWithFrame:frame style:UITableViewStylePlain];
self.tableView.delegate = self;
self.tableView.dataSource = self;
self.tableView.backgroundColor = [UIColor clearColor];
self.tableView.indicatorStyle = UIScrollViewIndicatorStyleWhite;
[self.view addSubview:self.tableView];
}
- (void)addAction:(id)sender
{
//导航到添加视图
AddBookViewController *addBookViewController = [[AddBookViewController alloc] init];
addBookViewController.delegate = self;//添加完成后回调到本视图(BookViewController)的方法
[self.navigationController pushViewController:addBookViewController animated:YES];
[addBookViewController release];
}
- (void)editAction:(id)sender
{
[self.tableView setEditing:YES animated:YES];
UIBarButtonItem *leftBarBtn = [[[UIBarButtonItem alloc] initWithBarButtonSystemItem:UIBarButtonSystemItemDone target:self action:@selector(doneAction:)] autorelease];
self.navigationItem.leftBarButtonItem = leftBarBtn;
}
//又把视图的编辑转态改了回去,同时也把左按钮改了回去。
- (void)doneAction:(id)sender
{
[self.tableView setEditing:NO animated:YES];
UIBarButtonItem *leftBarBtn = [[[UIBarButtonItem alloc] initWithBarButtonSystemItem:UIBarButtonSystemItemEdit target:self action:@selector(editAction:)] autorelease];
self.navigationItem.leftBarButtonItem = leftBarBtn;
}
//表视图的委托方法
//指定单元格的个数
- (NSInteger)tableView:(UITableView *)tableView numberOfRowsInSection:(NSInteger)section
{
return [booksArray count];
}
//单元格对象
- (UITableViewCell *)tableView:(UITableView *)tableView cellForRowAtIndexPath:(NSIndexPath *)indexPath
{
static NSString *CellIdentifier = @"Cell";
UITableViewCell *cell = [tableView dequeueReusableCellWithIdentifier:CellIdentifier];
if (cell == nil)
{
cell = [[[UITableViewCell alloc] initWithStyle:UITableViewCellStyleDefault reuseIdentifier:CellIdentifier] autorelease];
}
cell.textLabel.text = [[booksArray objectAtIndex:indexPath.row] valueForKey:@"Text"];
cell.accessoryType = UITableViewCellAccessoryDisclosureIndicator;//单元格右边的显示为一个箭头,用以提示用户点击后展开
return cell;
}
//选中某行
- (void)tableView:(UITableView *)tableView didSelectRowAtIndexPath:(NSIndexPath *)indexPath
{
DetailsViewController *detailsViewController = [[DetailsViewController alloc] init];
detailsViewController.bookDictionary = [booksArray objectAtIndex:indexPath.row];//将选中的值传递到详细视图页
[self.navigationController pushViewController:detailsViewController animated:YES];//导航到详细视图
[detailsViewController release];
[tableView deselectRowAtIndexPath:indexPath animated:YES];
}
//编辑,删除
- (void)tableView:(UITableView *)tableView commitEditingStyle:(UITableViewCellEditingStyle)editingStyle forRowAtIndexPath:(NSIndexPath *)indexPath
{
if (editingStyle == UITableViewCellEditingStyleDelete)
{
//从数据源中删除该行
//删除图片
NSString *filePath = [[booksArray objectAtIndex:indexPath.row] valueForKey:@"Image"];
if ([[NSFileManager defaultManager] fileExistsAtPath:filePath])
{
[[NSFileManager defaultManager] removeItemAtPath:filePath error:nil];
}
[booksArray removeObjectAtIndex:indexPath.row];
[tableView deleteRowsAtIndexPaths:[NSArray arrayWithObject:indexPath] withRowAnimation:UITableViewRowAnimationRight];
}
else if (editingStyle == UITableViewCellEditingStyleInsert)
{
//创建相应类的实例,插入到数组中,并且向表中增加一行
}
}
- (void)didFinishAddingNewBook:(NSDictionary *)theBook
{
[booksArray addObject:theBook];
[self.tableView reloadData];
}
- (void)viewDidUnload
{
[super viewDidUnload];
}
//程序快要结束时调用
- (void)applicationWillTerminate:(UIApplication *)application
{
NSString *path = [[NSBundle mainBundle] pathForResource:@"data" ofType:@"plist"];//找到文件路径
[booksArray writeToFile:path atomically:YES];//写入
}
- (BOOL)shouldAutorotateToInterfaceOrientation:(UIInterfaceOrientation)interfaceOrientation
{
return (interfaceOrientation == UIInterfaceOrientationPortrait);
}
- (void)dealloc {
[tableView release];
[super dealloc];
}
@end
3.
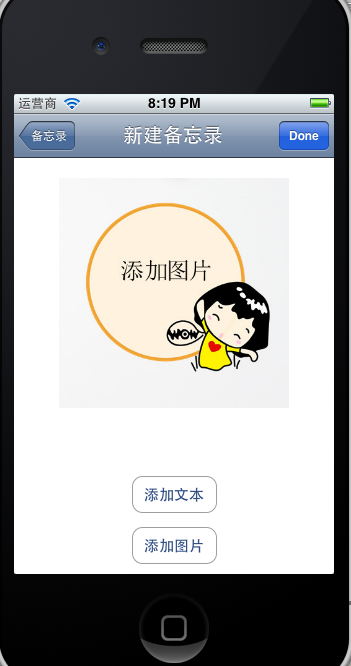
下面来实现AddViewController视图:
在xib上添加ImageView,Label,2个Button,如上图布局。
Button“添加文本”的方法:
用到UITextViewDelegate,UINavigationControllerDelegate,UIImagePickerControllerDelegate,UIActionSheetDelegate 等协议
UIBarButtonItem *rightBarBtn = [[[UIBarButtonItem alloc] initWithBarButtonSystemItem:UIBarButtonSystemItemDone target:self action:@selector(doneEditing:)] autorelease];
self.navigationItem.rightBarButtonItem = rightBarBtn;
textView = [[UITextView alloc] initWithFrame:CGRectMake(0, -240, 320, 240)];
textView.text = textLabel.text;
[self.view addSubview:textView];
[UIView beginAnimations:@"pushAnimation" context:textView];
[UIView setAnimationCurve:0.2];
[textView setFrame:CGRectMake(0, 0, 320, 240)];
[UIView commitAnimations];
[textView becomeFirstResponder];
}
//完成编辑
- (void)doneEditing:(id)sender
{
//textView弹回,取消其第一响应者身份(键盘弹回)
[textView resignFirstResponder];
[UIView beginAnimations:@"popAnimation" context:textView];
[UIView setAnimationDuration:0.2];
[textView setFrame:CGRectMake(0, -240, 320, 240)];
[UIView commitAnimations];
[textLabel setText:textView.text];
//右bar恢复“done”
UIBarButtonItem *rightBarBtn = [[[UIBarButtonItem alloc] initWithBarButtonSystemItem:UIBarButtonSystemItemDone
target:self
action:@selector(doneAction:)] autorelease];
self.navigationItem.rightBarButtonItem = rightBarBtn;
}
Button“添加图片”的方法:
cancelButtonTitle:@"取消"
destructiveButtonTitle:@"拍照"
otherButtonTitles:@"选择照片", nil];
[actionSheet showInView:[[UIApplication sharedApplication] keyWindow]];
}
//UIImagePickerControllerDelegate的委托方法
- (void)imagePickerController:(UIImagePickerController *)picker didFinishPickingMediaWithInfo:(NSDictionary *)info
{
image = [info objectForKey:UIImagePickerControllerEditedImage];
[imageView setImage:image];
[picker dismissModalViewControllerAnimated:YES];
}
- (void)imagePickerControllerDidCancel:(UIImagePickerController *)picker
{
[picker dismissModalViewControllerAnimated:YES];
[[picker parentViewController] dismissModalViewControllerAnimated:YES];
}
- (void)actionSheet:(UIActionSheet *)actionSheet didDismissWithButtonIndex:(NSInteger)buttonIndex
{
UIImagePickerController *imagePicker = [[[UIImagePickerController alloc] init] autorelease];
imagePicker.allowsImageEditing = YES;
if (buttonIndex == 0)
{
if ([UIImagePickerController isSourceTypeAvailable:UIImagePickerControllerSourceTypeCamera])
{
//imagePicker.sourceType = UIImagePickerControllerSourceTypeCamera;
}
else
{
UIAlertView *alert = [[UIAlertView alloc] initWithTitle:@"没有相机"
message:nil
delegate:nil
cancelButtonTitle:@"关闭"
otherButtonTitles:nil];
[alert show];
[alert release];
return;
}
}
else if (buttonIndex == 1)
{
//imagePicker.sourceType = UIImagePickerControllerSourceTypePhotoLibrary;
}
else if (buttonIndex == 2)
{
return;
}
imagePicker.delegate = self;
[self presentModalViewController:imagePicker animated:YES];
}
- (void)doneAction:(id)sender
{
NSArray *paths = NSSearchPathForDirectoriesInDomains(NSCachesDirectory, NSUserDomainMask, YES);
NSString *filePath = [paths objectAtIndex:0];
NSString *fileName = [NSString stringWithFormat:@"%d.png",random()];
filePath = [filePath stringByAppendingPathComponent:fileName];
//NSData *imageData = UIImageJPEGRepresentation(image,1.0f);//取1.0代表最佳品质
NSData *imageData = UIImagePNGRepresentation(image);//取1.0代表最佳品质
if (imageData)
{
[[NSFileManager defaultManager] createFileAtPath:filePath contents:imageData attributes:nil];
}
else
{
UIAlertView *alert = [[UIAlertView alloc] initWithTitle:nil
message:@"请选择照片"
delegate:nil
cancelButtonTitle:@"确认"
otherButtonTitles:nil];
[alert show];
[alert release];
return;
}
if ([textLabel.text isEqualToString:@""])
{
UIAlertView *alert = [[UIAlertView alloc] initWithTitle:nil message:@"请输入备忘" delegate:nil cancelButtonTitle:@"确认" otherButtonTitles:nil];
[alert show];
[alert release];
return;
}
NSDictionary *newBook = [[NSDictionary alloc] initWithObjectsAndKeys:textLabel.text, @"Text", filePath, @"Image", nil];
[delegate performSelector:@selector(didFinishAddingNewBook:) withObject:newBook];
[self.navigationController popViewControllerAnimated:YES];
}
4.
下面来实现DetailsViewController视图:
这个只需要将文本和图片读出来,所以比较简单
// DetailsViewController.m
#import "DetailsViewController.h"
@interface DetailsViewController ()
@end
@implementation DetailsViewController
@synthesize imageView;
@synthesize textView;
@synthesize bookDictionary;
- (void)viewDidLoad
{
[super viewDidLoad];
self.navigationItem.title = @"详细信息";
UIImage *image = [[UIImage alloc] initWithContentsOfFile:[bookDictionary valueForKey:@"Image"]];
if (image)
{
[imageView setImage:image];
}
[image release];
textView.text = [bookDictionary valueForKey:@"Text"];
}
- (void)viewDidUnload
{
[self setTextView:nil];
[self setImageView:nil];
[super viewDidUnload];
// Release any retained subviews of the main view.
// e.g. self.myOutlet = nil;
}
- (BOOL)shouldAutorotateToInterfaceOrientation:(UIInterfaceOrientation)interfaceOrientation
{
return (interfaceOrientation == UIInterfaceOrientationPortrait);
}
- (void)dealloc {
[textView release];
[imageView release];
[super dealloc];
}
@end
三十而立,从零开始学ios开发(四):IOS控件(1),Image View、Text Field、Keyboard
长话短说,谢谢大家的关注,这篇写了好长时间,下面继续学习ios。我将用2到3篇的篇幅来学习iphone上的一些常用控件,包括Image View、Text Field、Keyboard、Slider等等,这篇的内容包括ImageView和Keyboard的使用。完成后的效果图如下:

1)创建一个新的project,选择“Single View Application”,命名为“Control Fun”,然后保存。
一些和前几章相似的步骤在从这篇起就开始一笔待过了,也不再做截图了,例如这里的创建一个新的project。
2)添加ImageView
选中project navigator中的BIDViewController.xib,在object library中找到Image View 并拖入iphone视图中。
当把Image View拖入iphone视图后,Image View会拉伸充满整个iphone的界面(除了最上面的状态栏)。
(据我猜测,很多app在启动时都会有一张图片展示,停个几秒钟,就应该是上面的这种效果,当然,那时的状态栏也是被遮住的。)
在ImageView的四条边上总共有8个点可以调整ImageView的大小,鼠标放在某一个点上去调整ImageView的大小,调整后的ImageView如下
至于具体的长宽是多少这个无所谓,因为最终的大小会以上传图片的实际大小为准。
3)上传图片到project中,整个过程很简单,选中某一张图片,拖到project navigator中的Supporting Files文件夹中
放开鼠标后,一个对话框会弹出,问你如何处理这张图片,我们选中Destination的checkbox,把图片复制到项目中,其他保留默认值即可。
4)为ImageView添加图片
选中刚才添加的ImageView,在Attributes inspector中找到“Image View”中的Image
单击下拉按钮,刚才上传的图片已经显示在下拉列表中,选中即可,这样,图片就显示在ImageView里面了。
5)调整图片大小
默认情况下,图片会被拉伸到和ImageView一致的大小,图片的显示方式是由ImageView的Model属性来控制的,Model属性位于Attributes inspector中的View栏
上图中,Model的值为“Scale To Fill”,就是充满整个ImageView。
对于图片大小和显示方式的处理,iphone建议的是提供适当大小的图片(即图片的大小和最终要显示在iphone上的大小是一致的,不需要iphone的cpu进行更多的处理,这样有助于程序的快速运行和节约cpu的消耗),如果同一张图片有2种大小需要显示,那么你就传2张图片到程序了就可以了。
6)调整ImageView到图片的原始尺寸
首先选中图片,第一次选中图片的状态和4)里面的一致,然后我们再次单击图片,这时图片周围会有一圈灰色的边框
然后选中菜单栏中的Editor>Size to Fit Content,这样ImageView会自动调整到和图片原始尺寸一致
最后在调整一下ImageView的显示位置即可。
7)添加2个Label和2个textfield
这个过程比较简单了,具体操作可以参考前2篇的,下面是添加完Label和textfield后的效果,Label和testfield的排列主要还是依靠蓝色的辅助线
8)重命名Label,调整textfield大小
上图中,2个Label的文字分别换成了Name和Number,并向右对其(同时选中2个Label,选择菜单栏Editor>Align>Right Edges),2个textfield拉长到了合适的宽度。
9)为textfield添加Placeholder文字
Placeholder text是一种提示性的文字,默认显示在空的textfield中,当textfield获得焦点并输入内容后,Placeholder text会自动消失,当删除所有的内容,Placeholder text会再次出现。
选中第一个textfield,在Attribute inspector中找到Placeholder,并输入“Type a Name”
同样为第二个textfield的Placeholder输入“Type a Number”,完成后的效果
可以运行一下程序(command + R),看看实际的Placeholder text的效果是怎么样的。
至此,所有的界面布局都已经完成,下面进入code阶段,将学习如何调用iphone的虚拟键盘。
10)虚拟数字键盘
如果在第9步运行了程序,会发现当textfield获得焦点后,会有一个虚拟键盘弹出
但是第二个textfield期望的是只能够输入数字,不能够输入其他字符,因此需要改变虚拟键盘的类型,选中第二个textfield,在Attribute inspector中找到Keyboard,将其类型改成“Number Pad”
再次运行程序,让第二个text field获取焦点,一个虚拟数字键盘就出现了。
此时,一个新的问题又出现了,当我们输入结束后,如何隐藏键盘?当点击虚拟键盘的“return”按键时,它会调用一个Event,叫“Did End On Exit event”,我们可以关联一个Action到这个event,当触发这个event时,调用Action使键盘隐藏,下面说说具体的隐藏键盘的方法。
11)创建Outlet
在这个例子中,ImageView和Label在程序运行时都不会改变,因此不必为他们创建Outlet,我们只需为2个textfield创建Outlet即可。
在这里就不详细的重复创建Outlet的步骤了,有需要的朋友可以看我上一篇的文章,里面有描述如何创建Outlet。
Outlet创建完毕后的BIDViewController.h如下
#import <UIKit/UIKit.h>

@interface BIDViewController : UIViewController
@property (weak, nonatomic) IBOutlet UITextField *nameField;
@property (weak, nonatomic) IBOutlet UITextField *numberField;

@end
BIDViewController.m
#import "BIDViewController.h"

@implementation BIDViewController
@synthesize nameField;
@synthesize numberField;

......
我们添加了2个指向textfield的Outlet,分别命名为nameField和numberField。
12)手动添加一个Action
在上一章里,我们是通过和添加Outlet同样的方式在添加Action,在这章里,手动的添加Action。
a)在BIDViewController.h中声明一个Action:textFieldDoneEditing
#import <UIKit/UIKit.h>

@interface BIDViewController : UIViewController
@property (weak, nonatomic) IBOutlet UITextField *nameField;
@property (weak, nonatomic) IBOutlet UITextField *numberField;

- (IBAction)textFieldDoneEditing:(id)sender;

@end
b)在BIDViewController.m的最后实现textFieldDoneEditing方法
- (IBAction)textFieldDoneEditing:(id)sender
{
    [sender resignFirstResponder];
}
(下面是我个人对resignFirstResponder的理解,如果有错,希望大家能够指正,谢谢!)
这里注意“resignFirstResponder”,FirstResponder的意思是正在和用户交互的那个控件,textfield正在和用户交互,这时的它就是FirstResponder。 resignFirstResponder的意思是放弃第一响应者,即textfield不再和用户进行交互,那么此时的textfield也不会获得焦点,这样键盘就自然而然的消失了。
13)关联Action
选中第一个text field,打开connections inspector,下图中的第6个图标(最右边的一个图标)
找到connections inspector中的“Did End On Exit”方法,鼠标移到它右边的小圆圈,此时小圆圈中出现一个加号
按住鼠标左键不放,拖动到File's Owner上放开鼠标,此时一个小窗口会弹出,会显示File's Owner所拥有的Action
选中textFieldDoneEditing,这样“Did End On Exit”就和textFieldDoneEditing方法关联起来了
在此运行程序看看效果,当在第一个text field中输入完文字后,点虚拟键盘上的“return”按钮,键盘消失了。

但是第二个textfield调用的是数字键盘,没有“return”键,那要如何隐藏键盘呢?一种方式是再次使第一个textfield获得焦点,然后调出一般的虚拟键盘,点击“return”,隐藏键盘,但是这种方法过于繁琐且不切实际,如果我们没有第一个textfield呢?那岂不是很悲催了?好在事情没有那么糟糕,我们使用另一种方法使键盘消失,当我们点击屏幕上任何空白的地方时(包括ImageView和Label这些非活动控件,即静态控件),使键盘消失,这个操作相对简单,且可行性较高。
14)实现原理
先看下图Objects
这是一个控件布局的树形图,我们添加的所有控件都是放在一个根View上面的,这个View是不可见的,但是它充满了整个iphone屏幕,我们要做的就是写一个Action,希望能够使这个View所携带的一个event调用这个Action从而达到隐藏键盘的目的。但是这个根View的类型是UIView (identity inspector)
UIView是没有event的,这样就更无法和Action关联,因此我们需要把根View的类型UIView改成UIControl,UIControl是UIView的子类,它包含所有UIView的特性,且里面有我们所需要的event,所以这样的改变是非常合理且可行的。
选中Objects中的根View,在identity inspector中,将UIView改成UIControl。
Objects中的类型也随之改变
15)创建另一个Action:backgroundTap
BIDViewController.h
- (IBAction)backgroundTap:(id)sender;
BIDViewController.m
- (IBAction)backgroundTap:(id)sender
{
    [nameField resignFirstResponder];
    [numberField resignFirstResponder];
}
16)关联Action
选中根Control,切换到connections inspector,因为我们希望的是点击任何地方,键盘都会隐藏,所以我们选中Touch Down event
按住鼠标左键拖到File's Owner,选择backgroundTap action,关联完毕。
再次编译运行程序,在第二个textfield中输入数字,点击屏幕上的任何地方,虚拟数字键盘消失
至此,所有的功能开发完毕。