今天先不讲Spring是什么。我们直接通过代码来看Spring框架的一下基本用法。以此来看Spring到底是什么。
我们使用Eclipse来作为IDE,因为Eclipse是免费的。
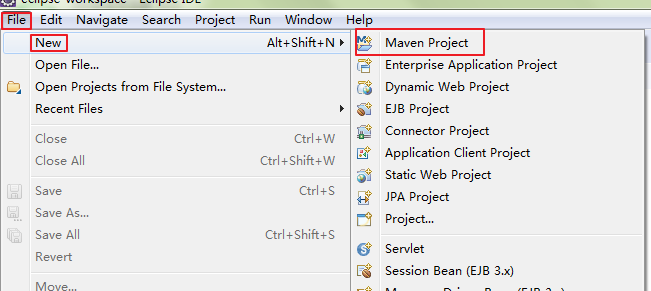
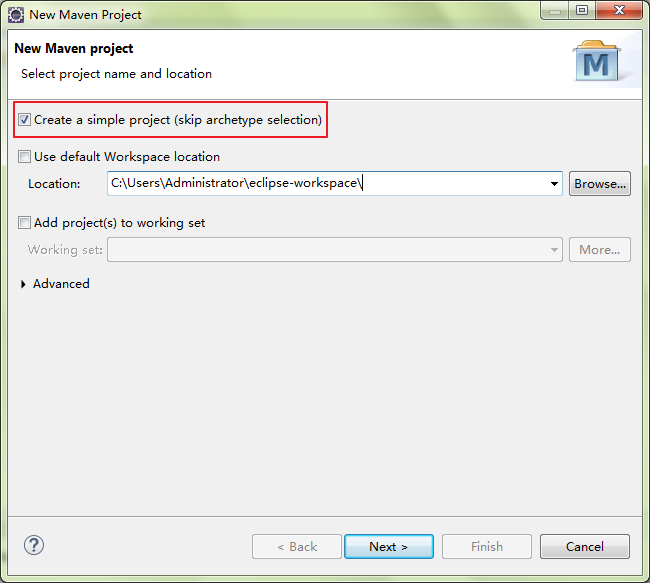
首先,我们创建一个Maven的项目。
在Eclipse中点击File,New,Maven Project
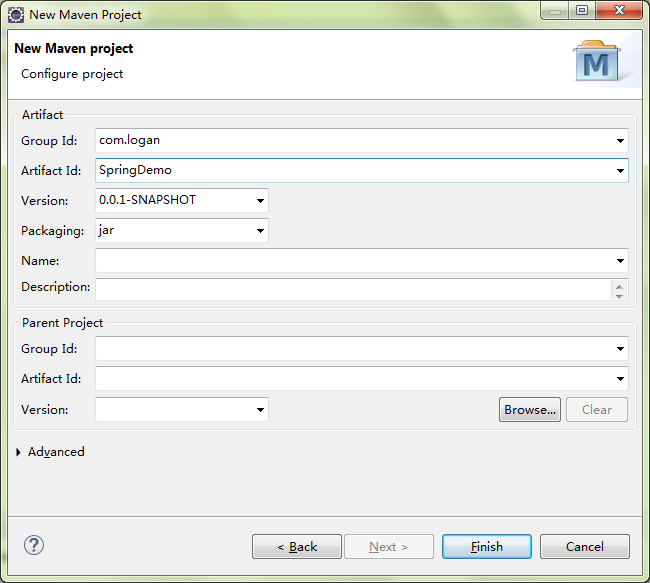
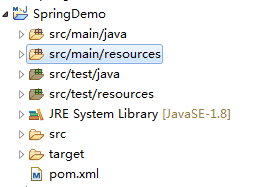
我们得到一个Maven的项目。
接下来,我们配置Spring的Jar包,maven的好处就是可以方便的管理jar包。
在https://mvnrepository.com/artifact/org.springframework/spring-context/4.3.12.RELEASE这个链接,我们可以看到spring context的jar包的maven配置方式
所以我们的pom.xml改成如下:
<project xmlns="http://maven.apache.org/POM/4.0.0"
    xmlns:xsi="http://www.w3.org/2001/XMLSchema-instance"
    xsi:schemaLocation="http://maven.apache.org/POM/4.0.0 http://maven.apache.org/xsd/maven-4.0.0.xsd">
    <modelVersion>4.0.0</modelVersion>
    <groupId>com.logan</groupId>
    <artifactId>SpringDemo</artifactId>
    <version>0.0.1-SNAPSHOT</version>
    <dependencies>
        <!-- https://mvnrepository.com/artifact/org.springframework/spring-context -->
        <dependency>
            <groupId>org.springframework</groupId>
            <artifactId>spring-context</artifactId>
            <version>4.3.12.RELEASE</version>
        </dependency>

    </dependencies>
</project>
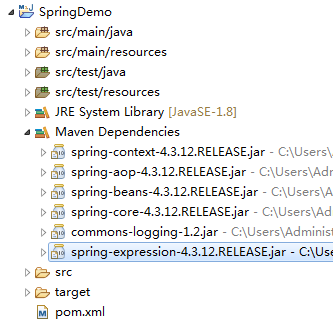
保存之后,maven就可以自动的帮我们下载jar包并添加到项目中:
接下来,我们创建一个package
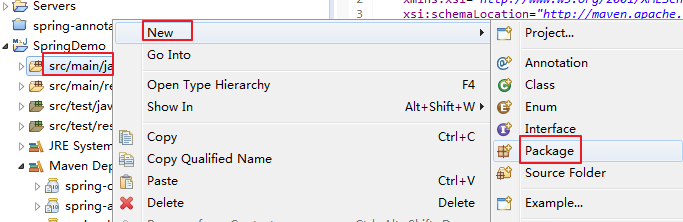
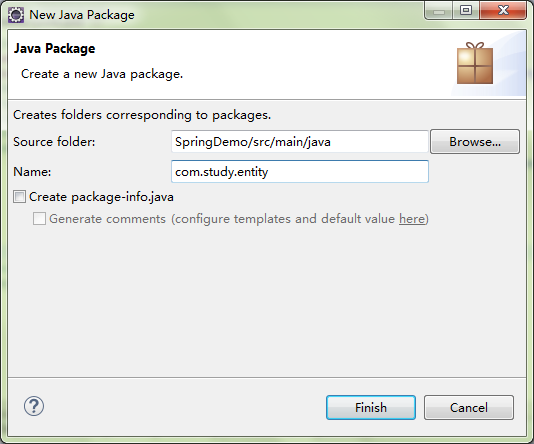
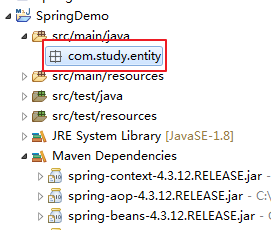
我们得到如下:
我们在package内创建一个实体类Persion

Persion.java的代码:
package com.study.entity;

public class Persion {

    private String name;
    private Integer age;
    public String getName() {
        return name;
    }
    public void setName(String name) {
        this.name = name;
    }
    public Integer getAge() {
        return age;
    }
    public void setAge(Integer age) {
        this.age = age;
    }
    public Persion(String name, Integer age) {
        super();
        this.name = name;
        this.age = age;
    }
    public Persion() {
        super();
        // TODO Auto-generated constructor stub
    }
    @Override
    public String toString() {
        return "Persion [name=" + name + ", age=" + age + "]";
    }


}
我们再创建一个TestPersion类
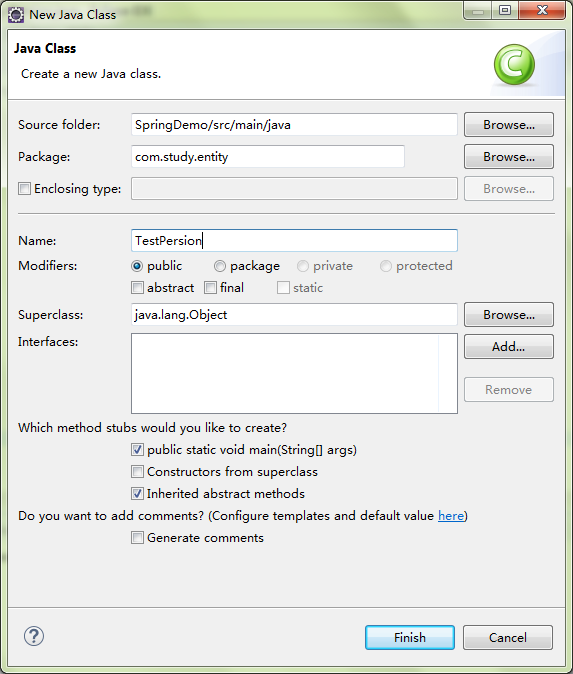
正常情况下如果我们想定义一个Persion对象并且使用,就可以按照如下代码进行:
package com.study.entity;

public class TestPersion {

    public static void main(String[] args) {
        // TODO Auto-generated method stub
        Persion p1 = new Persion();
        p1.setName("xiaoming");
        System.out.println(p1.getName());
    }

}
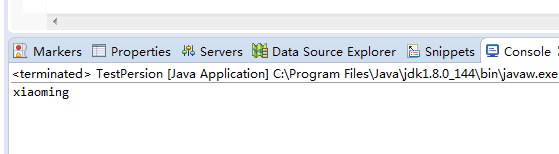
输出的结果也正是我们想要的结果:
下面我们看能不能不去声明一个Persion对象,我们就能使用呢?
当然是可以的,Spring就是干这个事的。
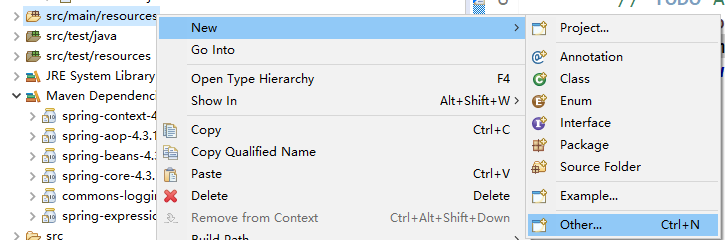
我们在src/main/resources上创建一个xml文件

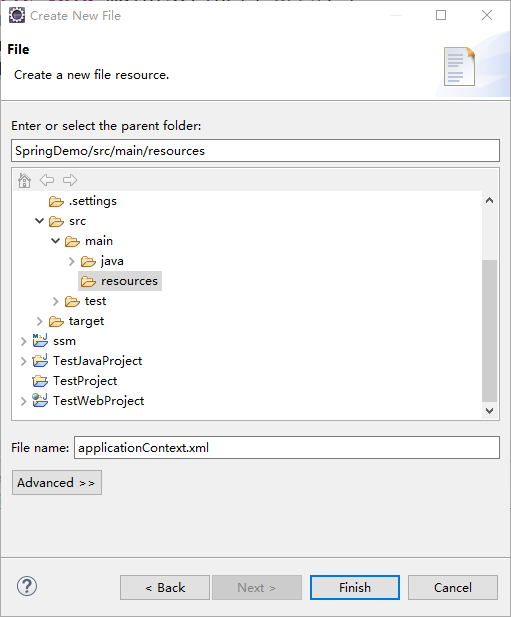
然后我们在applicationContext.xml中插入如下代码:
<?xml version="1.0" encoding="UTF-8"?>
<beans xmlns="http://www.springframework.org/schema/beans"
    xmlns:xsi="http://www.w3.org/2001/XMLSchema-instance"
    xsi:schemaLocation="http://www.springframework.org/schema/beans http://www.springframework.org/schema/beans/spring-beans.xsd">
    <bean id="persionService" class="com.study.entity.Persion">
    <property name="name" value="xiaozhang"></property>
    </bean>

</beans>
从上面的配置文件中可以看到,我们定义了一个bean,id是persionService,对应的类是com.study.entity.Persion
然后给name属性赋值xiaozhang。
我们在TestPersion中修改代码如下:
package com.study.entity;

import org.springframework.context.ApplicationContext;
import org.springframework.context.support.ClassPathXmlApplicationContext;

public class TestPersion {

    public static void main(String[] args) {
        // TODO Auto-generated method stub
//        Persion p1 = new Persion();
//        p1.setName("xiaoming");
//        System.out.println(p1.getName());

        ApplicationContext ext = new ClassPathXmlApplicationContext("applicationContext.xml");
        Persion p2 = (Persion) ext.getBean("persionService");
        System.out.println(p2.getName());

    }

}
得到结果如下:

三月 05, 2020 7:34:15 下午 org.springframework.context.support.ClassPathXmlApplicationContext prepareRefresh
信息: Refreshing org.springframework.context.support.ClassPathXmlApplicationContext@4d405ef7: startup date [Thu Mar 05 19:34:15 CST 2020]; root of context hierarchy
三月 05, 2020 7:34:15 下午 org.springframework.beans.factory.xml.XmlBeanDefinitionReader loadBeanDefinitions
信息: Loading XML bean definitions from class path resource [applicationContext.xml]
xiaozhang
Java代码中我们没有声明Persion对象,只是从配置文件里面去获取bean,然后强制转换成Persion类,然后输出的这个对象的name,可以看到我们得到了期望的xiaozhang。
不知道大家有没有感觉到神奇,反正我第一次接触Spring的时候就觉得很神奇,因为它和常规的Java开发不同,不需要声明对象就可以使用,只要你想用哪个对象,拿来就用。
这就颠覆了以往的Java开发。
其实这个就是通过Java的反射机制实现的,如果想对反射做一个了解,可以看我的这个博客
以上是20200305更新。
Spring网址:http://projects.spring.io/spring-framework/
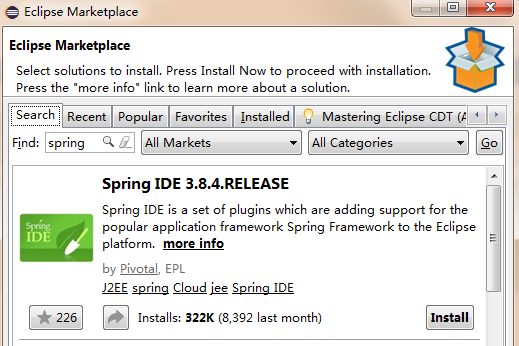
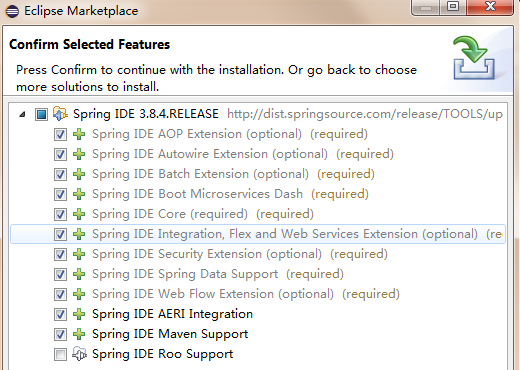
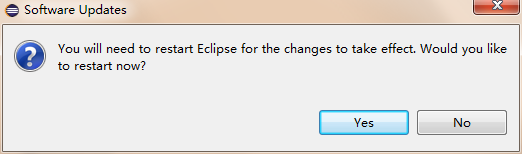
Eclipse 安装开发IDE
在Eclipse Marketplace搜索spring,然后直接安装。
下载spring的Jar包
http://repo.spring.io/simple/libs-release-local/org/springframework/spring/
下载4.3.8的zip包
先直接看代码。
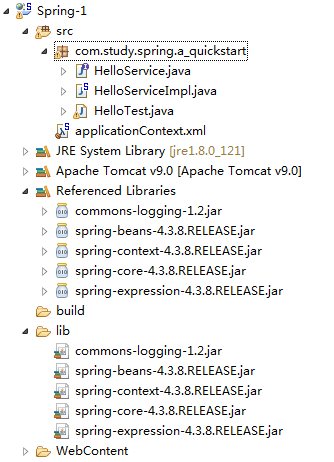
目录结构
代码
applicationContext.xml
<?xml version="1.0" encoding="UTF-8"?>
<beans xmlns="http://www.springframework.org/schema/beans"
    xmlns:xsi="http://www.w3.org/2001/XMLSchema-instance"
    xsi:schemaLocation="http://www.springframework.org/schema/beans http://www.springframework.org/schema/beans/spring-beans.xsd">
    <bean id="helloService" class="com.study.spring.a_quickstart.HelloServiceImpl">
    </bean>

</beans>
package com.study.spring.a_quickstart;

public interface HelloService {

    public void sayHello();

}
package com.study.spring.a_quickstart;

public class HelloServiceImpl implements HelloService {

    @Override
    public void sayHello() {
        // TODO Auto-generated method stub
        System.out.println("hello spring!");

    }

}
package com.study.spring.a_quickstart;

import org.springframework.context.ApplicationContext;
import org.springframework.context.support.ClassPathXmlApplicationContext;

public class HelloTest {

    public static void main(String[] args) {
        // TODO Auto-generated method stub
        HelloServiceImpl service = new HelloServiceImpl();
        service.sayHello();
        ApplicationContext ext = new ClassPathXmlApplicationContext("applicationContext.xml");
        HelloService helloService = (HelloService) ext.getBean("helloService");
        helloService.sayHello();

    }

}
下面是输出结果:
hello spring!
五月 17, 2017 10:13:04 下午 org.springframework.context.support.ClassPathXmlApplicationContext prepareRefresh
信息: Refreshing org.springframework.context.support.ClassPathXmlApplicationContext@3eb07fd3: startup date [Wed May 17 22:13:04 CST 2017]; root of context hierarchy
五月 17, 2017 10:13:04 下午 org.springframework.beans.factory.xml.XmlBeanDefinitionReader loadBeanDefinitions
信息: Loading XML bean definitions from class path resource [applicationContext.xml]
hello spring!