wxWidgets 组件wxCheckBox wxBitmapButton wxToggleButton wxStaticLine wxStaticText wxSlider
控件组成了我们的应用程序,wxWidgets中包含了大量有用的控件。控件被定义为一个GUI的基本对象,widget这个词通常在UNIX系统上使用,在windows系统上一个控件通常被叫做control。
wxCheckBox
wxCheckBox是一个有两个状态的控件,选中/未选中。它看起来是一个选框和一个标签,这个标签可以被设置在选框的左边或者右边,如果这个选框被选中,在这选框中会有一个√标记,一个wxCheckBox可以用来控制在启动时显示或隐藏LOGO,显示或隐藏一个工具栏,等等。
main.h
 1 //组件wxCheckBox
 2 #include <wx/wx.h>
 3
 4 class CheckBox : public wxFrame
 5 {
 6 public:
 7     CheckBox(const wxString & title);
 8
 9     void OnToggle(wxCommandEvent & event);
10     //定义一个wxCheckBox
11     wxCheckBox * m_cb;
12     //定义wxCheckBox的ID
13     enum{ID_CHECKBOX};
14 };
15
16 class MyApp : public wxApp
17 {
18 public:
19     virtual bool OnInit();
20 };
main.cpp
 1 #include "main.h"
 2
 3 CheckBox::CheckBox(const wxString & title)
 4         : wxFrame(NULL, wxID_ANY, title, wxDefaultPosition, wxSize(270, 150))
 5 {
 6     //定义一个Panel放置在wxFrame上
 7     wxPanel * panel = new wxPanel(this, wxID_ANY);
 8     //定义一个wxCheckBox放置在Panel上,标题是Show title
 9     m_cb = new wxCheckBox(panel, ID_CHECKBOX, _T("Show title"), wxPoint(200 / 2, 80 / 2));
10     //wxCheckBox默认选中
11     m_cb->SetValue(true);
12     //wxCheckBox选中事件处理函数的动态绑定
13     Connect(ID_CHECKBOX, wxEVT_COMMAND_CHECKBOX_CLICKED,
14             wxCommandEventHandler(CheckBox::OnToggle));
15     //使窗口在屏幕上居中显示
16     Centre();
17 }
18
19 void CheckBox::OnToggle(wxCommandEvent & WXUNUSED(event))
20 {
21     //如果wxCheckBox是选中的
22     if(m_cb->GetValue())
23     {
24         //设置窗口标题
25         this->SetTitle(_T("CheckBox"));
26     }
27     //如果wxCheckBox未选中
28     else
29     {
30         this->SetTitle(_T(""));
31     }
32 }
33 //声明应用程序
34 IMPLEMENT_APP(MyApp)
35
36 bool MyApp::OnInit()
37 {
38     CheckBox * cb = new CheckBox(_T("CheckBox"));
39     cb->Show(true);
40
41     return true;
42 }
在我们的例子中,我们显示了一个checkbox,我们通过这个选框来显示或隐藏主窗口的标题。
1 m_cb = new wxCheckBox(panel, ID_CHECKBOX, _T("Show title"), wxPoint(200 / 2, 80 / 2));
2 m_cb->SetValue(true);
我们创建了一个checkbox,并调用SetValue()方法,设置默认为选中状态。
Connect(ID_CHECKBOX, wxEVT_COMMAND_CHECKBOX_CLICKED, wxCommandEventHandler(CheckBox::OnToggle));
如果我们点击了这个选框,一个wxEVT_COMMAND_CHECKBOX_CLICKED事件产生,我们把这个事件同OnToggle()方法关联起来。
1 if(m_cb->GetValue())
2 {
3     this->SetTitle(_T("CheckBox"));
4 }
5 else
6 {
7     this->SetTitle(_T(""));
8 }
在OnToggle()方法内,我们检查了checkbox的状态,如果是选中状态,我们把标题设置为"CheckBox",如果是未选中,我们隐藏标题字符串。
wxBitmapButton
一个位图按钮是一个特殊的按钮,它的主体是一张图片。一个位图按钮上的图片可以随意设置。下面我们可以为三种音量状态指定不同的图片。
main.h
 1 //组件wxBitmapButton
 2 #include <wx/wx.h>
 3 #include <wx/slider.h>
 4
 5 class BitmapButton : public wxFrame
 6 {
 7 public:
 8     BitmapButton(const wxString & title);
 9
10     wxSlider * slider;
11     wxBitmapButton * button;
12     int pos;
13
14     void OnScroll(wxScrollEvent & event);
15
16     enum{ID_SLIDER};
17 };
18
19 class MyApp : public wxApp
20 {
21 public:
22     virtual bool OnInit();
23 };
main.cpp
 1 #include "main.h"
 2
 3 BitmapButton::BitmapButton(const wxString & title)
 4             : wxFrame(NULL, wxID_ANY, title, wxDefaultPosition, wxSize(250, 130))
 5 {
 6     //初始化PNG图像处理模块
 7     wxImage::AddHandler(new wxPNGHandler);
 8     //定义一个Panel放置在wxFrame上
 9     wxPanel * panel = new wxPanel(this);
10     //定义一个滑块放置在Panel上
11     //wxSlider的参数意义(父组件,ID,默认值,最小值, 最大值, 位置,大小)
12     slider = new wxSlider(panel, ID_SLIDER, 0, 0, 100, wxPoint(10, 30), wxSize(140, -1));
13     //定义一个图像按钮
14     button = new wxBitmapButton(panel, wxID_ANY, wxBitmap(_T("muted.png"), wxBITMAP_TYPE_PNG), wxPoint(180, 20));
15     //滑块拖动事件处理函数的动态关联
16     Connect(ID_SLIDER, wxEVT_COMMAND_SLIDER_UPDATED,
17             wxScrollEventHandler(BitmapButton::OnScroll));
18     //使窗口在屏幕上居中显示
19     Centre();
20 }
21
22 void BitmapButton::OnScroll(wxScrollEvent & event)
23 {
24     //获取滑块的当前值
25     pos = slider->GetValue();
26
27     //根据滑块的位置值显示不同的图片
28     if(pos == 0)
29     {
30         button->SetBitmapLabel(wxBitmap(_T("muted.png"), wxBITMAP_TYPE_PNG));
31     }
32     else if(pos > 0 && pos <= 30)
33     {
34         button->SetBitmapLabel(wxBitmap(_T("low.png"), wxBITMAP_TYPE_PNG));
35     }
36     else if(pos > 30 && pos < 80)
37     {
38         button->SetBitmapLabel(wxBitmap(_T("medium.png"), wxBITMAP_TYPE_PNG));
39     }
40     else
41     {
42         button->SetBitmapLabel(wxBitmap(_T("high.png"), wxBITMAP_TYPE_PNG));
43     }
44 }
45 //声明应用程序
46 IMPLEMENT_APP(MyApp)
47
48 bool MyApp::OnInit()
49 {
50     BitmapButton * bb = new BitmapButton(_T("BitmapButton"));
51     bb->Show(true);
52
53     return true;
54 }
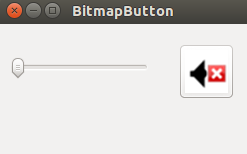
在我们的例子中,我们创建了一个滑块和一个位图按钮,我们通过拖动滑块改变按钮的图标来模仿了一个音量控制器。
wxImage::AddHandler(new wxPNGHandler);
我们将要用到PNG图片,所以我们初始化了PNG图像处理模块。
button = new wxBitmapButton(panel, wxID_ANY, wxBitmap(_T("muted.png"), wxBITMAP_TYPE_PNG), wxPoint(180, 20));
我们创建了一个位图按钮,我们指定了位图的类型wxBITMAP_TYPE_PNG
pos = slider->GetValue();
我们获取了滑块的数据,使用这个数据来设置按钮上的不同图标,我们有四种音量:静音、最低、中等、最大。我们使用SetBitmapLabel()方法来改变按钮上的图片。
效果展示:
wxToggleButton
wxToggleButton是一个有两种状态的按钮:按下或未按下,你可以通过点击这个按钮在这两种状态间切换。在有些情况下这种功能非常有用。
main.h
 1 //组件wxToggleButton
 2
 3 #include <wx/wx.h>
 4 #include <wx/tglbtn.h>
 5
 6 class ToggleButton : public wxFrame
 7 {
 8 public:
 9     ToggleButton(const wxString & title);
10
11     //定义了三个两态按钮点击事件的处理函数
12     void OnToggleRed(wxCommandEvent & event);
13     void OnToggleGreen(wxCommandEvent & evnet);
14     void OnToggleBlue(wxCommandEvent & event);
15
16 protected:
17     //定义了三个两态按钮
18     wxToggleButton * m_tgbutton1;
19     wxToggleButton * m_tgbutton2;
20     wxToggleButton * m_tgbutton3;
21     //定义了Panel和颜色组件
22     wxPanel * m_panel;
23     wxColour * colour;
24     //定义了三个两态按钮的ID
25     enum{ID_TGBUTTON1,
26          ID_TGBUTTON2,
27          ID_TGBUTTON3};
28 };
29
30 class MyApp : public wxApp
31 {
32 public:
33     virtual bool OnInit();
34 };
main.cpp
 1 #include "main.h"
 2
 3 ToggleButton::ToggleButton(const wxString & title)
 4             : wxFrame(NULL, wxID_ANY, title, wxDefaultPosition, wxSize(280, 180))
 5 {
 6     //定义了一个Panel放置在wxFrame上
 7     wxPanel * panel = new wxPanel(this, wxID_ANY);
 8     //colour设置为黑色
 9     colour = new wxColour(0, 0, 0);
10     //初始化了三个两态按钮
11     m_tgbutton1 = new wxToggleButton(panel, ID_TGBUTTON1, _T("Red"), wxPoint(20, 20));
12     m_tgbutton2 = new wxToggleButton(panel, ID_TGBUTTON2, _T("Green"), wxPoint(20, 70));
13     m_tgbutton3 = new wxToggleButton(panel, ID_TGBUTTON3, _T("Blue"), wxPoint(20, 120));
14     //三个两态按钮点击事件处理函数的动态关联
15     Connect(ID_TGBUTTON1, wxEVT_COMMAND_TOGGLEBUTTON_CLICKED,
16             wxCommandEventHandler(ToggleButton::OnToggleRed));
17     Connect(ID_TGBUTTON2, wxEVT_COMMAND_TOGGLEBUTTON_CLICKED,
18             wxCommandEventHandler(ToggleButton::OnToggleGreen));
19     Connect(ID_TGBUTTON3, wxEVT_COMMAND_TOGGLEBUTTON_CLICKED,
20             wxCommandEventHandler(ToggleButton::OnToggleBlue));
21     //新定义了一个m_anel放置在Panel上,用于显示颜色的变化
22     m_panel = new wxPanel(panel, wxID_ANY, wxPoint(150, 20), wxSize(110, 110), wxSUNKEN_BORDER);
23     //将m_panel的背景色设置为colour(黑色)
24     m_panel->SetBackgroundColour(colour->GetAsString());
25     //使窗口在屏幕上居中显示
26     Centre();
27 }
28
29 void ToggleButton::OnToggleRed(wxCommandEvent & WXUNUSED(event))
30 {
31     //获取colour初始值中green的值赋值给green
32     unsigned char green = colour->Green();
33     //获取colour初始值中blue的值赋值给blue
34     unsigned char blue = colour->Blue();
35     if(colour->Red())//如果colour中red的值不为0
36     {
37         colour->Set(0, green, blue);
38     }
39     else//如果colour中red的值为0
40     {
41         colour->Set(255, green, blue);
42     }
43     m_panel->SetBackgroundColour(colour->GetAsString());
44     //刷新背景色
45     Refresh();
46 }
47
48 void ToggleButton::OnToggleGreen(wxCommandEvent & WXUNUSED(event))
49 {
50     unsigned char red = colour->Red();
51     unsigned char blue = colour->Blue();
52
53     if(colour->Green())
54     {
55         colour->Set(red, 0, blue);
56     }
57     else
58     {
59         colour->Set(red, 255, blue);
60     }
61     m_panel->SetBackgroundColour(colour->GetAsString());
62
63     Refresh();
64 }
65
66 void ToggleButton::OnToggleBlue(wxCommandEvent & WXUNUSED(event))
67 {
68     unsigned char red = colour->Red();
69     unsigned char green = colour->Green();
70
71     if(colour->Blue())
72     {
73         colour->Set(red, green, 0);
74     }
75     else
76     {
77         colour->Set(red, green, 255);
78     }
79     m_panel->SetBackgroundColour(colour->GetAsString());
80
81     Refresh();
82 }
83 //声明应用程序
84 IMPLEMENT_APP(MyApp)
85
86 bool MyApp::OnInit()
87 {
88     ToggleButton * button = new ToggleButton(_T("ToggleButton"));
89     button->Show(true);
90
91     return true;
92 }
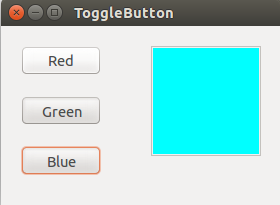
在我们的例子中,我们显示了三个开关按钮和一个panel,我们把panel的 背景色设置为黑色,通过开关按钮来显示红色绿色和蓝色,背景色会根据不同开关按钮的状态发生改变。
colour = new wxColour(0, 0, 0);
这是一个颜色值的初始化,RGB=#000000表示黑色,理论上来说黑色不是一种颜色orz
m_tgbutton1 = new wxToggleButton(panel, ID_TGBUTTON1, _T("Red"), wxPoint(20, 20));
这里我们创建了一个开关按钮。
Connect(ID_TGBUTTON1, wxEVT_COMMAND_TOGGLEBUTTON_CLICKED, wxCommandEventHandler(ToggleButton::OnToggleRed));
如果我们点击了一个开关按钮,一个wxEVT_COMMAND_TOGGLEBUTTON_CLICKED事件产生,我们把处理函数和这个事件连接起来。注意,我们也可以不把这个事件同开关按钮的处理函数连接,而是连接到wxFrame组件(这个开关按钮的父亲组件),因为事件指令会传递到父控件,在我们的例子中就是,toggle button→panel→frame。如果我们想把这个事件连接到按钮我们应该派生出自己的按钮类,这意味着更多的代码。
1 if(colour->Red())
2 {
3     colour->Set(0, green, blue);
4 }
5 else
6 {
7     colour->Set(255, green, blue);
8 }
在事件处理函数中我们指定了不同的wxColour参数。
m_panel->SetForegroundColour(colour->GetAsString());
我们设置了panel的背景色,最后不要忘了刷新背景
Refresh();
刷新背景。
效果展示:
wxStaticLine
这个组件在窗口内显示一条简单的线段,它可是水平的也可以是垂直的。
main.h
 1 //组件wxStaticLine
 2 //静态只读文本的字体样式设置
 3 #include <wx/wx.h>
 4 #include <wx/stattext.h>
 5 #include <wx/statline.h>
 6
 7 class Staticline : public wxDialog
 8 {
 9 public:
10     Staticline(const wxString & title);
11 };
12
13 class MyApp : public wxApp
14 {
15 public:
16     virtual bool OnInit();
17 };
main.cpp
 1 #include "main.h"
 2
 3 Staticline::Staticline(const wxString & title)
 4           : wxDialog(NULL, wxID_ANY, title, wxDefaultPosition, wxSize(360, 350))
 5 {
 6     //设置字体样式,参数意义(字体大小, 字体样式【倾斜与否】,是否加粗)
 7     wxFont font(10, wxDEFAULT, wxNORMAL, wxBOLD);
 8     //定义一个静态只读文本
 9     wxStaticText * heading = new wxStaticText(this, wxID_ANY, _T("The Central Europe"), wxPoint(30, 15));
10     //设置静态只读文本的字体样式
11     heading->SetFont(font);
12     //在wxFrame中添加一条水平横线
13     wxStaticLine * sl1 = new wxStaticLine(this, wxID_ANY, wxPoint(25, 50), wxSize(300,1));
14
15     //定义一组静态文本,用于显示内容
16     wxStaticText * st1 = new wxStaticText(this, wxID_ANY, _T("Slovakia"), wxPoint(25, 80));
17     wxStaticText * st2 = new wxStaticText(this, wxID_ANY, _T("Hungary"), wxPoint(25, 100));
18     wxStaticText * st3 = new wxStaticText(this, wxID_ANY, _T("Poland"), wxPoint(25, 120));
19     wxStaticText * st4 = new wxStaticText(this, wxID_ANY, _T("Czech Republic"), wxPoint(25, 140));
20     wxStaticText * st5 = new wxStaticText(this, wxID_ANY, _T("Germany"), wxPoint(25, 160));
21     wxStaticText * st6 = new wxStaticText(this, wxID_ANY, _T("Slovenia"), wxPoint(25, 180));
22     wxStaticText * st7 = new wxStaticText(this, wxID_ANY, _T("Austria"), wxPoint(25, 200));
23     wxStaticText * st8 = new wxStaticText(this, wxID_ANY, _T("Switzerland"), wxPoint(25, 220));
24
25     wxStaticText * st9  = new wxStaticText(this, wxID_ANY, _T("5 379 000"), wxPoint(220, 80), wxSize(90, -1), wxALIGN_RIGHT);
26     wxStaticText * st10 = new wxStaticText(this, wxID_ANY, _T("10 084 000"), wxPoint(220, 100), wxSize(90, -1), wxALIGN_RIGHT);
27     wxStaticText * st11 = new wxStaticText(this, wxID_ANY, _T("38 635 000"), wxPoint(220, 120), wxSize(90, -1), wxALIGN_RIGHT);
28     wxStaticText * st12 = new wxStaticText(this, wxID_ANY, _T("10 240 000"), wxPoint(220, 140), wxSize(90, -1), wxALIGN_RIGHT);
29     wxStaticText * st13 = new wxStaticText(this, wxID_ANY, _T("82 443 000"), wxPoint(220, 160), wxSize(90, -1), wxALIGN_RIGHT);
30     wxStaticText * st14 = new wxStaticText(this, wxID_ANY, _T("2 001 000"),  wxPoint(220, 180), wxSize(90, -1), wxALIGN_RIGHT);
31     wxStaticText * st15 = new wxStaticText(this, wxID_ANY, _T("8 032 000"),  wxPoint(220, 200), wxSize(90, -1), wxALIGN_RIGHT);
32     wxStaticText * st16 = new wxStaticText(this, wxID_ANY, _T("7 288 000"),  wxPoint(220, 220), wxSize(90, -1), wxALIGN_RIGHT);
33
34     //在wxFrame中添加一条水平横线
35     wxStaticLine * sl2 = new wxStaticLine(this, wxID_ANY, wxPoint(25, 260), wxSize(300, 1));
36
37     wxStaticText * sum = new wxStaticText(this, wxID_ANY, _T("164 102 000"), wxPoint(220, 280));
38     //获取总计对应的静态只读文本的字体样式
39     wxFont sum_font = sum->GetFont();
40     //将总计的值加粗显示
41     sum_font.SetWeight(wxBOLD);
42     sum->SetFont(sum_font);
43
44     Centre();
45 }
46 //声明应用程序
47 IMPLEMENT_APP(MyApp)
48
49 bool MyApp::OnInit()
50 {
51     Staticline * sl = new Staticline(_T("The Central Europe"));
52     sl->ShowModal();
53     sl->Destroy();
54
55     return true;
56 }
在这个例子中,我们显示了欧洲的国家和它们有的人口,使用wxStaticLine使得界面看上去更友好。
wxStaticLine * sl1 = new wxStaticLine(this, wxID_ANY, wxPoint(25, 50), wxSize(300,1));
这里我们创建了一个水平的分隔线,宽度为300像素,高度为1像素。
效果展示:

wxStaticText
一个wxStaticText组件可以显示一行或多行只读的文本。
main.h
 1 //组件wxStaticText静态只读文本组件
 2 #include <wx/wx.h>
 3
 4 class StaticText : public wxFrame
 5 {
 6 public:
 7     StaticText(const wxString & title);
 8 };
 9
10 class MyApp : public wxApp
11 {
12 public:
13     virtual bool OnInit();
14 };
main.cpp
 1 #include "main.h"
 2
 3 StaticText::StaticText(const wxString & title)
 4           : wxFrame(NULL, wxID_ANY, title)
 5 {
 6     //定义了一个面板组件放置在wxFrame中
 7     wxPanel *panel = new wxPanel(this, wxID_ANY);
 8     wxString  text = wxT("'Cause sometimes you feel tired,

 9     feel weak, and when you feel weak,
10     you feel like you wanna just give up.

11     But you gotta search within you,
12     you gotta find that inner strength

13     and just pull that shit out of you
14     and get that motivation to not give up

15     and not be a quitter,
16     no matter how bad you wanna just fall flat on your face and collapse.");
17
18     //定义一个静态只读文本,加载到Panel中
19     wxStaticText * st = new wxStaticText(panel, wxID_ANY, text, wxPoint(10, 10), wxDefaultSize, wxALIGN_CENTRE);
20
21     //设置wxFrame大小
22     this->SetSize(650, 150);
23     //使wxFrame在屏幕中居中显示
24     Centre();
25 }
26 //声明应用程序
27 IMPLEMENT_APP(MyApp)
28
29 bool MyApp::OnInit()
30 {
31     StaticText * st = new StaticText(_T("StaticText"));
32     st->Show(true);
33
34     return true;
35 }
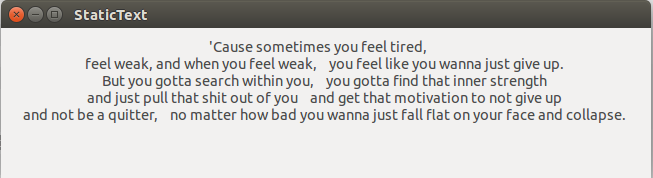
在我们的例子中,我们显示了。。。
wxStaticText * st = new wxStaticText(panel, wxID_ANY, text, wxPoint(10, 10), wxDefaultSize, wxALIGN_CENTRE);
这里我们创建了一个wxStaticText组件,静态文本内容被放置在中央。
效果展示:
wxSlider
wxSlider是一个有一个简单控件的组件,这个控件可以被来回拖动。有些时候使用一个滑块比提供一个数字旋钮(wxSpinCtrl)更加自然。
main.h
 1 //wxSlider组件
 2 //wxPaintDC组件
 3
 4 #include <wx/wx.h>
 5 #include <wx/slider.h>
 6 //自定义一个Panel
 7 class MyPanel : public wxPanel
 8 {
 9 public:
10     MyPanel(wxFrame * parent);
11
12     void OnPaint(wxPaintEvent & event);
13     void OnScroll(wxScrollEvent & event);
14     //定义一个滑块组件
15     wxSlider * slider;
16     int fill;
17
18     enum{ID_SLIDER};
19 };
20 //定义主框架类
21 class Slider : public wxFrame
22 {
23 public:
24     Slider(const wxString & title);
25
26     MyPanel * panel;
27 };
28
29 class MyApp : public wxApp
30 {
31 public:
32     virtual bool OnInit();
33 };
main.cpp
 1 #include "main.h"
 2
 3 Slider::Slider(const wxString & title)
 4       : wxFrame(NULL, wxID_ANY, title, wxDefaultPosition, wxSize(270, 200))
 5 {
 6     //初始化了一个自定义的Panel,并加载到wxFrame中
 7     panel = new MyPanel(this);
 8
 9     Centre();
10 }
11
12 MyPanel::MyPanel(wxFrame * parent)
13        : wxPanel(parent, wxID_ANY)
14 {
15     fill = 0;
16     //初始化wxSlider,
17     slider = new wxSlider(this, ID_SLIDER, 0, 0, 140, wxPoint(50, 30), wxSize(-1, 140), wxSL_VERTICAL);
18     //滑块滑动事件处理函数的动态关联
19     Connect(ID_SLIDER, wxEVT_COMMAND_SLIDER_UPDATED, wxScrollEventHandler(MyPanel::OnScroll));
20     //将wxEVT_PAINT事件与OnPaint函数连接起来
21     Connect(wxEVT_PAINT, wxPaintEventHandler(MyPanel::OnPaint));
22 }
23
24 void MyPanel::OnScroll(wxScrollEvent & event)
25 {
26     //获取滑块的当前值
27     fill = slider->GetValue();
28     //Refresh()方法会产生一个wxEVT_PAINT事件
29     Refresh();
30 }
31
32 void MyPanel::OnPaint(wxPaintEvent & event)
33 {
34     //定义一个绘图设备类wxPaintDC
35     wxPaintDC dc(this);
36     //定义一个画笔,画笔颜色为(212,212, 212)
37     wxPen pen(wxColour(212, 212, 212));
38     //设置画笔
39     dc.SetPen(pen);
40
41     //画一个矩形,(使用wxPen绘制的是空心矩形)
42     //wxRect()参数的意义(距离左侧边界的距离,距离顶部边界的距离,矩形的宽度,矩形的高度)
43     dc.DrawRectangle(wxRect(140, 30, 80, 140));
44     //定义一个画刷
45     wxBrush brush1(wxColour(197, 108, 0));
46     //设置画刷
47     dc.SetBrush(brush1);
48     //用画刷话矩形(使用wxBursh绘制的是实心矩形)
49     dc.DrawRectangle(wxRect(140, 30, 80, fill));
50 }
51
52 IMPLEMENT_APP(MyApp)
53
54 bool MyApp::OnInit()
55 {
56     Slider * slider = new Slider(_T("Slider"));
57     slider->Show(true);
58
59     return true;
60 }
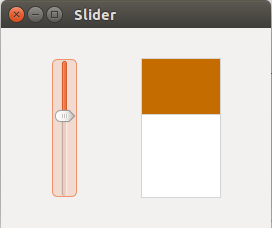
在我们的例子中,我们显示了一个滑块控件。我们通过拖动这个滑块来改变panel的背景色,在这种类型的程序中,使用一个滑块比一个数字旋钮方便的多。
slider = new wxSlider(this, ID_SLIDER, 0, 0, 140, wxPoint(50, 30), wxSize(-1, 140), wxSL_VERTICAL);
我们创建了一个垂直滑块,初值为0,最小值是0,最大值为140,我们没有显示标尺。
Connect(ID_SLIDER, wxEVT_COMMAND_SLIDER_UPDATED, wxScrollEventHandler(MyPanel::OnScroll));
这里我们把wxEVT_COMMAND_SLIDER_UPDATED事件同OnScroll()方法连接起来。
Connect(wxEVT_PAINT, wxPaintEventHandler(MyPanel::OnPaint));
我们也要画一些图案,所以我们把OnPaint()方法和wxEVT_PAINT事件连接起来。
fill = slider->GetValue();
Refresh();
在OnScroll()方法中,我们获得了滑块当前的值,我们调用Refresh()方法产生了一个wxEVT_PAINT事件。
1 dc.DrawRectangle(wxRect(140, 30, 80, 140));
2 wxBrush brush1(wxColour(197, 108, 0));
3 dc.SetBrush(brush1);
4 dc.DrawRectangle(wxRect(140, 30, 80, fill));
在OnPaint()方法里面,我们画了两个矩形,第一个是灰色边框的白色矩形,第二个是一个褐色的矩形。矩形的高度由滑块的当前值fill控制。
效果展示: