九、饼状图
/**目标
*掌握饼状图的绘制原理
*/
步骤:
1.自定义一个饼状View(PieView),添加到控制器View上
2.添加PieView的一个类型为数据的sections属性,存储所有分类的个数,并添加一个颜色数组,用于存储颜色
3.在drawRect方法中遍历sections的大小
4.遍历sections中的个数,进行总数绘总
5.定义一个 "扇形的起始位置"
6.设置路径中心点
7.遍历sections,计算数组中每一个元素占用总数的比例
8.根据比例计算饼状的结束位置,并设置 "弧" 路径
9.渲染扇形在UIView上,实现实心的扇形
8.给 "扇形的起始位置" 重新赋值,进入下一个循环
ViewController.m
#import "ViewController.h"
#import "CZPieView.h"
@interface ViewController ()
@end
@implementation ViewController
- (void)viewDidLoad {
[super viewDidLoad];
// Do any additional setup after loading the view, typically from a nib.
//实现饼状图 - quartz2d 画不同比例的扇形
//1.自定义view
CZPieView *pieView = [[CZPieView alloc] init];
pieView.frame = CGRectMake(10, 40, 200, 200);
pieView.backgroundColor = [UIColor grayColor];
[self.view addSubview:pieView];
//2.在自定义的view给个数据属性[NSArray], 往sections添加数据
pieView.sections = @[@20, @30, @40, @10];
//设置颜色
pieView.sectionColors = @[[UIColor redColor], [UIColor greenColor], [UIColor purpleColor], [UIColor yellowColor]];
//@[@20,30,@20,30] 0.2 0.3 0.2 0.3
//3.在drawrect里面去画不同的扇形
}
- (void)didReceiveMemoryWarning {
[super didReceiveMemoryWarning];
// Dispose of any resources that can be recreated.
}
@end
//
// CZPieView.m
// A01.饼状图
//
// Created by huan on 16/1/28.
// Copyright © 2016年 huanxi. All rights reserved.
//
#import "CZPieView.h"
@implementation CZPieView
/*
// Only override drawRect: if you perform custom drawing.
// An empty implementation adversely affects performance during animation.
*/
- (void)drawRect:(CGRect)rect {
// Drawing code
//根据sections的数据,绘制多个扇形
//获取上下文(Lagyer Graphics Context)
CGContextRef ctx = UIGraphicsGetCurrentContext();
//根据sections的个数,计算扇形的起始和结束位置来画扇形
NSInteger count = self.sections.count;
//如果没有数据,直接返回,不用画
if (count == 0) return;
//圆心
CGFloat centerX = rect.size.width * 0.5;
CGFloat centerY = rect.size.height *0.5;
//半径就是x的中心点
CGFloat radius = centerX;
//计算所以组的总数
NSInteger sum = 0;
for (NSInteger i = 0; i < count; i++) {
sum += [self.sections[i] integerValue] ;
}
//默认设置扇形的起始位置为 0(0, 0)
CGFloat startAngle = 0;
for (NSInteger i = 0; i < count; i++) {
//计算每组所占用的比例
// warning 计算float的值, 一定要除以float类型的值
CGFloat scale = [self.sections[i]integerValue] /(sum *1.0);
// 指定yanse
UIColor *sectionColor = self.sectionColors[i];
[sectionColor set];
// 计算结束的位置
// 计算结束的位置 = 起始位置 + 需要的画的弧度
CGFloat endAngle = scale * 2 *M_PI + startAngle;
//指定 “弧”的中心点路径
CGContextMoveToPoint(ctx, centerX, centerY);
CGContextAddArc(ctx, centerX, centerY, radius, startAngle, endAngle, 0);
//渲染
CGContextFillPath(ctx);
NSLog(@"scale:%f startAngle:%f endAngle:%f",scale, startAngle, endAngle);
// 重新设置起始的位置,供一次循环使用
startAngle = endAngle;
}
}
@end

十、图形上下文栈
"什么是图形上下文栈?"
(1)将当前的图形上下文状态copy一份到栈,这就是 '图形上下文栈'
(2)上下文的什么状态呢?比如 颜色、线宽,这些都是上下文的状态
"图形上下文栈有什么用?"
(1)恢复最初的绘图状态
"图形上下文栈API"
1.保存图形上下文状态使用CGContextSaveGState方法
2.恢复图形上下文状态使用CGContextRestoreGState方法
3.CGContextRestoreGState不能调用多次,要看图形上下文栈有多少个上下文状态可恢复
ViewController.m
#import "ViewController.h"
#import "CZCustomView.h"
@interface ViewController ()
@end
@implementation ViewController
- (void)viewDidLoad {
[super viewDidLoad];
// Do any additional setup after loading the view, typically from a nib.
//添加自定义的view
CZCustomView *customView = [[CZCustomView alloc] initWithFrame:CGRectMake(10, 40, 200, 200)];
customView.backgroundColor = [UIColor grayColor];
[self.view addSubview:customView];
}
- (void)didReceiveMemoryWarning {
[super didReceiveMemoryWarning];
// Dispose of any resources that can be recreated.
}
@end
CZCustomView.m
//
// CZCustomView.m
// 5A02.图形上下文栈
//
// Created by huan on 16/1/28.
// Copyright © 2016年 huanxi. All rights reserved.
//
#import "CZCustomView.h"
@implementation CZCustomView
/*
// Only override drawRect: if you perform custom drawing.
// An empty implementation adversely affects performance during animation.
*/
- (void)drawRect:(CGRect)rect {
// Drawing code
//先画一个矩形
//需求: 先画一个矩形,颜色为红色, 线宽为3
// 在画一个矩形,颜色为黑色, 线宽为默认
//上下文
CGContextRef ctx = UIGraphicsGetCurrentContext();
// 保存一个当前上下文的绘图状态到一个栈里面
// G代理Graphics(绘图)
CGContextSaveGState(ctx);
//画红色,线宽为3的矩形
[[UIColor redColor] set];
CGContextSetLineWidth(ctx, 3);
CGContextAddRect(ctx, CGRectMake(10, 10, 100, 100));
CGContextStrokePath(ctx);
//画黑色, 线宽为默认的矩形
// [[UIColor blackColor] set];
// CGContextSetLineWidth(ctx, 1);
//恢复 当前上下文的状态
CGContextRestoreGState(ctx);
CGContextAddRect(ctx, CGRectMake(10, 120, 50, 50));
CGContextStrokePath(ctx);
//再恢复 warning 恢复状态不能随便调用, 保存了多少次绘图状态,就可以调用多少次。
// CGContextRestoreGState(ctx);
}
@end

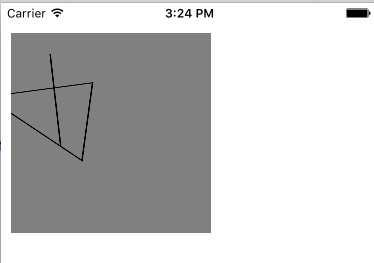
十、矩阵操作
/*目标
*掌握在图层上下文中的平稳、缩放、旋转
*/
//平移
CGContextTranslateCTM(ctx, 0, -80);
//缩放 - xy方向缩放到原来的几倍
CGContextScaleCTM(ctx, 1.0, 1.0);
//旋转 沿左上角旋转
CGContextRotateCTM(ctx,-M_PI * 0.1);
ViewController.m
#import "ViewController.h"
#import "CZCustomView.h"
@interface ViewController ()
@end
@implementation ViewController
- (void)viewDidLoad {
[super viewDidLoad];
// Do any additional setup after loading the view, typically from a nib.
CZCustomView *customView = [[CZCustomView alloc] initWithFrame:CGRectMake(10, 30, 200, 200)];
customView.backgroundColor = [UIColor grayColor];
[self.view addSubview:customView];
}
CZCustomView.h
#import <UIKit/UIKit.h>
@interface CZCustomView : UIView
@end
CZCustomView.m
//
// CZCustomView.m
// 5A03.矩阵的操作
//
// Created by huan on 16/1/28.
// Copyright © 2016年 huanxi. All rights reserved.
//
#import "CZCustomView.h"
@implementation CZCustomView
/*
// Only override drawRect: if you perform custom drawing.
// An empty implementation adversely affects performance during animation.
*/
- (void)drawRect:(CGRect)rect {
// Drawing code
//矩阵操作 平移、缩放、旋转
//先画三角形 + 画一条线
CGContextRef ctx = UIGraphicsGetCurrentContext();
// warning qurtz2d的平移,要在绘制之前
//平移
CGContextTranslateCTM(ctx, 50, 0);
//缩放
CGContextScaleCTM(ctx, 1.5, 1.0);
//旋转 负数 逆时针/正数 顺时针
//围绕左上角(0,0)旋转
CGContextRotateCTM(ctx, M_PI * 0.25);
//定义三个点
CGPoint points[3] = {{50, 20}, {100, 80}, {10, 80}};
CGContextAddLines(ctx, points, 3);
CGContextClosePath(ctx);
//画线
CGPoint LinePoints[2] = {{10, 20}, {80, 80}};
CGContextAddLines(ctx, LinePoints, 2);
CGContextStrokePath(
ctx);
}
@end
十一、裁剪圆形图片
/*掌握CGContextClip方法的作用,这个方法是裁剪 "路径" 之外多余的部分*/
"裁剪圆形图片"步骤
1.自定义一个CircleImageView控件,在drawRect中,获取上下文,往上下文中添加一个圆的路径
2.调用CGContextClip的方法,裁剪路径之外多余的部分
3.自定义的控制中,添加一个imageName属性,然后回到drawrect方法画图
4.画圆的边框,使用CGContextAddEllipseInRect添加圆的路径,并使用CGContextStrokePath画空心圆
ViewController.m
//
// ViewController.m
// 5A04.裁剪圆角图片
//
// Created by huan on 16/1/28.
// Copyright © 2016年 huanxi. All rights reserved.
//
#import "ViewController.h"
#import "CircleImageView.h"
@interface ViewController ()
@property (nonatomic, strong) CircleImageView *imageView;
@end
@implementation ViewController
- (void)viewDidLoad {
[super viewDidLoad];
// Do any additional setup after loading the view, typically from a nib.
//1.自定义一个CircleImageView控件, 在drawRect中,获取上下文, 往上下文中添加一个圆的路径
//2.自定义的控制器中,添加一个imageName属性,然后回到drawrect方法画图
//3.把自定的view添加到控制器view
CircleImageView *imageView = [[CircleImageView alloc] initWithFrame:CGRectMake(10, 40, 100, 100)];
//设置图片
imageView.imageName = @"papa";
//设置边框的颜色和宽度
imageView.borderColor = [UIColor blueColor];
imageView.borderWidth = 3;
imageView.backgroundColor = [UIColor grayColor];
[self.view addSubview:imageView];
//3.调用CGContextClip的方法,裁剪路径之外多余的部分
//4.画圆的边框,使用CGContextAddEllipseInrect添加圆的路径,并使用CGContextStrokePath画空心圆;
self.imageView = imageView;
}
-(void)touchesBegan:(NSSet<UITouch *> *)touches withEvent:(UIEvent *)event{
//更换图片
self.imageView.imageName = @"love";
}
- (void)didReceiveMemoryWarning {
[super didReceiveMemoryWarning];
// Dispose of any resources that can be recreated.
}
@end
CircleImageView.h
#import <UIKit/UIKit.h>
@interface CircleImageView : UIView
//图片的名称
@property (nonatomic, copy) NSString *imageName;
//边框的颜色
@property (nonatomic, strong) UIColor *borderColor;
//边框的宽度
@property (nonatomic, assign) CGFloat borderWidth;
@end
//
// CircleImageView.m
// 5A04.裁剪圆角图片
//
// Created by huan on 16/1/28.
// Copyright © 2016年 huanxi. All rights reserved.
//
#import "CircleImageView.h"
@implementation CircleImageView
/*
// Only override drawRect: if you perform custom drawing.
// An empty implementation adversely affects performance during animation.
*/
- (void)drawRect:(CGRect)rect {
// Drawing code
//1.实现裁剪图片为圆形
//1.1 获取上下文
CGContextRef ctx = UIGraphicsGetCurrentContext();
//1.2 指定圆的路径,并将圆外面多余的剪切掉[CGContextClip]
// 定义图片的Rect
CGRect imageRect = CGRectMake(0, 0, rect.size.width, rect.size.height);
CGContextAddEllipseInRect(ctx, imageRect);
CGContextClip(ctx);
//1.3 就把图片显示在UIView
UIImage *image = [UIImage imageNamed:self.imageName];
[image drawInRect:imageRect];
//2.添加一个圆的边框
//线宽
CGContextSetLineWidth(ctx, self.borderWidth);
//设置边框的颜色
[self.borderColor set];
CGContextAddEllipseInRect(ctx, imageRect);
CGContextStrokePath(ctx);
}
-(void)setImageName:(NSString *)imageName{
_imageName = imageName;
//重绘
[self setNeedsDisplay];
}
@end

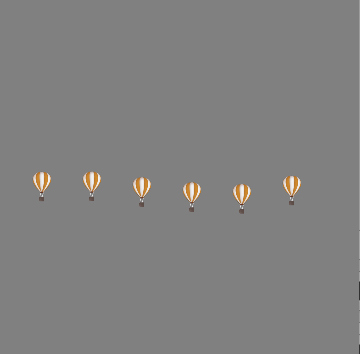
十二、动画(气球)
/**
*1.掌握定时器NSTimer和CADisplayLink的使用
*2.CADisplayLink多用于UI的刷新,1/60秒调用一次
*3.CADisplayLink要添加到主运行循环才能使用
*/
"一个气球下降"步骤
1.自定义一个BalloonView,添加一个position属性,用于记录气球的位置
2.在drawRect方法中,创建一张图片,并画出来
3.在awakeFromNib中,使用定时器NSTimer实现气球下降功能效果
[NSTimer scheduledTimerWithTimeInterval:0.03 target:self selector:@selector(setNeedsDisplay) userInfo:nil repeats:YES]
4.在drawRect如果气球的位置到达底部,从顶部重新开始下降
5.在awakeFromNib中,使用定时器CADisplayLink实现气球下降功能效果
(1)创建CADisplayLink对象,调用addToRunLoop,定时器就会执行
(2)CADisplayLine有个duration属性,代理定时器调用的间隔时间,不能改
"多个气球上升"
ViewController.m
#import "ViewController.h"
#import "BalloonView.h"
@interface ViewController ()
@end
@implementation ViewController
- (void)viewDidLoad {
[super viewDidLoad];
// Do any additional setup after loading the view, typically from a nib.
//添加 自定义的view到控制器view
BalloonView *balloonView = [[BalloonView alloc] init];
balloonView.frame = self.view.bounds;
balloonView.backgroundColor = [UIColor grayColor];
[self.view addSubview:balloonView];
}
- (void)didReceiveMemoryWarning {
[super didReceiveMemoryWarning];
// Dispose of any resources that can be recreated.
}
@end
BalloonView.h
#import <UIKit/UIKit.h>
@interface BalloonView : UIView
//记录当前气球绘制的位置
@property (nonatomic, assign) CGPoint position;
@property (nonatomic, strong) CADisplayLink *link;//定时器
//所有气球的位置
@property (nonatomic, strong) NSMutableArray *locations;
@property (nonatomic, strong) NSMutableArray *ballons;
@end
//
// BalloonView.m
// 5A05.动画(气球)
//
// Created by huan on 16/1/28.
// Copyright © 2016年 huanxi. All rights reserved.
//
#import "BalloonView.h"
@implementation BalloonView
/*
// Only override drawRect: if you perform custom drawing.
// An empty implementation adversely affects performance during animation.
*/
// drawRect会在view显示到屏幕的时候调用一次
-(NSMutableArray *)locations{
if (!_locations) {
_locations = [NSMutableArray array];
}
return _locations;
}
//通过懒加载的方式,初始化图片和位置
-(NSMutableArray *)ballons{//只需要初始化一次,而在drawRect方法需要初始化多次。
if (!_ballons) {
_ballons = [NSMutableArray array];
//添加六个图片
NSInteger count = 6;
UIImage *ballonImage = [UIImage imageNamed:@"sandyBalloon"];
for (NSInteger i = 0; i < count; i ++) {
//初始化每一个气球的位置
CGFloat leftMargin = 40;
CGFloat ballonDelta = 50;//气球的间距
CGPoint location = CGPointMake(leftMargin + ballonDelta * i, self.frame.size.height - 50);
// 2.一个数组来存储当前多个气球的位置
[self.locations addObject:[NSValue valueWithCGPoint:location]];
#warning 当前没有上下文,所以绘制不成功,一定要在drawRect里面才有“上下文”
// [ballonImage drawAtPoint:location];
//添加 image 到数组
[_ballons addObject:ballonImage];
}
}
return _ballons;
}
- (void)drawRect:(CGRect)rect {
// Drawing code
// 实现气球上升
//绘制多个图片到UIView里面去
NSInteger ballonCount = self.ballons.count;
for (NSInteger i = 0; i < ballonCount; i++) {
//获取“对应位置的气球”
UIImage *ballon = self.ballons[i];
//获取“对应气球”的位置
CGPoint location =[self.locations[i] CGPointValue];
//更改每一个气球的位置
//遍历气球,获取当前气球的位置,y方向上添加“10” 距离
location.y -= arc4random_uniform(10) * 0.1;
//如果y到顶部,从底部重新往上升
if (location.y + [ballon size].height< 0) {
location.y = rect.size.height;
}
// 更新“位置数组” 里的值
[self.locations replaceObjectAtIndex:i withObject:[NSValue valueWithCGPoint:location]];
//渲染
[ballon drawAtPoint:location];
}
NSLog(@"%s", __func__);
}
//=================================================
// //实现气球的下降
//
// //每次刷新更改位置的y值
// //warning 结构体不能直接赋值
// CGPoint newPosition = self.position;
// newPosition.y += 10;
// //判断y到达底部,从新开始下降
// if (newPosition.y > rect.size.height) {
// newPosition.y = 0;
// }
// //重新赋值position
// self.position = newPosition;
//
// //绘制图片
// UIImage *image = [UIImage imageNamed:@"sandyBalloon"];
// [image drawAtPoint:self.position];
// NSLog(@"==============");
//}
//#warning 调用 init方法 和initWithFrame方法,最终都会调用initWithFrame
-(instancetype)initWithFrame:(CGRect)frame{
if (self = [super initWithFrame:frame]) {
NSLog(@"%s", __func__);
[self addAnimation];
}
return self;
}
//
////-(instancetype)init{
//// if (self = [super init]) {
//// NSLog(@"%s", __func__);
//// [self addAnimation];
////
//// }
//// return self;
////}
//
////#warning 因为现在的这个view的创建方法,不是在storyboard或者xib上,所以(下面的方法)不会调用
//-(void)awakeFromNib{//加载完成被调用
// [self addAnimation];
//}
//
-(void)addAnimation{
//// // 写一个定时器,重绘当前的view userInfo 额外的信息
//// // 调用了setNeedsDisplay方法,内部会调用 drawRect方法进行重绘
//// [NSTimer scheduledTimerWithTimeInterval:1 target:self selector:@selector(setNeedsDisplay) userInfo:nil repeats:YES];
//// //[self setNeedsDisplay];
//
//CADisplayLink 定时器 1/60 一秒执行60次
CADisplayLink *link = [CADisplayLink displayLinkWithTarget:self selector:@selector(setNeedsDisplay)];
//要执行定时器,添加到主运行循环
[link addToRunLoop:[NSRunLoop mainRunLoop] forMode:NSDefaultRunLoopMode];
self.link = link;
}
//-(void)touchesBegan:(NSSet<UITouch *> *)touches withEvent:(UIEvent *)event{
// //继承了一个UIResponder对象,就有这个方法
// NSLog(@"%s", __func__);
//// self.link.paused = YES;//和下面的停止一样。
// //停止 定时器 在iOS9停止了定时器,
// [self.link invalidate];
// //移除主程序循环,不需要手写,因为invalidate方法,内部会把定时器,从主运行循环移除
//// [self.link removeFromRunLoop:[NSRunLoop mainRunLoop] forMode:NSDefaultRunLoopMode];
//}
@end